Table of Contents
Advertisement
Quick Links
Outdoor Type Refrigeration Unit
(Non-fluorocarbon Refrigeration Unit with CO
Operating Instructions and Installation Instructions
Model No. OCU-CR200VF5A / OCU-CR200VF5ASL
Thank you very much for purchasing Panasonic products this time.
Please read this instruction booklet and correctly comply with the explanations.
In particular, please read "Cautions for Safety" (Pages EN2 to EN8) for ensuring safe
operations.
Please retain this instruction booklet in a safe place.
Caution labels are attached to the product.
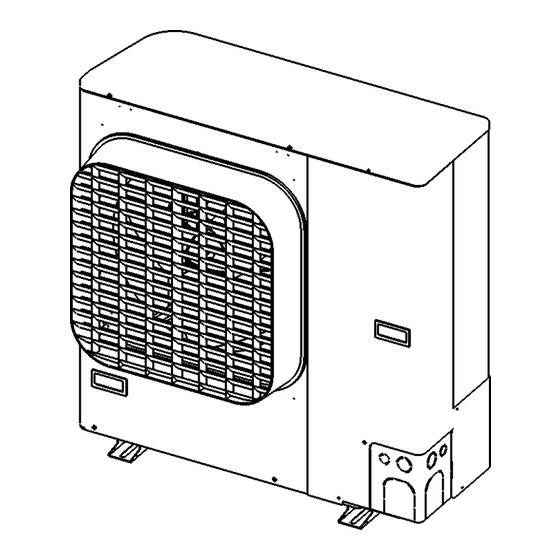
This illustration represents OCU-CR200VF5A
Electrical Approval CertificateinAustralia
CS10793N
2
CONTENTS
Cautions for Safety........................................................ 2-8
Name of Each Part ........................................................... 9
Scope of Application, Specifications......................... 10-11
For Effectively Using the Refrigeration Unit.............. 12-13
Selection of Installation Location .............................. 13-14
Carry-in / Installation.................................................. 14-15
Installation Example .................................................. 16-17
Refrigerant Piping Work ............................................ 17-18
Piping Example................................................................19
Refrigerant Circuit Diagram.............................................20
Refrigerant Charging ..................................................21-22
Cautions for Electrical Wiring Work ............................... 23
Electrical Wiring Work ............................................... 24-26
Electrical Circuit Diagram ......................................... 27-28
What Needs to be Checked before Operation............... 29
Setting and Indication ................................................30-35
Control Functions ....................................................... 35-37
Adjustment during Operation .................................... 37-39
About Alarms ............................................................. 39-40
Maintenance and Inspection........................................... 41
Actions at the time of Failure .................................... 42-43
Failure Diagnosis .......................................................44-51
• The English text is the original instructions.
NOTICE
Other languages are translation of the original
instructions.
Panasonic Corporation
1006 Oaza Kadoma, Kadoma City, Osaka, Japan
Refrigerant)
Advertisement
Table of Contents

Related Manuals for Panasonic OCU-CR200VF5A


Summary of Contents for Panasonic OCU-CR200VF5A
-
Page 1: Table Of Contents
Operating Instructions and Installation Instructions Model No. OCU-CR200VF5A / OCU-CR200VF5ASL Thank you very much for purchasing Panasonic products this time. Please read this instruction booklet and correctly comply with the explanations. In particular, please read "Cautions for Safety" (Pages EN2 to EN8) for ensuring safe operations. -
Page 2: Cautions For Safety
Cautions for Safety (Be sure to comply with the following) For the purpose of avoiding harm to people and damage to properties, items to be complied with are explained here. ■ Explanations are classified by degree of harm or damage caused by incorrect use. WARNING Indicates possibility of death or serious injury. - Page 3 Cautions for Safety (Be sure to comply with the following) Installation Work Installation should be made securely on a Perform airtight test before charging place that can fully support the mass of the refrigerant. refrigeration unit. Refrigerant gas leak may cause Insufficient foundation may cause insufficient oxygen and lead to a falling or dropping, and lead...
- Page 4 Cautions for Safety (Be sure to comply with the following) Cautions for Use Do not change the set values of the safety Do not insert a finger, stick or foreign device. object into the ventilation opening and fan guard of the enclosure panel. Using the refrigeration unit with changed values may cause Such object may hit the fast...
- Page 5 Cautions for Safety (Be sure to comply with the following) Cautions for Use Restriction on use of equipment This appliance is not intended for use by persons (including children) with reduced physical, sensory or mental capabilities, or lack of experience and knowledge, unless they have been given supervision or instruction concerning use of the appliance by a person responsible for their safety.
- Page 6 Cautions for Safety (Be sure to comply with the following) CAUTION Installation Work Do not install in a place with possible leak of Produce a refrigeration cycle within the flammable gas. limits of an operation standard (Scope of Application). Leaked flammable gas around the refrigeration unit may catch fire Non-standard refrigeration cycle from a spark of a switch and lead...
- Page 7 Cautions for Safety (Be sure to comply with the following) Cautions for Use When the refrigerant bursts out, shut off the Do not use flammable spray near the power and fully close the service valve. refrigeration unit. Do not place flammable materials nearby.
- Page 8 Cautions for Safety (Be sure to comply with the following) Disposal Request a specialty operator for disposing Before disposal the refrigeration unit. The refrigeration system is The refrigeration system is under under high pressure. Do not high pressure. Disposal with tamper with it.
-
Page 9: Name Of Each Part
Name of Each Part Low pressure sensor Refrigerant amount Electrical box adjustment tank Fan motor Balance pressure solenoid valve (EV2) Included components in unit (PRV bracket) Suction line (unit inlet) Liquid line (unit outlet) ※ These brackets are to install a PRV (Pressure Relief Valve) inside the unit Low pressure service valve when a local regulation requires that. -
Page 10: Scope Of Application,Specifications
Scope of Application,Specifications This refrigeration unit operates with a rotary compressor. Use the refrigeration unit within the range shown below. Item Standard Value Remarks The charge supply amount shall be Refrigerant R744 adequate Temperature conversion of inlet Evaporating temperature -45 °C to -5 °C pressure Suction pressure 0.73MPa to 2.95MPa... -
Page 11: Rated Specifications
Scope of Application,Specifications Rated Specifications Item Rating Unit Power source ~50 Hz 220/230/240 Power input 1.80/1.79/1.79 Current 8.31/7.94/7.60 Conditions 1. Evaporating temperature: -10 °C 2. Ambient temperature: 32 °C 3. Compressor rotational speed : 65 s 4. Suction superheat : 10K Performances (230 V) Symbol Evaporating temperature... -
Page 12: For Effectively Using The Refrigeration Unit
For Effectively Using the Refrigeration Unit Cautions for Installation Work This refrigeration unit has been designed exclusively for R744 (CO refrigerant). Refrigeration oil and each component including the compressor have been exclusively designed for the refrigeration unit. Please use sufficient caution for maintaining the reliability of the product. (1) Since CO refrigeration cycle becomes high pressure during operation, use the piping material and other components particularly designed for CO... -
Page 13: Selection Of Installation Location
(5) Rotary compressor consists of high precision components. Use caution during piping work to avoid contamination of dust, metal powder, or oxide scale, etc. Initial Oil Quantity Model No. Compressor OCU-CR200VF5A(SL) 300 mL Oil type PZ-68S Caution When adding oil or changing oil, be sure to use our specified oil. -
Page 14: Carry-In / Installation
Selection of Installation Location Location not disturbing neighbors Avoid air-blow from the gas cooler to the neighbor’s window or noise to disturb other people. Location with a sturdy and level surface Install the refrigeration unit on a firm foundation to avoid an increase of noise and vibration. Particularly at the boundary from the neighbor’s lot, comply with the regional laws and regulations. -
Page 15: External Dimensions
Carry-in / Installation Foundation / Platform Work ● As a reference, the foundation should be made from concrete having a mass about 3 times that of the refrigeration unit. (Absorbing vibration by mass) ● Vibration should be reduced by a platform or anti-vibration pad for avoiding transmission of vibration to the floor and wall. -
Page 16: Installation Example
Installation Example When no obstruction exists in the When an obstruction exists in the blow-out side blow-out side Unit depth Dimension or below 150 mm or wider 300 mm or wider (500 + h) mm or wider Stacked installation When installing next to a top-blow refrigeration unit Partition plate ( 500 + h ) mm or wider... -
Page 17: Refrigerant Piping Work
Refrigeration unit pipe dimension Model No. Suction line (Unit inlet) Liquid line (Unit outlet) OCU-CR200VF5A(SL) OD9.52 mm, 3/8” OD6.35 mm, 1/4” Note: Welding is inner diameter welding of refrigeration unit. ● Piping material should be seamless phosphorous-deoxidized copper pipes (refrigeration grade), K65. -
Page 18: Filter Dryer
Refrigerant Piping Work Cautions for Heat Insulation Work ● Apply heat insulation on the suction line and liquid line for avoiding thermal effect from outside. ● Do not wrap together the suction line and liquid line with heat insulation material. Liquid line (Refer to the right illustration) ●... -
Page 19: Piping Example
Piping Example Total piping length shall be limited to 25 m one way. When the evaporator is located higher ■ Height difference 5 m or below ● The suction line shall ideally slope gently towards the unit. Recommendation slope is 1/200~1/250. ●... -
Page 20: Refrigerant Circuit Diagram
Refrigerant Circuit Diagram Adjusting refrigerant Split cycle heat amount High pressure Filter exchanger Split cycle outlet solenoid service valve dryer Strainer Adjusting temperature sensor valve refrigerant amount electronic expansion Unit outlet Liquid line valve Split cycle temperature (Unit outlet) MOV4 electronic sensor expansion valve... -
Page 21: Refrigerant Charging
Refrigerant Charging Vacuum (Perform after completing electrical wiring.) To avoid inclusion of air or moisture in the refrigerant circuit, be sure to execute vacuum drying of the entire circuit by using a vacuum pump, before charging refrigerant. By following procedure, execute vacuum after securely carrying out airtight test. -
Page 22: Method Of Charging
– Close the low pressure service port to complete the charge. (3) Charge amount Adequate charge amount can be calculated by the tool provided by Panasonic. The below can be referenced in addition to above. In the case of a freezer reach-in case = 1,260 (g) + 12 (g / m) x piping length (one-way: m) In the case of a refrigeration showcase = 825 (g / m) x showcase length (m) + 12 (g / m) x piping length (one-way: m) Note: 1. -
Page 23: Cautions For Electrical Wiring Work
Detected area 10 m 20 m 30 m 50 m current current OCU-CR200VF5A(SL) 16 A 30 mA Notes: 1. Wiring and cabling quality need to follow local standards, regulations and laws. IEC: 60245 IEC57 CENELEC: H05RN-F AS/NZS : 3000 2. Use shielded cable for communication line, liquid tube electromagnetic valve line, external alarm and showcase operation signal Line 3. -
Page 24: Electrical Wiring Work
Electrical Wiring Work Wiring Block Diagram Example CR1-EN-PCB External Alarm (*4) Liquid tube Electromagnetic Valve (*5) 5P-2 5P-3 Showcase Operation Signal (*6) Communication Line Contact the shield layer with the surface of the electrical box.(*7) Power source terminal base CORE (*3) ⇑... - Page 25 Electrical Wiring Work Shielded cable assembly Modbus connector (Included Accessory) ◆ Red wire 5P2 COM1 Included harness 5P3 COM2 Red wire is ( + ) White wire Connector White wire is ( - ) Overlapped Clamp type Shielded cable ferrite core Shield wire part The clamp core included in the package is to be attached at this...
-
Page 26: Cable Wiring
Electrical Wiring Work Cable wiring Caution While a Showcase Operation Signal Line is illustrated here as an example, the other signal lines shall be installed in the same way. Attach a clamp type ferrite core(s) included in the package. A smaller one can bundle 1 cable while a larger one is for 3 cables. -
Page 27: Electrical Circuit Diagram
Electrical Circuit Diagram Electrical circuit diagram (Standard electrical wiring diagram) Power source 220V/230V/240V Power source White terminal base KRFC-13 CR1-EN-PCB 2P17 Black CR1-EN-PCB White Black White FIL-EN-PCB 250V 250V White Blue 250V Black White Black White Black White Black White INV2-EN-PCB White White... - Page 28 <For extracting external alarm> CR1-EN-PCB External power source Maximum AC 250V 3A (Resistive/Inductive load) Buzzer silencing switch Buzzer Gray <Showcase operation signal input> CR1-EN-PCB 5 4P4 CR1-EN-PCB 2P10 Terminal base showcase operation signal Blue Purple Yellow Brown AC 220V/230V/240V Maximum 0.3A (Inductive load) Terminal base liquid tube electromagnetic valve...
-
Page 29: What Needs To Be Checked Before Operation
What Needs to be Checked before Operation Confirmation before Operation (1) Please recheck if any incorrect wiring or loose wiring exists. (2) Fully open all service valves. (3) Check that the power supply voltage is within ± 10 % of the rated voltage (4) Check that insulation resistance is 1 MΩ... -
Page 30: Setting And Indication
Setting and Indication This refrigeration unit is equipped with the function of setting a variety of compressor operation modes by the switch on the CRD1-EN-PCB. Operating condition of the compressor can be checked by the 7-segment LED. In particular, when any abnormality occurs in the refrigeration unit, an alarm LED (Red) lights up or blinks, and the cause of abnormality is displayed digitally by an error code. -
Page 31: Switch Setting
Setting and Indication Switch Setting (1) AUTO/FORCED switch (Slide switch, SW14) SW14 Function Remarks AUTO Auto operation FORCED Forced operation Not applicable (2) CONTROL/CHECK switch (Slide switch, SW15) SW15 Function Remarks Normal mode CONTROL Vacuum mode CHECK Vacuum mode (DIP switch SW13 setting is also required) (3) 8P DIP switch (SW13) The following functions can be selected. -
Page 32: Low Pressure Setting
Setting and Indication Low Pressure Setting (1) Turn OFF the operation switch S1. (2) Power ON (3) Low Pressure Setting (ON value, OFF value ,Diff.value) The Low pressure setting at the shipment is as shown in No.4 of the “Standard Pressure Setup Table” below. Since the Target Low Pressure Setting can be changed , use the following procedure as required. - Page 33 Setting and Indication Indication (1) Individual LED 1. +5 V, +12 V (Yellow) Lights up when power is supplied to CR1-EN-PCB. 2. Alarm (Red) Lights up or blinks when abnormality or alarm occurred. For detail, refer to the “Explanation of Abnormality Alarm” in “About 3.
- Page 34 Setting and Indication Setting/Display Listing Digital display and operation list Rotary switch switch switch switch Display/Setup Remarks Mode (Knob) position SW13-5 SW13-7 SW13-8 Low pressure: ▲ pressing: Red LED blinking cancelled Lo.0.00 to 9.98 (MPa) Low pressure and high pressure ▼...
-
Page 35: Control Functions
Control Functions Low Pressure Control Method Compressor capacity is controlled by changing the inverter frequency based on the difference between the low pressure and set value by adjusting the low pressure to the set value (ON value to OFF value). However, compressor operation continues even if the low pressure becomes below “OFF value”... -
Page 36: Protective Functions
Control Functions Protective Functions (1) High pressure abnormal, over current Stops the compressor. (2) Discharge gas temperature abnormal 1. Normal operation Compressor operation stops when the discharge gas temperature exceeds 118 °C, and resumes when the discharge gas temperature becomes 75 °C. 2. -
Page 37: Adjustment During Operation
Control Functions (6) Inverter abnormality Compressor stops when the following occurs, and resumes operation in 1 min. later. Compressor stops when abnormality occurs 10 times per hour. 1. IPM protection 2. Voltage abnormality 3. Compressor over current 4. Compressor step out 5. - Page 38 Adjustment during Operation Adjusting Refrigerant Quantity of the Refrigeration Unit During determination of refrigerant quantity, temperature setting of all cooling coils of the showcase needs to be set to the lowest temperature without activation of the thermostat for making the refrigeration unit operating continuously. (1) Method of determining refrigerant quantity Check the operating condition of the refrigeration unit and adjust to the correct refrigerant quantity.
-
Page 39: About Alarms
Adjustment during Operation (2) Refrigerant quantity adjustment 1. Shortage of refrigerant (when charging additional refrigerant) ● Perform cooling operation and charge additional refrigerant from the low pressure service port. ● Adjust valve opening during slow charging operation to avoid frosting beyond the refrigerant service valve. ●... - Page 40 About Alarms Description of Abnormality Alarm When the ground fault protector is activated, check insulation of the equipment and circuit, eliminate the cause, and then supply power again. Alarm indication Compressor during abnormality External Abnormality item Reset method Alarms Operate/Stop Error code High pressure abnormal (7th ●...
-
Page 41: Maintenance And Inspection
Maintenance and Inspection Maintenance and inspection should be contacted with a specialty company. All work must be conducted by authorized and licensed technicians. Request for Maintenance and Inspection (To a specialty company for installation work) The structural components of refrigeration unit do not last permanently but include those wearing out in a certain period of time. -
Page 42: Actions At The Time Of Failure
Actions at the time of Failure When a component failure or malfunction is found, request the specialty company to repair. Actions at the time of Failure When the refrigeration unit or any refrigerant circuit component fails to operate by some reason, turn off the power for a repair. -
Page 43: Replacing The Compressor
Actions at the time of Failure Replacing the Compressor Before replacing the compressor, refer to the Engineering Service Manual “Compressor Replacement Procedure” Caution (1) Be sure to shut off the ground fault protector. (Operation switch OFF does not shut off the crankcase heater.) (2) Connect compressor terminals U, V, and W with each lead wire as connected before. -
Page 44: Failure Diagnosis
Failure Diagnosis Error Code (1) When the rotary switch (knob) is at [OPERATION] position, the digital display on the control PCB alternately displays low pressure, high pressure and error code (E ***). < Error Code Table > Error code Meaning Cause Method of Action (Listed) High pressure... - Page 45 Failure Diagnosis Error Code Error code Meaning Cause Method of Action (Listed) High pressure High pressure increased to abnormal level. (1) Check the cause of high pressure abnormality. abnormal (2) Check if abnormality exists in the high pressure (1st to 6th time) sensor.
- Page 46 Failure Diagnosis (2) Other indications Indication Meaning Action method Remarks Check the error code with the table above and eliminate the cause. Abnormality existed before. Then, by aligning the Up to 50 items of past error rotary switch knob with Alarm (red) LED blinking codes are memorized in the [OPERATION] and pressing...
- Page 47 Failure Diagnosis All normal Electronic expansion valve (MOV3) Operation Check High pressure/low pressure (1) Align the rotary switch (knob) with [DIS] and check the discharge gas service valves temperature of the compressor. (2) Set the DIP switch SW13-5 to [ON], and rotary switch (knob) to [ON] (valve opening fixed mode) and set the electronic expansion valve opening to 450 steps.
- Page 48 Failure Diagnosis Method of Checking Sensor Characteristics (1) Pressure (Low, Intermediate, High pressure) sensor While the connector is inserted to the control PCB, measure the voltage and check if the pressure is normal by using the table below. < Relationship between sensor output voltage and pressure > Pressure (MPa) 0.00 1.00...
- Page 49 Failure Diagnosis Method of Checking the Resistance of Electronic Expansion Valve Coil ■ Electronic expansion valve coil: (Split cycle electronic expansion valve MOV3 and Adjusting refrigerant amount electronic expansion valve MOV4) Measure the resistance value by disconnecting the connector from the control PCB, and check if the resistance value is normal.
- Page 50 Failure Diagnosis Failure Diagnosis of Inverter Unit Caution Before inspection or component replacement, always shut off the ground fault protector and take sufficient time. (Approx. 5 minutes are required for the capacitor to discharge) Electrical box internal layout Control terminal FIL-EN-PCB base INV2-EN-PCB...
- Page 51 Failure Diagnosis Failure Diagnosis of Inverter Unit (2) When inverter abnormality (E6 * to E7 *) is generated Possible cause is as follows. Check all of the following causes. Cause Method of Checking Method of Action (1) Check if the compressor motor current is high. Eliminate the cause of overload.
- Page 52 (English) (French / français) Importer: Importateur: Panasonic Marketing Europe GmbH Panasonic Marketing Europe GmbH Hagenauer Strasse 43, 65203 Wiesbaden, Germany Hagenauer Strasse 43, 65203 Wiesbaden, Allemagne Authorized Representative in EU: Représentant autorisé dans l’UE: Panasonic Marketing Europe GmbH Panasonic Marketing Europe GmbH...
- Page 53 (Finnish / suomi) (Hungarian / magyar) Maahantuoja: Importőr: Panasonic Marketing Europe GmbH Panasonic Marketing Europe GmbH Hagenauer Strasse 43, 65203 Wiesbaden, Saksa Hagenauer Strasse 43, 65203 Wiesbaden, Németország Valtuutettu edustaja EU:ssa: Hivatalos képviselő az EU-ban: Panasonic Marketing Europe GmbH Panasonic Marketing Europe GmbH...
- Page 54 NOTE – – EN - 54...
- Page 55 NOTE – – EN - 55...
- Page 56 If a product failure occurs by incorrect installation, the product becomes out of warranty. Documentation in local language can be downloaded from Internet Panasonic pro club «In the European Market». Download site: www.panasonicproclub.com Panasonic Heating & Ventilation Air-conditioning Europe...
Need help?
Do you have a question about the OCU-CR200VF5A and is the answer not in the manual?
Questions and answers