
Related Manuals for CPAT FLEX DRV3 Lite

Summary of Contents for CPAT FLEX DRV3 Lite
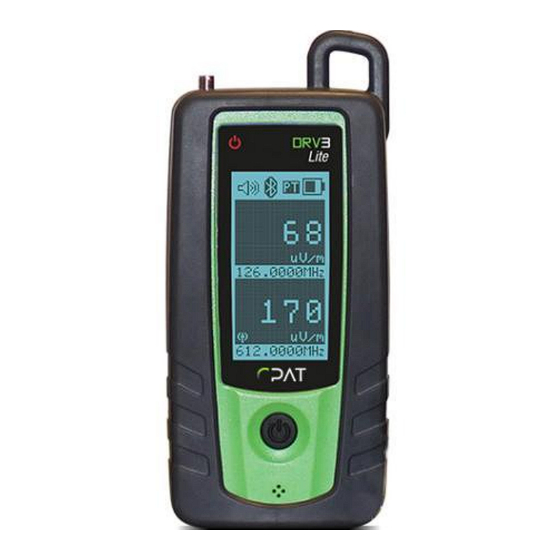
- Page 1 DRV3 Lite Digital Leakage Receiver Please direct all questions to your local CPAT Flex sales office representative, or distributor, or contact CPAT Flex technical support at: www.cpatflex.com. Copyright 2024 CPAT Flex Inc. All rights reserved.
- Page 2 CPAT Flex accepts no liability for any omissions or errors present in this document or for any damages that may arise from the utilization of the information provided herein.
-
Page 3: Table Of Contents
2.4.4 Data Interface 2.4.5 Antenna Connector 2.4.6 Speaker 2.4.7 Battery 3. DRV3 Lite Settings Application 3.1 Installing the DRV3 Lite Settings Application 3.2 Connecting the DRV3 Lite 3.3 Reading, Copying, Saving and Recalling Parameters 3.4 DRV3 Lite’s Parameters 3.4.1 Backlight 3.4.2 Contrast... - Page 4 5.2 Reading the Measurement Mode Screen 5.3 Mute Volume During Normal Use 5.4 Switching Mode 5.5 Charging the Battery 5.6 Replacing the Battery Pack 5.7 Updating the DRV3 Lite Firmware 5.8 Cleaning Appendix A – Specifications Appendix B – Our Services B.1 Customer Support B.1.1 Equipment Return Instructions...
-
Page 5: General Information
DRV3Lite GettingStartedManual2024-07-23V1.4 1. GENERAL INFORMATION 1.1 About this Manual This manual describes the features, operation and setup of the DRV3 Lite portable digital leakage detection meter. You will find important safety information in this manual. We strongly recommend that all users read this manual. -
Page 6: Technical Support
1.5 Calibration Your DRV3 Lite unit has been calibrated and tested at the factory and does not need further calibration before use. However, if the unit suffers damage or is repaired, it is recommended that the unit be tested by an authorized CPAT Flex service center. -
Page 7: System Components
2.1 Initial Verification Your DRV3 Lite unit is charged, calibrated, and ready to use right out of the box. Upon delivery, visually inspect each item for any damage that may have occurred during shipping. -
Page 8: Drv3 Lite Settings Application
You can download the latest version of the DRV3 Settings Application by visiting our website at: https://www.cpatflex.com/en/support/. In order to use the DRV3 Lite Settings Application, you will need to connect the DRV3 Lite to your PC via a Micro-B USB to a USB cable or a USB-to-serial cable (cables not provided). -
Page 9: Features
126 and 612 MHz in Mid and LTE. 2. “System mode” detecting leakage carriers produced from the DSG1 signal generator located at the headend. When operating in "system mode", the DRV3 Lite is fully agile from 118-140 MHz (Mid-band tuner) and 600-860 MHz (LTE band tuner). -
Page 10: Physical Overview
Go to the “Setup” section for more details on how to pre-configure the operation parameters. 2.4.3 Power Interface The DRV3 Lite has one circular power pin interface at the bottom of the unit. Connect the AC adapter (supplied by CPAT Flex) to the power interface to recharge the battery and power... -
Page 11: Data Interface
The DRV3 Lite is powered by a 7.2V 2000 mAh lithium-ion battery with a 4-pin connector. The battery pack is partially charged and ready to use when the DRV3 Lite is shipped. For more information on charging the battery, see Section 4.5. -
Page 12: Drv3 Lite Settings Application
CPAT Flex provides a PC-based settings application to configure the DRV3 Lite unit. The software is required to configure your DRV3 Lite from your Windows PC. It is also useful to consider the following. You can configure several DRV3 Lite units with the same settings. -
Page 13: Connecting The Drv3 Lite
DRV3Lite GettingStartedManual2024-07-23V1.4 4. Unzip the .zip file on your Windows PC. You are now ready to use DRV3 Lite Settings Application. 5. To launch the application, simply double-click the executable file named "Settings- Application-DRV3 Lite.exe". The main window will appear. -
Page 14: Reading, Copying, Saving And Recalling Parameters
You can save these settings to a file, using the “Export” icon, so that they can be copied later to another DRV3 Lite, or you can edit them before saving. To use settings from a file, use the “Import” icon, and select the file, which contains the settings to be uploaded in the Application. - Page 15 DRV3Lite GettingStartedManual2024-07-23V1.4 DRV3 Lite readings in System mode DRV3 Lite readings in PT (Pressure Test) mode Lastly, to store the settings in the DRV3 Lite, use the “Write” icon.
-
Page 16: Drv3 Lite's Parameters
DRV3Lite GettingStartedManual2024-07-23V1.4 NOTE 1 The “DRV3 Lite firmware management" section, located at the bottom of the interface, provides information on the firmware version used by the DRV3 Lite. NOTE 2 The Application allows configuring settings for the “system mode” only. The "pressure test"... -
Page 17: Contrast
Generated level. As an example, if the DSG1 signal is set at -25dBc from the adjacent QAM level measured in a 6 MHz bandwidth, the DRV3 Lite QAM offset setting will be set at -25. The QAM offset can be adjusted from -99 to 99 dB. The default value is set at 0 dB. -
Page 18: Lte Band Parameters
The DRV3 Lite supports AM tag detection with modulation frequencies ranging from 20 Hz to 110 Hz. You can also adjust the detection sensitivity of the channel tag to allow the DRV3 Lite to discriminate between channel noise and the tag signal (Sens: from 1 to 99. Recommended value = 21). -
Page 19: Proximity
DSB-SC mode. When the tag detection feature is enabled and the DRV3 Lite detects a leak, the letter ‘t’ appears on the main measurement mode screen. If the measured leak level is greater than the leak threshold, the letter ‘t’... -
Page 20: Units
3.4.9 Units Select the unit of measurement you want to use for leakage measurements (μV/m or dBμV/m) by clicking the proper unit button. By default, the DRV3 Lite uses μV/m as its unit of measurement. 3.4.10 DRV3 Lite Firmware Management This section shows the current firmware of the MCU and FPGA parts of the DRV3 Lite. -
Page 21: Cpat Mobile Application
DRV3 Lite. 4.1 Installing CPAT Mobile on your mobile CPAT Flex provides the CPAT Mobile application for Apple and Android devices. CPAT Mobile is available directly from the App Store (Apple) and Google Play (Android). The following figures show how to find the CPAT Mobile application on an iPhone: 1. -
Page 22: Connecting The Drv3 Lite
DRV3Lite GettingStartedManual2024-07-23V1.4 4.2 Connecting the DRV3 Lite 1. Turn the DRV3 Lite on and the Bluetooth icon appears (see section 5.2). 2. Open the CPAT Mobile application and enter your username and password. There is an offline mode without login. - Page 23 DRV3Lite GettingStartedManual2024-07-23V1.4 3. Go to “Egress” icon. 4. Automatically, the application will try to find Bluetooth-ready DRV3 Lite around. All found in the units are listed drop-down menu.
- Page 24 Bluetooth refresh icon if you want to find Bluetooth-ready DRV3 Lite around. If a DRV3 Lite is connected to a computer via USB, its Bluetooth port will be disabled. Be sure there is no USB connection on your DRV3 Lite.
- Page 25 DRV3Lite GettingStartedManual2024-07-23V1.4 5. Select the DRV3 Lite in the drop-down menu. The application will connect to the selected unit and display its measurements. The application's graphic interface colors are different according to the current DRV3 Lite mode: System or Pressure Test (PT).
- Page 26 DRV3Lite GettingStartedManual2024-07-23V1.4 6. Press the top-right icon to access the DRV3 Lite Settings. The parameters are similar to those described in the DRV3 Lite Settings Application in Section 3.4.
-
Page 27: Operation And Maintenance
5. Operation and Maintenance 5.1 DRV3 Lite Parameters The DRV3 Lite parameters are configured using an external application, such as the DRV3 Lite settings, via the USB or Bluetooth connection. The following sections describe how to set up the DRV3 Lite parameters. -
Page 28: Mute Volume During Normal Use
USB logo appears at the same location as the Bluetooth logo. It displays the USB connectivity. USB connection takes precedence over Bluetooth connection. Pressure Test Displays if the DRV3 Lite is in “pressure test" mode. In PT mode, readings are shown in white on a black background. Battery Displays the battery charge level. -
Page 29: Charging The Battery
DRV3Lite GettingStartedManual2024-07-23V1.4 5.5 Charging the Battery The DRV3 Lite can operate on battery power for hours when fully charged (see Appendix A.2). To maintain good battery health and ensure extended battery life, you must follow these recommendations for charging the battery. -
Page 30: Updating The Drv3 Lite Firmware
DRV3Lite GettingStartedManual2024-07-23V1.4 5.7 Updating the DRV3 Lite Firmware From time to time, firmware updates may be available for the DRV3 Lite. The update will be uploaded using the DRV3 Lite Settings Application. When a new firmware update becomes available, the CPAT Flex support team will plan the firmware upgrade with your internal CPAT manager. -
Page 31: Appendix A - Specifications
DRV3Lite GettingStartedManual2024-07-23V1.4 Appendix A – Specifications TECHNICAL DETAILS Detector type Dual-band digital receiver/demodulator Channel tuning Configurable via USB port and/or Bluetooth Frequency range Agile from 118 to 140 MHz (mid-band) Frequency range Agile from 600 to 860 MHz (LTE-band) Tuning resolution 100 Hz Level range 2 to 4,000 μV/m @ 3 meters (mid-band) -
Page 32: Appendix B. Our Services
CPAT Flex is not responsible for any damage that may occur during shipping. The customer should clearly mark the RA or reference number issued by CPAT Flex on the outside of the package and ship it prepaid and insured to CPAT Flex. -
Page 33: Limited Product Warranty
B.2 Limited Product Warranty B.2.1 Hardware CPAT Flex warrants to the original end user (Customer) that the new CPAT Flex branded products will be free from defects in workmanship and materials, under normal use, for one (1) year from the date of original shipment. -
Page 34: Exclusions
(Limited Warranty) and actually fails during the applicable warranty period and under normal use, CPAT Flex shall, at its sole discretion, (i) repair or replace the non-conforming product to remedy the nonconformity identified by the customer in accordance with this section (Limited Product Warranty);... - Page 35 DRV3Lite GettingStartedManual2024-07-23V1.4 Published by CPAT Flex 8566 Ave de l'Esplanade Montreal, Quebec CANADA H2P 2R8 www.cpatflex.com 1-888-307-2728...
Need help?
Do you have a question about the DRV3 Lite and is the answer not in the manual?
Questions and answers