Table of Contents
Advertisement
Quick Links
Advertisement
Table of Contents

Related Manuals for POWEROLOGY PWHDPBNBK


Summary of Contents for POWEROLOGY PWHDPBNBK
- Page 1 S K U : P W H D P B N B K...
-
Page 2: Safety Guidelines
Safety Guidelines Before using this device, thoroughly review all guidelines. Non-compliance with these instructions may void the warranty due to any resultant physical or data damage. Installation 1. Prevent fire or shock - keep the device dry and avoid liquid-filled objects like vases. 2. -
Page 3: Package Contents
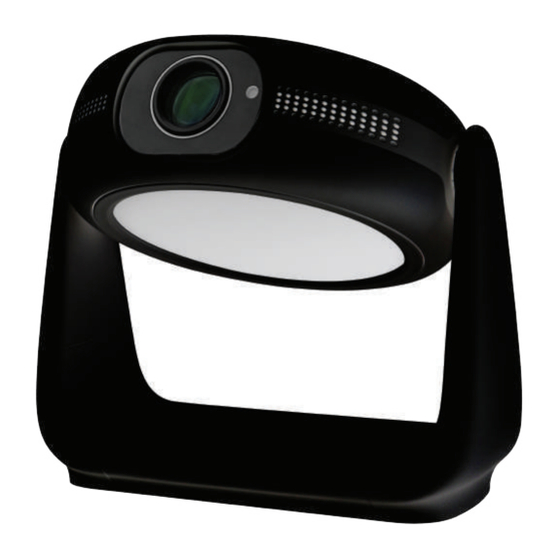
Notice 1. Handle the power cable carefully to prevent damage and reduce the risk of electric shock. 2. Use the projector with care to avoid dropping or impact damage. 3. Use the designated power voltage as indicated on the projector. 4. - Page 4 Overview 1. Increase Brightness 2. Lamp Power 3. Decrease Brightness 4. Infrared Sensor 5. Audio Output 6. HDMI Input 7. USB Port 8. Projection Toggle 9. Power Input 10. Status Indicator *Switch Button: Long press to turn on or off, Short press to change the light color *[+ or -]: Adjust (Increase/ Decrease) the brightness level Operation Tips *For a blurry image, adjust using Auto Four-Corner Correction or manual keystone via settings.
-
Page 5: Remote Control
Remote Control Bluetooth Remote Control Pairing Steps: 1. Navigate to Settings > Bluetooth and enable the Bluetooth switch. 2. Press and hold the left and right keys until the indicator lights flash, signaling Bluetooth activation. 3. The device will search and display “P007”. Select it to connect; a confirmation Left Right prompt indicates a successful connection. -
Page 6: Remote Control Overview
Remote Control Overview Power Button Usage Precautions: Menu Navigation Light Control Buttons Arrows 1. Do not immerse the remote in water. 2. Avoid exposure to high temperatures and fire. Back Button Home Button 3. Do not mix battery types in the remote to prevent Focus + leakage. -
Page 7: Network Settings
Network Settings Go to Settings > Network > Wi-Fi Enable, turn on Wi-Fi, select your network, and enter the password. -
Page 8: Bluetooth Settings
Bluetooth Settings Navigate to Settings > Bluetooth > Bluetooth Enable, select Refresh to search and pair with the desired device. Bluetooth Name: P007... - Page 9 Bluetooth Speaker Connection -To pair, enable Bluetooth mode on your mobile phone, then select the Bluetooth speaker from the list. -To disconnect, use the Return button on the projector and navigate to Settings > Bluetooth > Bluetooth Speaker > Disconnect on the mobile phone.
-
Page 10: Input Selection
Input Selection To select the input source, go to: Settings > Input Signal > Choose HDMI or USB Signal... -
Page 11: Display Configuration
Display Configuration Access display settings at: Settings > Display. -Keystone Correction: Adjust image distortion. -Smart Recognition: Enable intelligent detection features. -Auto Focus: Automatically sharpens the image. -Screen Scaling: Modify the image size to fit your screen. -Projection Mode: Choose between front or rear projection. - Page 12 Manual Keystone Adjustment Manually correct image distortion by navigating to: Settings > Display > Manual Keystone, and use the direction keys on the remote control.
- Page 13 Screen Scaling Options Adjust the display's aspect ratio for different content via: Settings > Display > Screen Scaling.
-
Page 14: Projection Options
Projection Options Select the projection method suitable for your setup at: Settings > Display > Projection Mode. Available options are Front Projection and Rear Front Projection. -
Page 15: System Preferences
System Preferences Customize system settings at: Settings > System. Options include system information, language, input method, date and time, developer mode, system upgrade, and factory reset. -
Page 16: File Management
File Management File Management Insert a USB drive to access its contents through the file manager, which supports various formats like video, audio, and pictures. - Page 17 Screen Mirroring with EShare for Android Installation & Setup: 1. Ensure your Android device and projector are on the same network. 2. On the projector, launch EShare. Follow the on-screen prompts to download and install EShare on your Android device from EShare website.
- Page 18 Screen Mirroring with EShare for Android Connection Instructions: 1. After installing EShare, open the app on your Android device. 2. EShare will search for projectors on the same network. Open the device list, recheck if necessary, and select the projector to establish a connection. 3.
- Page 19 Screen Mirroring with EShare for Android 1. Wireless File Transfer: Transfer music, videos, photos, documents, and other files from your Android device to the projector. 2. Wireless Control: Click this icon in the EShare, use your smartphone as a mouse, remote control, or keyboard for the projector.
- Page 20 Screen Mirroring with EShare for iPhone Installation & Setup: 1. Ensure your iOS device and projector are on the same network. 2. On the projector, launch EShare. Follow the on-screen prompts to download and install EShare on your iOS device from EShare website.
- Page 21 Screen Mirroring with EShare for iPhone Connection Instructions: 1. After installing EShare, open the app on your iOS device. 2. EShare will search for projectors on the same network. Open the device list, recheck if necessary, and select the projector to establish a connection. 3.
- Page 22 Screen Mirroring with EShare for iPhone 1. Wireless File Transfer: Transfer music, videos, photos, documents, and other files from your iOS device to the projector. 2. Wireless Control: Click this icon in the EShare, use your smartphone as a mouse, remote control, or keyboard for the projector.
- Page 23 Screen Mirroring with EShare for Windows Devices For Windows Devices: 1. Connect the Windows device and projector to the same network. 2. Open EShare on the projector and follow the on-screen prompts. 3. Visit the EShare download website on your Windows device, download, and install the EShare app. 4.
- Page 24 Screen Mirroring with AirPlay (for iPhone) 1. Connect your iPhone and the projector to the same network. 2. Swipe to open the Control Center and tap 'Screen Mirroring'. 3. Select the projector from the list to start wireless screen mirroring.
- Page 25 iPhone Wired Screen Mirroring 1. Connect your iPhone to the projector with a data cable and trust the device if prompted. 2. Enter your password if required to start screen mirroring.
- Page 26 Android Wired Screen Mirroring 1. Connect your Android device to the projector using a data cable. 2. Select 'View' and 'Install App' from the pop-up window on your device. 3. Open eShareLine on your phone to start screen mirroring.
- Page 27 Screen Mirroring-Using Miracast Receiver (Android Devices) 1. Ensure the Android device and the projector are on the same Wi-Fi network. 2. Open the MiracastReceiver app and go to the settings on your Android device. 3. Select 'Display settings' or 'Screen mirroring'. 4.
-
Page 28: Usb Connection
USB Connection a. Insert the USB drive into the projector's USB port for a pop-up window to appear. b. Supports playback of multimedia files including 4K video formats, images, and audio. Video Play Picture Play Audio Play Supports local decoding 4K. -
Page 29: Hdmi Connection
HDMI Connection Connect devices via the HDMI port and select the 3.5mm Audio Connection HDMI signal source. Use the 3.5mm jack to connect headphones or speakers. TV-Box PC/Laptop (with HDMI-out) The terms of HDMI and HDMI High-Definition Multimedia Interface, and the HDMI Logo are trademarks or registered trademarks of HDMI Licensing Administrator, Inc. -
Page 30: Questions And Answers
Questions & Answers Common issues and resolutions for your projector. Audio Q: No display, but audio is present. Why? A1: Unsupported video format. Check file type. A2: Encryption on the video may be restricting playback. A3: Faulty projector lamp if only audio plays. A4: Try another HDMI source. - Page 31 Image Q: How to correct a projection that's not square? A1: Adjust the image using the Manual Keystone in the Display settings. A2: Place the projector on a flat surface with the projector light in the center of the screen. Color Distortion Q: What to do if the colors seem off? A1: Check the video source for high resolution.
Need help?
Do you have a question about the PWHDPBNBK and is the answer not in the manual?
Questions and answers