
Related Manuals for Makita GEC03


Summary of Contents for Makita GEC03
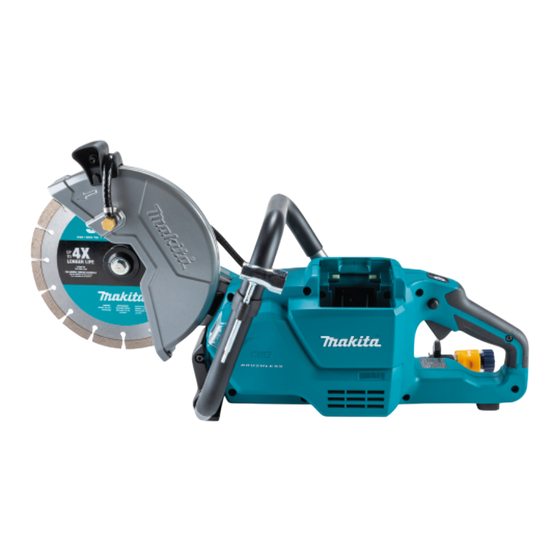
- Page 1 INSTRUCTION MANUAL MANUAL DE INSTRUCCIONES Cordless Power Cutter Cortadora de Concreto Inalámbrica GEC03 IMPORTANT: Read Before Using. IMPORTANTE: Lea antes de usar.
-
Page 2: Specifications
ENGLISH (Original instructions) SPECIFICATIONS Model: GEC03 Wheel diameter 230 mm (9″) Max. wheel thickness 3.0 mm (1/8″) Max.cutting depth 88 mm (3-1/2″) Rated speed 6,600 / min Rated voltage D.C. 36 V - 40 V max Max. permitted pressure of feed-water... - Page 3 Do not abuse the cord. Never use the cord for Power tool use and care carrying, pulling or unplugging the power tool. Do not force the power tool. Use the correct Keep cord away from heat, oil, sharp edges power tool for your application. The correct or moving parts.
- Page 4 Do not use a battery pack or tool that is dam- Do not use damaged wheels. Before each aged or modified. Damaged or modified batteries use, inspect the wheels for chips and cracks. If power tool or wheel is dropped, inspect for may exhibit unpredictable behaviour resulting in damage or install an undamaged wheel.
- Page 5 Maintain a firm grip on the power tool and Always use the wheel suitable for your work position your body and arm to allow you to and the material to be cut. resist kickback forces. Always use auxiliary Examine the material to be cut before cutting. handle, if provided, for maximum control over If the material contains explosive or flammable kickback or torque reaction during start-up.
- Page 6 Do not expose battery cartridge to water causing fires, personal injury and damage. It will or rain. also void the Makita warranty for the Makita tool and A battery short can cause a large current charger. flow, overheating, possible burns and even a breakdown.
-
Page 7: Parts Description
PARTS DESCRIPTION Fig.1 Abrasive cut-off wheel / Wheel cover grip Wheel guard Grip diamond wheel Battery cartridge Lock-off button Lamp Overload indicator Lamp button Switch trigger Handle Water inlet Cock Cover (for synchro-belt) Shaft lock button Coupling sleeve Box wrench (hex wrench-shaped han- dle tip) 7 ENGLISH... -
Page 8: Functional Description
Indicating the remaining battery FUNCTIONAL capacity DESCRIPTION Press the check button on the battery cartridge to indi- cate the remaining battery capacity. The indicator lamps CAUTION: Always be sure that the tool is light up for a few seconds. switched off and the battery cartridge is removed before adjusting or checking function on the tool. -
Page 9: Overheat Protection
A switch in need of repair may result in unintentional Protections against other causes operation and serious personal injury. Return tool to a Makita service center for proper repairs BEFORE further usage. Protection system is also designed for other causes... -
Page 10: Electronic Function
This tool is equipped with an electric brake. If the tool bolt, outer flange and wheel. consistently fails to quickly stop after the switch trigger is released, have the tool serviced at a Makita service center. Active Feedback sensing Technology The tool electronically detects situations where the wheel or accessory may be at risk to be bound. -
Page 11: Connecting To Water Supply
Connect the coupling sleeve to the water hose by turning the coupling sleeve. Fig.9 Fig.11 ► 1. Hex bolt 2. Outer flange (black) 3. Abrasive cut- ► 1. Water hose 2. Coupling sleeve off wheel / diamond wheel 4. Inner flange (silver) 5. -
Page 12: Operation
Move the tool over the workpiece surface, keeping it NOTICE: Keep the cock closed until you start the flat and advancing smoothly until the cutting is com- cutting operation with water feeding. For how to pleted. Keep your cutting line straight and your speed of feed water, refer to the section for the operation. -
Page 13: Cleaning The Tool
Discoloration, deformation or cracks may result. To maintain product SAFETY and RELIABILITY, repairs, any other maintenance or adjustment should be performed by Makita Authorized or Factory Service Centers, always using Makita replacement parts. Fig.20 ► 1. Inhalation vent 2. Exhaust vent... - Page 14 Push in the shaft lock button and hold it to lock the Changing the synchro-belt pulley (driven), turn the nut on the pulley (driven) coun- terclockwise using the box wrench, and then remove Remove the battery cartridge and the wheel. the nut and the plate on the pully.
- Page 15 Hook the new synchro-belt on the teeth of the Make sure that all the teeth on the internal circle pulley (driven), with the teeth of the belt facing inside. of the synchro-belt fit into the teeth on the pulleys. Move Put the other end of the synchro-belt onto the pulley the synchro-belt around the pulleys and check for any (driving) so that it is partially hooked on the teeth of the...
- Page 16 Align the pins on the pulley (driving) and the holes 10. Place the cover onto the tool and tighten the hex in the plate firmly, then put the cover on and tighten the socket bolts using the box wrench handle. hex socket bolts using box wrench handle.
-
Page 17: Troubleshooting
Before asking for repairs, conduct your own inspection first. If you find a problem that is not explained in the manual, do not attempt to dismantle the tool. Instead, ask Makita Authorized Service Centers, always using Makita replace- ment parts for repairs. -
Page 18: Especificaciones
ESPAÑOL (Instrucciones originales) ESPECIFICACIONES Modelo: GEC03 Diámetro de la rueda 230 mm (9″) Grosor máx. de la rueda 3,0 mm (1/8″) Profundidad de corte máxima 88 mm (3-1/2″) Velocidad especificada 6 600 r/min Tensión nominal 36 V - 40 V c.c. máx. - Page 19 Mantenga a los niños y curiosos alejados Retire cualquier llave de ajuste o llave de mientras utiliza una herramienta eléctrica. Las apriete antes de encender la herramienta. Una distracciones le pueden hacer perder el control. llave de ajuste o llave de apriete que haya sido dejada puesta en una parte giratoria de la herra- Seguridad eléctrica mienta eléctrica puede ocasionar alguna lesión.
- Page 20 Mantenga las herramientas de corte limpias Servicio y filosas. Si recibe un mantenimiento adecuado Haga que una persona calificada repare la y tiene los bordes afilados, es probable que la herramienta eléctrica utilizando sólo piezas de herramienta se atasque menos y sea más fácil repuesto idénticas.
- Page 21 El tamaño del eje de las ruedas y bridas se debe Retrocesos bruscos y advertencias relacionadas ajustar adecuadamente al eje de la herramienta El retroceso brusco es una reacción repentina a un atora- eléctrica. Las ruedas y bridas con orificios para ejes miento o enganchamiento de la rueda giratoria.
- Page 22 Evite reiniciar la operación de corte en la pieza de 13. Mantenga las manos o la cara alejadas de la trabajo. Permita que la rueda alcance su velocidad rueda giratoria. completa y se reintroduzca con cuidado en el 14. Ajuste la cubierta de la rueda a una posición corte.
- Page 23 Asimismo, esto inva- contra el cartucho de batería. Dicha acción lidará la garantía de Makita para la herramienta y el podría resultar en un incendio, calor excesivo o en cargador Makita.
-
Page 24: Table Of Contents
DESCRIPCIÓN DE LAS PIEZAS Fig.1 Rueda cortadora abra- Empuñadura de la Protector de la rueda Empuñadura siva / rueda de diamante cubierta de la rueda Cartucho de batería Botón de desbloqueo Lámpara Indicador de sobrecarga Botón de la lámpara Gatillo interruptor Mango Entrada para agua Llave... -
Page 25: Descripción Del Funcionamiento
Indicación de la capacidad restante DESCRIPCIÓN DEL de la batería FUNCIONAMIENTO Oprima el botón de verificación en el cartucho de la batería para que indique la capacidad restante de la PRECAUCIÓN: Asegúrese siempre de que la batería. Las luces indicadoras se iluminarán por algu- herramienta esté... -
Page 26: Protección Contra Sobrecarga
Deje que la máquina y la(s) batería(s) se enfríen. Si no hay ninguna mejora al restaurar el sistema de protec- ción, comuníquese con su centro local de servicio Makita. AVISO: Si la herramienta se detiene debido a una causa no descrita anteriormente, consulte la sección de detección y solución de problemas. -
Page 27: Botón De La Lámpara
Si de manera consistente la herramienta no logra dete- nerse rápidamente después de soltar el gatillo interrup- tor, lleve la herramienta a un centro de servicio Makita para que le den mantenimiento. Tecnología de detección de retroalimentación activa... -
Page 28: Protector De La Rueda
Para extraer la rueda, oprima el botón de bloqueo del PRECAUCIÓN: Siempre instale la rueda de eje y gire la rueda hasta que esta no pueda girar más. tal forma que la flecha en esta apunte en la misma Mientras el bloqueo del eje está totalmente bloqueado, dirección que la flecha en el protector de la rueda. -
Page 29: Operación
Conecte la manguera de agua al suministro de OPERACIÓN agua. Cuando conecte a una toma de agua, utilice un adita- mento adecuado como una banda para manguera o PRECAUCIÓN: Asegúrese de sujetar firme- junta para llave de agua. mente la pieza de trabajo hacia abajo sobre un banco o mesa estable durante la operación. -
Page 30: Mantenimiento
Para mantener la SEGURIDAD y FIABILIDAD del pro- ducto, las reparaciones, y cualquier otra tarea de man- tenimiento o ajuste deberán ser realizadas en centros de servicio autorizados o de fábrica Makita, empleando siempre repuestos Makita. Fig.17 ► 1. Llave... -
Page 31: Llave De Bujías (Punta Del Mango Con Forma De Llave Hexagonal)
Limpieza de la herramienta Cambio de la correa de sincronización Después de cada uso, retire el cartucho de la batería y la rueda y luego limpie el polvo, la suciedad o las Retire el cartucho de la batería y la rueda. virutas de metal acumuladas dentro del protector de la Afloje los pernos de cabeza hueca hexagonal con rueda. - Page 32 Presione el botón de bloqueo del eje y mantén- Enganche la nueva correa de sincronización en galo presionado para bloquear la polea (impulsada), los dientes de la polea (impulsada), con los dientes de gire la tuerca de la polea (impulsada) en sentido inverso la correa hacia adentro.
- Page 33 Asegúrese de que todos los dientes del círculo Alinee firmemente los pasadores de la polea (impulsora) y los interno de la correa de sincronización encajen en los orificios de la placa, luego coloque la cubierta y apriete los pernos dientes de las poleas. Mueva la correa de sincroniza- de cabeza hueca hexagonal con el mango de una llave de bujías.
- Page 34 10. Coloque la cubierta sobre la herramienta y apriete los pernos de cabeza hueca hexagonal usando el mango de la llave hexagonal. Fig.29 ► 1. Tubo 2. Perno de cabeza hexagonal 3. Cubierta AVISO: Asegúrese de que el tubo para la ali- mentación de agua esté...
-
Page 35: Resolución De Problemas
Antes de solicitar alguna reparación, primero realice una inspección por su cuenta. Si detecta algún problema que no esté explicado en el manual, no intente desensamblar la herramienta. En vez de esto, solicite la reparación a un centro de servicio autorizado de Makita, usando siempre piezas de repuesto Makita. Estado de la anomalía Causa probable (avería) - Page 36 Para reducir la exposición a estos productos químicos: trabaje en un área bien ventilada y póngase el equipo de seguridad indicado, tal como las máscaras contra polvo que están especialmente diseñadas para filtrar partículas microscópicas. Makita Corporation 3-11-8, Sumiyoshi-cho, Anjo, Aichi 446-8502 Japan 885A73-945...
Need help?
Do you have a question about the GEC03 and is the answer not in the manual?
Questions and answers