Advertisement
Quick Links
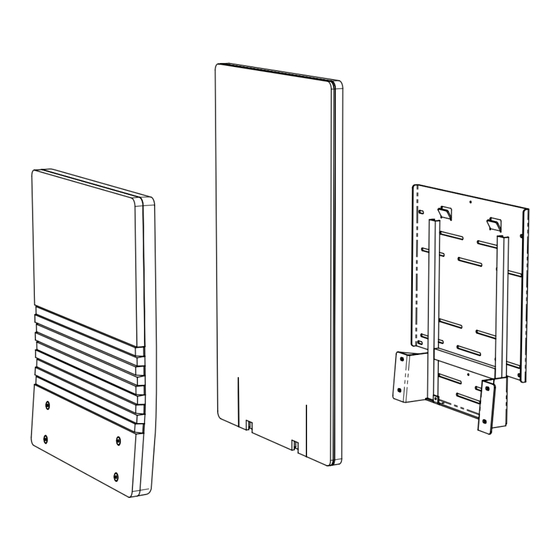
JumpSeat
Wall
®
Seat
Parts Included
Level
Power Drill
#3 Philips Screwdriver
Tools Required
Back
1/4" Nut Driver
(Brick/Concrete)
3/16"
Masonry
1/4"
1/2"
Drill Bit
Drill Bit
Drill Bit
Bracket
1
2
HILTI HTB
#8 Screw
Toggler Anchors
4
1/4" Slot/Philips
Combo Round Head
Screws
6
#10 Screw
7
1/4-20 Nuts
Hardware Included
3
1/4"x1-3/4"
Concrete Anchors
5
9
Bumpers
5/32"
Allen Wrench
8
1/4-20 Hex
Head Screws
Advertisement

Related Manuals for sedia systems JumpSeat Wall


Summary of Contents for sedia systems JumpSeat Wall
- Page 1 JumpSeat Wall ® Seat Back Bracket Parts Included Level HILTI HTB #8 Screw Toggler Anchors 1/4" Nut Driver (Brick/Concrete) 1/4"x1-3/4" Concrete Anchors 1/4" Slot/Philips Combo Round Head Screws Power Drill Bumpers #10 Screw 5/32" Allen Wrench 1/4-20 Nuts 3/16" Masonry 1/4"...
- Page 2 JumpSeat Wall ® Installation Notes Plywood Drywall Bracket Mounting on Hollow Masonry Mounting with Plywood Reinforced Drywall When mounting on cinder block masonry walls, care It is recommended that a drywall installation be should be taken to ensure anchors t within the reinforced with 3/4"...
- Page 3 JumpSeat Wall ® Installation 25.5" • Lean brackets against wall at a minimum • Attach bracket to wall with #8 screw at the top distance of 22" apart. center position. • Use laser level to scribe a line at 25.5" above •...
- Page 4 (B) on the face of the wall bracket.. • Fasten the back panel at the bottom with the #10 screws. 866.892.6130 | www.sediasystems.com | © 2014 Sedia Systems Inc. JumpSeat is a trademark of Aria Enterprises, Inc. used under license by Sedia Systems, Inc. ®...
Need help?
Do you have a question about the JumpSeat Wall and is the answer not in the manual?
Questions and answers