Advertisement
Quick Links
Package Contents
CXW1000
Power Supply
Prerequisites
You will need a computer equipped with an Internet browser. Firefox or Chrome is
recommended. By default, the Swift CXW1000 is configured with a static IP address of
10.10.10.10 and a network mask of 255.255.255.0.
Configure the Ethernet interface of your computer for an IP address from the same sub-network
range. For example, 10.10.10.11/255.255.255.0
Step 1: Connecting the Unit
1)
Using a straight Ethernet cable, connect the Swift to your computer
2)
Connect the power cord to the Swift. The device startup process takes about 30
seconds.
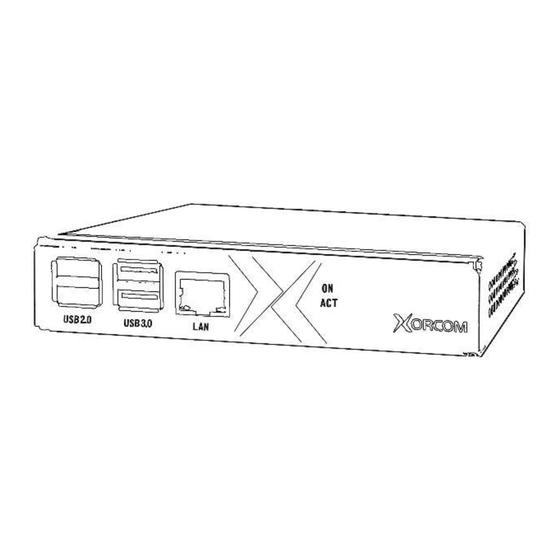
USB 2
USB 3
Micro-HDMI Audio
Power (USB)
Step 2: Configuring Swift
In order to configure your device follow these steps:
1)
From a computer's Internet browser enter the Swift IP address: http://10.10.10.10
You will be prompted to define a password for "administrator". Once you define a
2)
password you will be able to connect
to the web interface as user admin with password that you defined.
PM1000.02 – Swift CXW1000 Getting Started Guide
Status Indicators
Ethernet
Now you can modify your Swift CXW1000 CompletePBX configuration.
The CompletePBX Reference Guide can be found on the Xorcom Web site.
Step 3: Protect Swift Against Unauthorized Access
Once you have fully configured CompletePBX we highly recommend that you use the following
procedures and applications supported in CompletePBX to protect it against unauthorized
access:
Change the Linux Password
The default password for the Linux root user is !x0rc0m!voip5472#
It can be changed by using the Linux passwd command.
IP Protection
CompletePBX must be installed on a protected LAN and must not be directly
connected to the public Internet.
Intrusion Detection and Firewall
In order to maximize protection from external threats, the fail2ban process is activated, in
addition to the internal firewall.
Use the Admin|Security|Firewall and Admin|Security|Intrusion Detection dialog to modify the
internal firewall and intrusion detection settings.
Status LED Indicators
Swift CXW1000 is equipped with two LED indicators on the front panel:
On – indicates the power status
Act - indicates activity of the microSD card
Step 4: Security Settings
To ensure the security settings of your PBX, follow the Security Checklist in this link
https://www.xorcom.com/ip-pbx-security-checklist/
or QR code.
Advertisement

Related Manuals for Xorcom Swift CXW1000


Summary of Contents for Xorcom Swift CXW1000
- Page 1 You will need a computer equipped with an Internet browser. Firefox or Chrome is It can be changed by using the Linux passwd command. recommended. By default, the Swift CXW1000 is configured with a static IP address of 10.10.10.10 and a network mask of 255.255.255.0.
- Page 2 Consult the dealer or an experienced radio/TV technician for help. Tel: +972 499 51 999 | Mail: support@xorcom.com | Web: www.xorcom.com Add: 8 Katom St., Misgav Industrial Park, DN Misgav, 2017400, Israel Copyright: © Xorcom Ltd. 2019 All rights reserved.
Need help?
Do you have a question about the Swift CXW1000 and is the answer not in the manual?
Questions and answers