Table of Contents
Advertisement
Quick Links
Advertisement
Table of Contents

Subscribe to Our Youtube Channel
Related Manuals for dji Mini 3


Summary of Contents for dji Mini 3
- Page 1 DJI Mini 3 Easy-to-Use Guide for Beginners...
-
Page 2: Table Of Contents
Content About DJI Mini 3 ........................5 Video Tutorial ......................... 5 User Manual ........................5 Unboxing and Getting Started ..................5 Unboxing ..........................6 Removing the Storage Cover ..................9 Powering on or off the Device ................. 10 Status Indicator Descriptions ................... 12 Replacing the Propellers ....................13... - Page 3 Battery Maintenance ....................21 Using for the First Time .....................21 Preparing the Aircraft ....................21 Preparing the Remote Controller ................22 Getting Ready For First Flight .................. 23 Updating the Firmware ....................23 Intermediate Operations ....................24 QuickShots ........................24 Portrait Mode ....................... 24 Zooming .........................
- Page 4 DJI Care Service Plans ......................32...
-
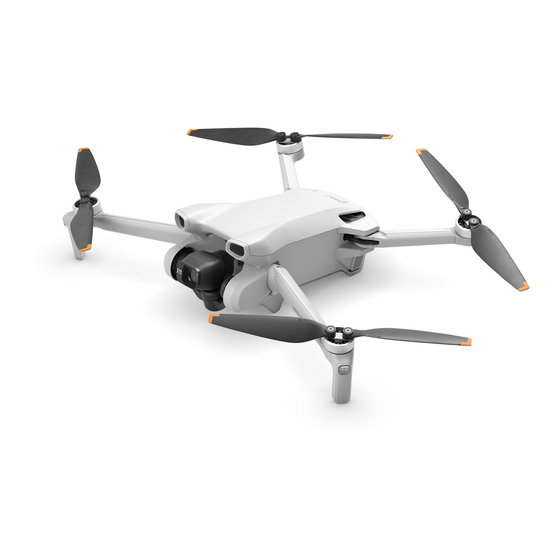
Page 5: About Dji Mini 3
About DJI Mini 3 With Intelligent Flight Battery Plus, DJI Mini 3 can fly for up to 51 min. It supports abundant intelligent flight features, such as Quickshots, Portrait Mode, and QuickTransfer. Click here to know details about DJI Mini 3 Technical Specifications. -
Page 6: Unboxing
Fly, and connect the drone to remote controller and mobile device. Then you will need to follow the prompts on the screen to activate the drone. Here are some helpful tips on how to power on and activate DJI Mini 3. Unboxing DJI Mini 3 packages vary among different regions. - Page 7 · DJI Mini 3 (DJI RC)
- Page 8 · DJI Mini 3 Fly More Combo · DJI Mini 3 Fly More Combo (DJI RC)
-
Page 9: Removing The Storage Cover
Removing the Storage Cover [Important] Remove the storage cover before powering on the drone. · When powering on the drone, the gimbal will rotate and perform self-check*. If the storage cover is not removed, the motor may be damaged or the service life will be affected, or even impact the flight safety after takeoff. -
Page 10: Powering On Or Off The Device
· Removing the Storage Cover Push the lower buckle of the storage cover towards the camera to remove the storage cover. Note: If GIF images are not displayed properly, click here fordetails. · Attaching the Storage Cover 1. Snap the buckle at the upper part of the storage cover into the slot on the aircraft. - Page 11 · Aircraft · Remote Controller DJI RC RC-N1...
-
Page 12: Status Indicator Descriptions
Status Indicator Descriptions You can tell the status of your device through the blinking patterns of the aircraft status indicator. Different color indicates different status of the aircraft, and the blinking frequency as well. Refer to the table below for more information about the aircraft status indicators. -
Page 13: Replacing The Propellers
Before mounting the propeller, better confirm the mark on each first. DJI Mini 3 has been installed with propellers before leaving the factory. In case of a propeller replacement, please refer to the steps below. -
Page 14: Mounting And Removing The Battery
· Replacing the Propellers Step 1: Place the drone horizontally and make sure that the drone’s camera faces forwards; Step 2: Tighten the propellers with a mark onto the motors using the provided screwdriver. Step 3: Tighten the propellers without a mark onto the remaining motors. To learn more about how to replace the propellers, Watch this video for the more details:... -
Page 15: Activating Your Device
· Installing the Battery · Removing the Battery Activating Your Device DJI Mini 3 requires activation before first use. After powering on the aircraft and remote controller, follow the on-screen prompts to activate the device using DJI Fly. Step 1: Download the app. -
Page 16: Step 2: Connect The Drone To Other Devices
Step 3: Activate for the First Time Make sure that the aircraft, remote controller, and mobile device are connected (there is no need to connect the mobile device for DJI RC) and linking is successfully. Launch the DJI Fly app, and then complete the activation according to the on-screen instructions (An Internet connection is required for activation). -
Page 17: Choose An Adapter
Choose an Adapter As DJI Mini 3 does not come with an adapter, please refer to the following content to select an appropriate adapter. · DJI Mini 3 supports PD fast charging protocol. You can charge your drone using a PD fast charger with the included PD charging cable (Type-C to Type-C). -
Page 18: Charging Method
· If a PD fast charger is currently not available, you can also use a charger with a Type-C port for charging, but the charging speed may be relatively slower. Charging Method... - Page 19 Note: If GIF images are not displayed properly, click here fordetails. · Connecting the aircraft with the battery mounted for charging · Using the Battery Charging Hub · Charging the DJI RC Remote Controller · Charging the DJI RC-N1 Remote Controller...
-
Page 20: Charging Duration
1 hour and 18 minutes to fully charge an Intelligent Flight Battery Plus). · Charging a Remote Controller DJI RC It takes about one and a half hours to charge a DJI RC using a 15 W charger. DJI RC-N1... -
Page 21: Battery Maintenance
It takes about three and a half hours to charge a DJI RC-N1 using a 10 W charger. Battery Maintenance 1. Discharge the battery to 40%-65% (the third battery level LED lights up or blinks) if it will not be used for 10 days or more. -
Page 22: Preparing The Remote Controller
Then connect the mobile device. Step 3: Check the battery level of the remote controller and power on the remote controller. Then launch DJI Fly. Watch this video for the more details. -
Page 23: Getting Ready For First Flight
DJI Mini 3: Updating the Firmware Using DJI Fly or DJI Assistant 2 (Consumer Drones Series) to update DJI Mini 3 firmware. 1. Update the whole firmware package including the drone and remote controller firmware using DJI Fly (Recommended). -
Page 24: Intermediate Operations
DJI Mini 3 supports shooting in Dronie, Rocket, Circle, Helix, and Boomerang modes. Portrait Mode The DJI Mini 3 camera can be rotated 90° for lossless shooting in Portrait mode, allowing for more freedom in composition. Tap the vertical shooting icon on the app interface to enter Portrait mode. -
Page 25: Zooming
Live Streaming When using DJI RC-N1 remote controller with your mobile device, you can live stream with your DJI Mini 3 via DJI Fly. Live streaming is not available when using DJI RC. Go to 「“...” > Transmission > Enable Livestreaming」to broadcast the camera view in real time. -
Page 26: Smart Rth
Storage · The combo does not come with a microSD card. DJI Mini 3 supports up to 512 GB cards, and it is recommended that you use the following ones. -
Page 27: Installing And Removing A Memory Card
Kingston Canvas React Plus 128GB V30 A1 microSDXC Samsung Pro Plus 256GB V30 A2 microSDXC · DJI RC does not come with internal storage, but supports installing a microSD card. After a memory card is inserted, you are allowed to cache files while shooting or recording, and to download your raw materials to the remote controller. -
Page 28: Exporting The Photos/Videos
· Removing a Memory Card Exporting the Photos/Videos... -
Page 29: Tips For Flight Safety
The raw footage captured by DJI Mini 3 is stored in the internal storage or microSD card. Watch this video for the more details. Tips for Flight Safety Before a takeoff, have a glance at the nearby restricted and GEO zones. -
Page 30: Pre-Flight Checklist
5. Do not fly the aircraft near areas with magnetic or radio interference, including Wi-Fi hotspots, routers, Bluetooth devices, high-voltage lines, large-scale power transmission stations, radar stations, mobile base stations, and broadcasting towers. Otherwise, the wireless transmission performance of the aircraft may be affected by interference, and the aircraft cannot fly normally. -
Page 31: Available Accessories
5. It is recommended to set the RTH Altitude higher than the height of obstacles in the surrounding environment to avoid collisions during RTH. Available Accessories With its great accessories, DJI Mini 3 helps you put the icing on the cake. Popular Accessories DJI Mini 3 Series 360° Propeller... - Page 32 Add DJI Care Refresh 1-Year Plan (DJI Mini 3) Add DJI Care Refresh 2-Year Plan (DJI Mini 3) · [DJI Care Express] A DJI service center will ship you a replacement as soon as they receive your product. DJI will cover shipping costs both ways anytime a product is sent back for replacement service.
- Page 33 · [Rewards for Safe Flight] Throughout the service period, if you haven’ t used any replacements or repair services, DJI will provide you with a 1-year warranty extension as reward.
Need help?
Do you have a question about the Mini 3 and is the answer not in the manual?
Questions and answers