Table of Contents
Advertisement
Quick Links
Advertisement
Table of Contents

Subscribe to Our Youtube Channel
Related Manuals for Dougherty Everglades 365 CC

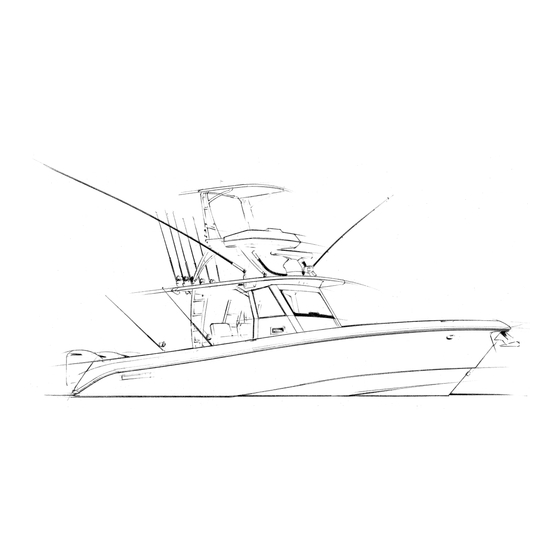
Summary of Contents for Dougherty Everglades 365 CC
- Page 1 2013 OWNER’S MANUAL 365 CC...
- Page 2 Revision 1 7-6-2020...
-
Page 3: Table Of Contents
TABLE OF CONTENTS TABLE OF CONTENTS ......................3 SAFETY INFORMATION ......................7 BOAT INFORMATION ......................8 SPECIFICATIONS ........................ 9 CERTIFICATIONS & SPECIFICATIONS ...................10 INTRODUCTION & IMPORTANT INFORMATION ...............11 OWNER / OPERATOR INFORMATION ..................13 Chapter 1: SAFETY EQUIPMENT 1.1 General ........................15 1.2 Engine Alarms ......................15 1.3 Neutral Safety Switch ....................15 1.4 Engine Stop Switch .....................15... - Page 4 TABLE OF CONTENTS Chapter 4: HELM CONTROL SYSTEMS 4.1 General ........................43 4.2 Engine Throttle and Shift Controls .................43 4.3 Neutral Safety Switch ....................45 4.4 Engine Power Tilt and Trim ...................45 4.5 Engine Stop Switch .....................46 4.6 Steering System ......................47 4.7 Joystick Controls ......................48 4.7 Trim Tabs ........................48 4.8 Bow Thruster (Optional) ....................49 4.9 Control Systems Maintenance ..................50...
- Page 5 TABLE OF CONTENTS Chapter 9: DRAINAGE SYSTEMS 9.1 General ........................83 9.2 Cockpit and Deck Drainage ..................83 9.3 Hardtop and Tower Drains ....................84 9.4 Bilge Drainage ......................84 9.5 Aft Fishbox and Baitwell ....................84 9.6 Head Compartment Drainage ..................84 9.7 Drainage System Maintenance ..................85 Chapter 10: VENTILATION SYSTEM 10.1 Head Compartment Ventilation ..................87...
- Page 6 TABLE OF CONTENTS Appendix A: SCHEMATICS ........................129 Appendix B: GLOSSARY OF TERMS ......................131 Appendix C: MAINTENANCE LOG ......................135 Appendix D: BOATING ACCIDENT REPORT ....................139 Appendix E: FLOAT PLAN ........................143 Appendix F: TROUBLESHOOTING GUIDE ....................145...
-
Page 7: Safety Information
SAFETY INFORMATION Your Everglades owner’s manual has been written to include a number of safety instructions to assure the safe operation and maintenance of your boat. These instructions are in the form of DANGER, WARNING and CAUTION statements. The following definitions apply: CAUTION HAZARDS OR UNSAFE PRACTICES WHICH COULD RESULT IN MINOR PERSONAL INJURY OR PRODUCT AND PROPERTY... -
Page 8: Boat Information
BOAT INFORMATION Please fill out the following information section and leave it in your Everglades owner’s manual. This information will be important for you, your dealer and/or Everglades service personnel to know, if you may need to call them for technical assistance or service. BOAT MODEL: HULL SERIAL #:... -
Page 9: Specifications
SPECIFICATIONS 365 CC Specifications HULL LENGTH OVERALL W/ ENGINE _____________________________________________________ 38’ 0” BEAM _______________________________________________________________________________ 10’ 8” WEIGHT DRY - NO ENGINES _______________________________________________________ 11,5000 lbs DEAD RISE _____________________________________________________________________________ 25 DRAFT WITH ENGINES UP _______________________________________________________________ 24” DRAFT WITH ENGINES DOWN _____________________________________________________________ 41” TRANSOM HEIGHT __________________________________________________________________ 30”... -
Page 10: Certifications & Specifications
CERTIFICATIONS & SPECIFICATIONS 365 CC Export Documentation (For Export Only) To be in compliance with European directives for recreational boats as published by the International Organization for Standardization (ISO) in effect at the time this boat was manufactured, we are providing the following information. Manufacturer: Name Everglades Boats... -
Page 11: Introduction & Important Information
INTRODUCTION & IMPORTANT INFORMATION All instructions given in this book are as seen from the stern looking toward the bow with starboard being to your right and port to your left. The information and precautions listed in this manual are not all inclusive. It may be general in nature in some cases and detailed in others and is designed to provide you with a basic understanding of your Everglades boat and some of the responsibilities... -
Page 12: Product Changes
INTRODUCTION & IMPORTANT INFORMATION Transferring the Limited Structural Warranty Service For a transfer fee, Everglades Boats will offer to All warranty repairs must be performed by an extend a Transferable Limited Structural Hull War- authorized Everglades Dealer. Should a problem ranty to subsequent owners of Everglades Boats. -
Page 13: Owner / Operator Information
OWNER / OPERATOR INFORMATION Registration and Numbering an accident. If you need additional information regarding accident reporting, please call the Boat- Federal law requires that all undocumented ves- ing Safety Hotline, 800-368-5647. sels equipped with propulsion machinery be regis- tered in the state of principal use. A certificate of Education number will be issued upon registering the boat. - Page 14 THIS PAGE WAS LEFT BLANK INTENTIONALLY...
-
Page 15: Safety Equipment
Chapter 1: SAFETY EQUIPMENT 1.1 General Your boat and outboard engines have been equipped with safety equipment designed to en- hance the safe operation of the boat and to meet U.S. Coast Guard safety standards. The Coast Guard or state, county and municipal law enforce- ment agencies require certain additional accessory safety equipment on each boat. -
Page 16: Required Safety Equipment
Safety Equipment Visual Distress Signals Notice: You should carry an extra stop switch lan- All boats used on coastal waters, the Great Lakes, yard and instruct at least one other crew territorial seas and those waters connected di- member on the operation of the stop switch rectly to them, must be equipped with Coast Guard and location of the extra lanyard. -
Page 17: Navigation Lights
Safety Equipment • Electric Distress Light (Night use only) Refer to the “Federal Requirements And Safety Tips For Recreational Boats” pamphlet or Contact The electric distress light is accepted for the U.S. Coast Guard Boating Safety Hotline, night use only and must automatically flash 1-800-368-5647, for information on the type and the international SOS distress signal. -
Page 18: First Aid
Safety Equipment Satellite EPIRBS 1.7 First Aid EPIRBs (Emergency Position Indicating Radio Beacon) operate as part of a worldwide distress It is the operator’s re- system. When activated, EPIRBs will send distress sponsibility to be familiar code homing beacons that allow Coast Guard with the proper first-aid aircraft to identify and find them quickly. -
Page 19: Caution And Warning Labels
Safety Equipment 1.9 Caution and Warning Labels The caution and warning labels shown are examples of the labels that could be on your boat. The actual labels and their location could vary on your boat. - Page 20 THIS PAGE WAS LEFT BLANK INTENTIONALLY...
-
Page 21: Operation
Chapter 2: OPERATION 2.1 General the boat as well. Always modify the boat speed in accordance with the sea conditions, boat traffic Before you start the engines on your Everglades, and weather conditions. you should have become familiar with the vari- ous component systems and their operation and Remember, it is the operator’s responsibility to have performed a “Pre-Cruise System Check.”... -
Page 22: The General Prudential Rule
Operation Overtaking Situations When one motor boat is overtaking another mo- tor boat, the boat that is being passed has the right-of-way. The overtaking boat must make the adjustments necessary to provide clearance for a safe passage of the other vessel. The boats should sound the appropriate signals. - Page 23 Operation...
-
Page 24: Pre-Cruise Check
Operation 2.3 Pre-Cruise Check • Have a tool kit aboard. The kit should include the following basic tools: Before Starting the Engines: Hammer Electrician’s tape • Check the weather forecast and sea conditions before leaving the dock. Decide if the planned Screwdrivers Offset screwdrivers cruise can be made safely. -
Page 25: Operating Your Boat
Operation 2.4 Operating Your Boat WARNING After Starting the Engines: DO NOT OPERATE THE BOAT UNLESS IT IS COMPLETELY • Visibly check the engines to be sure there are A S S E M B L E D. K E E P A L L FA S T E N E R S T I G H T. K E E P no apparent water, fuel or oil leaks. -
Page 26: Docking, Anchoring And Mooring
Operation • As different types of engines are used to • Turn off all electrical equipment except the power the boat, have the dealer describe the automatic bilge pumps. operating procedures for your boat. For more • If you are going to leave the boat for a long instructions on “How To Operate The Boat,”... -
Page 27: Leaving The Dock
Operation Maneuvering to the Dock Notice: If your boat is equipped with triple engines, we recommend turning the center engine After Bow Spring Cleat off and using the port and starboard engines Stern Cleat Bow Cleat to maneuver the boat to the dock or back it into a slip. -
Page 28: Controls, Steering Or Propulsion System Failure
Operation Mooring cal. It should release when you pass that point. If the anchor doesn’t release right away, stop the Approach the mooring heading into the wind or boat directly above the anchor and tie the line to current. Shift to neutral when you have just the cleat as tight as possible. -
Page 29: Grounding, Towing And Rendering Assistance
Operation port. Request assistance if necessary. Haul the WARNING boat and make a thorough inspection of the hull and running gear for damage. R U N N I N G A G R O U N D C A N C A U S E S E R I O U S I N J U RY TO PASSENGERS AND DAMAGE TO A BOAT AND ITS UNDERWATER GEAR. -
Page 30: Tower Operation (Optional)
Operation the tower raises the boat’s center of gravity and • Be careful when using the trim tabs from the the boat’s motion is greatly exaggerated for the tower. The reaction of the trim tabs will be person in a tower. exaggerated in the tower. -
Page 31: Man Overboard
Operation 2.12 Man Overboard some time to become familiar with the boat and the way it handles before pulling a skier. The If someone falls overboard, you must be pre- driver should also know the skier’s ability and pared to react quickly, particularly when you are drive accordingly. - Page 32 Operation • Never follow directly behind another boat while pulling skiers. Always stay a safe distance behind or off the side of other boat traffic. If the boat you are following stops unexpectedly, you may not be able to respond quick enough endangering your skier and occupants of both boats.
-
Page 33: Trash Disposal
Operation Trash Disposal and Discharge of Placards on Starboard Side of Cockpit 2.14 Trash Disposal Federal law requires that vessels of 26 feet or longer must display in a prominent location, a The discharge of plastic trash or trash mixed with durable placard at least 4 by 9 inches notifying plastic is illegal anywhere in the marine environ- the crew and passengers of the discharge restric-... -
Page 34: Trailering Your Boat
Operation 2.15 Trailering Your Boat If you trailer your boat, make sure that your tow vehicle is capable of towing the weight of the trailer, boat and equipment and the weight of the passengers and equipment inside the vehicle. This may require that the tow vehicle be spe- cially equipped with a larger engine, transmission, brakes and trailer tow package. - Page 35 Operation • The SAFETY CHAINS must be attached CAUTION crisscrossing under the coupler to the frame of the tow vehicle. If the ball was to break, BOATS HAVE BEEN DAMAGED BY TRAILERS THAT DO NOT the trailer would follow in a straight line and PROPERLY SUPPORT THE HULL.
- Page 36 THIS PAGE WAS LEFT BLANK INTENTIONALLY...
-
Page 37: Propulsion System
Chapter 3: PROPULSION SYSTEM 3.1 General Your Everglades is designed to be powered with 4-cycle outboard motors. 4-cycle outboard en- gines do not use an oil injection system and are not equipped with remote oil tanks. They have an oil sump in the crankcase that must be kept full of the type of oil recommended by the engine manufacturer. -
Page 38: Engine Lubrication
Propulsion System tors as high as possible. This will decrease the CAUTION risk of marine growth around the cooling inlets, propeller and exhaust ports and damage from NEVER RUN AN OUTBOARD MOTOR WITHOUT WATER galvanic corrosion. FLOWING TO THE WATER PUMP. SERIOUS DAMAGE TO THE WATER IMPELLER OR ENGINE COULD RESULT. - Page 39 Propulsion System Notice: Before changing propellers to correct boat performance problems, be sure other factors such as engine tuning, bottom and running gear growth, etc. are not the source of per- formance changes. Always be sure the load conditions are those normally experienced, before changing propellers.
-
Page 40: Engine Instrumentation
Propulsion System Yamaha Command Link Plus Display ® 3.7 Engine Instrumentation Some or all of the following gauges may be The helm station is ©equipped with a set of engine present. instruments and/or alarms. These instruments allow the operator to monitor the operational Tachometers condition of the engines. -
Page 41: Overheat Warning Indicator
Propulsion System options are installed in your boat. Refer to the engine gauge and electronics operating manuals for more information on the speedometer options available for your boat. Overheat Warning Indicator The temperature warning indicates that the tem- perature of the engine is too high. A sudden increase in the temperature could indicate an obstructed water inlet or an impeller failure. -
Page 42: Instrument Maintenance
Propulsion System that system. Compass All boats are equipped with a compass on the top of the instrument panel. The compass cannot be adjusted accurately at the factory as it must be compensated for the influence of the electrical equipment and electronics unique to your boat. Therefore, the compass should be adjusted by a professional after the electronics and additional electrical accessories are installed and before op-... -
Page 43: Helm Control Systems
Chapter 4: HELM CONTROL SYSTEMS 4.1 General The helm controls consist of three systems: the engine throttle and shift controls, the steering system and the trim tab control switches. These systems provide the operator with the ability to control the direction and attitude of the boat from the helm station. - Page 44 Helm Control Systems provided directly on the control and a master trim switch is located on the port handle. The port throttle lever controls both the port and center engine when all three engines are selected by the engine selector switch. General control operation is very similar to the twin engine control.
-
Page 45: Engine Synchronizer
Helm Control Systems • Station selection (a separate button on may be required to correct this condition should it Yamaha controls) that allows the operator to persist. See your Everglades dealer for necessary transfer control from one station to another control adjustments. -
Page 46: Engine Stop Switch
Helm Control Systems Moving the outboards closer to the boat transom is called trimming “in” or “down.” Moving the out- boards further away from the boat transom is called trimming “out” or “up.” In most cases, the boat will run best with the outboards adjusted so the hull will run at a 3 to 5 degree angle to the water. -
Page 47: Steering System
Helm Control Systems 4.6 Steering System Power Assist Hydraulic Steering Power assisted steering systems on boats without the joystick option are hydraulic and comprised of two hydraulic circuits: a manual system, which is the control element and a hydraulic power assist pump, which is the working element. -
Page 48: Tilt Steering Wheel
Helm Control Systems the correct procedure to avoid damage to the en- gine cowlings if a steering system failure occurs. Refer to the engine manufacturer owner’s manuals for specific information on the operation, mainte- nance and emergency procedures for the steering system installed in your boat. -
Page 49: Bow Thruster (Optional)
Helm Control Systems The trim tabs are programmed to automatically retract when the engines are shutdown to keep the actuators clean and set the tabs in the full “UP” position when leaving the dock. Refer to the trim tab operating manual for more information on the operation and programming of the trim tabs. -
Page 50: Control Systems Maintenance
Helm Control Systems 4.9 Control Systems Maintenance Control Maintenance Periodic inspection of the control systems and all connections should be made. Signs of rust, cor- rosion, wear or other deterioration should imme- diately be serviced. Generally, periodic lubrication of all moving parts and connections with a light waterproof grease is in order. -
Page 51: Trim Tab Maintenance
Helm Control Systems your Everglades or outboard engine dealer for Refer to the trim tab owner’s manual for additional assistance. maintenance information, specifications, trouble- shooting and operating instructions. WARNING Bow Thruster Maintenance (Optional) The bow thruster is mounted in the forward bilge IMPROPERLY ADJUSTED ELECTRONIC ENGINE CONTROLS below the center hatch. - Page 52 THIS PAGE WAS LEFT BLANK INTENTIONALLY...
-
Page 53: Fuel System
Chapter 5: FUEL SYSTEM 5.1 General The gasoline fuel system used in Everglades boats is designed to meet or exceed the requirements of the U.S. Coast Guard, the Boating Industry As- sociation and the American Boat and Yacht Council in effect at the time of manufacture. All gasoline fuel systems have been factory in- spected and pressure tested in accordance with regulations in effect at the time of manufacture. -
Page 54: Outboard Engine Fuel System
Fuel System Typical Yamaha Engine Fuel Filters 5.2 Outboard Engine Fuel System The gasoline fuel system has one fuel tank that fills from the port gunnel. The starboard engine is supplied by the starboard fuel line and the port engine is supplied by the port fuel line. If your boat is equipped with triple engines, the center engine will be supplied by a center fuel line. - Page 55 Fuel System for additional information regarding fuel filters and DANGER the outboard engine fuel system. Notice: TO REDUCE THE POSSIBILITY OF A FIRE OR EXPLOSION, Clean fuel is especially important in fuel in- MAKE SURE ALL ELECTRICAL SWITCHES ARE IN THE “OFF” POSITION BEFORE SERVICING THE FUEL SYSTEM.
-
Page 56: Fueling Instructions
Fuel System 5.4 Fueling Instructions 6. Turn the key counter clockwise to open the cap. WARNING 7. Remove the cap. 8. Put the nozzle in the fuel opening. FUEL IS VERY FLAMMABLE. BE CAREFUL WHEN FILLING THE FUEL TANK. NO SMOKING. NEVER FILL THE TANK WHILE AN ENGINE IS RUNNING. -
Page 57: Fuel System Maintenance
Fuel System 5.5 Fuel System Maintenance The age of gasoline can effect engine performance. Chemical changes occur as the gasoline ages that Periodically inspect all primer bulbs, connections, can cause deposits and varnish in the fuel system clamps and hoses for leakage, damage or deterio- as well as reduce the octane rating of the fuel. - Page 58 THIS PAGE WAS LEFT BLANK INTENTIONALLY...
-
Page 59: Electrical System
Chapter 6: ELECTRICAL SYSTEM 6.1 General windshield, windlass and power steering system. Additional fuses near the main circuit breakers Your Everglades is equipped with 120 volt AC protect continuous power circuits for the stereo and 12 volt DC electrical systems. The AC sys- memory, automatic switches for bilge pumps, tem draws current from shore power outlets at shower sump automatic switch and helm battery... - Page 60 Electrical System Battery Switches, Emergency Parallel Switches, PT & STBD Voltage Sensitive Relays, Main Circuit Breakers and Continuous Power Fuse Panel The batteries should be of the size and capacity the switch if the remote switch or relay fails. The recommended by the manufacturer of your en- manual override is a yellow knob on each battery gines.
- Page 61 Electrical System manual override is a yellow knob on each battery switch that can be pressed to manually activate the switch or rotated to reactivate remote activa- tion of the switch or to lockout the switch in the OFF position when servicing the electrical system. The normal operating position for each switch is the “Enabled”...
-
Page 62: Dc System Switch Panels
Electrical System 6.4 DC System Switch Panels Ignition Switch Panels Ignition switch panels are unique to each engine manufacturer and the engine control options selected. Your dealer will provide you with the proper starting procedure for your boat at the time of delivery. - Page 63 Electrical System 12 volt Helm Accessory Switch Panel The main accessory switch panel is located at the helm. Most of the circuit breakers that protect the accessories are located in the head compartment DC panel. An LED light built into the toggle switches indicates that the circuit is activated.
- Page 64 Electrical System Livewell Recirc Wiper/Washer Activates the pump that recirculates the water in A three position switch that activates the optional the livewell. windshield wiper and washer. Press the lower position to turn the wiper OFF. Move the switch Livewell Light to the center position to activate only the wiper.
- Page 65 Electrical System Parallel and Battery Switches in Helm Switch Panel Engine 2 Battery Parallel Remotely activates the Starboard Engine battery Activates the circuit that connects the port and switch. A red LED light in the switch glows when starboard engine starting batteries in parallel for the battery switch it controls is activated.
- Page 66 Electrical System Additional DC Switches and Panels Trim Tab Switch Located in the helm. This switch controls the trim tab planes located on the transom of the boat. It is protected by a fuse located in the accessory fuse panel behind the helm. Please refer to the Helm Control Systems chapter for detailed information on the operation of the trim tab controls.
- Page 67 Electrical System Table Located on the starboard side of the cockpit, for- ward of the console. A three position momentary switch that raises and lowers the table pedestal. The center position is OFF. Press the top of the switch to raise the table, press the bottom of the switch to lower it.
-
Page 68: Dc System Circuit Protection
Electrical System CONTINUOUS POWER FUSE PANEL MAIN CIRCUIT BREAKERS Main Circuit Breakers and Continuos Power Fuse Panel 6.5 DC System Circuit Protection Main Circuit Breakers DC Power is distributed to the head compart- DC Circuit Breaker Panel ment DC breaker panel, accessory fuse panels, Power is distributed to most of the 12 volt acces- electronics and other main circuits through heavy sories activated by the helm and hard top switch... - Page 69 Electrical System Main Protects the circuit that supplies 12 volt current to the head compartment DC breaker Panel and ac- cessory fuse panels behind the helm. This circuit is deactivated when the House battery switch is off. Electronics Protects the main circuit that supplies 12 volt current to the electronics fuse panel in the helm.
-
Page 70: Bonding System
Electrical System Notice: The continuous power circuits are always supplied current when the batteries are con- nected. These circuits are not deactivated when the battery switches are off. Electronics and Accessory Fuse Panels There are three fuse panels located in the helm that are accessed through a hatch in the head compartment. -
Page 71: Ac Electrical System
Electrical System 6.7 AC Electrical System DANGER TO REDUCE THE RISK OF ELECTRICAL SHOCK IN WET WEATHER, AVOID MAKING CONTACT WITH THE SHORE CABLE OR MAKING A CONNECTION TO A LIVE SHORE OUTLET. NEVER SPRAY WATER ON ELECTRICAL CABLES WHILE WASHING DOWN DECKS. TO R E D U C E T H E P O S S I B I L I T Y O F A N E L E C T R I C A L SHOCK, IT IS IMPORTANT THAT THE AC GROUND SYSTEM I S F U N C T I O N I N G P R O P E R LY A N D T H AT A P R O P E R... -
Page 72: Electrical System Maintenance
Electrical System Battery Charger Operation CAUTION AC electrical current is supplied directly to the automatic battery charger, located in the systems W H E N R E P L A C I N G L I G H T B U L B S I N M A R I N E L I G H T compartment, by the shore power cord and AC FIXTURES, ALWAYS USE A BULB WITH THE SAME RATING AS inlet plug located below the port rear gunnel. - Page 73 signs of corrosion or fraying. Deteriorated cables WARNING cause a considerable voltage loss when high cur- rents are drawn, as for starting the engines. CORROSION ALLOWED TO BUILD ON THE ELECTRICAL C O N N E C T O R S C A N C A U S E A P O O R C O N N E C T I O N RESULTING IN SHORTS, GROUND FAULTS OR POOR AC Electrical System Maintenance GROUND CONNECTIONS.
- Page 74 THIS PAGE WAS LEFT BLANK INTENTIONALLY...
-
Page 75: Fresh Water System
Chapter 7: FRESH WATER SYSTEM 7.1 General The fresh water system consists of a potable water tank, distribution lines and a distribution pump. The pump is equipped with an automatic pressure switch and is located near the water tank in the systems compartment. - Page 76 Fresh Water System Work Station Sink and Fresh Water Shower The sink in the cockpit work station is equipped with fresh and raw water. A spray head/shower on a retractable hose is mounted in a recess next to the faucet. To use the fresh water spray head, pull it out of the recess and make sure the Fresh Water switch is on.
-
Page 77: Fresh Water System Maintenance
Fresh Water System 7.3 Fresh Water System Maintenance Information supplied with water system compo- nents by the equipment manufacturers is included with this manual. Refer to this information for additional operation and service data. Routine Maintenance The following items should be done routinely to maintain your fresh water system: •... - Page 78 THIS PAGE WAS LEFT BLANK INTENTIONALLY...
-
Page 79: Raw Water System
Chapter 8: RAW WATER SYSTEM 8.1 General A raw water manifold located in the systems com- partment bilge supplies seawater to the raw water pumps. The intake for the manifold is equipped with a ball valve that turns the raw water main supply to the manifold on or off. -
Page 80: Livewell And Baitwell
Raw Water System Washdown Hose Connector The raw water washdown hose connection is lo- cated on the port side of the cockpit below the gunnel and uses a standard garden hose connec- tor. It is equipped with a valve that allows the flow of water to be turned on or off. -
Page 81: Raw Water System Maintenance
Raw Water System supply valve in the well are open. Then activate the pump. When the water level reaches the overflow, it will begin to circulate. When the recirculating feature for either well is activated by the Recirc switches, a separate pump will recirculate and aerate the water that is in the well without drawing additional seawater into the system. - Page 82 Raw Water System • Operate all valves at least once a month to Intake Scoop Strainer keep them operating properly. A thru-hull water intake scoop and strainer pro- vides seawater to the raw water manifold. This CAUTION strainer is located on the hull bottom and must be kept free of mud, weeds and other debris.
-
Page 83: Drainage Systems
Chapter 9: DRAINAGE SYSTEMS 9.1 General All water is drained by gravity to overboard thru- hull fittings located in the hull above the water line. It is important to check the drain system frequently to ensure it is free flowing and that the hoses on the thru-hull fittings are secure and not leaking. -
Page 84: Hardtop And Tower Drains
Drainage Systems 9.3 Hardtop and Tower Drains There is a hole drilled in the leg bases on the frame to prevent water from being trapped within the legs. Additional drain holes are drilled in the tubing to drain other areas as required. Always make sure the leg drain holes are clear when the boat is laid up for the winter. -
Page 85: Drainage System Maintenance
Drainage Systems After showering, it is important to let the cold water flow for a period of time to flush the drain- age system of soap residue. Make sure to inspect the sump system regularly and keep the sump components and pump strainer clean. The sump pump and switch are located below a hinged hatch in the head compartment sole. - Page 86 THIS PAGE WAS LEFT BLANK INTENTIONALLY...
-
Page 87: Ventilation System
Chapter 10: VENTILATION SYSTEM 10.1 Head Compartment Ventilation Door & Vents Ventilation to head compartment is provided by vents in the door and an opening port window. The door itself is held in the open position by an automatic magnetic latch. Make sure the door is fully latched in the closed position before operat- ing the boat above idle speed. -
Page 88: Windshield Ventilation
Ventilation System 10.2 Windshield Ventilation The windshield can be lowered to provide ventila- tion at the helm and improved visibility. The wind- shield is raised and lowered by hydraulic cylinders activated by an electric hydraulic pump in the head compartment. The system is controlled by the Windshield switch in the hardtop switch panel. -
Page 89: Maintenance
Ventilation System 10.4 Maintenance • Keep the windshield slide tracks clean. Peri- odically coating the tracks with silicone spray • Periodically lubricate all hinges and latch as- will reduce friction and keep the windshield semblies with a light oil. sliding smoothly. •... - Page 90 THIS PAGE WAS LEFT BLANK INTENTIONALLY...
-
Page 91: Exterior Equipment
Chapter 11: EXTERIOR EQUIPMENT 11.1 Deck Rails and Deck Hardware The rail system and hardware fittings have been selected and installed to perform specific func- tions. Hand rails are installed to provide a hand- hold in certain areas of the boat. You should make sure you keep at least one hand on the handholds as you move about the boat. - Page 92 Exterior Equipment A. Raw Water Faucet E. Anchor Line Cleat B. Coiled Washdown Hose Compartment F. Bow Roller Assembly C. Chain Binder G. Rope Locker D. Windlass H. Windlass Switch The chain binder is accessed by opening the hatch secures the hatch in the closed position. Always and is designed to connect to a link in the anchor make sure the hatch is closed and latched before chain when the anchor is hauled in.
- Page 93 Exterior Equipment to open the hatch and rinse the windlass and all hardware with freshwater when the boat is washed at the end of each day. The rope locker is designed for the anchor line and not for storing anchors or additional anchor lines. Do not store anchors or any heavy objects in the locker.
-
Page 94: Hull
Exterior Equipment 11.3 Hull Engine Mounting System and Swim Platform Your Everglades is equipped with an engine mounting system that is integrated into the hull and stringer system that is designed to distribute the stresses of engine weight and thrust through- out the entire hull. -
Page 95: Transom Door
Exterior Equipment Some large hatches in the cockpit sole and deck are secured with special flush mounted, twist lock latches with handles that store flush in the latch in the open or latched position. There is a large red dot in some handles that indicate that the latch is in the open position and the hatch is not secure. - Page 96 Exterior Equipment Notice: Periodically inspect the transom door fittings for wear, damage or loose fit. Any problems should be inspected and corrected immedi- ately. WARNING THE TRANSOM DOOR SHOULD BE CLOSED AND PROPERLY LATCHED WHENEVER THE ENGINES ARE RUNNING. NEVER OPEN THE TRANSOM DOOR WHILE UNDERWAY OR IN ROUGH SEA CONDITIONS.
- Page 97 Exterior Equipment WARNING OPERATING THE BOAT UNDER POWER WITH THE DIVE DOOR OPEN MAY ALLOW PERSONS TO FALL OVERBOARD AND INTO BOAT PROPELLERS OR TO BE LOST IN OPEN WATER. ALWAYS CHECK TO MAKE SURE THE DIVE DOOR IS PROPERLY CLOSED AND LATCHED BEFORE STARTING THE ENGINES.
- Page 98 Exterior Equipment Aft Bench Seats Folded Aft Bench Seats in the Seat Position Stern Cooler/Fishbox and Prepped Bait box An insulated cooler/fishbox is located in the tran- som at the rear of the cockpit. A flush, “push to close” latch secures the hatch in the closed posi- tion and two straps hold the hatch in the open position.
-
Page 99: Work Station
Exterior Equipment The latch handle shafts are threaded to pull the pawl against cockpit sole, securing the hatch and compressing the gasket for a more watertight seal. Always make sure the hatch is closed with the latches in the secured position and the handles folded flush before operating the boat above idle speed. - Page 100 Exterior Equipment To use the seat, release the latch then pull the top of the seat toward the cockpit. The bottom of the seat slides in a track and two side supports move out with the seat as it folds out. The seat automatically locks into the seating position when the cushion reaches the full down position.
- Page 101 Exterior Equipment A molded recess on each side of the seat base is designed for fire extinguishers. The recessed mounting location keeps the fire extinguishers out of the way and readily available. Cooler Compartment A 94 quart cooler is mounted in a special compart- ment at the front of the seat base below the helm seats.
-
Page 102: Rod Lockers
Exterior Equipment The bow seat cushions are removable and are secured to the hatches with snaps. The cushions should be removed and stored in the head compart- ment or another safe location out of the weather when the boat is not being used. Casting Deck, Sun Lounge and Table A retractable table con- verts the bow area into... -
Page 103: Center Console And Helm
Exterior Equipment Side Storage/life Jacket Compartments There are 3 storage compartments on each side of the cockpit, forward of the helm. The compart- ments are designed to accommodate life jackets or dunnage. Each compartment drains to the bilge and is accessed by a door secured with “push to close”... - Page 104 Exterior Equipment To open the helm station, make sure the engines are not running and hold the helm in the closed position while another person releases the latches that secure the helm inside the head compart- ment. The latches are located behind the storage compartment doors in the rear head compartment bulkhead.
- Page 105 Exterior Equipment down position. Refer to the Ventilation chapter for instructions on operating the windshield. The windshield wiper and washer is standard on your Everglades boat. A special lockout mecha- nism prevents the windshield wiper or washer from activating unless the windshield is in the full up (closed) position.
-
Page 106: Hardtop
Exterior Equipment Forward Console Seats Two lounge seats with armrests are located on the front of the console. The seats are equipped with a folding center armrest with drink holders. 11.6 Hardtop Standard Hardtop The standard hardtop consists of a laminated fi- berglass top mounted to a welded, powder coated aluminum frame that is bolted to the console and helm seat base. -
Page 107: Upper Station (Optional)
Exterior Equipment the warranty could be void. If you intend to add equipment or make modifications to the hard top, you should contact Everglades Customer Service or your dealer to make sure the equipment you would like to add or the intended modification will not void the warranty on the top. - Page 108 Exterior Equipment WARNING ACCIDENTALLY STEPPING INTO THE UPPER STATION ACCESS HATCH OPENING CAN CAUSE SEVERE INJURY TO THE OPERATOR OR CREW. ALWAYS MAKE SURE THE UPPER STATION ACCESS HATCH IS CLOSED AND LATCHED WHENEVER PEOPLE ARE IN THE UPPER STATION. The upper station seats are equipped with a flip up bolster to provide more room between the seats and the helm.
- Page 109 Exterior Equipment To lower the Upper helm station: 1. Before raising or lowering the upper station, the boat should be either on a cradle, the trailer or moored to a dock in a safe location close to the haul out where rough water, wind or boat wakes are not a problem.
-
Page 110: Aftermarket Hardtop Or Tower
Exterior Equipment 4. With everyone in position and ready, slowly 10. Install antennas and outriggers as required lift the rear section as high as possible. The and test all upper station controls and equip- person in the cockpit should lift the section ment before operating the boat. -
Page 111: Interior Equipment
Chapter 12: INTERIOR EQUIPMENT Head Compartment 12.1 Head Compartment and Berth The head compartment is equipped with a fresh water sink and faucet that converts to a shower by pulling the faucet out of the base. An acrylic panel folds down above the marine toilet to provide a seat while showering. - Page 112 Interior Equipment Daylight and ventilation is provided by an opening port window and vents in the cabin door. There are also 12 volt lights in the headliner and in the berth area that are activated by a switch near the door. There are two large doors and a removable hatch in the rear bulkhead.
-
Page 113: Marine Head System
Interior Equipment A storage compartment is located below the sink. The hydraulic system that raises and lowers the windshield is located in this compartment. There is another storage compartment and a berth for- ward of the sink. The electric pedestal for the cockpit table is mounted above the forward section of the berth. - Page 114 Interior Equipment To operate the overboard discharge pump, make sure the thru-hull valve in the bilge and the dis- charge valve near the pump are open. Then turn the key switch in the panel to the ON position. Press and hold the momentary button to activate the pump.
-
Page 115: Routine Maintenance
Chapter 13: ROUTINE MAINTENANCE 13.1 Exterior Hull and Deck CAUTION Hull Cleaning-Below The Water Line When the boat is removed from the water, clean BARRIER COATINGS AND BOTTOM PAINT SHOULD BE the outer bottom surface immediately. Algae, APPLIED ONLY BY QUALIFIED MARINE PROFESSIONALS IN A BOAT YARD OR DEALERSHIP THAT SPECIALIZES IN grass, dirt and other marine growth is easier to THEIR APPLICATION. -
Page 116: Fiberglass Gel Coat
Routine Maintenance other underwater hardware that is bonded. tend to fade, dull or chalk. A heavier buffing is The anodes are less noble than copper based required to bring the finish back to its original alloys, stainless steel and aluminum. They will luster. - Page 117 Routine Maintenance The following guidelines will help keep stain- when the boat is washed and will not be rinsed by less steel looking good for many years. the rain. Consequently, the aluminum just below • Clean stainless steel frequently (daily in salt the top is more likely to become pitted than the ex- or polluted environments) with mild soap and posed aluminum on the structure.
- Page 118 Routine Maintenance the salt and become corroded than the exposed Notice: You should contact Everglades Customer areas on the structure. Make sure the aluminum Service before making any modifications to in this area is washed frequently with soap and water and rinsed thoroughly. Pay particular at- aluminum fabrications.
-
Page 119: Upholstery, Canvas And Enclosures
Routine Maintenance provide additional information on fuel degradation • Food grease and oily stains - Spray immediately and fuel stabilizers recommended for your engine. using either Fantastik Cleaner® or Tannery Car Care Cleaner®, wiping with a soft cloth. Take In many states, most gasoline is blended with care not to extend the area of contamination ethanol alcohol. - Page 120 Routine Maintenance Laminated Vinyl Tops Snaps should be lubricated periodically with Tef- lon or silicone grease or a lubricant designed for Laminated vinyl top material is a lamination of two snaps. Zippers should be lubricated with silicone plies of specially formulated vinyl with an inner spray, paraffin or silicone stick.
-
Page 121: Interior
Routine Maintenance 13.3 Interior For heavy duty cleaning, use a mixture of water and Murphy’s Oil Soap or a solution of 10% white The cabin or head interior can be cleaned just vinegar and water to clean the wood and wipe it like you would clean a home interior. - Page 122 THIS PAGE WAS LEFT BLANK INTENTIONALLY...
-
Page 123: Seasonal Maintenance
Chapter 14: SEASONAL MAINTENANCE 14.1 Storage and Lay-up minutes after adding the stabilizer to allow the treated fuel to reach the engines. Yamaha Before Hauling: recommends using Yamaha Fuel Conditioner • Pump out the head holding tank. Flush the and Stabilizer for their engines. holding tank using clean water, soap and a deodorizer. - Page 124 Seasonal Maintenance • Make sure the engines are in the down CAUTION position. • The cradle or lift must be in the proper fore BOATS CAN BE DAMAGED FROM IMPROPER LIFTING AND TRANSPORTING WITH FORK LIFTS. CARE AND CAUTION and aft position to properly support the hull. MUST BE EXERCISED WHEN TRANSPORTING A BOAT WITH A When the cradle or lift is in the correct location, FORK LIFT.
-
Page 125: Winterizing
Seasonal Maintenance • Remove the batteries and store in a cool of commercially available non toxic, fresh water place. Clean using clear, clean water. Be sure system antifreeze. After draining the fresh water the batteries have sufficient water and clean tank, lines, filters and water heater, pour the an- terminals. - Page 126 Seasonal Maintenance visible at the discharge fitting. Remove the drain Notice: Properly winterize the engines and fuel plugs and wipe down the inside of the wells. system by following the engine manufac- Refer to the Raw Water System chapter for ad- turer’s winterizing procedures located in ditional information on the raw water system.
-
Page 127: Recommissioning
Seasonal Maintenance 14.3 Recommissioning Special Notes Prior To Winter Storage If the boat will be in outside storage, properly sup- port a storage cover and secure it over the boat. It CAUTION is best to have a frame built over the boat to sup- port the canvas. - Page 128 Seasonal Maintenance After Launching: • Carefully check all water systems and the engine bolts for leaks. Operate each system one at a time checking for leaks and proper operation. • Check the bilge pump manual and automatic switches. • When each engine starts, check the cooling system port below the engine cowling for a strong stream of water.
-
Page 129: Appendix A: Schematics
Appendix A: SCHEMATICS ... - Page 130 THIS PAGE WAS LEFT BLANK INTENTIONALLY...
-
Page 131: Appendix B: Glossary Of Terms
Appendix B: GLOSSARY OF TERMS Bow Rail: Knee high rails of solid tubing to aid ft: In, near or toward the stern of a boat. in preventing people from falling overboard. Aground: A boat stuck on the bottom. Bridge: The area from which a boat is steered and controlled. - Page 132 Glossary of Terms Grab Rail: Hand-hold fittings mounted on cabin eck: The floor-like platform of a boat that tops or sides for personal safety when moving covers the hull. around the boat, both on deck and below. Displacement: The volume of water displaced by Ground Tackle: A general term including anchors, the hull.
- Page 133 Glossary of Terms Length On The Waterline (l.w.l.): A length mea- Pile or Piling: A long column driven into the bot- surement of a boat at the waterline from the stern tom to which a boat can be tied. to where the hull breaks the water near the bow. Pitching: The fore and aft rocking motion of a Limber Hole: A passage cut into the lower edges boat as the bow rises and falls.
- Page 134 Glossary of Terms Scupper: An opening in the hull side or transom affrail: Rail around the rear of the cockpit. of the boat through which water on deck or in the cockpit is drained overboard. Thru-hull: A fitting used to pass fluids (usually Seacock: Safety valves installed just inside the water) through the hull surface, either above or below the waterline.
-
Page 135: Appendix C: Maintenance Log
Appendix C: MAINTENANCE LOG Service/Repairs Date Dealer Hours... -
Page 136: Maintenance Schedule And Log
Maintenance Schedule and Log MAINTENANCE LOG Date Dealer Service/Repairs Hours... - Page 137 Maintenance Schedule and Log MAINTENANCE LOG Date Dealer Service/Repairs Hours...
- Page 138 Maintenance Schedule and Log MAINTENANCE LOG Date Dealer Service/Repairs Hours...
-
Page 139: Boating Accident Report
BOATING ACCIDENT REPORT Appendix D: ... - Page 140 Boating Accident Report ...
- Page 141 Boating Accident Report ...
- Page 142 THIS PAGE WAS LEFT BLANK INTENTIONALLY...
-
Page 143: Appendix E: Float Plan
Appendix E: FLOAT PLAN Everglades recommends filling out a float plan each time you use your boat for an off- shore day trip or a long cruise. Leave this information with a responsible person ashore, like a close friend or relative that you know well. 1. - Page 144 THIS PAGE WAS LEFT BLANK INTENTIONALLY...
-
Page 145: Troubleshooting Guide
Appendix F: TROUBLESHOOTING GUIDE PROBLEM CAUSE AND SOLUTION CONTROL SYSTEMS Hydraulic Steering is slow to respond & erratic and/or the • Steering system is low on fluid. Fill and bleed system. • Steering system has air in it. Fill and bleed system. steering wheel feels bumpy. • A component in the steering system is binding. Check and adjust or repair binding component. - Page 146 Troubleshooting Guide PROBLEM CAUSE AND SOLUTION ENGINE PROBLEMS An engine is running too hot. • The engine raw water pick up strainer is clogged with marine growth. Clean pick up. • The engine raw water pump impeller is worn or damaged. Repair the pump.
- Page 147 Troubleshooting Guide PROBLEM CAUSE AND SOLUTION ACCESSORY PROBLEMS The livewell pump runs, but does not pump water. • The intake scoop strainer for the raw water system is clogged with weeds or debris. Back down the boat to clear debris or clean the scoop strainer.
- Page 148 Troubleshooting Guide PROBLEM CAUSE AND SOLUTION ACCESSORY PROBLEMS The automatic switch on the bilge pump does not activate • The fuse or circuit breaker for the automatic switch has tripped or blown. Replace the fuse or reset the circuit the pump . breaker.
- Page 149 CAUSE AND SOLUTION...
- Page 150 All Channels Lead to Everglades Boats Everglades Boats 544 Air Park Road Edgewater, Florida 32132...
Need help?
Do you have a question about the Everglades 365 CC and is the answer not in the manual?
Questions and answers