Chapters
Table of Contents

Related Manuals for cool blue blue built BBFHM24100

Summary of Contents for cool blue blue built BBFHM24100
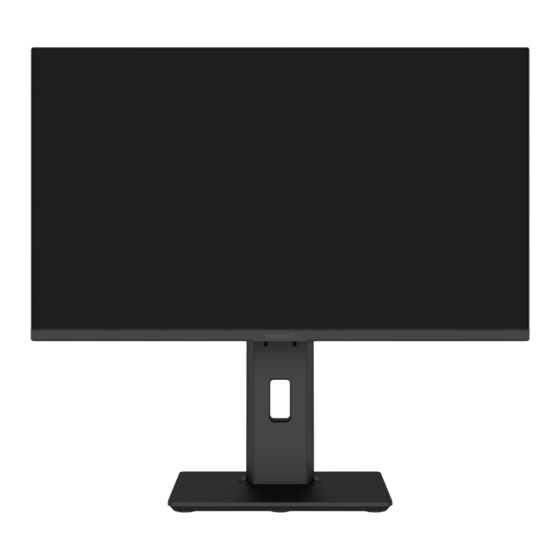
- Page 1 FLYING START. Whoooo. Full HD 23,8" 100Hz Monitor Full HD 23,8" 100Hz Monitor Moniteur Full HD 23,8 pouces 100 Hz 23,8-Zoll-Monitor mit Full HD und 100 Hz 946911 - BBFHM24100 V1.0...
-
Page 2: Table Of Contents
TABLE OF CONTENTS FOREWORD BlueBuilt BBFHM24100 SAFETY INSTRUCTIONS 1.1 . Safety instructions: electrical safety ......7 1.2 Safety instructions: installation . -
Page 3: Foreword
FOREWORD ORIGINAL INSTRUCTIONS This manual was originally written in Dutch. All other languages are translated ABOUT THIS DOCUMENT documents. In the case of translation errors, the Dutch version takes precedence. This manual contains all information for the correct, efficient and safe use of •... -
Page 4: Safety Instructions
1. SAFETY INSTRUCTIONS COPYRIGHT The data depicted in this manual, including texts, photographs, graphic 1.1 SAFETY INSTRUCTIONS: ELECTRICAL SAFETY drawings, trademarks, (trade) names and logos, are the property of Coolblue B.V. and are protected by copyright, trademark law and/or any other intellectual property right, unless these data belong to a third party. -
Page 5: Safety Instructions: Installation
1.2 SAFETY INSTRUCTIONS: INSTALLATION 1.4 SAFETY INSTRUCTIONS: CLEANING ! ! ! ! WARNING! WARNING! Do not place the monitor near heat sources. Never insert objects into the air vents. • • Never let children play with the packaging material. Keep the packaging •... -
Page 6: Preparation
2. PREPARATION 2.3 CHOOSE MOUNTING ARRANGEMENT 2.1 UNPACKING THE MONITOR Mount the monitor on the stand supplied or choose another mounting method; mounting on a monitor arm or wall bracket. These are not supplied as standard 1. Remove all packaging material and any transport attachments present (e.g. and you purchase them yourself. -
Page 7: Attach The Stand To The Monitor
2.4 ATTACH THE STAND TO THE MONITOR 5. Align the holes of the base with the holes at the bottom of the stand. 1. Lay a soft cloth on a flat surface. 6. Attach the base to the stand with the four bolts and the screwdriver. 2. -
Page 8: Connections
3. CONNECTIONS 4. SETTING 4.1 ROTATE OR TILT THE MONITOR The monitor has the following connections (from left to right): Rotate or tilt the monitor in three ways. Horizontal rotation angle Vertical rotation angle Vertical tilt The horizontal rotation angle is limited when the monitor is mounted on the wall or on a monitor arm. -
Page 9: The Control Panel
4.2 THE CONTROL PANEL 4.3 SETTINGS MENU Category Setting Description Set the monitor using the button on the back of the monitor. Brightness Adjust the light intensity of the display. Adjust the difference between the light and Contrast dark parts of the screen. Enable power-saving mode for reduced ECO mode power consumption. -
Page 10: Maintenance And Cleaning
5. MAINTENANCE AND CLEANING Category Setting Description Clean the monitor often. Language Adjust the language of the on-screen menu. 1. Press the button on the back of the monitor and switch off the monitor. Set the horizontal position of the on-screen H.Position menu. -
Page 11: Specifications
7. SPECIFICATIONS 540.04 × 42 × 319.59 mm Dimensions (w × d × h) 540.04 × 365.35 × 190 mm (with stand) (down) 540.04 × 495.35 × 190 mm (with stand) (up) Screen diagonal 23.8" Packaging dimensions 630 × 175 × 490 mm Backlight E-LED (w ×... -
Page 12: Taking Out Of Service
10. TAKING OUT OF SERVICE 1. Clean the device. Follow the instructions on page 19 Maintenance and cleaning 2. Remove the power cable from the (earthed) socket. 3. Carefully remove the device from its place. 4. Store the device in its original packaging in a dry and ventilated space. 11. - Page 13 INHOUDSOPGAVE VOORWOORD VEILIGHEIDSVOORSCHRIFTEN 1.1 . Veiligheidsvoorschriften: elektrische veiligheid ....29 1.2 Veiligheidsvoorschriften: installatie ......30 1.3 Veiligheidsvoorschrift: gebruik .
-
Page 14: Voorwoord
VOORWOORD OORSPRONKELIJKE INSTRUCTIES Deze handleiding is oorspronkelijk geschreven in het Nederlands. Alle andere OVER DIT DOCUMENT talen zijn vertaalde documenten. In geval van vertaalfouten, is de Nederlandse Deze handleiding bevat alle informatie voor correct, efficiënt en veilig gebruik versie leidend. •... -
Page 15: Veiligheidsvoorschriften
1. VEILIGHEIDSVOORSCHRIFTEN AUTEURSRECHT De in deze handleiding afgebeelde gegevens, waaronder begrepen teksten, 1.1 VEILIGHEIDSVOORSCHRIFTEN: ELEKTRISCHE foto’s, grafische tekeningen, beeldmerken, (handels)namen en logo’s, zijn VEILIGHEID eigendom van Coolblue B.V. en worden beschermd door het auteursrecht, merkenrecht en/of enig ander intellectueel eigendomsrecht, tenzij deze gegevens toebehoren aan een derde. -
Page 16: Veiligheidsvoorschriften: Installatie
1.2 VEILIGHEIDSVOORSCHRIFTEN: INSTALLATIE 1.4 VEILIGHEIDSVOORSCHRIFT: REINIGING ! ! ! ! WAARSCHUWING! WAARSCHUWING! Plaats de monitor niet in de buurt van warmtebronnen. Steek nooit voorwerpen in de ventilatieopeningen. • • Laat kinderen nooit met het verpakkingsmateriaal spelen. Houd het • verpakkingsmateriaal buiten bereik van kinderen. LET OP! LET OP! Druk niet op het beeldscherm van de monitor met uw handen of andere... -
Page 17: Voorbereiding
2. VOORBEREIDING 2.3 MONTAGE OPSTELLING KIEZEN 2.1 DE MONITOR UIT DE VERPAKKING HALEN Monteer de monitor op de meegeleverde standaard of kies voor een andere montagemethode; montage op een monitorarm of muurbeugel. Deze worden 1. Verwijder al het verpakkingsmateriaal en mogelijk aanwezige niet standaard meegeleverd en schaf je zelf aan. -
Page 18: Bevestig De Standaard Aan Het Beeldscherm
2.4 BEVESTIG DE STANDAARD AAN HET BEELDSCHERM 5. Lijn de gaten van de voet uit met de gaten aan de onderkant van de 1. Leg een zacht doek op een vlakke ondergrond. standaard. 2. Plaats het beeldscherm voorzichtig met het scherm naar beneden op het 6. -
Page 19: Aansluitingen
3. AANSLUITINGEN 4. INSTELLEN 4.1 DRAAI OF KANTEL DE MONITOR De monitor heeft de volgende aansluitingen (van links naar rechts): Draai of kantel de monitor op 3 manieren. Horizontale draaihoek Verticale draaihoek Verticale kanteling De horizontale draaihoek is beperkt mogelijk wanneer de monitor aan de muur of op een monitorarm is gemonteerd. -
Page 20: Het Bedieningspaneel
4.2 HET BEDIENINGSPANEEL 4.3 INSTELLINGEN MENU Categorie Instelling Beschrijving Stel de monitor in met de knop aan de achterkant van het beeldscherm. Pas de lichtintensiteit van het beeldscherm Helderheid aan. Pas het verschil tussen de lichte en donkere Contrast delen van het beeldscherm aan. Schakel de energiebesparende modus in ECO-stand voor minder stroomverbruik. -
Page 21: Onderhoud En Reiniging
5. ONDERHOUD EN REINIGING Categorie Instelling Beschrijving Maak de monitor vaak schoon. Taal Pas de taal van het on-screen menu aan. 1. Druk op de knop aan de achterkant van het beeldscherm en schakel de Stel de horizontale positie van het on-screen H-Positie menu in. -
Page 22: Specificaties
Probleem Mogelijke oorzaak Mogelijke oplossing HDMI IN ×1 (1920×1080@100Hz) Pas de kleuren rood, groen DisplayPort 1.4 ×1 (1920×1080@100Hz) De schermkleur is De kleuren zijn verkeerd en blauw aan in het inconsistent. ingesteld. on-screen menu Level: 110 ± 40 mVrms Hoofdtelefoon Interface: Φ3,5 mm mini-interface “Kleurinst.”. -
Page 23: Garantie
9. GARANTIE Het apparaat wordt geleverd met een garantieperiode van 5 jaar na aankoop. Om aanspraak te kunnen maken op de garantie, dient u te beschikken over de aankoopbon met koop- en/of leverdatum. Ga voor meer informatie over de garantievoorwaarden naar: www.coolblue.nl/klantenservice of www.coolblue.be/nl/klantenservice. - Page 24 TABLE DES MATIÈRES AVANT-PROPOS CONSIGNES DE SÉCURITÉ 1.1 . Consignes de sécurité : sécurité électrique ..... 51 1.2 Consignes de sécurité : installation......52 1.3 Consignes de sécurité...
-
Page 25: Avant-Propos
AVANT-PROPOS INSTRUCTIONS D’ORIGINE Ce manuel a été écrit à l'origine en néerlandais. Toutes les autres langues sont À PROPOS DE CE DOCUMENT des documents traduits. En cas d'erreurs de traduction, la version néerlandaise Ce manuel contient toutes les informations nécessaires pour une utilisation prévaudra. -
Page 26: Consignes De Sécurité
1. CONSIGNES DE SÉCURITÉ DROIT D'AUTEUR Les données représentées dans ce manuel, y compris les textes, photos, dessins 1.1 CONSIGNES DE SÉCURITÉ : SÉCURITÉ ÉLECTRIQUE graphiques, marques figuratives, noms (commerciaux) et logos, sont la propriété de Coolblue B.V. et sont protégées par le droit d’auteur, le droit des marques et/ ou tout autre droit de propriété... -
Page 27: Consignes De Sécurité : Installation
1.2 CONSIGNES DE SÉCURITÉ : INSTALLATION 1.4 CONSIGNES DE SÉCURITÉ : NETTOYAGE ! ! ! ! AVERTISSEMENT ! AVERTISSEMENT ! Ne placez pas le moniteur à proximité de sources de chaleur. N'introduisez jamais des objets dans les orifices de ventilation. • • Ne laissez jamais les enfants jouer avec l'emballage. -
Page 28: Préparation
2. PRÉPARATION 2.3 CHOIX DE LA CONFIGURATION DE MONTAGE 2.1 DÉBALLAGE DU MONITEUR Montez le moniteur sur le support fourni ou choisissez une autre méthode de montage : montage sur un bras de moniteur ou sur une console murale. Ces 1. -
Page 29: Fixation Du Support Au Moniteur
2.4 FIXATION DU SUPPORT AU MONITEUR 5. Alignez les trous de la base avec les trous situés au bas du support. 1. Posez un chiffon doux sur une surface plane. 6. Fixez la base au support à l'aide de 4 boulons et du tournevis. 2. -
Page 30: Connecteurs
3. CONNECTEURS 4. RÉGLAGES 4.1 ROTATION OU INCLINAISON DU MONITEUR Le moniteur dispose des connecteurs suivants (de gauche à droite) : Vous pouvez pivoter ou incliner le moniteur de 3 façons. Angle de rotation Angle de rotation Inclinaison verticale horizontale verticale L'angle de rotation horizontale est limité... -
Page 31: Panneau De Commande
4.2 PANNEAU DE COMMANDE 4.3 MENU RÉGLAGES Catégorie Réglage Description Vous pouvez régler le moniteur à l'aide du bouton situé à l'arrière de l’écran. Luminos. Ajuste l'intensité lumineuse de l'écran. Ajuste la différence entre les zones claires et Contras. les zones sombres de l'écran. Active le mode d'économie d'énergie pour réduire la consommation d'énergie. -
Page 32: Entretien Et Nettoyage
5. ENTRETIEN ET NETTOYAGE Catégorie Réglage Description Nettoyez régulièrement le moniteur. Langue Permet de régler la langue du menu à l'écran. 1. Appuyez sur le bouton situé à l'arrière de l’écran pour éteindre le moniteur. Définit la position horizontale du menu à Position-H l'écran. -
Page 33: Spécifications
Problème Cause possible Solution possible HDMI IN ×1 (1920×1080@100Hz) Réglez les couleurs rouge, DisplayPort 1.4 ×1 (1920×1080@100Hz) Les couleurs à l'écran ne Les couleurs sont mal vert et bleu dans le menu à sont pas uniformes. réglées. l'écran "Réglages Couleur". Niveau : 110 ±... -
Page 34: Garantie
9. GARANTIE L'appareil est livré avec une période de garantie de 5 ans après l'achat. Pour faire valoir la garantie, vous avez besoin de la facture d'achat avec la date d'achat et/ ou de livraison. Pour en savoir plus sur les conditions de garantie, rendez-vous sur www.coolblue.be/fr/service-client. - Page 35 INHALTSVERZEICHNIS VORWORT SICHERHEITSVORSCHRIFTEN 1.1 . Sicherheitsvorschriften: elektrische Sicherheit ....73 1.2 Sicherheitsvorschriften: Installation ......74 1.3 Sicherheitsvorschriften: Verwendung .
-
Page 36: Vorwort
VORWORT URSPRÜNGLICHE ANWEISUNGEN Diese Gebrauchsanleitung wurde ursprünglich auf Niederländisch verfasst. Alle ÜBER DIESES DOKUMENT anderen Sprachen sind übersetzte Dokumente. Bei Übersetzungsfehlern ist die Diese Gebrauchsanleitung enthält alle Informationen für den korrekten, niederländische Version maßgeblich. • effizienten und sicheren Gebrauch des Monitors. VERWENDETE SYMBOLE Lesen Sie die Anweisungen in diesem Handbuch vollständig durch, bevor Sie •... -
Page 37: Sicherheitsvorschriften
1. SICHERHEITSVORSCHRIFTEN URHEBERRECHT Die in dieser Gebrauchsanleitung abgebildeten Daten, darunter Texte, Fotos, 1.1 SICHERHEITSVORSCHRIFTEN: ELEKTRISCHE Grafiken, Bildmarken, (Handels-)Namen und Logos, sind Eigentum der SICHERHEIT Coolblue B.V. und unterliegen dem Urheberrecht, dem Markenrecht und/ oder anderen geistigen Eigentumsrechten, es sei denn, diese Daten gehören einem Dritten. -
Page 38: Sicherheitsvorschriften: Installation
1.2 SICHERHEITSVORSCHRIFTEN: INSTALLATION 1.4 SICHERHEITSHINWEISE: REINIGUNG ! ! ! ! WARNUNG! WARNUNG! Stellen Sie den Monitor nicht in der Nähe von Wärmequellen auf. Stecken Sie nie Gegenstände in die Lüftungsöffnungen. • • Lassen Sie Kinder nie mit dem Verpackungsmaterial spielen. Das •... -
Page 39: Vorbereitung
2. VORBEREITUNG 2.3 MONTAGEANORDNUNG WÄHLEN 2.1 AUSPACKEN DES MONITORS Montieren Sie den Monitor auf dem mitgelieferten Ständer oder wählen Sie eine andere Montagemethode: Montage an einem Monitorarm oder einer 1. Entfernen Sie sämtliches Verpackungsmaterial und eventuell vorhandene Wandhalterung. Diese sind nicht im Lieferumfang enthalten und müssen von Transportbefestigungen (z. -
Page 40: Befestigung Des Ständers Am Monitor
2.4 BEFESTIGUNG DES STÄNDERS AM MONITOR 5. Richten Sie die Löcher des Fußes mit den Löchern an der Unterseite des 1. Legen Sie ein weiches Tuch auf eine ebene Fläche. Ständers aus. 2. Legen Sie den Monitor mit der Vorderseite nach unten vorsichtig auf das 6. -
Page 41: Anschlüsse
3. ANSCHLÜSSE 4. EINSTELLUNG 4.1 DREHEN ODER NEIGEN DES MONITORS Der Monitor verfügt über die folgenden Anschlüsse (von links nach rechts): Drehen oder neigen Sie den Monitor auf 3 Arten. Horizontaler Drehwinkel Vertikaler Drehwinkel Vertikale Neigung Der horizontale Drehwinkel ist begrenzt, wenn der Monitor an der Wand oder an einem Monitorarm montiert ist. -
Page 42: Das Bedienfeld
4.2 DAS BEDIENFELD 4.3 MENÜ EINSTELLUNGEN Kategorie Einstellung Beschreibung Stellen Sie den Monitor mit der Taste auf der Rückseite des Monitors ein. Stellen Sie die Lichtintensität des Displays Heiligkeit ein. Stellen Sie den Unterschied zwischen Kontrast den hellen und dunklen Bereichen des Bildschirms ein. -
Page 43: Wartung Und Reinigung
5. WARTUNG UND REINIGUNG Kategorie Einstellung Beschreibung Stellen Sie die Sprache für das Reinigen Sie den Monitor häufig. Sprache Bildschirmmenü ein. 1. Schalten Sie den Monitor durch Druck auf die Taste auf der Rückseite des Legen Sie die horizontale Position des H-Position Bildschirmmenüs fest. - Page 44 Stromverbrauch im Problem Mögliche Ursache Mögliche Lösung ≤0,5W Standby-Modus Der Bildschirm ist zu Stellen Sie die Helligkeit ×1 (1920 × 1080 @ 75 Hz) dunkel. Helligkeit und Kontrast und den Kontrast sind falsch eingestellt. im Bildschirmmenü HDMI IN ×1 (1920 × 1080 @ 100Hz) Der Bildschirm ist zu hell.
- Page 45 9. GARANTIE Auf dieses Gerät wird eine 5-jährige Garantie ab dem Kaufdatum gewährt. Um einen Garantieanspruch geltend zu machen, benötigen Sie den Kaufbeleg mit Kauf- und/oder Lieferdatum. Weitere Informationen zu den Garantiebedingungen finden Sie auf: www.coolblue.de/kundendienst. 10. AUSSERBETRIEBNAHME 6. Reinigen Sie das Gerät. Befolgen Sie die Anweisungen auf Seite 85 Wartung und Reinigung 7.
- Page 46 BACKSIDE. Turn over for use. BlueBuilt is a registered trademark of Coolbue B.V., Weena 664, 3012 CN Rotterdam, The Netherlands.
Need help?
Do you have a question about the blue built BBFHM24100 and is the answer not in the manual?
Questions and answers