Advertisement
Quick Links
Advertisement

Related Manuals for PS Audio aspen FR5


Summary of Contents for PS Audio aspen FR5
- Page 1 Owner’s Reference...
- Page 3 Table of Contents Aspen® FR5 Safety Information Introduction Unpacking FR5 Assembling the Stand Wiring FR5 Basic Setup and Placement Specifications Warranty Information 11-12 Service Information 13-14...
-
Page 4: Safety Information
Please contact your authorized dealer, distributor, or PS Audio® directly if you have any questions or concerns that are not addressed in this reference manual. PS Audio® and the sine wave logo are registered trademarks of PS Audio, Inc., and are restricted for use to PS Audio, Inc., its subsidiaries, and authorized agents. - Page 5 Aspen® FR5 Thank You Thank you for your purchase of the PS Audio Aspen FR5 Loudspeaker. This is your comprehensive Operator’s Guide, intended to provide a full overview of the Aspen FR5’s functions and capabilities. It is our intention to answer any and all questions you may have in this manual.
-
Page 6: Getting Started
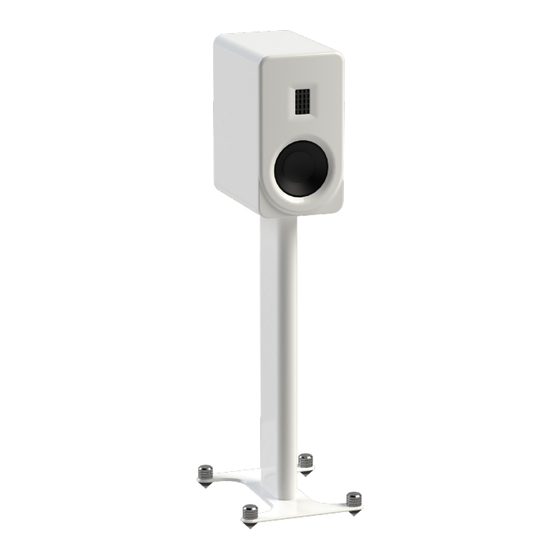
Accessories also include this owner’s manual, jumpers (for configuring the inputs for mono or bi-wiring), and 8 adhesive rubber feet. Note : Only apply the rubber feet to the bottom of the speaker if not using the PS Audio stand. (If using the stand, rubber feet will be installed on the stand.) - Page 7 Getting Started Aspen® FR5 If you purchased an FR5 stand with your speakers, see the below installation instructions. If Assemble you did not purchase the FR5 stand, go to page 7. Stand Stand Materials The base plate has the 4 feet installed. Before assembling the stand, make adjustments to the Configuring feet.
- Page 8 Getting Started Aspen® FR5 For carpeted floors, leave the spiked tip in place. Configuring Stand Feet Leveling: These are leveling feet as well. After assembling the stand, you can level the feet before placing the speaker on top. While small adjustments may be needed once the speaker is in place, adjusting the feet in advance will be easier.
- Page 9 Getting Started Aspen® FR5 Step 1: Attach base plate to pillar using 2 M8 screws. Stand Assembly Step 2: If desired, the front and middle channels of the pillar can be filled with sand, kitty litter, etc. to provide greater stability and better definition.
- Page 10 Getting Started Aspen® FR5 Jumper / Input The FR5 comes with four input terminals as shown. For single wiring/amping, connect Wiring the set of jumpers from the accessory box to parallel wire the black and red terminals (bi-amp, bi-wiring) sets together (black to black and red to red) as shown below. Connect a single amplifier to the left set of terminals.
-
Page 11: Speaker Placement
Speaker Placement Aspen® FR5 Basic Setup Loudspeakers and the room layout work together as a system. To get the best and Placement performance, it’s important to take great care when setting up your speakers. Some helpful tools include a tape measure (or laser measurement tool), pen/paper to note the distances and listening impressions, and some demo music. - Page 12 Speaker Placement Aspen® FR5 The speakers should be toed-in a little, aimed at a point in space about 3 ft behind the listening position. Further pointing of the speakers towards the listening position will increase “focus” and the level of the extreme treble at the expense of the spaciousness and “width”...
-
Page 13: Specifications
Specifications Aspen® FR5 Aspen FR5 Color Options Satin White, Satin Black Specifications Enclosure Type Passive radiator (one 6x9” oval rear-firing) High Frequency Transducer 2.5” planar magnetic with Teonex diaphragm Low Frequency Transducer 1 x 6.5” woofers, cast frame, Curv woven... -
Page 14: Warranty Information
3 years from the date the unit was first purchased from PS Audio or its dealers and agents. If you do not register your product within 30 days of service, a copy of your purchase receipt from an authorized PS Audio dealer may be used as proof of purchase to establish the warranty start date. - Page 15 Warranty Information Aspen® FR5 Limitations Under In no event will PS Audio’s liability to you exceed the original purchase price of your unit. This Warranty This warranty does not cover the cost of custom installation, customer instruction, setup adjustments, or signal reception problems. Consequential and incidental damages are not covered under this warranty.
-
Page 16: Service Information
Authorization Number (RMA#) prior to returning any item. Please contact PS Audio or an authorized PS Audio repair center to receive an RMA#. The RMA# must be on all returned items. If it is not clearly marked, PS Audio will return the package back to you, freight collect. -
Page 17: Your Product
Your Product Your Product Aspen® FR5 Your Serial Number Your Purchase Information Date of Purchase... - Page 18 Notes Aspen® FR5...
- Page 19 Notes Aspen® FR5...
- Page 20 In fact, we believe that every nutty, hertz-counting audiophile out there is part of our tribe. That’s how we’ve built our company over the last 50 years - with the kind of care and respect that you give to your family. PS Audio® Inc. 800-PSAUDIO 4865 Sterling Drive Boulder, Colorado 80301...
Need help?
Do you have a question about the aspen FR5 and is the answer not in the manual?
Questions and answers