
Related Manuals for Burromax TT1000R

Summary of Contents for Burromax TT1000R
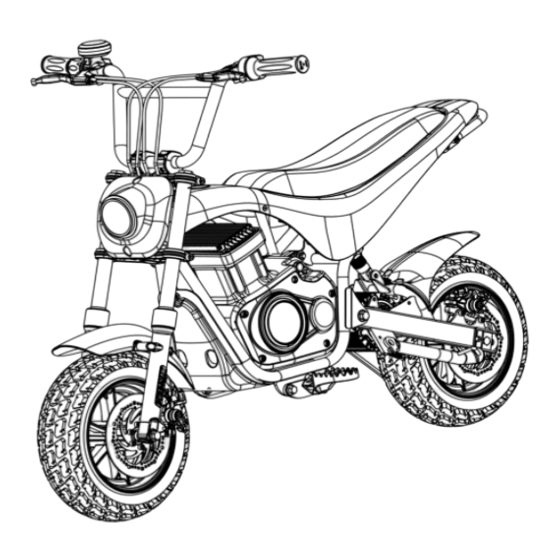
- Page 1 OWNERS MANUAL TT1000R MINI BIKE READ AND UNDERSTAND THIS ENTIRE MANUAL BEFORE RIDING...
-
Page 2: Carton Contents
CARTON CONTENTS Allow up to 30 Min for assembly. Located within top of the packing foam you will find the front fender, rear fender, right and left footrest Check for all parts and hardware before beginning assemblies, handlebar clamps, all hardware and tool kit. assembly. -
Page 3: Attaching The Handlebars
ATTACHING THE HANDLEBARS BRAKE LEVERS AND THROTTLE AND WIRING Rotate the brake levers into a good riding position and tighten the clamp bolts using a 5mm Allen wrench. Rotate Tools required: 6mm, 5mm, 3mm,2.5mm Allen wrench the throttle to a good operating position and tighten using a 3mm Allen wrench leaving space between the lever Place the handlebars in the lower handlebar clamps mount and the throttle body. -
Page 4: Installing The Front Wheel
INSTALLING THE FRONT WHEEL INSTALLING THE FRONT BRAKE CALIPER Install the front axle into the left fork leg far enough to install the first wheel spacer. Hold the front wheel up with Remove the caliper mounting screws from the brake the brake rotor to the brake caliper side of the front fork caliper or caliper mount bracket on the front fork. -
Page 5: Checking The Tire Pressure
ADJUSTING THE BRAKE CALIPER INSTALL THE REAR FENDER After you have tightened the brake mounting bolts, Using (3) 6mm Allen bolts, attach the rear fender to the squeeze the brake lever a couple times to set the position top of the rear fork just behind the rear shock. Tighten of the caliper. -
Page 6: Key Switch Operation
Lithium batteries. You can ride for an hour and charge to full again if you like. When the Your TT1000R has a charging port located on the left side minibike is not in regular use, recharge the battery at of the battery box as shown in Fig (4). -
Page 7: Modes Of Operation
All Burromax electric bikes are set on saver mode and the hi-low speed button should be in the low position when they are shipped. You should change this setting only when you feel the rider can control the vehicle at higher speeds. -
Page 8: Features And Controls
FEATURES AND CONTROLS... -
Page 9: Pre-Ride Checklist
It is up to the end user to know the local laws governing such vehicles LOOSE PARTS and where they are legal to be ridden. Burromax makes no claim that these bikes are street legal. Check and secure all fasteners before every ride. Make sure handlebar clamp bolts are locked properly in place. -
Page 10: Proper Clothing
2. Use ONLY Burromax Li-ion Battery Charger throttle on the hand grip unless you are on the electric Specific to the TT1000R. Use of any other mini bike and in a safe, outdoor environment suitable for charger may pose a fire risk. -
Page 11: Running Time
POWER WASHING WARNINGS rider to lose control. This bike can achieve high speeds on steep hills that can cause injury or even death. Select the proper speed mode for Use care when washing to avoid pointing the water rider skill and avoid steep hills. streams directly at the electrical components. -
Page 12: Maintenance
We do not recommend running the bike to cuto , as it is a The TT1000R is equipped with cable brake systems front real pain to push your bike home. If this happens to you, and rear. For assistance on adjusting your brake we you can wait approx. -
Page 13: Chain Adjustment
CHAIN ADJUSTMENT REPLACING THE CHAIN You will need the Chain adjustment instructions for Tools required: 5mm Allen wrench, 2- 10mm replacing the chain as well. wrenches, 14mm, 17mm wrench and chain lube. CHAIN AND SPROCKET NOTES You should use this sequence to start: The chain will typically have a “loose spot”... - Page 14 CHAIN FREE PLAY Fig 3 TT1000R AXLE ASSEMBLY B-1 Rear Axle B-2 Rear Axle Adjuster Plate (2) B-3 Rear Axle Spacer-Sprocket and Disc Sides -Outer (2) 22mm B-4 Caliper Mounting Plate B-5 Rear Axle Spacer-Disc Side –Inner ONLY-22mm B-6 Rear Tire...
-
Page 15: Battery Replacement
WARNING: Make sure the power switch is in o position before performing any maintenance. Li-ion battery (1-48v-17.4ah) contains a non-replaceable internal breaker. Only use the Burromax Li-ion battery and Li-ion battery charger together. Do Not attempt to replace this battery with anything other than the OEM battery. -
Page 16: Specifications
80% Charge in 2.5-3.0 Hrs. Rear Shock: 160mm Coil Over–Adjustable Wheel: 3.5x8” 6 Spoke Alloy WEIGHT CAPACITY Tire: 90-65-8” Burromax Track Tire Up to 300 lbs. on Flat Pavement/Dirt Brakes: 160mm Mechanical Disc F/R For O Road Riding we recommend 180 lb max... - Page 17 ● Check both front and rear brakes for wear–Replace as needed. It is recommended that all Burromax Mini Bike owners do ● Check and adjust the rear chain if needed. See “ the following service to the bikes in the times shown Adjusting Chain”...
-
Page 18: Owner's Tool Kit
Numbers and areas where strong chemicals are stored. Power Washing Warnings: You may need to contact Burromax from time to time for parts or maintenance. To expedite communications with us please provide the Vehicles Serial Number located on Use care when washing to avoid pointing the water the front of the frame near the steering head. - Page 19 Warranty If you have defects of quality or workmanship Burromax Burromax does not o er an extended warranty. If you have will send you replacement parts free of charge for a purchased an extended warranty, it must be honored by period of 90 days from date of purchase.
- Page 20 Notes:...
-
Page 21: California Prop 65 Warning
Warranty If you have defects of quality or workmanship Burromax Burromax does not o er an extended warranty. If you have will send you replacement parts free of charge for a purchased an extended warranty, it must be honored by period of 90 days from date of purchase.
Need help?
Do you have a question about the TT1000R and is the answer not in the manual?
Questions and answers