Advertisement
Advertisement
Table of Contents

Related Manuals for CRYODRY CD8

Summary of Contents for CRYODRY CD8
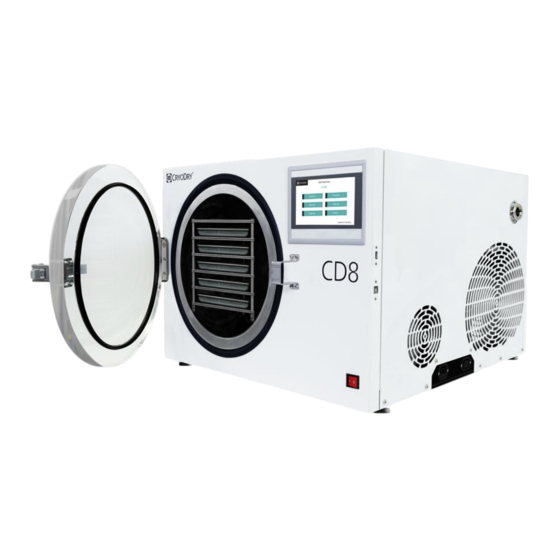
- Page 1 CD8 Freeze Dryer Quick Installation Guide cryodry.biz...
-
Page 2: Table Of Contents
Table Of Contents Included with the CD8 ..............................2 Packing list .................................. 4 Safety ..................................4 Assembly ..................................5 Pfieffer Pump Configuration ............................ 8 cryodry.biz 1... -
Page 3: Included With The Cd8
Included with the CD8 KF25 Vacuum hose (1.5m) KF25 Clamps and seal rings IEC C13 Male to C14 Female (Included with Vacuum Pump) Vacuum pump (If ordered) USB-A to USB-B Wall plug to IEC C13 Update Cable (Plug dependent on region) - Page 4 Trays 5 Stack Shelf Tray Removal Tool Drain valve gaskets Drain hose Drain hose connector cryodry.biz 3...
-
Page 5: Packing List
2. The power supply must be properly earthed. 3. Use the supplied power cable between CD8 and mains power supply. 4. The Environmental Specification for CD8 is between 10°C to 30°C and 10% to 80%, non- condensing. 5. CryoDry recommends an average room temperature of 25C with good ventilation. -
Page 6: Assembly
1. Unbox and remove all contents from the CD8 crate and Vacuum pump box. 2. With an assistant, move the CD8 onto a bench that is a minimum of 77cm x 75cm (DxW) and able to support the weight of the CD8 (~90 kg). Allow 20cm spacing around the instrument. CryoDry recommends an average room temperature of 25C with good ventilation. - Page 7 5. Apply the same technique to the vacuum pump. 6. On the right side of the CD8, locate the power terminal. Insert the wall power plug into the CD8 power socket, and the other power cable from the Vacuum pump power socket to the vacuum pump.
- Page 8 10. Optionally, insert the drain hose onto the drain hose connector 11. Verify the CD8 is properly sealed. Go onto the Manual screen, enable the compressor, vacuum valve, vacuum pump, and set the pressure setpoint to 0 mbar. Wait for about 30 minutes and see if pressure drops to less than 0.4 mbar.
-
Page 9: Pfieffer Pump Configuration
Please note: If the pump is turned off using the power button , followed by a power cycle, it will not automatically start until the power button is pressed again to enable it. There is no requirement to repeat the above steps. cryodry.biz 8... - Page 10 CryoDry Pty Ltd Unit 31, 1 Talavera Road, Macquarie Park NSW 2113 Australia Email: support@cryodry.biz Website: https://cryodry.biz @cryodry @cryodry /company/cryodry @cryodry @cryodryau cryodry.biz 1...
Need help?
Do you have a question about the CD8 and is the answer not in the manual?
Questions and answers