
Subscribe to Our Youtube Channel
Related Manuals for Gravely Pro-Turn EV 60


Summary of Contents for Gravely Pro-Turn EV 60
- Page 1 Pro-Turn ™ Operator’s Manual Manuel de I’utilisateur Models 997001 – Pro-Turn EV 60 Side Discharge (SN 000101 +) 997002 – Pro-Turn EV 60 Rear Discharge (SN 000101 +) ENGLISH • 09363000 1/21 FRANÇAIS Printed in USA...
-
Page 2: Table Of Contents
TABLE OF CONTENTS WELCOME ..... . 1 OPERATION ..... 24 Register Your Product!. -
Page 3: Welcome
WELCOME Congratulations on your purchase and welcome to the Gravely family! Every machine in the Gravely lineup is designed for long-lasting and unsurpassed performance. We are confident your machine will be part of your family for many years to come. -
Page 4: Safety
If you have any questions, please call our customer support line at 920-756-4688 or 3. Caution contact us at www.gravely.com. Do not use this equipment if, after reading the Operator's CAUTION: Indicates a Manual and the on-board decals, you have... -
Page 5: Safety Decals
SAFETY DECALS ALWAYS replace missing or damaged safety decals. Replacement decal information is in The safety decals on your unit are visual the parts manual for your unit. Decals can be reminders of the important safety information ordered from your dealer. in this manual. - Page 6 Safety Decal Descriptions 3. DANGER! 1. DANGER! Discharge Hazard – NEVER DANGER! operate unit without discharge chute in operating position. Thrown objects can cause injury or damage. Read Operator’s Manual. DO NOT operate mower unless all guards are in operating position or bagger is attached.
- Page 7 DO NOT operate the unit in the presence of bystanders. Reuse of recycled material decreases pollution in the environment. Contact an authorized Gravely EV dealer to recycle battery. DO NOT carry passengers. Look behind when operating the unit in reverse.
-
Page 8: Safety Rules
SAFETY RULES 6. WARNING! The following safety instructions are based on the present state of knowledge and SERIOUS INJURY OR current legislation (B71.4 specifications of the DEATH may result from American National Standards Institute and machine rollover. ISO 5395). This safety information provides guidance on health, safety and environmental aspects of •... - Page 9 Inspect unit before each use for missing or Children damaged decals and shields, correctly Tragic accidents can occur if the operator is operating safety interlock system, and not alert to the presence of children. deterioration of grass catchers. Replace or Children are often attracted to the machine repair as needed.
- Page 10 NEVER engage PTO when attachment, Slope Operation including mower blades, is not in use. Slopes are a major factor related to loss of ALWAYS turn off power to attachment when control and tip-over accidents, which can not in active use such as traveling or result in severe injury or death.
- Page 11 Service Towing/Transporting The use of non-genuine replacement parts Follow the manufacturer’s recommendations or accessories could adversely affect for weight limits for towed equipment and machine operation and safety. towing on slopes. Maintain or replace safety and instruction NEVER allow children or others in or on labels, as necessary.
- Page 12 (SOC) when storing for a long duration. Charge to less than 80% SOC. Battery Disposal Contact an authorized Gravely EV dealer to recycle battery. DO NOT dispose in household or commercial waste bin. Discharge within the temperature limits of the battery.
-
Page 13: Controls And Features
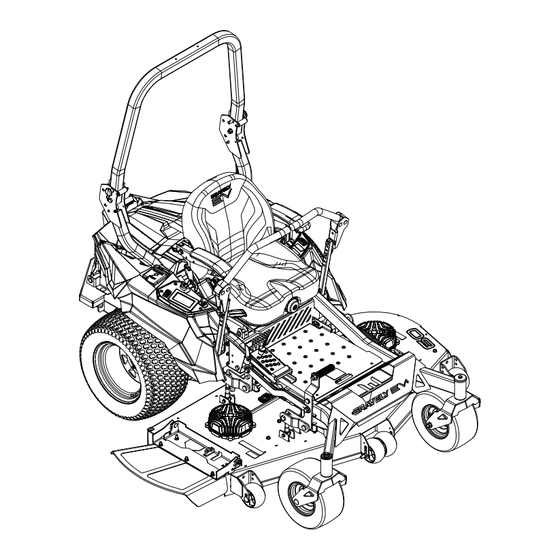
CONTROLS AND FEATURES Figure 3 EN - 11... - Page 14 Figure 4 EN - 12...
- Page 15 1. Key Switch 21. Steering Lever (2) 2. Charge Port 22. Discharge Chute 3. Digital Display Panel 23. Anti-Scalp Wheel (6) 4. Display Navigation Switch 24. Hood Assembly 5. Power Take-off (PTO) Knob 25. Hood Latch 6. USB Port 26. Battery (4) 7.
-
Page 16: Key Switch
DIGITAL DISPLAY PANEL WARNING: AVOID INJURY. See Figure 7. Read and understand the Provides electrical system information to the entire Safety section before operator. Digital display is accessible when proceeding. key switch is turned to the on position, hood assembly is closed, and seat is in the See Figure 3 for all controls and features operating position. -
Page 17: Usb Port
USB PORT VEHICLE CONTROL MODULE See Figure 9. See Figure 11. Controls electrical components of the NOTICE: DO NOT attempt to charge machine. accessories rated more than 4 amps as it could damage the USB port or mower. Located behind seat near right fender IMPORTANT: Ensure hearing protection and audio devices do not interfere with ability to hear the audible alarm. -
Page 18: Battery Busbar
BATTERY BUSBAR EMI FILTER See Figure 13. See Figure 15. Reduces electromagnetic noise that may NOTICE: AVOID DAMAGE! Batteries must cause interference with electrical devices. be carefully inserted vertically into busbar with battery connection pins facing the center IMPORTANT: EMI filters must be used with of the machine. -
Page 19: Seat Adjustment Lever
SEAT ADJUSTMENT LEVER PARKING BRAKE LEVER Unlocks seat to allow operator to move seat See Figure 18. forward or backward and then lock in desired Controls the parking brake. position. Parking Brake SEAT LATCH Engaged (On) Unlocks seat to allow operator to rotate seat forward for service. -
Page 20: Deck Motors
AUDIBLE ALARM See Figure 20. Notifies operator of certain operating conditions and helps prevent accidental movement of the machine. The audible alarm beeps under the following conditions: • When key switch is turned to the run position (1 beep). IMPORTANT: Reference Digital Display on page 19 for display function details. -
Page 21: Digital Display
DIGITAL DISPLAY Side Bar Navigation See Side Bar Navigation on page 20. 02:59:13 Home Screen Balance Screen See Home Screen on page 20. See Balance Screen on page 23. 02:59:13 0235 0235 Charge Screen Power Screen See Charge Screen on page 22. See Power Screen on page 21. -
Page 22: Side Bar Navigation
SIDE BAR NAVIGATION Displays when key switch is turned to the on position. Icon Meaning Description Color Code(s) Home Screen See Home Screen on Blue: Default color when operator page 20. navigates to home screen. Power Screen See Power Screen on page 21. -
Page 23: Power Screen
Blade Status Displays blade status. White: PTO switch disengaged (blades off). Blue: PTO switch engaged (blades on). Yellow: PTO switch engaged when machine is turned on (blades locked) and / or fault condition. Red: Blade status fault. Parking Brake Displays parking brake White: Parking brake engaged. -
Page 24: Maintenance Screen
Displays when key switch is turned to the on position and operator navigates to the maintenance screen. IMPORTANT: See Warnings on page 39 for digital readout warning codes. For fault codes, contact an authorized Gravely EV dealer. Icon Meaning Description Color Code(s) Fault Icon &... -
Page 25: Balance Screen
BALANCE SCREEN Displays when: a. Key switch is in the off position. b. Hood assembly is closed. c. Two or more batteries have at least a 12% difference in SOC. IMPORTANT: To check battery balance, see Check Battery Balance on page 31. For battery balancing details, see Auto-Balance Feature on page 32. -
Page 26: Operation
1. Check function of the Safety Interlock System by performing the tests in Check Safety Interlock System on page 29. Contact an authorized Gravely EV dealer 1. Deck Lift Pedal for repair if any of the tests fail. 2. Height-of-Cut Adjustment System 2. -
Page 27: Start The System
START THE SYSTEM 1. Push PTO knob down to off position. 2. Move steering levers to neutral position. 3. Engage parking brake. 4. Insert key switch and turn to the on position. OPERATE UNIT 1. Ensure Live-to-Drive feature is activated. See Home Screen on page 20. -
Page 28: Stop The Unit
NOTICE: Aggressive turning can scuff or damage lawns. Always keep both wheels rotating when making sharp turns. DO NOT make turns with inside wheel completely stopped. For minimum turning radius, slowly reverse inside wheel while moving outside wheel slowly forward. For Best Mowing Results •... -
Page 29: Maintenance
Safety section before Contact an authorized Gravely EV dealer. proceeding. SERVICE PARTS An authorized Gravely EV dealer can provide Contact an authorized Gravely EV dealer to service and adjustments to keep your unit purchase service parts for your unit. operating at peak efficiency. - Page 30 • Model 997001 only (side-discharge): DO NOT sharpen to this Turn hex bolts counter-clockwise to pattern. loosen. Remove hardware, blades, and lower spindle guard. Sharpen or discard blades and retain hardware and lower spindle guard. • Model 997002 only (rear-discharge): To loosen, turn hex bolts counter- clockwise for left and center blades and clockwise for right blade.
-
Page 31: Check Safety Interlock System
Check function of the Safety Interlock System by performing the tests below. Contact an 2. Remove key and wait for all moving parts authorized Gravely EV dealer for repair if any to stop and for hot parts to cool. of the tests fail. -
Page 32: Check Faults / Warnings
N•m – 221.0 N•m (133 in-lbs – 163 in- lbs). 11. Fill gearcase with 150mL of 80W-140 synthetic motor oil (Gravely p/n 00980720) or equivalent. 12. Reinstall oil fill plug. Torque to 180.3 N•m – 221.0 N•m (133 in-lbs – 163 in- lbs). -
Page 33: Check Fasteners
WARNING: AVOID INJURY. Explosive separation of tire and rim parts is possible. • DO NOT inflate tires above the recommended pressure. • DO NOT inflate tires with a compressor; use a hand pump. • DO NOT stand in front of tire assembly when inflating. -
Page 34: Auto-Balance Feature
AUTO-BALANCE FEATURE NOTICE: If there is a battery fault, the battery fault indicator will display a fault code instead Auto-balance feature occurs under the of a charge status. See Fault Codes on following conditions: page 38. If any battery fault indicators not •... - Page 35 IMPORTANT: Batteries will not charge if batteries have entered sleep mode. See Sleep Mode on page 33. 1. Engage parking brake and place steering levers in neutral position. 2. Ensure hood and seat are in the operating position. 3. Remove key and wait for moving parts to stop and for hot parts to cool.
-
Page 36: Adjustments
ADJUSTMENTS WARNING: AVOID INJURY. Read and understand the Safety section before proceeding. REMOVE BATTERIES 1. Open hood assembly. See Battery Access on page 30. Figure 40 2. Starting with the two rearmost batteries, vertically lift batteries from busbar using the supports on either side of battery tray. IMPORTANT: After installing batteries, press SOC indicator to ensure batteries wake and INSTALL BATTERIES... -
Page 37: Adjust Seat
ADJUST SEAT See Figure 43. Set Backrest Angle WARNING: AVOID INJURY. Pull lever on left side of seat to adjust Make all seat adjustments backrest angle. with the unit stopped, parking Set Armrest Angle brake engaged and key switch in the off position. Turn height adjustment knob clockwise to raise the front of armrest or counterclockwise to lower front of armrest. -
Page 38: Adjust Unit To Drive Straight
Figure 44 Figure 46 4. Adjust steering lever position. 5. Turn eccentric spacer so levers are at the Adjust Forward Position same height and have a 1.3 cm – 2.5 cm The steering lever forward position may be (1/2" – 1") gap between lever ends. See adjusted for operator comfort. -
Page 39: Calibrate Steering Sensors
NOTICE: If calibration does not properly set neutral, forward, or reverse, contact an authorized Gravely EV dealer. Steering Sensor Positions The digital display will prompt the following steering positions during the steering sensor... -
Page 40: Fault / Warning Code Index
Operator’s Note: These faults do not disable the unit. If fault exists and temperature is below 0°C (32°F), no action is needed. If fault exists, no other controller faults exist, and temperature is above 0°C (32°F), contact an authorized Gravely EV dealer, as a temperature sensor failure has occurred in the identified component. -
Page 41: Warnings
WARNINGS IMPORTANT: Warning codes do not require service or troubleshooting. Warning codes display when unit is not within standard operating conditions. IMPORTANT: See Fault / Warning Code Index on page 38 for fault and warning code details. Location Component Dealer Description Dealer Troubleshooting 0 = Other 1 = VCM 1 = Left... - Page 42 WARNINGS IMPORTANT: Warning codes do not require service or troubleshooting. Warning codes display when unit is not within standard operating conditions. IMPORTANT: See Fault / Warning Code Index on page 38 for fault and warning code details. Location Component Dealer Description Dealer Troubleshooting 0 = Other 1 = VCM 1 = Left...
- Page 43 WARNINGS IMPORTANT: Warning codes do not require service or troubleshooting. Warning codes display when unit is not within standard operating conditions. IMPORTANT: See Fault / Warning Code Index on page 38 for fault and warning code details. Location Component Dealer Description Dealer Troubleshooting 0 = Other 1 = VCM 1 = Left...
- Page 44 WARNINGS IMPORTANT: Warning codes do not require service or troubleshooting. Warning codes display when unit is not within standard operating conditions. IMPORTANT: See Fault / Warning Code Index on page 38 for fault and warning code details. Location Component Dealer Description Dealer Troubleshooting 0 = Other 1 = VCM 1 = Left...
-
Page 45: Troubleshooting
See Safety Interlock System on page 17. 10A fuse is blown. Replace fuse. Contact an authorized Gravely EV dealer if fuse fails again. Unit does not drive. Fault code is present. Contact an authorized Gravely EV dealer. -
Page 46: Storage
STORAGE ACCESSORIES SHORT-TERM STORAGE See your Gravely EV dealer for a complete list of compatible accessories and 1. Allow unit to cool and clean with attachments for your unit. compressed air or a dry cloth. Description Part No. NOTICE: DO NOT clean unit with water. To avoid damage to electrical components and Second Offboard Charger Kit –... -
Page 47: Specifications
Wheel Drive Motors – kW 5 per motor Spindle Motors – kW 3.5 per motor Transmission Type Electric Transaxles 80W-140 synthetic motor oil (Gravely p/n Gearcase Oil 00980720) Drive Forward Maximum – km/h (mph) 17.7 (11.0) Reverse Maximum – km/h (mph) 8.8 (5.5) -
Page 48: Warranty
Exclusions – Items Not Covered by This Warranty • Parts that are not genuine Gravely service parts are not covered by this warranty and may void the war- ranty if the parts result in premature wear or damage to the product. - Page 49 • Ensure that the maintenance and adjustments explained in the Operator’s Manual are routinely completed. • Promptly notify AriensCo or an authorized Gravely EV dealer of the need for warranty service. • Transport the product to and from the place of warranty service at owner’s expense.
- Page 50 655 West Ryan Street Brillion, WI 54110 www.gravely.com...
Need help?
Do you have a question about the Pro-Turn EV 60 and is the answer not in the manual?
Questions and answers