Table of Contents
Advertisement
Available languages
Available languages
Quick Links
• Updated information (the latest Instruction Manual, system updates, new
functions, etc.) is available from
• Encontrará la información actualizada (el manual de instrucciones más
reciente, actualizaciones del sistema, nuevas funciones, etc.) en
・ 可从以下网站获取更新信息 (最新的使用说明书、 系统更新、 新功能等)
• 最新資訊 (最新的使用說明書、系統更新、新增功能等) ,請至
<https://www.kenwood.com/cs/ce/>
Model name indication position
See Removing the trim plate (P.16)
Posición de la indicación del nombre del
modelo
Consulte Retirada del marco (P.32)
© 2024 JVCKENWOOD Corporation
DMX5023S
MONITOR WITH RECEIVER
Quick Start Guide
MONITOR CON RECEPTOR
Guía de inicio rápido
接收器显示器
快速入门指南
顯示器附接收器
快速入門指南
型号名称表示位置
型號名稱指示位置
Trim plate
Marco
调节板
修剪板
参见 取下调节板(第48页)
詳見 拆下飾板 (第64頁)
B5K-1157-11(M)
Advertisement
Table of Contents

Related Manuals for Kenwood DMX5023S


Summary of Contents for Kenwood DMX5023S
- Page 1 DMX5023S MONITOR WITH RECEIVER Quick Start Guide MONITOR CON RECEPTOR Guía de inicio rápido 接收器显示器 快速入门指南 顯示器附接收器 快速入門指南 • Updated information (the latest Instruction Manual, system updates, new functions, etc.) is available from • Encontrará la información actualizada (el manual de instrucciones más reciente, actualizaciones del sistema, nuevas funciones, etc.) en...
-
Page 2: Software License Agreement
Important Notice on Software EULA Ñ Ñ Software License on This Product Software License Agreement The software embedded in this product comprises a JVCKENWOOD Corporation (hereinafter called number of independent software components, each “Licensor”) holds either the copyright to the of which is copyrighted by JVCKENWOOD Corporation embedded software or the right to sublicense it. - Page 3 Article 3 (Terms of License) Article 8 (Cancellation of the Agreement) 1. In assigning this product, User may not retain Licensor reserves the right to cancel this agreement the original copy of the embedded Licensed forthwith and claim compensation from User for the Software (including associated literature, updates damages caused by such cancellation when User: and upgrades) and any duplicates and associated...
-
Page 4: Before Use
For detailed operations and information, refer • When you purchase optional accessories, to the INSTRUCTION MANUAL on the following check with your KENWOOD dealer to make website: sure that they work with your model and in <https://www.kenwood.com/cs/ce/>... -
Page 5: Basic Operations
Basic Operations Name • Motion Reset Turning on the Unit • If the unit or the connected unit fails to operate properly, the unit returns to initial settings when this button is pressed. Press the [HOME] button. h The unit is turned on. NOTE ●... -
Page 6: Getting Started
Select the playback source Getting Started Initial setup Touch [ ] on the HOME screen. Perform this setup when you use this unit first time. Set each item as follows. • Returns to previous screen. ■ [Language] • Changes the playback source. Select the language used for the control •... -
Page 7: Calendar/Clock Settings
Calendar/clock settings NOTE • Please set the date and time. If they are not set, Press the [MENU] button. some functions may not work. h Popup menu appears. Touch [ Radio Basic Operation h SETUP Menu screen appears. Touch [User Interface]. Touch [Radio] icon. -
Page 8: Bluetooth Control
Bluetooth Control Touch [ ] you want to connect. Register the Bluetooth device It is necessary to register the Bluetooth audio player or cell-phone to this unit before using the Bluetooth function. Turn on the Bluetooth function on your smartphone/cell-phone. Search the unit (“DMX*****”) from your NOTE smartphone/cell-phone. - Page 9 Select a dialing method. • [ ]: Call using call records • [ ]: Call using the phonebook • [ ]: Call using the preset number • [ ]: Call by entering a phone number • [ ]: Voice Recognition •...
-
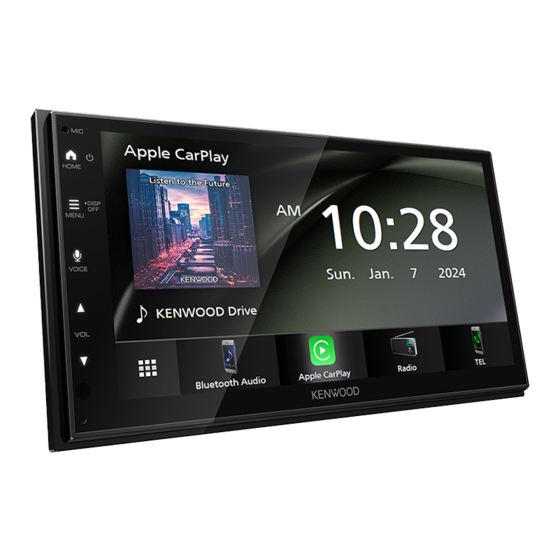
Page 10: Apple Carplay Operation
Ñ APPS Operation buttons and available Apps on the home screen of Apple CarPlay Apple CarPlay Operation You can use the Apps of the connected iPhone. The items displayed and the language used on Apple CarPlay is a smarter, safer way to use your the screen differ among the connected devices. -
Page 11: Android Auto™ Operation
Ñ Android Auto™ Operation Operation buttons and available Apps on the Android Auto screen Android Auto enables you to use functions of your Android smartphone convenient You can perform the operations of the Apps of for driving. You can easily access route the connected Android smartphone. -
Page 12: Connecting An Iphone
Ñ USB Mirroring Operation for Connecting an iPhone iPhone Pair your iPhone with the unit via Bluetooth. You can display and control the App on the See Register the Bluetooth device (P.8) unit while your iPhone is connected to the USB terminal. - Page 13 Ñ USB Mirroring Operation for Connecting an Android smartphone Android Smartphone Pair your Android smartphone with the You can display and control the App on the unit unit via Bluetooth. while your Android smartphone is connected to the USB terminal. See Register the Bluetooth device (P.8) and Connect the Bluetooth device To use USB mirroring, follow the instructions on...
-
Page 14: Before Installation
Connection/ • If the power is not turned ON (“There is an error in the speaker wiring. Please check Installation the connections.” is displayed), the speaker wire may have a short-circuit or touched the chassis of the vehicle and the protection This section is for the professional installer. -
Page 15: Supplied Accessories For Installation
Ñ Installing the unit Supplied accessories for installation Ñ Japanese cars 5 or 6 Car Bracket (2 m) 5 or 6 Ñ Trim plate 1) Attach accessory 2 to the unit. (M5 × 8 mm) (M5 × 8 mm) (3 m) Ñ... - Page 16 Ñ Ñ GPS antenna Removing the trim plate 1) Insert the extraction key (accessory 4) GPS antenna is installed inside of the car. It between the trim plate and the main unit should be installed as horizontally as possible to from between the claws.
-
Page 17: Connecting Wires To Terminals
Ñ Connecting wires to terminals Subwoofer Preout (Blue) Visual Output (Yellow) SUB-W V-OUT CAM IN Rear view camera input (Yellow) Rear Audio Preout (Left; White, Right; Red) Front Audio Preout (Left; White, Right; Red) SUB-W V-OUT CAM IN Fuse (15A) USB terminal (1.0 m) 2.1A... - Page 18 To use the steering wheel remote control feature, you need an exclusive remote adapter (not Battery supplied) matched to your car. Connect to vehicle’s steering remote harness. Contact your KENWOOD dealer for details. ST REMOTE Green/Red INPUT 1 Orange/White ST REMOTE...
-
Page 19: Specifications
Ñ Connecting an iPhone/Android Android smartphone USB cable for Android smartphone iPhone USB cable for iPhone USB terminal (1.0 m) 2.1A SUB-W V-OUT CAM IN USB maximum power supply current : DC 5 V = 2.1 A Sold separately Specifications ■... -
Page 20: Antes De La Utilización
Para obtener información y operaciones detalladas, consulte el MANUAL DE • Cuando compre accesorios opcionales, INSTRUCCIONES en el siguiente sitio web: pregunte a su distribuidor KENWOOD si dichos <https://www.kenwood.com/cs/ce/> accesorios son compatibles con su modelo y en su región. • Puede seleccionar el idioma de visualización de los menús, las etiquetas de archivos... -
Page 21: Funciones Básicas
Funciones básicas Nombre • Función Restablecer Poner en marcha la unidad • Si la unidad o el equipo conectado no funcionan correctamente, la unidad restablece la configuración inicial al pulsar Pulse el botón [HOME]. este botón. h La unidad se pone en marcha. NOTA ●... -
Page 22: Configuración Inicial
Selección de la fuente de Inicio reproducción Configuración inicial Toque [ ] en la pantalla INICIO. Realice esta configuración si es la primera vez que utiliza esta unidad. Ajuste cada elemento del modo siguiente. • Regresa a la pantalla anterior. ■... - Page 23 Ajustes del calendario/reloj NOTA • Por favor, configure la fecha y la hora. Si no Pulse el botón [MENU]. se configuran, algunas funciones podrían no h Aparece el menú emergente. funcionar. Toque [ h Aparece la pantalla SETUP Menu. Funcionamiento basico de la radio Toque [User Interface].
- Page 24 Control de Bluetooth Toque el icono [ ] del dispositivo que desea conectar. Registre el dispositivo Bluetooth Es necesario registrar el reproductor de audio o el teléfono móvil Bluetooth antes de utilizarlos en esta unidad con la función Bluetooth. Active la función Bluetooth en su teléfono inteligente/teléfono móvil.
- Page 25 Seleccione un método de marcación. • []: Llamar usando los registros de llamada almacenados • []: Llamar usando la agenda telefónica • []: Llamar usando el número preseleccionado • []: Llamar introduciendo un número telefónico • []: Reconocimiento de voz •...
- Page 26 Ñ APLICACIONES Botones de operación y aplicaciones disponibles en la pantalla de inicio de Apple CarPlay Operación de Apple CarPlay Podrá usar las aplicaciones del iPhone Apple CarPlay es la forma más inteligente y conectado. segura de usar su iPhone en el coche. Apple Los elementos visualizados y el idioma CarPlay realiza lo que usted desee hacer con utilizado en la pantalla varían en función de los...
- Page 27 Ñ Operación de Android Auto™ Botones de operación y aplicaciones disponibles en la pantalla Android Auto Android Auto le permite usar las funciones de su teléfono inteligente Android útiles para Podrá realizar las operaciones de las la conducción. Podrá acceder fácilmente a aplicaciones del teléfono inteligente Android la guía de ruta, realizar llamadas, escuchar conectado.
- Page 28 Ñ Operación de USB Mirroring Conexión de un iPhone para iPhone Empareje su iPhone con la unidad a través de Bluetooth. Puede visualizar y controlar la aplicación en la unidad mientras su iPhone está conectado al Consulte Registre el dispositivo Bluetooth terminal USB.
- Page 29 Ñ Operación de USB Mirroring Conexión de un teléfono inteligente Android para teléfono inteligente Android Empareje su teléfono inteligente Android con la unidad a través de Bluetooth. Puede visualizar y controlar la aplicación en la Consulte Registre el dispositivo Bluetooth unidad mientras su teléfono inteligente Android (P.24) y Conecte el dispositivo está...
-
Page 30: Antes De La Instalación
Conexión/ • No instale la unidad en un sitio expuesto a la luz directa del sol, o excesivamente Instalación húmedo o caluroso. Además deberá evitar sitios con mucho polvo o con posibilidad de salpicaduras de agua. Esta sección es para el instalador profesional. •... -
Page 31: Instalación De La Unidad
• Después de instalar la unidad, compruebe 3) Conecte los cables del mazo de los altavoces. que las luces de freno, las luces intermitentes, 4) Conecte los cables del mazo en el orden el limpiaparabrisas, etc., funcionan siguiente: tierra, batería, encendido. satisfactoriamente. - Page 32 Ñ Ñ Antena GPS Retirada del marco 1) Inserte la llave de extracción (accesorio 4) La antena GPS está instalada dentro entre la placa embellecedora y la unidad del vehículo. Debe instalarse lo más principal entre las garras. horizontalmente posible para permitir una fácil recepción de las señales de satélite GPS.
- Page 33 Ñ Conectar los cables a los terminales Salida de previa del subwoofer (Azul) Salida de vídeo (Amarillo) SUB-W V-OUT CAM IN Entrada de la cámara de visión trasera (Amarillo) Salida previa del audio trasero (Izquierda; Blanco, Derecha; Rojo) Salida previa del audio delantero (Izquierda;...
- Page 34 (no Batería suministrado) apropiado para su Conecte al arnés remoto de la dirección del vehículo. vehículo. Consulte a su distribuidor KENWOOD para obtener más detalles. ST REMOTE Verde/Rojo INPUT 1 Naranja/Blanco...
-
Page 35: Especificaciones
Ñ Conexión de un iPhone/ Android Cable USB para Teléfono inteligente Android teléfono inteligente Android iPhone Cable USB para iPhone Terminal USB (1,0 m) 2.1A Tapa SUB-W V-OUT CAM IN Corriente de alimentación máxima USB: CC 5 V = 2,1 A Vendida por separado Especificaciones ■... - Page 36 Ñ 使用之前 本机的使用注意事项 • 在购买选购附件时,请与 KENWOOD 经销 商进行确认,以确保其适用于您的机型及 关于快速入门指南 所在区域。 • 可以选择显示菜单、音频文件标签等的语 本快速入门指南介绍了本机的基本功能。 言。参见使用说明书 。 有关详细操作和信息,请参阅以下网站上的 • 如果广播电台不支持该项服务,则无线电 使用说明书 : 数据系统或无线电广播数据系统无法使用。 <https://www.kenwood.com/cs/ce/> Ñ 显示器的保护 • 不得使用圆珠笔或前端尖锐的工具等操作 显示器,防止显示器损坏。 Ñ 本机的清洁 • 如果本机的面板弄脏,请使用硅布等干燥 的软布擦拭清洁。如果面板很脏,请用布 蘸中性清洁剂擦拭污垢,然后再次使用清 使用说明书可能因规格的修改等有所变更。 请务必下载最新版本的使用说明书用于参 洁的软布擦拭。 照。 备注 如何阅读本手册 • 对本机直接喷洒清洁剂可能使得机械部件受...
- Page 37 基本操作 名称 • 动作 重置 接通本机电源 • 如果设备或连接的设备无法正常运行, 按下此按钮后设备将返回初始设置。 按 [HOME] 键。 h 本机电源接通。 备注 ● 切断本机电源 : • 通话过程中车内的噪音可能会影响通话质量。 按住 [HOME] 按钮。 如果通话质量不佳,建议将空调风扇设为最 低。 备注 • 如果是安装后首次打开装置,则需要进行初 HOME (主页) 画面说明 始设置 (第38页) 。 大部分功能可通过 「HOME」 (主页) 画面完成。 面板上按钮的功能 • 显示信号源选择画面。 (第 38 页) •...
- Page 38 选择播放信号源 入门 初始设置 触摸 HOME(主页)屏幕上的 [ ]。 首次使用本机时,请执行此设置。 设定下列各项目。 • 返回到前一画面。 ■ [Language] 选择用于控制画面和设定项目的语言。默 • 更改播放信号源。 认为「[British English(en)]」 。 • 显示设置菜单画面。 1 触按 [Language]。 2 选择目标语言。 可在屏幕上选择以下信号源和功能。 3 触按 [Close]。 ■ [Clock] • 切换至无线电广播。 (第 39 页) 设定时钟同步并进行调整。 要了解详细操作信息,请参阅 日历 / 时钟 •...
- Page 39 日历/时钟设置 收音机的基本操作 按 [MENU] 键。 触按 [Radio] 图标。 h 出现弹出菜单。 触按 [ ]。 h 显示设置选单画面。 触按 [User Interface]。 搜索模式 按照以下顺序切换搜索模式 ; [AUTO1]、 h 显示用户界面画面。 [AUTO2]、[MANUAL]。 • [AUTO1] : 自动调谐接收状况良好的电台。 设定下列各项目。 • [AUTO2] : 依次调谐存储的电台。 滚动页面以显示隐藏项目。 • [MANUAL] : 手动切换到下一个频率。 操作键 • [E] [F] : 调谐电台。可更改频率切换方 法...
- Page 40 触按需要连接的 [ ]。 蓝牙的控制 注册蓝牙设备 使用蓝牙功能之前,需要将蓝牙音频播放机 或手机与本机登录。 开启您的智能手机 / 手机上的蓝牙功能。 在智能手机 / 手机上搜索装置 ( 「DMX*****」 ) 。 备注 根据显示的消息操作智能手机 / 手机。 • 如果[ ] 变为[ ],表示本机将使用该设 在智能手机 / 手机上确认请求。 ■ 备。 要删除所登录的蓝牙设备 触按 [ ]。 如果需要 PIN 码,请输入 PIN 码 ■ (...
- Page 41 选择拨号方法。 ] : 使用通话记录拨打电话 ] : 使用电话簿拨打电话 ] : 使用预设号码拨打电话 ] : 输入电话号码拨打电话 ] : 语音识别 ] : 设备列表 Ñ 接听电话 触按 [ ] 以接听电话或触按 [ ] 以 拒接来电。 中文...
- Page 42 Ñ Apple CarPlay 主页画面上的操作 按钮及可用的 App 您可使用所连 iPhone 上的应用程序。 Apple CarPlay 操作 显示条目及画面所用语言视所连装置而异。 要进入 Apple CarPlay 模式,请触按信号源选 在车内使用 iPhone 时,Apple CarPlay 是一 择画面中的 [Apple CarPlay] 图标。 (第38 种智能程度较高且更为安全的方式。Apple 页) CarPlay 可代您完成您在驾驶过程中想要通过 iPhone 完成的各种操作并将其显示在产品屏 幕上。在驾驶时,您可从 iPhone 规划路线、 拨打电话、发送及接收信息并聆听音乐。还 可使用 Siri 语音控制更轻松地操作 iPhone。 有关 Apple CarPlay 的详情,请访问 https://www.apple.com/ios/carplay/ 。...
- Page 43 Ñ Android Auto™ 操作 Android Auto 画面上的操作按钮 及可用的应用程序 通过 Android Auto 可使用安卓智能手机上各 您可对所连安卓智能手机的应用程序进行各 种方便驾驶的功能。在驾驶时,您可轻松进 项操作。 行路线导航、拨打电话、聆听音乐并使用安 画面上显示的条目视所连安卓智能手机而不 卓智能手机上的便利功能。 同。 有关 Android Auto 的详情,请访问 要进入 Android Auto 模式,请触按信号源选 https://www.android.com/auto/ 和 择画面中的[Android Auto] 图标。 (第38页) https://support.google.com/androidauto 。 备注 • 如果安卓智能手机未按预期工作,请将其关 闭后再打开进行重启。 Ñ 准备 通过 USB 端子连接安卓智能手机。 (第 51 页) 应用程序...
- Page 44 Ñ USB 镜像操作 (适用于 iPhone) 连接 iPhone 通过蓝牙将 iPhone 与本机配对。 当您的 iPhone 连接到 USB 端子时,您可以 在本机上显示和控制应用程序。 参阅 注册蓝牙设备(第 40 页) 和 连接 蓝牙设备(第 40 页) 。 若要使用 USB 镜像,请按照 iPhone 的操作 说明进行。 通过 USB 端子连接 iPhone。 备注 在 iPhone 上启动镜像应用程序。 • 在使用 USB 镜像时,请将车停在安全的地 触按 [Screen Mirror] 以启动镜像应用程 方。 在驾驶过程中,本机显示画面上不会出 序。...
- Page 45 Ñ USB 镜像操作 (适用于安卓智能 连接安卓智能手机 手机) 通过蓝牙将您的安卓智能手机与本机配 对。 当您的安卓智能手机连接到 USB 端子时,您 参阅 注册蓝牙设备(第 40 页) 和 连接 可以在本机上显示和控制应用程序。 蓝牙设备(第 40 页) 。 若要使用 USB 镜像,请按照安卓智能手机的 操作说明进行。 通过 USB 端子连接安卓智能手机。 备注 在安卓智能手机上启动镜像应用程序。 • 在使用 USB 镜像时, 请将车停在安全的地方。 触按 [OK] 以启动 Mirroring App。 在驾驶过程中,本机显示画面上不会出现安 触按 [Start now] 以开始捕获您的安卓画 卓智能手机的画面。...
- Page 46 连接/安装 源。如果将点火线连接到恒定电压的电源, 如蓄电池电线,蓄电池将耗尽。 • 如果控制台有盖子,安装本机时应保证在 本部分适用于专业安装程序。 打开和关闭时面板不会碰到盖子。 为安全起见,请由专业人员进行布线及安装。 • 如果保险丝熔断,首先保证电线不会触碰而 请咨询汽车音响经销商。 导致短路,然后用相同规格的保险丝更换。 • 使用聚氯乙稀绝缘带或其它类似材料绝缘 未连接的电缆。为了避免短路,请勿移除 安装之前 未连接电线或端子末端的罩帽。 • 请将扬声器正确连接到其相应的端子。如 安装本机之前,请注意下列事项。 果共用¤ 导线或将其与汽车的金属部件连 #警告 接,可能造成本机损坏或无法正常工作。 • 只有两个扬声器连接到系统时,请将连接 • 如果将点火导线 (红色) 和蓄电池导线 (黄 器连接到两个前置输出端子或两个后置输 色) 与汽车底盘 (接地) 连接,将造成短路, 出端子 (不得混接前置和后置端子) 。例如, 可能导致火灾。始终将这些导线通过保险 如果将左侧扬声器的¢...
- Page 47 Ñ 用于安装的随机附件 安装本机 Ñ 日本汽车 5或6 汽车托架 (2 m) 5或6 Ñ 调节板 (M5 × 8 mm) (M5 × 8 mm) 1) 将附件 2 安装到本机上。 (3 m) x1 Ñ 1DIN 安装 Ñ 安装步骤 可取下右边、左边和后部托架,将本机安装 1) 为了防止发生短路,请拔出点火钥匙,切 在 1DIN 大小空间中。 断蓄电池的 ¤ 端子连接。 取下后部托架上的四颗黑色螺丝,然后分别...
- Page 48 Ñ Ñ GPS天线 取下调节板 1) 将开启钥匙 (附件4) 从钳爪之间插入调节 GPS天线安装在汽车的内部。安装时应尽可 板和主机之间。 能保持水平以便于接收GPS卫星信号。 在汽车内安装GPS天线 : 1) 清洁仪表板或其他安装表面。 2) 揭下金属板(附件 9 )的保护纸。 3) 牢牢地将金属板(附件 9 )压在仪表板或 其它安装表面上。 必要时可以弯曲金属板 (附件 9 )以匹配弯曲的表面。 2) 将板朝身前拉出。 4) 剥下双面胶带(附件 8 )的底纸,并用于 安装 GPS 天线(附件 7 )和金属板(附 件 9 ) 。 备注...
- Page 49 Ñ 将导线与端子连接 重低音预输出 (蓝色) 视频输出 (黄色) SUB-W V-OUT CAM IN 后视摄像机输入 (黄色) 后侧音频预输出 (左 ; 白,右 ; 红) 前侧音频预输出 (左 ; 白,右 ; 红) SUB-W V-OUT CAM IN 保险丝 (15A) USB端子 (1.0 m) 2.1A USB装置 附件 1 罩帽 FM/AM天线 附件 7 : GPS天线 GPS Antenna 罩帽...
- Page 50 黑色 STEERING WHEEL REMOTECONT (接地导线) ¤ REMOTEINPUT (至汽车底盘) 至方向盘遥控器 使用方向盘遥控控制功能时,需 要使用兼容本轿车的专用遥控适 配器(不随机提供) 。 电池 与汽车的方向盘遥控导线束连接。 有关详细内容,请与 KENWOOD 经销商联系。 ST REMOTE 绿色 / 红色 INPUT 1 橙色 / 白色 (调光器控制导线) ST REMOTE 紫色 / 红色 INPUT 2 ILLUMI 至车灯控制开关 ST REMOTE 灰色...
- Page 51 Ñ 连接iPhone/安卓 安卓智能手机 用于安卓智能手机的 USB 连接线 iPhone 用于 iPhone 的 USB 连接线 USB端子 (1.0 m) 2.1A 罩帽 SUB-W V-OUT CAM IN USB 最大供电电流 : DC 5 V = 2.1 A 另行销售 技术规格 ■ 蓝牙部分 频率 : 2.402 - 2.480 GHz 射频输出功率...
- Page 52 Ñ 使用前 本裝置使用注意事項 • 當您購買選購配件時,請與您的 KENWOOD 經銷商確認您的型號及所在區域的相容性。 關於 《快速入門指南》 • 您可以選擇選單顯示語言、音訊檔案標籤 等。請參閱 《使用說明書》 。 本 《快速入門指南》 描述了本機的基本功能。 • 任何廣播電台不支援服務的地區將不具備 有關詳細操作和資訊,請參閱以下網站上的 無線電數據系統或無線電廣播數據系統功 使用說明書: 能。 <https://www.kenwood.com/cs/ce/> Ñ 保護顯示器 • 為了避免損壞顯示器,請勿使用原子筆或 類似工具的尖端操作顯示器。 Ñ 清潔裝置 • 若本裝置的面板骯髒,請使用乾燥軟布如 矽膠布擦拭。若面板非常髒,請先將布沾 《使用說明書》 可能會因規格修改等而有所變 濕中性清潔劑以去除污漬,再使用乾淨的 更。請確保下載最新版本的 《使用說明書》 以...
- Page 53 基本操作 名稱 • 功能 復位 開啟本裝置 • 如果本裝置或連接的裝置無法正常運行, 按下此按鈕將裝置返回初始設定。 按 [HOME] 按鈕。 h 本裝置已開啟。 注意 ● 關閉裝置: • 通話過程中,車內有噪音會影響通話品質。 按住 [HOME] 按鈕 . 如果通話品質不佳,建議將空調風扇設置為 最低。 注意 • 若這是您安裝後第一次開啟本裝置,將需要 首頁畫面說明 執行初始設定 (第54頁) 。 大部分功能都可以在首頁畫面執行。 前方面板的按鈕功能 • 顯示選擇訊號源畫面。 ( 第 54 頁 ) •...
- Page 54 選擇播放訊號源 開始 初始設定 觸碰首頁畫面上的 [ ]。 當您第一次使用本裝置執行時本設定。 請依下述設定各項目。 • 返回至上個畫面。 ■ [Language] 選擇控制畫面和設定項目使用的語言。預 • 更改播放訊號源。 設值為「[British English(en)]」 。 • 顯示設定選單畫面。 1 觸碰 [Language]。 2 選擇想要的語言。 您可以在螢幕中選擇以下訊號源及功能。 3 觸碰 [Close]。 ■ [Clock] • 切換至電台廣播。 ( 第 55 頁 ) 設定時鐘同步化並調整它。 操作詳細資訊,詳見 日曆 / 時鐘設定 ( 第 •...
- Page 55 日曆/時鐘設定 無線電基本操作 按 [MENU] 按鈕。 觸碰 [Radio] 圖示。 h 顯示彈出式選單。 觸碰 [ ]。 h 顯示設定選單畫面。 觸碰 [User Interface]。 搜尋模式 依據下列順序切換搜尋模式;[AUTO1]、 h 顯示使用者界面畫面。 [AUTO2]、[MANUAL]。 請依下述設定各項目。 • [AUTO1] : 自動調頻至接收狀況良好的電台。 • [AUTO2]:接續記憶調頻電台。 滾動頁面以顯示隱藏項目。 • [MANUAL]:手動切換至下個頻率。 操作鍵 • [E] [F]:調頻電台。可以更換切換頻率 的方式 (詳見表1) 。 預設列表 • 觸碰螢幕右側的[ ]兩次以顯示預設列表。 觸碰[ ]以關閉列表。...
- Page 56 觸碰要連接的 [ ] 。 藍牙控制 註冊藍牙裝置 使用藍牙功能前,需要將藍牙音訊播放器或 手機註冊至本裝置。 開啟智慧型手機 / 手機上的藍牙功能。 從您的智慧型手機 / 手機搜尋裝置 ( 「DMX*****」 ) 。 注意 依據顯示的訊息操作智慧型手機 / 手機。 • 若[ ] 變為[ ],代表該單元會使用該裝 確認在智慧型手機 / 手機上申請。 ■ 置。 刪除已註冊的藍牙裝置 觸碰 [ ]。 如果需要 PIN 碼,請輸入 PIN 碼 ■ ( 「0000」 ) 。 觸碰 [Yes]。...
- Page 57 選擇撥號方式。 • [ ]:使用通話記錄撥打 • [ ]:使用電話簿撥打 • [ ]:使用預設號碼撥打 • [ ]:輸入電話號碼撥打 • [ ]:語音識別 • [ ]:裝置列表 Ñ 接收來電 觸碰 [ ] 以接聽來電或 [ ] 以拒接 來電。 中文...
- Page 58 Ñ Apple CarPlay 首頁畫面的操作 按鈕和可用的應用程式 您可以使用已連接 iPhone 的應用程式。 Apple CarPlay 操作 螢幕上顯示的項目和使用語言會因連接的裝 置而有所差異。 Apple CarPlay 讓您能在車上以更智慧、更安 若要進入 Apple CarPlay 模式,請在選擇訊號 全的方式使用 iPhone。Apple CarPlay 讓您在 源畫面觸碰[Apple CarPlay]圖示。 (第54頁) 駕駛時完成您想用 iPhone 完成的操作並將其 顯示在本裝置的螢幕上。您可以在駕駛時由 iPhone 規劃路線、撥打電話、發送和接收訊 息及聆聽音樂。您也可以使用 Siri 語音控制 更容易地操作 iPhone。 有關Apple CarPlay的詳細資訊,請訪問 https://www.apple.com/ios/carplay/ 。...
- Page 59 Ñ Android Auto™ 操作 Android Auto 畫面上的操作按鈕 和可用應用程式 Android Auto 讓您可以在駕駛時方便地使用 您可以操作已連接 Android 智慧型手機的應 您的 Android 智慧型手機的功能。您可以在 用程式。 駕駛時輕鬆地使用路線導航、撥打電話、聆 畫面顯示的項目會因已連接的 Android 智慧 聽音樂和使用 Android 智慧型手機方便的功 型手機不同而有所差異。 能。 若要進入 Android Auto 模式,請觸碰選擇訊 有關 Android Auto 的詳細資訊,請訪問 號源畫面上的[Android Auto]圖示。 (第54 https://www.android.com/auto/ 和 頁) https://support.google.com/androidauto 。...
- Page 60 Ñ iPhone 的 USB 鏡像操作 連接iPhone 透過藍牙將 iPhone 與本裝置配對。 當您的 iPhone 連接至 USB 接頭時,您可以 在本裝置上顯示並控制應用程式。 詳見 註冊藍牙裝置 ( 第 56 頁 ) 和 連接 藍牙裝置 ( 第 56 頁 ) 。 若要使用 USB 鏡像,請遵照 iPhone 上的說 明進行。 透過 USB 接頭連接 iPhone。 注意 在 iPhone 上啟動鏡像應用程式。 • 在使用 USB 鏡像時,請將車停在安全的地 觸碰...
- Page 61 Ñ Android 智慧型手機的 USB 鏡 連接 Android 智慧型手機 像操作 透過藍牙將本機與 Android 智慧型手機配 對。 當您的 Android 智慧型手機連接至 USB 接頭 詳見 註冊藍牙裝置 ( 第 56 頁 ) 和 連接 時,您可以在本裝置上顯示並控制應用程式。 藍牙裝置 ( 第 56 頁 ) 。 若要使用 USB 鏡像,請遵照 Android 智慧型 手機上的說明進行。 透過 USB 接頭連接 Android 智慧型手機。 注意...
- Page 62 連接/安裝 若您以固定的電壓供應像是電池線將點火 線連接至電源,電池可能會耗盡。 • 若控制台具有蓋子,在安裝裝置時一定要 本部分適用於專業安裝人員。 確保在開關時前方面板不會碰到蓋子。 為了安全起見,請由專業人員接線和安裝。 • 若保險絲熔斷,請確認線材未碰觸而導致 請諮詢汽車音響經銷商。 短路,然後更換相同額定的保險絲。 • 使用聚氯乙烯絕緣帶或其他類似材料將未 連接的線材絕緣。為了防止短路,請勿移 安裝前 開未連接線材的末端或端子的蓋子。 • 將揚聲器正確地連接至對應的端子。若您 安裝本裝置前,請注意以下注意事項。 共用 ¤ 線材或接地至汽車的任何金屬部 # 警告 分,會使本裝置損壞或故障。 • 當只有兩個揚聲器連接至系統時,將連接 • 若您將點火線 (紅色) 和電池線 (黃色) 連接 器連接至前方兩個輸出端子或後方兩個輸 至汽車底盤 (接地) ,可能會導致短路而引 出端子 (請勿混用前方和後方) 。例如:若 起火災。請確保將這些線材經過保險絲盒...
- Page 63 Ñ 提供的安裝配件 安裝本裝置 Ñ 日本汽車 5或6 車載支架 (2 公尺) 5或6 Ñ 修剪板 (M5 × 8 mm) (M5 × 8 mm) 1) 將配件 2 連接到本裝置。 (3 公尺) x1 Ñ 1DIN 安裝 Ñ 安裝步驟 可取下右邊、左邊和後部支架,在 1DIN 大 1) 為了防止短路,自點火線移開按鍵並斷開 小的空間內安裝本機。 ¤ 電池端子。 取下後部支架上的四顆黑色螺絲,然後分別...
- Page 64 Ñ Ñ GPS 天線 拆下飾板 1) 將開啟鑰匙 (配件4) 從鉤爪間插入飾板與 GPS 天線安裝在汽車內部。它應該盡可能地 主機之間。 水平安裝以方便接收 GPS 天線訊號。 在您的汽車內部安裝 GPS 天線: 1) 清潔儀表板或其他安裝表面。 2) 移除金屬板(配件 9 )的隔板。 3) 緊密地按壓金屬板(配件 9 )至您的儀表 板或其他安裝表面。 您可以依需求彎曲金 屬板(配件 9 )以匹配彎曲的表面。 2) 將板朝身前拉出。 4) 剝下雙面膠帶(配件 8 )的襯紙,然後 將其用於安裝 GPS 天線(配件 7 )和金 屬板(配件...
- Page 65 Ñ 連接線材至端子 低音揚聲器前置輸出 (藍色) 視覺輸出 (黃色) SUB-W V-OUT CAM IN 後視攝影機輸入 (黃色) 後方音訊前置輸出 (左、白色,右、紅色) 前方音訊前置輸出 (左、白色,右、紅色) SUB-W V-OUT CAM IN 保險絲 (15A) USB 端子 (1.0 m) 2.1A USB 裝置 配件 1 蓋子 FM/AM 天線 配件 7:GPS 天線 GPS Antenna 蓋子 USB 最大電源電流:DC 5 V = 2.1 A 分開販售...
- Page 66 黑色 STEERING WHEEL REMOTECONT (接地線) ¤ REMOTEINPUT (至汽車底盤) 方向盤遙控 您需要專用的遙控器轉接器(不 提供)適用您的汽車,才可使用 方向盤遙控器功能, 。 電池 連接至汽車方向盤遙控器線束。 請聯絡您的 KENWOOD 經銷商了解詳細資訊。 ST REMOTE 綠色 / 紅色 INPUT 1 橘色 / 白色 (調光器控制線) ST REMOTE 紫色 / 紅色 INPUT 2 ILLUMI 汽車燈光控制開關 ST REMOTE 灰色...
- Page 67 Ñ 連接 iPhone/Android Android 智慧型手機 用於 Android 智慧型 手機的 USB 連接線 iPhone 用於 iPhone 的 USB 連接線 USB 端子 (1.0 m) 2.1A 蓋子 SUB-W V-OUT CAM IN USB 最大電源電流: DC 5 V = 2.1 A 分開販售 規格 ■ 藍牙部分 頻率 :2.402 –...
- Page 68 Appendix PERSONAL AND NON-COMMERCIAL ACTIVITY AND/ ■ Copyrights OR WAS OBTAINED FROM A VIDEO PROVIDER LICENSED • The Bluetooth® word mark and logos are registered TO PROVIDE VC-1 VIDEO. NO LICENSE IS GRANTED OR trademarks owned by Bluetooth SIG, Inc. and any use SHALL BE IMPLIED FOR ANY OTHER USE.
- Page 69 BUT NOT LIMITED TO, THE IMPLIED WARRANTIES OF MERCHANTABILITY AND FITNESS FOR A PARTICULAR PURPOSE ARE DISCLAIMED. IN NO EVENT SHALL THE FOUNDATION OR CONTRIBUTORS BE LIABLE FOR ANY DIRECT, INDIRECT, INCIDENTAL, SPECIAL, EXEMPLARY, OR CONSEQUENTIAL DAMAGES (INCLUDING, BUT NOT LIMITED TO, PROCUREMENT OF SUBSTITUTE GOODS OR SERVICES;...
- Page 70 Rendementsweg 20 B-9, 3641 SL Mijdrecht, THE NETHERLANDS English Hereby, JVCKENWOOD declares that the radio equipment DMX5023S is in compliance with Directive 2014/53/EU. The full text of the EU declaration of conformity is available at the following internet address: URL : https://www.kenwood.com/euukdoc/...
Need help?
Do you have a question about the DMX5023S and is the answer not in the manual?
Questions and answers