Table of Contents
Advertisement
Quick Links
Advertisement
Table of Contents

Subscribe to Our Youtube Channel
Related Manuals for Asus G71G


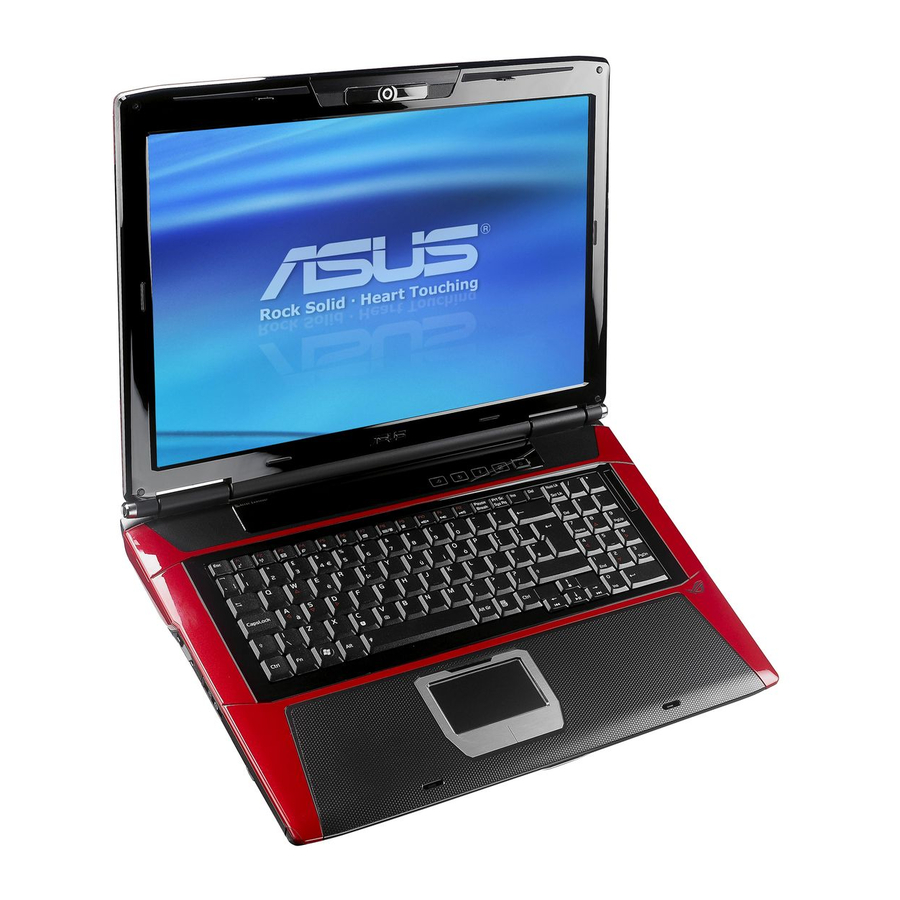
Summary of Contents for Asus G71G
- Page 1 Notebook PC Hardware User’s Manual E3954/ July 2008...
-
Page 2: Table Of Contents
Thermal Power Control ���������������������������������������������������������������������������������������� 31 Special Keyboard Functions ������������������������������������������������������������������������������������� 32 Colored Hot Keys ������������������������������������������������������������������������������������������������� 32 Microsoft Windows Keys �������������������������������������������������������������������������������������� 33 Switches and Status Indicators �������������������������������������������������������������������������������� 34 Switches��������������������������������������������������������������������������������������������������������������� 34 Status Indicators �������������������������������������������������������������������������������������������������� 35 Multimedia Control Keys (on selected models) ��������������������������������������������������� 38... - Page 3 Windows Wireless Network Connection �������������������������������������������������������������� 56 Bluetooth Wireless Connection (on selected models) ����������������������������������������� 57 Antenna Connections (on selected models) ������������������������������������������������������������� 58 Media Center Remote Controller (on selected models) ��������������������������������������� 59 Direct Console 2�0 ���������������������������������������������������������������������������������������������������� 60 Appendix Optional Accessories ���������������������������������������������������������������������������������������������� A-2 Optional Connections ����������������������������������������������������������������������������������������...
- Page 4 Contents...
-
Page 5: Introducing The Notebook Pc
1. Introducing the Notebook PC About This User’s Manual Notes For This Manual Safety Precautions Preparing your Notebook PC Photos and icons in this manual are used for artistic purposes only and do not show what is actually used in the product itself. -
Page 6: About This User's Manual
Introduces you to optional accessories and gives additional information. Notes For This Manual A few notes and warnings in bold are used throughout this guide that you should be aware of in order to complete certain tasks safely and completely. These notes have different degrees of importance as described below: NOTE: Tips and information for special situations. -
Page 7: Safety Precautions
Introducing the Notebook PC Safety Precautions The following safety precautions will increase the life of the Notebook PC. Follow all precautions and instructions. Except as described in this manual, refer all servicing to qualified personnel. Do not use damaged power cords, accessories, or other peripherals. Do not use strong solvents such as thinners, benzene, or other chemicals on or near the surface. -
Page 8: Transportation Precautions
OFF to prevent scratching of the hard disk surface during transport. Therefore, you should not transport the Notebook PC while the power is still ON. Close the display panel and check that it is latched securely in the closed position to protect the keyboard and display panel. -
Page 9: Preparing Your Notebook Pc
Introducing the Notebook PC Preparing your Notebook PC These are only quick instructions for using your Notebook PC. Read the later pages for detailed infor- mation on using your Notebook PC. 2. Connect the AC Power Adapter 1. Install the battery pack 3. - Page 10 Introducing the Notebook PC...
-
Page 11: Knowing The Parts
2. Knowing the Parts Basic sides of the Notebook PC Photos and icons in this manual are used for artistic purposes only and do not show what is actually used in the product itself. -
Page 12: Top Side
Knowing the Parts Top Side Refer to the illustration below to identify the components on this side of the Notebook PC. The keyboard differs for each territory. -
Page 13: Display Panel
TFT LCD, which provides excellent viewing like that of desktop monitors. Unlike desktop monitors, the LCD panel does not produce any radiation or flickering, so it is easier on the eyes. Use a soft cloth without chemical liquids (use plain water if necessary) to clean the display panel. -
Page 14: Touchpad And Buttons
Windows operating system. Touchpad and Buttons The touchpad with its buttons is a pointing device that provides the same functions as a desk- top mouse. A software-controlled scrolling function is available after setting up the included... -
Page 15: Bottom Side
Knowing the Parts Bottom Side Refer to the illustration below to identify the components on this side of the Notebook PC. The bottom side may vary in appearance depending on model. The battery pack size varies depending on model. WARNING! The bottom of the Notebook PC can get very hot. Be careful when han- dling the Notebook PC while it is in operation or recently been in operation. -
Page 16: 2 Knowing The Parts
Knowing the Parts Secondary Hard Disk Drive Compartment (Optional) The hard disk drive is secured in a compartment. Visit an authorized service center or retailer for information on hard disk drive upgrades for your Notebook PC. Only purchase hard disk drives from authorized retailers of this Notebook PC to ensure maximum compatibility and reliability. -
Page 17: Battery Pack
Battery Lock - Spring The spring battery lock is used to keep the battery pack secured. When the battery pack is inserted, it will automatically lock. To remove the battery pack, this spring lock must be held in the unlocked position. -
Page 18: Left Side
USB Port (2.0/1.1) The USB (Universal Serial Bus) port is compatible with USB 2.0 or USB 1.1 devices such as keyboards, pointing devices, cameras, hard disk drives, printers, and scanners connected in a series up to 12Mbits/sec (USB 1.1) and 480Mbits/sec (USB 2.0). USB allows many devices to run simultaneously on a single computer, with some peripherals acting as additional plug-in sites or hubs. -
Page 19: Optical Drive
Optical Drive Electronic Eject The optical drive eject has an electronic eject button for opening the tray. You can also eject the optical drive tray through any software player or by right clicking the optical drive in Windows “Computer”... -
Page 20: Right Side
SPDIF Output Jack This jack provides connection to SPDIF (Sony/Philips Digital Interface) compliant de- vices for digital audio output. Use this feature to turn the Notebook PC into a hi-fi home entertainment system. Headphone Output Jack The stereo headphone jack (1/8 inch) is used to connect the Notebook PC’s audio out signal to amplified speakers or headphones. -
Page 21: Rear Side
Refer to the illustration below to identify the components on this side of the Notebook PC. Power (DC) Input The supplied power adapter converts AC power to DC power for use with this jack. Power sup- plied through this jack supplies power to the Notebook PC and charges the internal battery pack. -
Page 22: Lan Port
External SATA or eSATA allows external connection of Serial-ATA devices originally designed for use inside the computer. It is up to six times faster than existing USB 2.0, & 1394 for external storage solutions and is also hot pluggable using shielded cables and connectors up to two meters. -
Page 23: Front Side
Knowing the Parts Front Side Refer to the illustration below to identify the components on this side of the Notebook PC. Audio Speaker Indicators (front) The audio speaker indicators light and changes colors with the speaker volume or your customized definitions. - Page 24 Knowing the Parts...
-
Page 25: Getting Started
Powering ON the Notebook PC Checking Battery Power Powering Options Power Management Modes Special Keyboard Functions Switches and Status Indicators Photos and icons in this manual are used for artistic purposes only and do not show what is actually used in the product itself. -
Page 26: Power System
Most hotels will provide universal outlets to support different power cords as well as voltages. It is always best to ask an experienced traveler about AC outlet voltages when bringing power adapters to another country. -
Page 27: Using Battery Power
The battery pack’s useful life will depend on your environment temperature, humidity, and how your Notebook PC is used. It is ideal that the battery be used in a temperature range be- tween 5˚C and 35˚C (41˚F and 95˚F). You must also take into account that the Notebook PC’s internal temperature is higher than the outside temperature. -
Page 28: Powering On The Notebook Pc
The Notebook PC’s power-ON message appears on the screen when you turn it ON. If necessary, you may adjust the brightness by using the hot keys. If you need to run the BIOS Setup to set or modify the system configuration, press [F2] upon bootup to enter the BIOS Setup. If you press [Tab] during the splash screen, standard boot information such as the BIOS version can be seen. -
Page 29: Checking Battery Power
Charging the Battery Pack Before you use your Notebook PC on the road, you will have to charge the battery pack. The battery pack begins to charge as soon as the Notebook PC is connected to external power using the power adapter. -
Page 30: Power Options
Getting Started Power Options The power switch turns ON and OFF the Notebook PC or putting the Notebook PC into sleep or hibernation modes. Actual behavior of the power switch can be customized in Windows Control Panel “Power Options.” For other options, such as “Switch User, Restart, Sleep, or Shut Down,”... -
Page 31: Power Management Modes
Getting Started Power Management Modes The Notebook PC has a number of automatic or adjustable power saving features that you can use to maximize battery life and lower Total Cost of Ownership (TCO). You can control some of these fea- tures through the Power menu in the BIOS Setup. -
Page 32: Special Keyboard Functions
The colored commands can only be accessed by first pressing and holding the function key while pressing a key with a colored command. The Hot Key locations on the function keys may vary depending on model but the functions should remain the same. Follow the icons instead of the function keys. -
Page 33: Microsoft Windows Keys
Microsoft Windows Keys There are two special Windows keys on the keyboard as described below. The key with the Windows Logo activates the Start menu located at the bottom left of the Win- dows desktop. The other key, that looks like a Windows menu with a small pointer, activates the properties... -
Page 34: Switches And Status Indicators
Pressing this button will launch Express Gate. Refer to the Express Gate User’s Manual for details. It is normal to see a dim light on this key even when the Notebook PC is powered off. This key may blink but will not function after the Notebook PC enters the operat- ing system. -
Page 35: Status Indicators
Front Power Indicator The power indicator lights when the Notebook PC is turned ON and blinks slowly when the Notebook PC is in the Suspend-to-RAM (Sleep) mode. This indicator is OFF when the Note- book PC is turned OFF or in the Suspend-to-Disk (Hibernation) mode. -
Page 36: Capital Lock Indicator
Indicates that capital lock [Caps Lock] is activated when lighted. Capital lock allows some of the keyboard letters to type using capitalized letters (e.g. A, B, C). When the capital lock light is OFF, the typed letters will be in the lower case form (e.g. a,b,c). Number Lock Indicator Indicates that number lock [Num Lk] is activated when lighted. -
Page 37: Notebook Leds
HDMI E-SATA There are two sets of LEDs for you to create special light effects when using the Notebook PC. You can use the provided Direct Console 2.0 software to customize the LEDs behavior. Direct console 2.0 can be opened from the notification area or from Windows | Start Programs | ASUS Utility | ASUS... -
Page 38: Multimedia Control Keys (On Selected Models)
CD Skip to Previous Track (Rewind) & Audio Volume Down During CD play, this button has two functions: Track: The first push will restart the current track. Second push will skip to the previous track. Audio: Hold down to decrease audio volume. CD Skip to Next Track (Fast Forward) & Audio Volume Up During CD play, this button has two functions: Track: Push once to skip to the next track during CD playing. -
Page 39: Using The Notebook Pc
Bluetooth Wireless Connection (on selected models) Antenna Connections (on selected models) Media Center Remote Controller (on selected models) Direct Console 2.0 Photos and icons in this manual are used for artistic purposes only and do not show what is actually used in the product itself. -
Page 40: Pointing Device
Left Click the touchpad’s surface. Using the Touchpad Light pressure with the tip of your finger is all that is required to operate the touchpad. Because the Slide finger touchpad is electrostatic sensitive, objects cannot forward be used in place of your fingers. -
Page 41: Touchpad Usage Illustrations
If the interval between the clicks or taps is too long, the operation will not be executed. You can set the double-click speed using the Windows Control Panel “Mouse.” The following 2 examples produce the same results. -
Page 42: Caring For The Touchpad
Using the Notebook PC Caring for the Touchpad The touchpad is pressure sensitive. If not properly cared for, it can be easily damaged. Take note of the following precautions. • Make sure the touchpad does not come into contact with dirt, liquids or grease. -
Page 43: Gaming Optical Mouse (On Selected Models)
Using the Notebook PC Gaming Optical Mouse (on selected models) The gaming optical mouse is a standard mouse with some added software features for easier controls when playing games. Parts of the mouse (top) (1) In-game dpi Increase: Press button to increase dpi of tracking sensitivity. -
Page 44: 4 Using The Notebook Pc
Game Settings feature (2) to configure up to five personalized sensitivity levels between 400dpi and 1600dpi. Sensitivity levels require an ascending order (3). Refer to the software help sys- tem (4) to learn how to choose sensitivity levels, and to learn more about the mouse and its software. -
Page 45: Gaming Laser Mouse (On Selected Models)
Using the Notebook PC Gaming Laser Mouse (on selected models) The gaming laser mouse is a standard mouse with some added software features for easier controls when playing games. Default mouse button assignments A Mouse button 1 - Left click... - Page 46 The Windows button5 and button4 are by default re- served for customized definitions. 4� Click the green triangles on the ADVANCED and SENSITIVITY tabs on the left and perform the advanced mouse adjustments� Click APPLY and OK after the configuration�...
- Page 47 To load or save the configuration 1� Click CONFIG | SAVE / LOAD SETTINGS� 2� In the ADVANCED CONFIG SETTINGS dialog box, click the desired action� You can load the existed configuration, save the present configuration, or reset to the default configuration�...
-
Page 48: Storage Devices
Using the Notebook PC Storage Devices Storage devices allow the Notebook PC to read or write documents, pictures, and other files to various data storage devices. This Notebook PC has the following storage devices: • Expansion Card • Optical drive •... -
Page 49: Optical Drive
When the drive stops, the disc is hub. The hub should be higher than the ready to be used. disc when correctly mounted. It is normal to hear as well as feel the CD spinning with great intensity in the CD drive while data is read. -
Page 50: Removing An Optical Disc
Keep in mind the important safety instructions from your CD suppliers. Unlike desktop optical drives, the Notebook PC uses a hub to hold the CD in place regardless of the angle. When inserting a CD, it is important that the CD be pressed onto the center hub or else the optical drive tray will scratch the CD. -
Page 51: Flash Memory Card Reader
MP3 players, mobile phones, and PDAs. This Notebook PC has a single built-in memory card reader that can use many flash memory cards as shown in the example below. The built-in memory card reader is not only convenient, but also faster than most other forms of memory card readers because it utilizes the internal high-bandwidth PCI bus. -
Page 52: Hard Disk Drive
Handle the Notebook PC gently and keep it away from static electricity and strong vibrations or impact. The hard disk drive is the most delicate component and will likely be the first or only component that is damaged if the Notebook PC is dropped. WARNING! Disconnect all the con-... -
Page 53: Memory (Ram)
Notebook PC to ensure maximum compatibility and reliability. This is only an example� The BIOS automatically detects the amount of memory in the system and configures CMOS accordingly during the POST (Power-On-Self-Test) process. There is no hardware or software (including BIOS) setup required after the memory is installed. -
Page 54: Connections
Connect a network cable, with RJ-45 connectors on each end, to the modem/network port on the Notebook PC and the other end to a hub or switch. For 100 BASE-TX / 1000 BASE-T speeds, your network cable must be category 5 or better (not category 3) with twisted-pair wiring. If you plan on running the interface at 100/1000Mbps, it must be connected to a 100 BASE-TX / 1000 BASE-T hub (not a BASE-T4 hub). -
Page 55: Wireless Lan Connection (On Selected Models)
The optional built-in wireless LAN is a compact easy-to-use wireless Ethernet adapter. Implementing the IEEE 802.11 standard for wireless LAN (WLAN), the optional built-in wireless LAN is capable of fast data transmission rates using Direct Sequence Spread Spectrum (DSSS) and Orthogonal Frequen- cy Division Multiplexing (OFDM) technologies on 2.4GHz/5GHz frequencies. -
Page 56: Windows Wireless Network Connection
Windows Wireless Network Connection Connecting to a network 1� Switch ON the Wireless function if necessary for your model (see switches in Section 3)� 2� Press [FN F2] repeatedly until Wireless LAN 2b� Or double click the Wireless Console icon on ON or WLAN &... -
Page 57: Bluetooth Wireless Connection (On Selected Models)
You can wireless connect to your mobile phone. Depending on your mobile phone’s capabilities, you can transfer phone book data, photos, sound files, etc. or use it as a mo- dem to connect to the Internet. You may also use it for SMS messaging. -
Page 58: Antenna Connections (On Selected Models)
Using the Notebook PC Antenna Connections (on selected models) This page shows multimedia connections for TV Tuner Models. TV and radio features require built-in modules only on selected models. IMPORTANT! The Notebook PC must be used indoors when using the antenna. -
Page 59: Media Center Remote Controller (On Selected Models)
The Media Center on-screen menus are designed for remote control interaction, providing users with a convenient and engaging way to access digital media from across the room. A Media Center remote control functions like a remote control for any other consumer electronics device, such as an audio/ video receiver or DVD player. -
Page 60: Direct Console 2�0
Click the gear button in the Performance area to adjust the system performance. The Turbo and Turbo Extreme mode require more power than Normal mode. Clear the Enable in battery mode check box if you do not want to use these two modes without attaching the power adapter. - Page 61 Click Advance, and then click the gear button to do the advanced configurations. There are two sets of Notebook PC LEDs in different locations. Click the LED buttons on the top to set up the LED acti- vated event and customize the Lighting behavior respectively.
- Page 62 Display. Click or clear the check boxes in the Real-time message and Fixed message areas to change the displayed messages. To add a special notice, click the Note check box and type the mes- sage in the box. You can preview all the messages in the preview pane on the right.
- Page 63 Using the Notebook PC 4� Click your account name box and click Turn on “Direct Console.” 5� You will see Direct Console under your account name box if it is properly turned on�...
- Page 64 Using the Notebook PC...
-
Page 65: Appendix
System BIOS Settings Common Problems and Solutions Windows Software Recovery Glossary Declarations and Safety Statements Notebook PC Information Photos and icons in this manual are used for artistic purposes only and do not show what is actually used in the product itself. -
Page 66: Optional Accessories
USB peripherals through a single cable. USB Flash Memory Disk A USB flash memory disk is an optional item that can replace the 1.44MB floppy disk and provide storage up to several hundred megabytes, higher transfer speeds, and greater durability. -
Page 67: Optional Connections
Windows navigation to be more comfortable. Both the external USB keyboard and mouse will work simultaneously with the Notebook PC’s built-in keyboard and touchpad. Printer Connection One or more USB printers can be simultaneously used on any USB port or USB hub. -
Page 68: Bluetooth Mouse Setup (Optional
Bluetooth Mouse Setup (optional) This process can be used to add most Bluetooth devices in Windows operating system. 1� Switch ON the Wireless function if necessary for your model (see switches in Section 3)� 2� Press [FN F2] repeatedly until Bluetooth ON or 2b�... - Page 69 8� Wait while the Bluetooth mouse is being added� 9� Click Finish when adding is complete� 10� You will see your device in the window� You can also add or remove Bluetooth devices here� “RESET” may be necessary after changing batteries. Repeat steps if necessary.
-
Page 70: Operating System And Software
A recovery disc is optional and includes an image of the original operating system installed on the hard drive at the factory. The recovery disc provides a comprehensive recovery solution that quickly restores the Notebook PC’s operating system to its original working state provided that your hard disk drive is... -
Page 71: System Bios Settings
Appendix System BIOS Settings Boot Device 1� On the Boot screen, select Boot Device Priority. 2� Select each item and press [Enter] to select a device� Security Setting To clear the password: 2� Type in a password and press [Enter]�... -
Page 72: Save Changes
Password Check User Access Level Select whether to ask for a password during bootup (Always) Select the level of access to allow the “User Password” to or only when entering the BIOS setup utility (Setup)� have in the BIOS setup utility�... - Page 73 System BIOS Settings (cont.) RAID Function Support (on selected model) For models support RAID function, you must set the RAID item in the BIOS Setup before you can create a RAID set from the built-in hard disk drives. WARNING! Building a RAID set will clear all your data on both the primary disk drive and the secondary disk drive, including Express Gate.
-
Page 74: Common Problems And Solutions
1. Register the Notebook PC for a one-year-warranty using the following website: http://member.asus.com/login.aspx?SLanguage=en-us 2. Do NOT remove the battery pack while using the Notebook PC with the AC adaptor to prevent damage caused by the accidental power loss. The ASUS battery pack has protection circuitry to prevent over-charging so it will not damage the battery pack if it is left in the Notebook PC. - Page 75 Mechanical Problem - FAN / Thermal Why is the cooling fan always ON and the temperature high? 1. Make sure that the FAN works when the CPU temperature is high and check whether there is air flow from the main air vent. 2. If you have many applications running (see taskbar), close them to decrease system load.
- Page 76 Software Problem - ASUS bundled software When I power ON the Notebook PC, there will be an “Open policy file error” message. A. Reinstall the latest version “Power4 Gear” utility to solve your problem. It is available on the ASUS website.
- Page 77 1. Please verify the Notebook PC’s exact model and download the latest BIOS file for your model from the ASUS website. 2. Use the “WINFLASH” utility to update your BIOS. The utility can be found in your Driver & Utility CD that came with your Notebook PC.
- Page 78 Common Problems and Solutions (Cont.) Symantec’s Norton Internet Security (NIS) 1. Sometimes NIS will show an alert to stop a Trojan virus from a local IP address. This problem can be solved by making sure the virus definition file is the latest one and regularly updating the virus definition file. 2. Reinstalling fails at the “Information Wizard” after uninstalling Norton Antivirus. Make sure NIS has been uninstalled from your computer, reboot your system, install NIS again, use “Live Update”...
- Page 79 Turn off Privacy Control from “Status & Settings”. 11. Insufficient privilege message. Many settings, including disabling or uninstalling NIS, require you to be logged into Windows with Administrator privileges. Log Off and switch to a user account with Administrator privileges. A-15...
-
Page 80: Windows Vista Software Recovery
3. Read the “ASUS Preload Wizard” screen and click Next. 4. Select a partition option and click Next. Partition options: Recover Windows to first partition only. This option will delete only the first partition, allowing you to keep other partitions, and create a new system partition as drive “C”. Recover Windows to entire HD. - Page 81 “CD/DVD”) using the down cursor and press <Enter> to boot from the Recovery DVD. 3. Select a partition option and click Next. Partition options: Recover Windows to first partition only. This option will delete only the first partition, allowing you to keep other partitions, and create a new system partition as drive “C”. Recover Windows to entire HD.
-
Page 82: Glossary
BIOS file into the EEPROM. Bit (Binary Digit) Represents the smallest unit of data used by the computer. A bit can have one of two values: 0 or 1. Boot Boot means to start the computer operating system by loading it into system memory. - Page 83 VGA, audio, Ethernet, printer, or modem. DVD is essentially a bigger, faster CD that can hold video as well as audio and computer data. With these capacities and access rates, DVD discs can provide you with dramatically-enhanced high-color, full-motion videos, better graphics, sharper pictures, and digital audio for a theater-like experience.
- Page 84 Class 4 laser is operating without proper eye protection. PCI Bus (Peripheral Component Interconnect Local Bus) PCI bus is a specification that defines a 32-bit data bus interface. PCI is a standard widely used by ex- pansion card manufacturers.
-
Page 85: Suspend Mode
The time-out setting of both Hard Disk and Video can be set by the BIOS Setup. The Power LED blinks when the Notebook PC is in STR mode. In STD mode, the Notebook PC will appear to be powered OFF. -
Page 86: Declarations And Safety Statements
“Region Definitions” below. Copyright laws require that all DVD movies be limited to a particular region (usually coded to the region at which it is sold). While DVD movie content may be released for multiple regions, CSS design rules require that any system capable of playing CSS encrypted content must only be capable of playing one region. -
Page 87: Internal Modem Compliancy
Overview On 4th August 1998 the European Council Decision regarding the CTR 21 has been published in the Official Journal of the EC. The CTR 21 applies to all non voice terminal equipment with DTMF-dialling which is intended to be connected to the analogue PSTN (Public Switched Telephone Network). - Page 88 National requirements will apply only if the equipment may use pulse dialling (manufacturers may state in the user guide that the equipment is only intended to support DTMF signalling, which would make any additional testing superfluous).
-
Page 89: Federal Communications Commission Statement
• This device must accept any interference received, including interference that may cause undesired operation. This equipment has been tested and found to comply with the limits for a class B digital device, pursuant to Part 15 of the Federal Communications Commission (FCC) rules. These limits are designed to provide reasonable protection against harmful interference in a residential installation. -
Page 90: Ce Mark Warning
• Radio test suites according to [EN 300 328-2] CE Mark Warning This is a Class B product, in a domestic environment, this product may cause radio interference, in which case the user may be required to take adequate measures. -
Page 91: Wireless Operation Channel For Different Domains
• Maximum authorized power indoors is 100mW • Maximum authorized power outdoors is 10mW Departments in which the use of the 2400–2483.5 MHz band is permitted with an EIRP of less than 100mW indoors and less than 10mW outdoors: 01 Ain Orientales... -
Page 92: Ul Safety Notices
These batteries contain metallic lithium, or a lithium alloy, or a lithium ion, and may consist of a single electrochemical cell or two or more cells connected in series, parallel, or both, that convert chemical energy into electrical energy by an irreversible or reversible chemical reaction. - Page 93 Batterien nach Angaben des Herstellers. (German) ADVARSELI! Lithiumbatteri - Eksplosionsfare ved fejlagtig håndtering. Udskiftning må kun ske med batteri af samme fabrikat og type. Levér det brugte batteri tilbage til leverandøren. (Danish) VARNING! Explosionsfara vid felaktigt batteribyte. Använd samma batterityp eller en ekvivalent typ som rekommenderas av apparattillverkaren.
-
Page 94: Optical Drive Safety Information
Optical Drive Safety Information Laser Safety Information Internal or external optical drives sold with this Notebook PC contains a CLASS 1 LASER PRODUCT. Laser classifications can be found in the glossary at the end of this user’s manual. WARNING! Making adjustments or performing procedures other than those specified in the user’s manual may result in hazardous laser exposure. - Page 95 Appendix CTR 21 Approval (for Notebook PC with built-in Modem) Danish Dutch English Finnish French German Greek Italian Portuguese Spanish Swedish A-31...
-
Page 96: Notebook Pc Information
Notebook PC Information This page is provided for recording information concerning your Notebook PC for future reference or for technical support. Keep this User’s Manual in a secured location if passwords are filled out. Owner’s Name: ___________________________ Owner’s Telephone: ______________... -
Page 97: Copyright Information
ASUS will only be responsible for or indemnify you for loss, damages or claims based in contract, tort or infringement under this Warranty Statement. This limit also applies to ASUS’ suppliers and its reseller. It is the maximum for which ASUS, its sup- pliers, and your reseller are collectively responsible.
Need help?
Do you have a question about the G71G and is the answer not in the manual?
Questions and answers