
Subscribe to Our Youtube Channel
Related Manuals for Apex Digital DRX-9200

Summary of Contents for Apex Digital DRX-9200
- Page 1 DVD+R/RW Recorder PLAY INPUT STOP VIDEO AUDIO S-VIDEO I-LINK DRX9200 Owner's Manual Playable Disk Format: DVD/DVD+R/DVD+RW/VCD/AUDIO CD/MP3 CD/ Kodak Picture CD/ JPEG Picture CD www.apexdigitalinc.com...
-
Page 2: Fcc And Safety Information
Confi dential Unpublished Works. ©1992-1997 Dolby Lab o ra to ries, mode. Press I/P on your remote control to cycle between the two modes. Inc. All rights reserved. Please refer to page 21 in this manual to learn more about this func- tion. -
Page 3: Important Safety Instructions
To reduce the risk of fi re or electric shock, do not expose this apparatus to rain or moisture. The WARNING: apparatus shall not be exposed to dripping or splashing and that no objects fi lled with liquids, such as vases, shall be placed on the apparatus. -
Page 4: Precautions
Depending on the reception condition of the TV, interference may appear on the TV monitor while you watch a TV broadcast and the unit is left on. This is not a malfunction of the unit or the TV. To watch a TV... -
Page 5: Defi Nition Of Terms
DVD+R/RW discs. Play Time This indicates the play time which has elapsed from the start of a disc or a title. It can be used to fi nd a specifi c scene quickly. (It may not work with some discs.) - Page 6 Defi nition of Terms Protect Title A feature of a DVD+RW disc, that when selected, will prevent a title to be accidentally erased from the disc. Subtitles These are the printed lines appearing at the bottom of the screen which translate or transcribe the dia- logue.
-
Page 7: Table Of Contents
Pause Playback ........25 Stopping Playback and Returning to the Menu Screen How to Program the Order of Playback....25 (If a Menu Screen is Available on The Disc) ..13 Selecting Music by Track......27 Stopping Playback ........14 Selecting Music by Time......27 Fast Forward (Fast Backward)...... -
Page 8: Table Of Contents
How To Schedule A Recording ...... 35 RATINGS Setting [DVD]........ 54 2-5 Editing Options.........36 PASSWORD Setting [DVD]......55 How To Edit a Title While the Title is Playing On Date/Time Setting ........56 A DVD+RW)..........36 Schedule (Record) Setting ......57 How To Remove A Chapter While Its Playing (On A DVD+RW)..........37... -
Page 9: Introduction (Feature Overview)
PCD fi les. Record live or scheduled television broadcasts in multiple recording modes. Up to 6 hours of recording can be achieved using one side of a DVD+R or DVD+RW disc. Besides the built-in TV tuner, your recorder/player incorporates progressive scan video for the best fi lm-like quality picture. -
Page 10: Playable Discs
If you load a disc of a different region code to your player, you will see the region code notice on the screen. The disc will not play, and should be unloaded. -
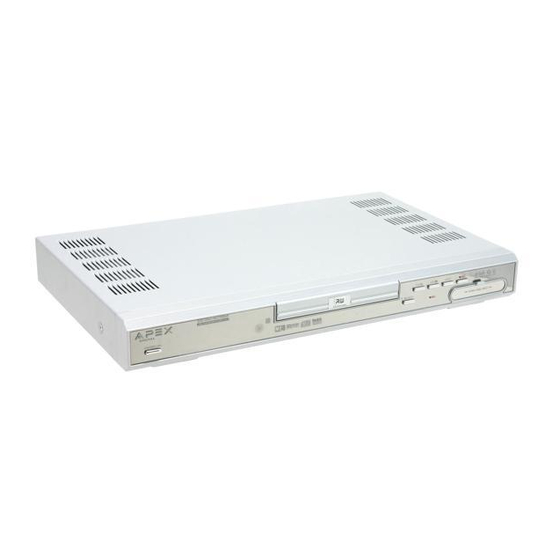
Page 11: Functional Overview (Front Panel)
Note: By connecting the RF coaxial cable to ANTENNA IN/TV OUT jacks of this DVD Re cord er, you can still watch your TV even if this DVD Recorder is off. This function allows you to watch channels on TV normally while this DVD Re cord er is off and will improve the reception at your TV. -
Page 12: Functional Overview (Led Indicator)
Lights when an audio CD is loaded JPEG dts indicator Lights when a MP3 disc is loaded Lights when a Koad Picture or a JPEG Lights when dts is present compatible CD is loaded while playing the disc Schedule REC indicator... -
Page 13: Functional Overview (Front Panel Display)
Remote Control Operation Range Point the remote control unit approximately no more than 20 feet from the remote sensor and approximately within 60° from the front of the unit. The operating distance may vary depending on to the brightness in the room. -
Page 14: Dvd & Cd Playback
The disc tray closes and the DVD unit starts playback. If the disc has one or more titles recorded on it, a menu screen will appear on the TV screen. Proceed with steps 5 and 6 when a menu is available on the disc. -
Page 15: Stopping Playback And Returning To The Menu Screen (If A Menu Screen Is Available On The Disc)
Press Menu. The DVD Recorder stops playback, and then displays the menu screen at the beginning of the disc. After operation When the DVD Recorder is not in use, remove the disc and press the Power button located Power button located Power on the remote control to enter Standby-By mode. -
Page 16: Skipping Ahead Or Back To Chapters
Prev. during play back. Press When you press the button once midway through a chapter, the DVD Recorder returns to the previous chapter to play back. The player skips a chapter each time you press the button quickly. Still Picture (Pause) Press Pause once during playback. -
Page 17: Direct Selection Of Scenes
, and the current (time) box turns yellow. Press the number button(s) to spec i fy the starting position. Example: To locate “01 hr. 50 min. 00 sec.”, press “0”,“1”, “5”, “0”, “0” and “0”. Press The DVD Recorder starts playback from the specifi ed position. -
Page 18: Repeat Playback
2 Press A-B again at the point where repeat play is to end (B). appears on the right corner of the screen. Repeat playback of points A to B starts playback. To return to normal playback Press A-B until disappears. -
Page 19: Using Other Remote Control Functions
Press Zoom a number of times until the zoom window box disappears. Changing Audio Soundtrack Language You can change the audio language from the one se lect ed at the initial settings to a different language, if available. (This op er a tion func tions only with discs on which multiple audio soundtrack lan guag es are recorded.) -
Page 20: Clearing/Changing Subtitles
Viewing From Another Angle Certain DVD discs may contain scenes that have been shot si mul ta neous ly from a number of dif- ferent angles. For these discs, the same scenes can be viewed from each of these different angles using the ANGLE “... -
Page 21: The Title Menu Function
Note: Certain DVD discs are divided into titles. The titles are then subdivided into chapters. Moreover, Audio CDs and MP3 are divided into tracks. You can easily locate any specifi c title, chapter or track with this player/recorder. Most commerically available DVDs contain one... -
Page 22: Interlaced/Progressive Setting
This function only works on recorded DVD+R/RW discs. VCD Menu (only for VCD 2.0) PBC is a function which provides a menu for you to choose and start from your selected chapter. Use VCD2.0 discs with menus. Press PBC twice during playback. -
Page 23: Playing Kodak Picture Cds And Jpeg Files
Using Other Remote Control Functions Playing Kodak Picture CDs and JPEG Files You can play Kodak picture CDs and JPEG pictures for viewing on screen in a slide show style presentation. Basic Playback Basic Playback Basic Playback Load a Kodak picture CD on the tray. -
Page 24: Audio Cd Playback
Turn on your DVD Recorder/Player. Turn on your TV, cycle through your video sources (video 1, video 2, etc) to fi nd the input used for DVD. Turn on your stereo system if the player has been connected to a stereo system. -
Page 25: Stopping Playback
A track is skipped each time you press the button. Skipping Back Skipping Back Prev. during playback. Press When you press the button once midway through a track, the unit returns to the previous track to play back and skips a track each time the button is pressed. -
Page 26: Pause Playback
This will pause playback. To return to normal playback Press How to Program the Order of Playback You can program music to play back in your favorite order. When programming an Audio CD: A List of the total songs on your Audio... - Page 27 The default playback order will start from the beginning to the end of the tracks. If you set the playback order of the available tracks, the DVD Recorder will play back the order you’ve specifi ed.
-
Page 28: Selecting Music By Track
” appears while you are pressing a button, it may indicate that the corresponding operation is pro hib it ed by the player. To exit selecting music by time, press Goto while the box turns white. (If the box turns yellow, you can’t choose other options.) This function only works within a track, so your input time number can’t be more than... -
Page 29: Random Playback
” appears while you are pressing a button, it may indicate that the corresponding operation is pro hib it ed by the player. To exit repeat playback, press Goto while the box turns white. (If the box turns yellow, you can’t choose other options.) -
Page 30: Before Recording
2. Verify that the DVD Recorder is connected to your external equipment correctly. Please refer to the enclosed Quick Connection Guide for further information. 3. Make sure to use the proper disc (with free space) for recording. This unit is designed for recording DVD+R/DVD+RW discs only. -
Page 31: Record Setup
Chapter 3-2: RECORD/DISC Setup (Page 51) for details. Finalize Setting After being recorded and fi nalized, the recorded disc can be played back on a standard DVD PLAYER, PROVIDED IT ACCEPTS AND CAN READ DVD+R/RW DISCS. Please refer to Chapter 3-2: RECORD/DISC Setup (Page 47) for details. -
Page 32: Quick Record (Brief Tutorial)
How To Record a TV Program How To Record a TV Program Turn on your tv, and select the proper video input used to monitor the DVD recorder’s signal (i.e. video 1, video 2, etc.) Press Input on the remote control repeatedly to view TV channels through the DVD Recorder. -
Page 33: Recording
Press Press If you use a brand new DVD+RW or DVD+R disc, the fi rst reading will take about one minute. If this DVD Recorder reads a new DVD disc, the disc will be formatted automatically and then show one empty title with 100% free disc space. If this DVD Recorder reads a used DVD disc, a Title menu will show the available title for play and available space left for recording. -
Page 34: How To Record From I-Link Compatible Equipment
5 seconds. Note 2: On some DV models, you must press PLAY before you try to record otherwise, it may cause the recorder to freeze. In this case, disconnect and reconnect the AC power, Press Cancel when the “Unexpected Power Off Detected; Recover... -
Page 35: Howto Record Tv Programs (Instant Record)
Press to play back the preferred recordings. Three title boxes will be shown on the TV screen at one time. If there are more than three title boxes, press to continue to the next page. -
Page 36: How To Schedule A Recording
TV channel number by pressing number or CH+- buttons. IMPORTANT: After the scheduled recording has fi nished, a warning message “Exit Setup then Switch Off for timer recording!“ will appear on the screen. Press the Power on the remote con- Power on the remote con- Power trol to enter Stand-By mode. -
Page 37: Editing Options
Your DVD Recorder provides two ways to edit a title. One is to edit a title while the title is playing, the other is to edit a title while the title is not playing. -
Page 38: How To Remove A Chapter While Its Playing
Please review page 36 “Insert a Chapter”. Once a chapter is hidden, it will not show up during normal playback. If you want to see the hidden chapter, you have to select it by chapter number. For details please refer to Chapter 1-2: “Direct Selection of Scenes”... -
Page 39: How To Show A Chapter While Its Playing
If the new thumbnail does not match the scene you selected in “New picture” it is probabaly due to the delay time in the recorder when it is trying to capture the picture. This usually occurs when the title is recorded using a lower quality recording setting such as LP, EP or SLP. -
Page 40: How To Protect A Title On A Dvd+Rw Disc
Editing Options -continued You have Four options to edit a title when using a DVD+RW disc: Protect Title, Erase Title, Play full title, and Edit Title. You have three options to edit a title when using a DVD+R disc: Edit Title, Play full title and Finalize. -
Page 41: How To Play A Full Title On A Dvd+Rw Disc
Title button. To go back to Title Selection Menu, press DVD+RW How To Edit or Change The Title Name On A DVD+RW Disc How To Edit or Change The Title Name On A DVD+RW Disc Press to select a title from the title menu. -
Page 42: How To Edit A Title On A Dvd+R Disc
How To Edit a Title on A DVD+R Disc Press to select a title from the title menu. Press Edit on your remote, the EDIT menu will be shown on the screen. Press to select “Edit Title”, and then press An “Edit Title”... -
Page 43: Initial Settings Before Use
(Please refer to Chapter 1: DVD on Page 13) There are fi ve parts in the Setup menu to choose from for the settings that best suit your situation, includ- ing CHANNEL, RECORD/DISC, VIDEO, SYSTEM and SCHEDULE. - Page 44 Initial Settings Before Use -continued C. Under VIDEO Setup: D. Under SYSTEM Setup: E. Under SCHEDULE Setup: Please refer to the OSD instruction to adjust settings.
- Page 45 DVD Recorder. 2. Turn on your TV, and switch it to the correct Video input. (video 1, video 2, etc.) 3. Press Setup button in the stop mode in the stop mode to display the menus.
-
Page 46: Tv Channel Setup
TV CHANNEL Setup TV Channel Search Setting Channel Search is a tuner search and allows a channel to be confi rmed. During initial setup, this DVD Recorder will select available TV channels. If more channels become available in your area, you may need to repeat the Channel Search to update the available channels. -
Page 47: Add/Del Tv Channel Setting
TV CHANNEL Setup -continued Add/Del TV Channel Setting Press Setup in the stop mode to display the menus. Select “CHANNEL” by pressing Press to select “Add / Delete Channel”, and then press Press to choose the preferred channel number. Press to add or delete the se lect ed channel. -
Page 48: Record / Disc Setup
DVD+R DVD+RW Once you’ve inserted a DVD+R or DVD+RW disc, a Title Menu automatically appears on the Screen. For details on how to edit the titles, please refer to Chapter 2-5: Editing Options (page 40). If you place a blank DVD+R or DVD+RW disc, the DVD recorder will automatically start formatting formatting the disc. -
Page 49: Auto Chapter Setting
For details, please refer to Chapter 2-5: Editing Options on page 36. The OSD Example in the right is when No Disc is placed. If you insert a DVD+R or DVD+RW disc, the OSD will be shown as follows :... -
Page 50: Disc Info. Setting
Disc type, Total title, Total recorded time and Total free time. If you placed a DVD+R disc that has not been fi nalized If you placed a Closed DVD+R disc (Alreday fi nalized) If you placed a DVD+RW disc... -
Page 51: Finalize Your Dvd+R Disc
The fi nalization function only works once in DVD+R discs. You can also fi nalize the disc by using the “Edit“ function. For details please refer to Chapter 2-5: Editing on page 36. To return to the Setup MENU screen Press button. -
Page 52: Protect Disc Setting
The “Protect Disc” option will become “Unprotect Disc” when a protected disc is detected. l Once the Disc is Protected, the “Erase“ and “Make Compatible” function will become disabled and you will not be able to record on this disc until you “Unprotect” the disc. To return to the Setup MENU screen Press button. -
Page 53: Video Setup
VIDEO Setup TV Type Setting The kind of TV set (4:3 or 16:9) connected to this DVD Recorder can be se lect ed. Press Setup in the stop mode to display the menus. Press to select “VIDEO” and press Select “TV type” by pressing Press to select a preferred TV display. -
Page 54: System Setup
“Confi rm”, and then press to reset. After selecting “Confi rm”, this DVD Recorder will reset every setup item in the setup menu. When factory default is done, the machine will automatically restart. To return to the Setup MENU screen Press button. -
Page 55: Ratings Setting [Dvd]
A built-in viewer rating setting enables you to lock the videos that you do not want children to view. For ex am ple, if you set it to PG-13 then the player will not play the videos rated R, NC-17 or X unless the correct pass word is entered. -
Page 56: Password Setting [Dvd]
Input a NEW 5-digit password with the number buttons. Enter your new password again for confi rmation, and then press Input the same 5-digit password as in Step 5 with the number buttons. If you’ve input the wrong password, the following screen will appear: * Input 5-digit numbers Please then re-enter your password. -
Page 57: Date/Time Setting
SYSTEM Setup -continued Before you do Schedule Recording, make sure you have set up both date and time in advance. Other- wise, the schedule recording will be invalid. Date/Time Setting Press Setup in the stop mode to display the menus. -
Page 58: Schedule (Record) Setting
TV programs, enter the TV channel number by pressing number or CH+- buttons. IMPORTANT: After fi nishing the schedule recording, a warning message “Exit Setup then Switch Off for timer recording!“ will appear on the screen. You have to press the Power on the remote Power on the remote Power control to enter stand-by mode. -
Page 59: Troubleshooting
Before requesting service for the DVD Recorder, check the chart below for a possible cause of the problem you are ex pe ri enc ing. Some simple checkups or a minor adjustment on your part may eliminate the problem and restore proper op er a tion. We also encourage you to visit our website at www.apexdigitalinc.com... - Page 60 -continued SYMPTOM (COMMON) REMEDY PLAY does not start playback even when • This may be a result of the parental lock function that has been set. Confi rm the title is selected. “PARENTAL” setup. Audio soundtrack and/or subtitle language • If the audio soundtrack and/or subtitle language does not exist on the disc, the is not the one selected at the initial settings.
-
Page 61: Disc Handling And Maintenance
Be careful not to drop or bend the disc. Do not install more than 1 disc on the disc tray. Do not try to close the disc tray when the disc is not installed properly. (B) Be sure to store the disc in its exclusive case when not in use. - Page 62 APEX Digital, Inc. dealer in N. America. Keep your original box and packaging in case your unit needs to be shipped to us. You will need to prepay shipping and APEX will pay the cost of shipping the unit back to you.
Need help?
Do you have a question about the DRX-9200 and is the answer not in the manual?
Questions and answers