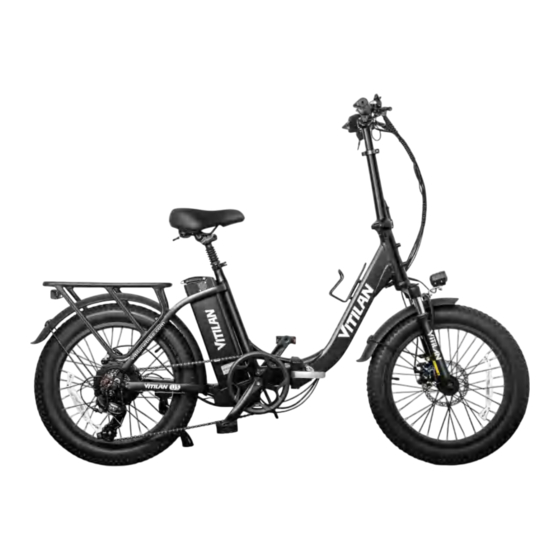
Summary of Contents for Vitilan U3
- Page 2 P4 - P15 P16 - P21 P22 - P26 P27 - P28 P29 - P30...
- Page 7 Kickstand Installation Instruction Step 1: Finding out the kickstand and2 bolts and Step 2: Tightening the bolts separately with a 5mm spacers in the box, install the kickstand on the hexagonal tool. frame mounting hole by the bolts and spacers.
- Page 8 Front Fender and Headlight Installation Step 1: Finding the headlight, bolt, spacer, align them together, Step 2: Adjusting the headlight to the center posi- and let the bolts pass through the headlight mounting holes, tion, and use a 5mm hexagonal tool to gradually spacer , and front fender hole correctly.
- Page 9 Brake Rotor Installation Instruction Step 1: Putting the brake rotor on the front Step 2: Aligning the 6 holes on the brake rotor wheel axle. with the 6 corresponding holes on the axle. Step 3: Finding out 6 brake screws and put Step 4: Tightening the screws with a 4mm hex- them into the brake mounting holes.
- Page 10 Front wheel installation Instruction Step 1: Aligning the front wheel and the front Step 2: installing the front fork hook, align it with the corresponding position, and insert the front fork hooks axle, then insert the front fork on the front axle.
- Page 11 Folding Stem Installation Instruction Step 1: inserting the folding stem into the tube of the e-bike, lock the latch of the folded stem, and then unfold the folded part of the stem. Step 3: If the handlebar angle is a little mis- aligned, use two legs hold the front wheel, and fining out the folding stem.
- Page 12 Seat Post Installation Instruction Step 1: unlocking the buckle and inserting Step 2: Adjusting the bolt on the buckle 1-2 the seat post into the seat tube. times to tighten the buckle slightly. Step 3: Locking the buckle to fasten the seat post on the e-bike.
- Page 13 Rear Derailleur Guard Installation Instruction Step 1: fining out the rear derailleur guard. Step 2: Using an 18mm wrench to turn Step 3:putting the rear derailleur guard on counterclockwise several times to loosen the rear wheel axle. the bolt, loosen the spacer and bolt. Step 4: Installing the spacer on the axle.
- Page 14 Pedal Installation Instruction Step 1: Finding out the right pedal with the letter “R”, then align Step 2. Using a 15mm wrench to tighten the the pedal axle with the hole on the right crank, and firstly use your right pedal clockwise. hands to correctly screw the pedal into the hole clockwise.
- Page 15 Water Bottle Rack Installation Instruction Step 1: Finding out the rack and it with bolts and Step 2: Using a 4mm hexagonal tool to tighten the spacers and installing them on the frame. bolts and fasten the water bottle rack.
- Page 16 Rear Rack Installation Instruction Step 2: Adjusting the position of the rear rack and Step 1: Putting the rear rack on the rear frame, aligning it with the mounting holes, and installing spacers and using a 4mm hexagonal tool to tighten the bolts & bolts on the rear rack.
- Page 17 Tire Air Refill Step 2: Recommended inflation pressure for 20"x3.0" Step 1: Before the bike leaves the factory, the tire pressure is about half as low. Before riding, check tires: 22-25PSI for adequate air pressure.


Need help?
Do you have a question about the U3 and is the answer not in the manual?
Questions and answers
comment changer ecran lcd du U-3 de vitilan. et quel ecran acheté.
To replace the LCD screen of the Vitilan U3, you need to:
1. Identify the cable types in front of the handlebars to ensure compatibility.
2. Match the correct display unit based on those cable types.
3. Purchase the compatible display model. Suitable options listed include V3 C1+, U7 2.0 C1+, I7PRO 2.0 C1+, T7 C1+, and T7 pro C1+.
4. Install the new display by connecting it to the appropriate cables.
The correct screen to purchase depends on the specific configuration of your Vitilan U3. Use the cable type to choose the matching USB display.
This answer is automatically generated
13 p blocked
The "13 p blocked" error on the Vitilan U3 likely indicates a problem with the motor or wheel hub being blocked or obstructed. It may also relate to poor connection or damage in the motor wiring. Check for physical obstructions and inspect the motor cable connections.
This answer is automatically generated
manuel du vitilan en francais