
Summary of Contents for Topex 7100 Series
- Page 1 Controller topex 7100 Controller for printer, dispenser and handling device USER MANUAL Version 1.5 Keep for further use topex GmbH • Daimlerstraße 2 • D-73268 Erkenbrechtsweiler www.topex.de...
- Page 2 Address of manufacturer topex GmbH Daimlerstraße 2 D-73268 Erkenbrechtsweiler Phone: (+49) 7026 / 9316 - 0 Internet: www.topex.de Email: zentrale@topex.de Service and Support Same address as above Phone (+49) 7026 / 9316 - 80, (+49) 7026 / 9316 - 0...
- Page 3 They are not part of this user manual. Operating personnel Only personnel authorized by topex GmbH are allowed to operate the topex labelling machine. Additional requirements, qualifications and skills that are required for special works can be found in the respective chapter.
-
Page 4: Table Of Contents
Use according to requirements ................. 2-1 Marking of Controller ..................2-1 Workplace ......................2-1 2.3.1.1 Interface of labelling system: ................2-1 2.3.2 Control unit topex 7100 ..................2-4 Technical Data ....................2-6 2.4.1 Control unit topex 7100 ..................2-6 2.4.2 Options ......................2-7 Transport and installation ................ - Page 5 Temporary shutdown ..................7-1 Final shutdown / disposal.................. 7-2 Control unit topex 7100 .................. 8-1 Introduction of control unit topex 7100 .............. 8-1 Control unit topex7100 – front view ..............8-2 Control unit topex7100 – Rear view ..............8-3 Control unit topex7100 – Rear view with optional assembly units ....8-4 Overview of interfaces ..................
- Page 6 topex7100 8.5.8.1 I/O-interface (Junior-Simulation) ..............8-13 8.5.8.2 Data cable labelling machine ................8-14 8.5.8.3 Power supply of labelling machine ..............8-14 Operation of touch panel ................9-1 Menu setting of labelling machine (printer menu) ..........9-1 Operation of touch panel .................. 9-2 Menu tree of printer menu.................
- Page 7 topex7100 9.3.4.10 System date ....................9-12 9.3.4.11 System time ....................9-12 9.3.5 Printer menu „PLC“ ..................9-13 9.3.5.1 Autostart ......................9-13 9.3.5.2 Pressure time in ms ..................9-13 9.3.5.3 Waiting time 1 in ms ..................9-13 9.3.5.4 Waiting time 2 in ms ..................9-13 9.3.5.5 Delay Aux.
- Page 8 topex7100 9.6.1 PLC menu „Service“ ..................9-21 9.6.1.1 Home position ....................9-21 9.6.1.2 Automatic cycle ....................9-21 9.6.1.3 IO-Test (password protected) ................. 9-21 9.6.1.4 Scan ....................... 9-21 9.6.2 PLC menu „Customer“ ..................9-21 9.6.3 PLC menu „Actuators“ ..................9-22 9.6.4 PLC menu „ExActuators“...
- Page 9 topex7100 11.1 Brief description ....................11-1 11.2 Selection ......................11-2 11.3 Operation ......................11-2 11.4 Description of control objects ................11-4 11.5 Interpreter of PLC programs in the control unit ..........11-7 Data of controlling at acceptance test ............12-1 BIOS-Parameter ....................
-
Page 10: Safety Devices
topex7100 Safety Devices Explanation of symbols and reference notes Danger! This reference note means an immediate threatening danger for life and health of persons. ⇒ Failure to observe these notes will result in severe damages to your health or even to your life. Warning! This reference note means a possible threatening danger for life and health of persons. -
Page 11: Dangers At The Controller Unit
topex7100 Dangers at the controller unit 1.2.1 Sources of danger There can be a dangerous electrical voltage on the supply cable of the labelling machine: • On the supply cable between control unit and labelling machine • On the electrical connectors of driving motor, on the printer and inside the housing of the labelling machine. -
Page 12: Safety Instructions
Warning! Exclusively authorized stuff, trained by topex GmbH and with the required qualifi- cations, may operate and adjust the control unit topex 7100. ⇒ Improperly made changes on the control unit might result in faults or damages to the labelling system and in injuries for the operator. -
Page 13: Responsibility Of Stuff
topex7100 1.3.2 Responsibility of stuff All persons that work on the machine are, before start of work, obliged to: • follow the basic regulations of job safety and the rules of accident prevention, • read the safety chapters and warnings of this user manual. 1.3.3 Safety measures in normal operation The machine shall only be operated by trained and authorised personnel who are... -
Page 14: Safety Measures For Maintenance And Servicing
Safety measures for maintenance and servicing We recommend that maintenance or repairs are carried out in principle by specially trained personnel only or to assign topex service technicians for this purpose. Carry out the setup-, maintenance- and inspection works on the due date. -
Page 15: Works On The Pneumatic Equipment
topex7100 • Refasten loose connections. • Replace damaged wires and cables immediately. 1.3.6 Works on the pneumatic equipment Maintenance and repair work on the pneumatic equipment shall only be assigned to specially trained personnel. • Remove the pressure of the pneumatic system before doing any maintenance and repair work. -
Page 16: Product Description
topex7100 Product description Use according to requirements The system is designed for the integration in existing industrial systems. The ma- chine must not be operated in potentially explosive atmosphere. Marking of Controller The nameplate is mounted on the rear side. The systems comply with the ma- chine directive 98/37/EG inclusive appendix. - Page 17 topex7100 • Power supply - Connection designation on the labelling machine: Power, - Connection designation on control unit: Power 24 V, • Date cable, - Connection designation on labelling machine: Data, - Connection designation on control unit: Print Ctrl, • I-/O-interface – for connection to a superior controlling (24 V, potential free) - Connection designation on labelling machine: I/O, Figure 2 Connection plugs Item Description...
- Page 18 • toplabel: - Graphical user interface to design label layouts for printing. Figure 3 Design of label layouts with toplabel. Example Further details for the optional PC programs can be provided by the sales de- partment of topex. Product description 2-3...
-
Page 19: Control Unit Topex 7100
The control unit is equipped with a touch panel. The handling is menu-driven. The control unit topex 7100 can be equipped depending on its function with a PLC to control the handling device and/or with a TCP/IP interface for the integra- tion in a network. - Page 20 Detailed information about the interface configuration see chapter 8. Detailed information about the operation of the control unit see chapter 9. Further detailed information concerning the control commands and printer func- tions can be found in the Programming Manual – Control unit topex 7100. Product description 2-5...
-
Page 21: Technical Data
Technical Data 2.4.1 Control unit topex 7100 General data Basic function Stepping motor- and printer control Handling Menu-driven Controlling unit Construction 1/2 19“-housing, with ventilator, excess temperature protection and real time clock Controller 32 Bit CISC Microprocessor • 128 MB Flash memory Memory •... -
Page 22: Options
For detailed information about the operation of the control unit refer to chapter 9. Further detailed information concerning the control commands and printer functions can be found in the Programming Manual – topex 7100. 2.4.2 Options • Network connection via TCP/IP interface •... - Page 23 topex7100 Optional PC-Programs • TopTerm: Terminal program supporting the data exchange between PC and control unit. • TopTerm - RemoteControl: Graphical user interface to create PLC programs for handling devices. • toplabel: Graphical user interface to design label layouts for printing. Product description 2-8...
-
Page 24: Transport And Installation
⇒ Do not drive on a ramp or downhill. Information! The assembly and installation of the machine should only be made • By authorized persons by topex or • By topex service technicians according to the safety regulations. Transport and installation 3-1... -
Page 25: Transport
Transport • The transport is made by a forwarding agent from the topex plant to the cus- tomer. • Only fork lift and hand lift trucks are allowed for in-plant transport. 3.2.1 Packaging • In order to avoid machine damage or seriously bodily injury during the transport of the machine, this machine is delivered on a pallet. -
Page 26: Installation
3.3.3 Disposal of packaging material Euro pallet Return to forwarding agent Transport rack Return to topex Foil, label material, crate, Disposal according to the local dis- other materials posal regulations Transport and installation 3-3... - Page 27 topex7100 Notizen Transport and installation 3-4...
-
Page 28: Commissioning And Operation
Safety notes Information! The initial commissioning and the setup of the machine can only be made • By trained persons from topex or • By topex service technicians according to the safety regulations. • The machine may only be used according to regulations. -
Page 29: Notes For The Installation Of The Control Unit
9. Detailed information about the control commands and printer function can be found in the programming manual – control unit topex 7100. • Make sure that the maximum allowed supply voltage is not exceeded. • Check the fuses on the rubber connector. - Page 30 Print- I/O interface (Ju- motor barrier head nior simulation) 3,5“ Disk drive Screen Keyboard Power 24V Print Ctrl Control unit Mouse topex 7100 Power COM1 COM2 COM3 Customer Inputs Outputs Handling Data host 230V Sensors PLC or PC Handling Service-...
-
Page 31: Switching On
topex7100 Switching on 4.3.1 Checks before switching on Ensure that all safety devices are correctly mounted. If not remount them. Check if the setup of the machine is correct and corresponding with the appli- cation. Expel unauthorized persons from the labelling machine. 4.3.2 Processing •... -
Page 32: Switching Off
topex7100 Switching off There are various possibilities to switch off the machine depending on the period of switching off. 4.4.1 Switching off for a longer period • Switch off the control unit. • Switch off the superior system. • Switch of the compressed air. •... -
Page 33: Troubleshooting
topex7100 Troubleshooting Safety notes Caution! By resolving failures dangerous situations can occur. ⇒ Follow the safety regulations in chapter Fehler! Verweisquelle konnte nicht gefunden werden.. • Block the access wide-ranging for unauthorized persons to the working area of the machine. •... -
Page 34: Errors And Corrections
Errors and corrections Categories: • Machine in general, • Error messages on system level, displayed in clear text on touch panel, • Error messages in PLC program, only if a PLC program is activated on the control unit topex 7100. Troubleshooting 5-2... -
Page 35: Machine In General
8 and chapter • Check data line Data line faulty • Change sending and receiving line, if necessary (Pin 2+3) Controlling faulty Correct positioning and control sequences of PC software on the basis of Programming Manual topex 7100 Troubleshooting 5-3... -
Page 36: Error Messages On System Level
topex7100 5.2.2 Error messages on system level Shown as clear text on the touch panel. Error Reason Correction Label does not exist/ A label that was not stored in Store the required label in printer the printer was loaded. WARNING •... - Page 37 topex7100 Error Reason Correction Runtime error/ see Compiler error see Compiler error ERROR I/O Card Error/ The I/O card that realises the Change I/O card. printer functions is defective ERROR (Connection „Print Ctrl“ on con- trol unit). • Change transfer ribbon sensor Transfer ribbon/ The sensor of transfer ribbon sends no feedback.
-
Page 38: Error Messages In Plc Program
5.2.3 Error messages in PLC program Only valid if the PLC program is activated on the control unit topex 7100. Error Reason Correction • Check compressed air (6 bar) Timeout Cyl. WP The respective cylinder has not reached its working position. - Page 39 topex7100 Error Reason Correction Timeout Special in- The special input can be pro- Check the requirement that is con- grammed with Timeout i.e., if trolled by the special input. the object in the sequence is active, this input must lead the signal HIGH in an adjustable time.
- Page 40 topex7100 Error Reason Correction Overload outputs By automatic check of I/O card Change I/O card amongst others all outputs are set simultaneously. One or more inputs had not connected through. Troubleshooting 5-8...
-
Page 41: Maintenance And Servicing
topex7100 Maintenance and servicing Safety notes Danger! Missing safety devices or safety devices without function can endanger your life. ⇒ Operate the machine only with properly working safety devices! ⇒ Shut the machine immediately down if a faulty or ineffective safety de- vice is recognized. - Page 42 Information! • Use only the specified operating material. • Use only original spare parts that are indicated in the topex spare part list. • Do not use thinner, acids or bases even not in thin concentration as cleaning agents.
-
Page 43: Requirements For The Performing Personnel
• Follow the requirements for performing personnel, see chapter 6.2. • Use solely original spare parts that are indicated in the topex spare parts list. • Regard the provided information in the documentation folder. - Page 44 topex7100 Notes Maintenance and servicing 6-4...
-
Page 45: Shutting Down
topex7100 Shutting down Safety notes • Regard the safety notes in chapter 1, „Safety Devices“. • Block the access wide-ranging for unauthorized persons to the working area of the machine. • At disposal pay attention to environmental safety, risks to health, disposal requirements and the local possibilities of disposal according to the regula- tions. -
Page 46: Final Shutdown / Disposal
topex7100 Final shutdown / disposal • Respectively wait until the system is in home position. • Secure all operating media as e.g. compressed air against accidental restart. • Switch off the control unit. • Secure the control unit against unintentional restart. Lock respectively the main switch of the superior system and remove the key. -
Page 47: Control Unit Topex 7100
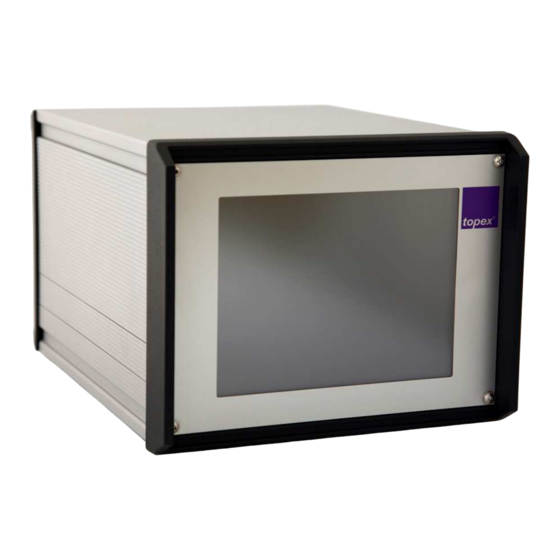
Control unit topex 7100 Introduction of control unit topex 7100 The control unit topex7100 consists of a full-fledged industrial PC. As operating system MS-DOS for standard applications or Windows XP for complicated cus- tomer applications is used. By using a file system the up- and download of the entire settings, fonts, labels, firmware and PLC programs is possible. -
Page 48: Control Unit Topex7100 - Front View
Control unit topex7100 – front view Figure 6 Control unit topex7100 – Front view Control unit topex 7100 8-2... -
Page 49: Control Unit Topex7100 - Rear View
230V-power supply/ power USB for a disk drive supply switch 24V-power supply labelling COM1 (RS232), machine service interface Keyboard and mouse via COM2 (RS232/RS422/RS485), Y-cable Data interface Data cable labelling machine VGA-interface COM3 (RS232), peripheral interface Control unit topex 7100 8-3... -
Page 50: Control Unit Topex7100 - Rear View With Optional Assembly Units
COM2 data interface of the control unit. • The PLC-Board contains 12 digital inputs / 12 digital outputs 24V DC potential free. The following 10-pole bushings are available: The following SUB-D connectors are available: • Control unit topex 7100 8-4... -
Page 51: Overview Of Interfaces
Computer Computer ready for receiving data Printer Request for transmitting always HIGH • Signal description is shown in bolt letters: Signal is compulsory necessary, standard • Signal description is not shown in bolt letters: Signal optional Control unit topex 7100 8-5... -
Page 52: Serial Data Interface Com2
Pin assignment of serial interface COM2 (RS232, RS422, RS485) Description of connector: „COM2“ Connector type: D-Sub-9-pole male connector • Signal description is shown in bolt letters: Signal is compulsory necessary, standard • Signal description is not shown in bolt letters: Signal optional Control unit topex 7100 8-6... -
Page 53: Pin Assignment Rs232
Transmit data „–“ Potential TxD+ Printer Transmit data „+“ Potential RxD+ Computer Receive data „+“ Potential RxD- Computer Receive data „–“ Potential Signal grounding Not connected Not connected Not connected Voltage Power supply optional 5V / 12V DC Control unit topex 7100 8-7... -
Page 54: Pin Assignment Rs485
Function RTX- Transmit / receive data „–“ Potential RTX+ Transmit / receive data „+“ Potential Not connected Not connected Signal grounding Not connected Not connected Not connected Voltage Power supply optional 5V / 12V DC Control unit topex 7100 8-8... -
Page 55: Serial Peripheral Interface Com3
Computer ready for receiving data Printer Request for transmitting always HIGH • Signal description is shown in bolt letters: Signal is compulsory necessary, standard • Signal description is not shown in bolt letters: Signal optional Control unit topex 7100 8-9... -
Page 56: Power Supply
24V. For the circuit diagram refer to the separate documentation folder of the labelling machine. With the program „RemoteControl“ up to 3 pneumatic cylinders, as well as auxiliary air and vacuum can be programmed freely (see chapter 11, „PLC prog- raming with TopTermControl RemoteControl“). Control unit topex 7100 8-10... -
Page 57: Assignment Of Customer Interface Of Plc Board
Start Applying Label is applied onto the product. Step se- quence must contain the object „E_Applying?“ (topTermControl) External acknowledging Error can be acknowledged at topex panel or externally. Emergency Stop IO Emergency Stop cycle closed 24 V from customer 24 V emergency stop potential for all inputs and outputs (optional in groups of 4). - Page 58 LED FOIL, green To I/O-interface Pin 11 To light barrier of transfer ribbon LED DATA, yellow LED LAB, green to I/O-interface Pin 10 To light barrier of label synchro- nisation LED ERR, yellow To I/O-interface Pin 13 Control unit topex 7100 8-12...
-
Page 59: I/O-Interface (Junior-Simulation)
RAM before starting the (Input) next label cycle. 1 - 5 24 V from customer Power supply provided by customer. 14 - 15 0 V from customer Power supply provided by customer. Control unit topex 7100 8-13... -
Page 60: Data Cable Labelling Machine
Power supply of labelling machine Description of bushing on control unit: POWER Description of bushing on interface board on the labelling machine: POWER The labelling machine is connected to the mains via a 4- pin cable. Control unit topex 7100 8-14... - Page 61 Notes Control unit topex 7100 8-15...
-
Page 62: Operation Of Touch Panel
topex7100 Operation of touch panel Menu setting of labelling machine (printer menu) Figure 10 Menu setting of labelling machine Description Function FEED Feed of a blank label. Print Feed of a printed label. If no data record has been yet transmitted or selected a test label is printed otherwise the last printed data record is used (if „Delete after print“... - Page 63 topex7100 Operation of touch panel Figure 11 Operation of touch panel • By pressing the Setup-key you can jump to the firmware menu and back. • By pressing the arrow-keys you scroll through the menu levels. • By pressing the Up- and Down- key you select the values in the menu levels and by pressing the Enter- key you get to the dialogue where the values can be selected or set.
- Page 64 topex7100 Figure 12 Operation of touch panel If a parameter value has been changed then this value after having been ac- knowledged is stored permanently with the OK-key. Figure 13 shows the dialogue for inserting a numeric value. Operation of touch panel 9-3...
-
Page 65: Menu Tree Of Printer Menu
topex7100 Menu tree of printer menu ● Information Chap. 9.3.1 Enter < > ● Label Chap. 9.3.2 ● Quality Chap. 9.3.3 ● Device Data Chap. 9.3.4 ● PLC Chap. 9.3.5 ● Interface Chap. 9.3.6 ● System Chap. 9.3.7 Figure 14 Menu tree of printer menu Operation of touch panel 9-4... -
Page 66: Printer Menu Item „Information
topex7100 9.3.1 Printer menu item „Information“ 9.3.1.1 Warnings In this menu you can set whether warnings (Attention: No ERROR!) should be confirmed (ESC), only be displayed or be ignored (no display). Parameter field: confirm, display, ignore 9.3.1.2 Barcodes The barcodes that are implemented in the printer firmware are displayed. Parameter field: no parameter values, display only. -
Page 67: Printing Fonts
topex7100 9.3.1.8 Printing Fonts This menu item prints the font files that are saved in the control unit. Parameter field: no parameter values, display only. Operation of touch panel 9-6... -
Page 68: Printer Menu „Label
topex7100 9.3.2 Printer menu „Label“ 9.3.2.1 XOffset Displaces label layout that has to be printed on dot line in X direction. This function enables to position the printout independent of transmitted label layout subsequently to the left or right (global parameter). This item corresponds with the parameter X alignment that defines where the zero point in X- direction is. -
Page 69: X-Alignment
topex7100 9.3.2.5 X-alignment This function enables to position the label layout that has to be printed either to the left margin, centered or to the right margin. Parameter field: left/right/centered 9.3.2.6 Y-alignment This function positions the label layout to the top margin, to the bottom margin or centered on the label. -
Page 70: Min. Labels
topex7100 9.3.2.10 min. Labels This item shows the remaining quantity of labels per roll that sets off the label-end pre-warning. Example: Label/Roll = 5000, min.Labels = 100. After 4900 labels the output „label-end pre-warning“ is reset on both I/O inter- faces of print system. -
Page 71: Printer Menu „Print Quality
topex7100 9.3.3 Printer menu „Print quality“ 9.3.3.1 Print speed This item defines the speed in mm/s (value between 20 and 200). Parameter field: +005/+200 mm/s 9.3.3.2 Heating value The heating value defines the power supply of the printhead. Parameter field: +001/+200 Operation of touch panel 9-10... -
Page 72: Printer Menu „Device Data
topex7100 9.3.4 Printer menu „Device data“ 9.3.4.1 Print with Print key This item sets the print-start performance. Entering „On“ starts the print only when the print data is complete and the print-key or the input print-start is set. Entering „Off“ starts the print as soon as the data record is complete. Parameter field: ON/OFF 9.3.4.2 PLC enable... -
Page 73: Continuous Material
topex7100 9.3.4.6 Continuous Material With the parameter value „On“ the light barrier is set inactive. Then the synchro- nization is made via the defined label length as described in chapter 9.3.2.4. Parameter field: ON/OFF 9.3.4.7 Medium transparent (password protected) With the parameter value „On“ the logic of the label synchronization is inverted. This function is necessary if using transparent label material. -
Page 74: Printer Menu „Plc
topex7100 9.3.5 Printer menu „PLC“ 9.3.5.1 Autostart If this item is set to “On“ the PLC program is loaded and started automatically after booting of firmware. 9.3.5.2 Pressure time in ms This value defines the time period of the vacuum stamp on the product before re- turning to home position (value in milliseconds) 9.3.5.3 Waiting time 1 in ms... -
Page 75: Timeout Scan. In Ms
topex7100 9.3.5.9 Timeout Scan. in ms This item defines the time period of waiting for the scan results until a timeout er- ror is set off (value in milliseconds). 9.3.5.10 Timeout Special in ms This item defines the time period of waiting for the signal of the special input until a timeout error is set off (value in milliseconds). -
Page 76: Printer Menu „Interface
topex7100 9.3.6 Printer menu „Interface“ 9.3.6.1 Aux-Port (password protected) Definition of the interface parameters of COM1. COM1 is the service-interface for updating and downloading the firmware and PLC-programs. Parameter format: COMx:baudrate, parity, data bit, stop bit 9.3.6.2 Data-Port (password protected) Definition of the interface parameters of COM2. -
Page 77: Printer Menu „System
Parameter field: all available languages in clear text 9.3.7.5 Device (password protected) This function defines the data processing of the control unit. If the option „topex“ is chosen the topex printer syntax is processed. If the option „Zebra“ is activated the Zebra syntax is processed. -
Page 78: Printhead Width (Password Protected)
If Standard.SBS is selected the PLC program is interpreted by the firmware (quicker processing) if Auto.SBS is chosen the PLC program is interpreted by the formula compiler, which can be expanded by topex at any time. Also special pro- grams can be executed. -
Page 79: Rotating Direction (Password Protected)
topex7100 9.3.7.10 Rotating direction (password protected) This function sets the rotating direction of the motor. Minus = right construction Plus = left construction Parameter field: Plus/Minus 9.3.7.11 Micro step (password protected) This function sets the step width of stepping motor per tact signal. This value is adjusted to 4 steps as standard. -
Page 80: Setting Of Menu Labelling Machine (Dispenser Menu)
topex7100 Setting of menu labelling machine (Dispenser menu) Figure 15 Menu of labelling machine (dispenser) Description Function Feed Feed of a label. Calibr With the CALIB-key a test run is started. About 4 labels are dispensed and calibrated. Setup With the SETUP-key you get to the menu. With the Reset-key upcoming firmware failures are deleted. -
Page 81: Menu Tree Of Plc Menu
topex7100 Menu tree of PLC menu The PLC menu is started in the printer menu by pressing the Menu-key. There- fore a PLC program has to be stored and to be activated in the control unit. The step back to the printer menu is made with the Menu-key as well. With the Start-/ Stop-keys the operation mode „Automatic“... -
Page 82: Menu Item Of Plc Menu
9.6.1.3 IO-Test (password protected) Warning! Before start of I/O- Test a topex check adapter has to be connected to the I/O- board. The I/O- Test must not be carried out if a pneumatic driven handling device is connected. After starting the test all outputs are switched on and off one after the other and the corresponding inputs are checked. -
Page 83: Plc Menu „Actuators
topex7100 9.6.3 PLC menu „Actuators“ This menu is used to test the pneumatic cylinders of the handling device as well as the vacuum and auxiliary air unit. This item operates in the same way as the menu customer interface. At end position HP the background of the actuator inscription gets green, at WP blue. -
Page 84: Settings Of Plc Menu
topex7100 Settings of PLC menu Figure 17 Settings of PLC parameters 9.7.1 PLC menu „Settings“ This menu adjusts all time values with a resolution of 1 ms. Furthermore it sets the scanner configuration. A PLC program designed with RemoteControl is required for all these adjustments;... -
Page 85: Waiting Time1
topex7100 9.7.1.3 Waiting time1 This item defines the free-programmable waiting time in the PLC sequencer. 9.7.1.4 Waiting time 2 This item defines the free-programmable waiting time in the PLC sequencer. 9.7.1.5 Delay Auxiliary Air Start delay of auxiliary air. Instead of a time the feed in dots is set after this set value the auxiliary air is activated. -
Page 86: Repeat Reading
topex7100 9.7.1.13 Repeat Reading This item sets how often the scanner carries out a repeat reading if a timeout error has been set off. 9.7.1.14 Repeat Reading not okay This menu item requires the object niO (not okay) scan of the automatic se- quencer. -
Page 87: Datenhandling Mit Topterm
Datenhandling mit TopTerm Warning! Exclusively authorized stuff, trained by topex GmbH and with the required qualifi- cations, may carry out the data processing with TopTerm. Improperly made changes on the control unit might result in faults or damages to the labelling system and in injuries for the operator. - Page 88 topex7100 Figure 18 „Setting port“ Figure 19 „Setting port“ Datenhandling mit TopTerm 10-2...
- Page 89 topex7100 Figure 20 Status request Datenhandling mit TopTerm 10-3...
-
Page 90: File Download
topex7100 10.2 File Download Any files can be transmitted from the hard disk of the service PC to the control unit. • Menu topex7000/File Download • Select the file to be transmitted in „Datei senden/Send file“- dialogue • Click the button „Öffnen/open“ Figure 21 „Sending file“... -
Page 91: File Upload
topex7100 10.3 File Upload Any files can be transmitted from the hard disk of the service PC to the control unit. • Menu topex7000/File Upload • Select the file to be transmitted in „Directory“- dialogue. • Click the button „Ok“ File transfer is displayed as bar graph •... -
Page 92: Diskupload / Diskdownload
topex7100 10.4 DiskUpload / DiskDownload This function saves all important files and directories of the control unit on the Service PC respectively are transmitted from the PC to the control unit. DiskUpload: • Menu Topex7000/Explorer • Menu Topex7000/DiskUpload • Select the target directory „Speichern unter/Save as“- dialogue •... - Page 93 topex7100 DiskDownload: • Menu Topex7000/Explorer • Menu Topex7000/DiskDownload • Select source directory • Start the process by pressing the button „Speichern/Save“. The total transmission takes about 5 – 10 min. Figure 25 Selection of source directory Datenhandling mit TopTerm 10-7...
-
Page 94: Remote Setup
topex7100 10.5 Remote Setup All settings of the printer menu (see chapter 9.3) can also be changed with the item Remote Setup. Figure 26 Remote Setup Datenhandling mit TopTerm 10-8... -
Page 95: Explorer
topex7100 10.6 Explorer With this tool all files in the control unit can be edited, copied, deleted, up- and downloaded. • Menu topex7000/Explorer • Select file with left mouse click • Open context menu by right mouse click • Choose desired function Figure 27 Explorer Datenhandling mit TopTerm 10-9... -
Page 96: Edit File
topex7100 10.6.1 Edit file Files can also be changed directly in the control unit: • Menu topex7000/Explorer • Select file with left mouse click • Open context menu with right mouse click • Select „Datei bearbeiten/edit file“, file is displayed in bottom window of explor- •... -
Page 97: Files Of The Control Unit
topex7100 10.7 Files of the control unit The following describes the file structure of the control unit. 10.7.1 System files c:\wctio7kx.exe Firmware c:\ctio7kx.ini Setup parameters c:\ctio7kx.mnu Configuration of main menu in printer mode c:\digea.ini Configuration of main menu in dispenser (not active) c:\ctio7kx.txt PLC menu configuration c:\labdm.exe... -
Page 98: Toptermcontrol-Interpreter, Menu Configuration And Plc Sequence Program10-12
topex7100 10.7.3 TopTermControl-Interpreter, Menu configuration and PLC sequence program c:\standard.prd Project file c:\standard.sbs Global functions c:\standard.cly Object macros c:\control.def Definition of inputs, outputs, flags and variables c:\standard.mnu Menu configuration of PLC menu c:\*.cfg PLC sequence program (designed by RemoteControl) Datenhandling mit TopTerm 10-12... -
Page 99: Plc Programing With Toptermcontrol
PLC programing with TopTermControl Warning! Exclusively authorized stuff, trained by topex GmbH and with the required qualifi- cations, may carry out the PLC programming with TopTerm RemoteControl. Improperly made changes on the control unit might result in faults or damages to the machine and in injuries for the operator 11.1... -
Page 100: Selection
topex7100 11.2 Selection The programming tool is started via „TopTerm“ by the menu item Topex7000/topTermControl. Figure 29 Starting topTermControl 11.3 Operation The user interface is divided in 6 sections: • Commands: List of all available control objects • Parameter: Configuration of time values and scanners as well as repetitions of printing and reading procedure. - Page 101 topex7100 For each section of automatic and home position sequence chain are 4 buttons and 1 input field with the following functions available: • Schritt einfügen (Insert step): Inserts the current marked control object from the command section in front of the marked object of each list.
-
Page 102: Description Of Control Objects
topex7100 11.4 Description of control objects All available control objects are displayed in the command section of the user interface. Each object displays while a sequence chain is active a text in the 2. line of the operation panel so that the processing of the sequence chain can be watched. - Page 103 topex7100 Control objects Display text Description Zylinder AS Cylinder [1-10] WP The respective valves of cylinder work position (WP) are set and the corresponding inputs are checked. The number of the cylinders to be programmed is entered in the respective input field of the sequence chain.
- Page 104 topex7100 Control objects Display text Description niO Vakuum No display This object sets a jump label in front of the step as from there the sequence chain should be repeated after a vacuum- Timeout. The repetitions are configured with the pa- rameter „Wdhlg.
-
Page 105: Interpreter Of Plc Programs In The Control Unit
topex7100 11.5 Interpreter of PLC programs in the control unit The file SPS.cfg designed with topTermControl and saved in the control unit is in- terpreted with the formula project standard.prd. This program includes the complete logic of the PLC sequence control system. The following files belong to the formula project: •... -
Page 106: Data Of Controlling At Acceptance Test
topex7100 Data of controlling at acceptance test The acceptance report contains the software versions: • Firmware version of control unit • Version of TopTermControl Both versions are displayed after restart of the control unit. The following files must be saved to the folder \Elektro\t7000 on the CAD-Server: •... -
Page 107: Bios-Parameter
topex7100 BIOS-Parameter To check or adjust the BIOS parameters you will need a PS2-Keyboard with a PS2 Y-Adapter or a USB- Keyboard, which will only be recognized in the BIOS To enter the BIOS you have press the „delete“ Button on the connected Key- board after the controller is powered on. - Page 108 topex7100 Under the menu item „Integrated Peripherals“ and „Onboard Device“ BIOS-Parameter 13-3...
- Page 109 topex7100 you will find the settings for the USB controller And under the menu item "SuperIO Device" and " SuperIO Device " you will find the settings for the serial interfaces. „SuperIO Device BIOS-Parameter 13-4...
- Page 110 topex7100 SecondIODevice Please make sure that all the parameters are set as described or adjust them accordingly. BIOS-Parameter 13-5...
Need help?
Do you have a question about the 7100 Series and is the answer not in the manual?
Questions and answers