Advertisement
Quick Links
Advertisement

Subscribe to Our Youtube Channel
Related Manuals for argon audio ONE V3 / M.2 NVMe PCIe


Summary of Contents for argon audio ONE V3 / M.2 NVMe PCIe
- Page 1 Argon ONE V3 / M.2 NVMe PCIe Product Guide...
- Page 2 Argon ONE V3 / M.2 NVMe PCIe Parts CONTENTS Argon ONE V3 / M.2 NVMe PCIe Features Argon ONE V3 / M.2 NVMe PCIe Add-on Modules Assembly Instructions Install Argon ONE V3 Power Button and Fan Script Automated Settings in Argon Script Default Argon ONE V3 Power Button &...
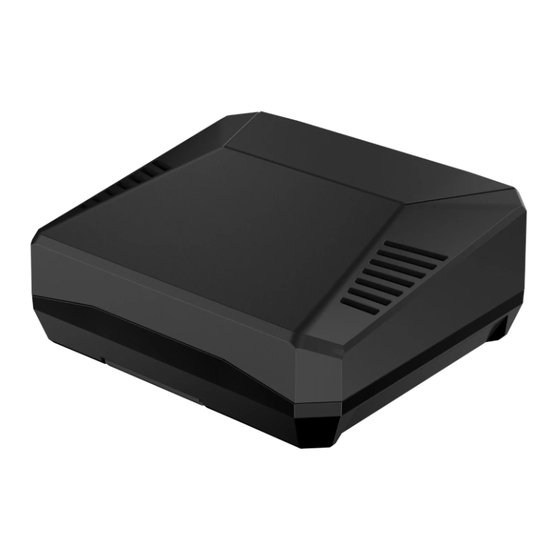
- Page 3 A. ARGON ONE V3 / M.2 NVMe PCIE PARTS ARGON ONE V3 ARGON ONE V3 M.2 NVMe PCIE Magnetic Removable Top Cover 40 Pin GPIO Access USB-C Power In 2 x USB 3.0 Power Pogo Pins Exhaust vents 2 x Type A HDMI 2 x USB 2.0...
- Page 4 B. ARGON ONE V3 FEATURES Durable and Functional Whole top of the case is injected aluminum alloy and injected ABS plastic bottom Case Material for Passive Cooling More efficient Blower type 30mm PWM Programmable fan. Full fan power Active Cooling control vis-a-vis CPU Temp response via Argon Script Internal MicroController for Power Powered by Raspberry Pi RP2040 Chip.
- Page 5 D. ASSEMBLY INSTRUCTIONS 1. Connect the Raspberry Pi® 5 to HDMI-Power Board. Place the Silicon Thermal Pads on the Argon ONE V3 case heatsinks (CPU and PMIC). Raspberry Pi 5 with HDMI-POWER BOARD will NOT POWER UP if NOT CONNECTED with the TOP CASE PUSH ALL THE WAY IN THE HDMI-POWER BOARD SILICON...
-
Page 6: Default Settings
2. Select the Argon ONE V3 Power Button Management Mode: ARGON ONE V3 / M.2 NVMe PCIe CASE JUMPER PIN SETTING JUMPER PIN MODE BEHAVIOUR SETTING Default You need to PRESS button to Pin 1-2 Setting Power ON from shutdown or (Mode 1) power outage. - Page 7 3. Connect the PCIe Pipe Flat Flex Cable to the Raspberry Pi® 5 PCIE port. Skip this step if you have not purchased the Argon ONE V3 M.2 NVMe PCIe Case or Expansion Board COPPER SIDE of the strip should be facing the white side of the PCIE connector of the Raspberry Pi®...
- Page 8 4. Connect the Argon BLSTR DAC Board to the pins of the Argon ONE V3 RP2040-Fan Board. Argon BLSTR DAC is needed to activate the 3.5mm Audio Port. Skip this step if you have not purchased the Argon BLSTR DAC. Refer to Configuring Argon BLSTR DAC page 16.
- Page 9 5. Carefully connect Raspberry Pi® 5 HDMI-Power assembly to the female GPIO and 6-pin Power port of the Argon ONE V3 case. FOR ARGON ONE V3 CASE ONLY: Please make sure that the microSD Card is NOT INSERTED to the Raspberry Pi during assembly. 1.
- Page 10 6. Secure flat head screws to fasten Raspberry Pi® 5 and HDMI-Power Board assembly to top case. www.argon40.com We Make, You Create.
- Page 11 7. Fasten the bottom cover of the Argon ONE V3 / M.2 NVMe PCIe using the round head screws. ARGON ONE V3 M.2 NVMe PCIe To ensure that the NVMe Drive is powered correctly via the POGO PINS make sure that the Case Bottom is SCREWED TOGETHER with the Case Top.
- Page 12 8. Connect your M.2 NVMe Drive to the Argon ONE V3 M.2 NVMe PCIe Expansion Board. This Board will accept M.2 Key M and M.2 Key B+M NVMe Storage Drive. THRML M.2 Heatsink This Board is NOT compatible with M.2 SATA Storage Drives.
- Page 13 E. INSTALL ARGON ONE V3 POWER BUTTON AND FAN CONTROL SCRIPT STEP 1: Configure the EEPROM Setting to optimize power and boot from NVMe. 1. Connect to the Internet, make sure Raspberry Pi Time is updated and execute in the Terminal. curl https://download.argon40.com/argon-eeprom.sh | bash 2.
- Page 14 F. AUTOMATED SETTINGS IN ARGON ONE V3 SCRIPT The ARGON ONE Script automates the installation of all the libraries, programs and EEPROM and Config settings necessary for the RP2040 in the Argon ONE V3 Case to be able to communicate with the Raspberry Pi 5 and perform the various functions like Active Cooling and Power Management.
- Page 15 G. DEFAULT ARGON ONE V3 POWER BUTTON AND FAN SETTINGS Upon installation of the Argon ONE V3 script by default, the settings of the Argon ONE V3 Power button and cooling system are as follows: ARGON ONE V3 CPU TEMP FAN POWER ACTION FUNCTION...
- Page 16 H. CONFIGURE ARGON BLSTR DAC FOR RASPBERRY PI OS 1. Make sure you have installed the Argon Configuration Script into your by running in the Terminal Shell: curl https://download.argon40.com/argon1.sh | bash 2. To enter the Argon Configuration Tool type argon-config in the Terminal Shell. Enter number 3 to install Argon BLSTR DAC Configuration.
- Page 17 3. Once installed you will be able to see this. 4. If you want to configure manually the ARGON BLSTR DAC just add the setting in the config file located at /boot/firmware/config.txt dtoverlay=hifiberry-dacplus,slave 5. Then Reboot. For more information please visit: https://argon40.com/blogs/argon-resources Stay Happy.
- Page 18 I. SET UP BUILT-IN INFRARED RECEIVER The latest version has a programmable Infrared Receiver installed that can turn ON and OFF the device using the proprietary Argon 40 IR Remote. To configure the Infrared Receiver ON/OFF signal of Argon ONE V3 type in the Terminal Shell: argonone-ir Then follow the instructions as indicated.
-
Page 19: Connect To Power Supply
J. ARGON ONE V3 BASIC HARDWARE TEST 1. Connect the internal USB-C socket on the RP2040-Fan Board to a 5V Power Supply. 2. Press the Power ON Button. CONNECT TO POWER SUPPLY 3. This would initiate the internal FAN to RUN for 5 SECONDS and then STOP. 4. - Page 20 K. UPDATE ARGON ONE V3 FIRMWARE 1. Download in your PC or Raspberry Pi Computer the latest Argon ONE V3 Firmware from the link below: https://download.argon40.com/firmware/ArgonOne.uf2 2. PRESS and HOLD the Argon ONE V3 POWER BUTTON while you connect internal USB-C with Data cable to your PC or Raspberry Pi computer. 3.
Need help?
Do you have a question about the ONE V3 / M.2 NVMe PCIe and is the answer not in the manual?
Questions and answers