
Related Manuals for Pelonis Phoenix 13M


Summary of Contents for Pelonis Phoenix 13M
- Page 1 Phoenix 13M User Manual Oil Filled Radiator MODEL: PHO25A3ABGUK Please read this manual carefully and keep it for future reference. The device is only suitable for well insulated spaces or occasional use.
- Page 2 Thanks for Choosing PELONIS! Your support is pivotal and we hope you enjoy it! Follow us: @Pelonis UK @pelonis.uk...
-
Page 3: Table Of Contents
Contents Important Safeguards Product Overview Installation Operation Instructions Troubleshooting Cleaning And Maintenance Specifications... -
Page 4: Important Safeguards
Important Safeguards CAUTION Some parts of this product can become very hot and cause burns. Particular attention has to be given where children and vulnerable people are present. This heater is filled with a precise quantity of special oil. Repairs requiring opening of oil-container are only to be made by the manufacturer or his service agent who should be contacted if there is an oil leak. - Page 5 WARNING Warning: In order to avoid overheating, do not cover theheater. If the supply cord is damaged, it must be replaced by the manufacturer or its service agent or a similarly qualified person in order to avoid a hazard. This appliance can be used by children aged from 8 years and above and persons with reduced physical, sensory or mental capabilities or lack of experience and knowledge if they have been given supervision or instruction concerning use of the appliance in a safe way and understand the hazards involved.
-
Page 6: Product Overview
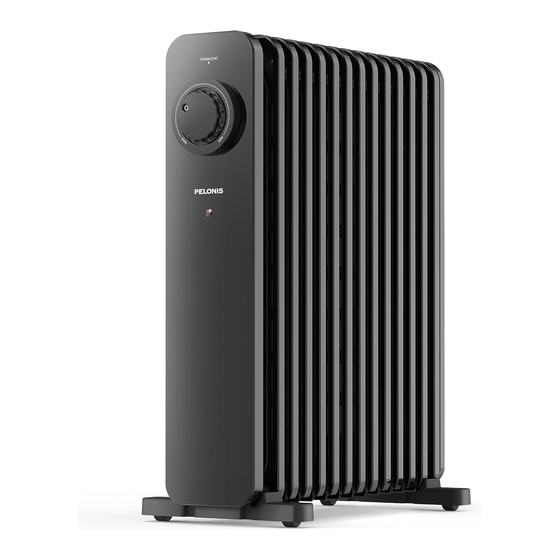
Product Overview Temperature Control Switch Control Indcator Light [Note] All the pictures in this manual are for explanation purpose only. Any discrepancy between the real object and the illustration in the drawing shall be subject to the real subject. -
Page 7: Installation
Installation Instructions Turn the heater body upside down with the bottom facing up. As shown in Figure 1, align the mounting buckles of a set of foot components with the holes of the 2nd and 3rd heat sinks on one side, press in the direction of the arrow, and the buckle on the foot will drop into the hole of the heat sink. - Page 8 Instructions for Removing the Foot Wheels As shown in Figure 3, press down on one side of the foot end with force, and lift the other side up with force. Figure 3 Press down on one end Lift up...
-
Page 9: Operation Instructions
Operating Instructions THERMOSTAT Temperature Adjustment Knob Power Adjustment Knob Rotation Adjustment Power Adjustment Temperature Adjustment MIN - MAX 1000W 1500W 2500W 5°C - 105°C Note: 5°C-105°C is the temperature range of the product's built-in temperature controller. 1. Inspection before start •... - Page 10 3. Temperature adjustment • During use, if you feel it is necessary to lower the room temperature since it is too high, you can use the following adjustment modes: · Turn the power switch to gear "ll" or "I". · Counterclockwise turn the thermostat knob back by a certain angle, for which it indicates that the set temperature is lower when the temperature indication is closer to the "MIN"...
-
Page 11: Troubleshooting
Troubleshooting Operation of your appliance can lead to errors and malfunctions. The following tables contain possible causes and notes for resolving an error message or malfunction. It is recommended to read the tables carefully below in order to save your time and money that may cost for calling to the service center. - Page 12 Item Symbol Value Unit Item Unit Type of heat input, for electric local Heat output space heaters only (select one) Nominal Manual heat charge control [no] heat output with integrated thermostat Manual heat charge control Minimum heat with room and/or outdoor [no] output (indicative) temperature feedback...
-
Page 13: Cleaning And Maintenance
CLEANING AND MAINTENANCE Precautions • The electric heater should be cleaned regularly to wipe out the dust on the surface of flanges. As this may influence the radiating e ciency. • Disconnect electricity supply and allow radiator to cool, wipe out dust with a soft damp cloth. - Page 14 Specifications Model Power Supply Rated Power PHO25A3ABGUK 220-240V~,50Hz 2500W Dimension Cord Lenth: 16.9” × 4.9” × 21.5” 5.7 ft / 1.73 m 430mm × 125mm × 545mm...
- Page 15 Pelonis Customer Care Default 12-Month Warranty This appliance is covered by Pelonis warranty for 12 months from the date of its original purchase. Extend Your Warranty Send email to cs_eu@pelonis.com to extend your warranty. *Please include your Amazon purchase order number, date of purchase when sending the email for quick activation of your extended warranty.
- Page 16 Company: TC Kangbridge Ltd Address: TC Lumionous house, 300South row, Milton keynes, MK9 2FR Mail: epr@tangcheng.top...
- Page 20 Rev 1.1 amazon.co.uk/pelonis Looking for help? cs_eu@pelonis.com Contact us to get expert support.
Need help?
Do you have a question about the Phoenix 13M and is the answer not in the manual?
Questions and answers