
Related Manuals for SANJO RAE90L


Summary of Contents for SANJO RAE90L
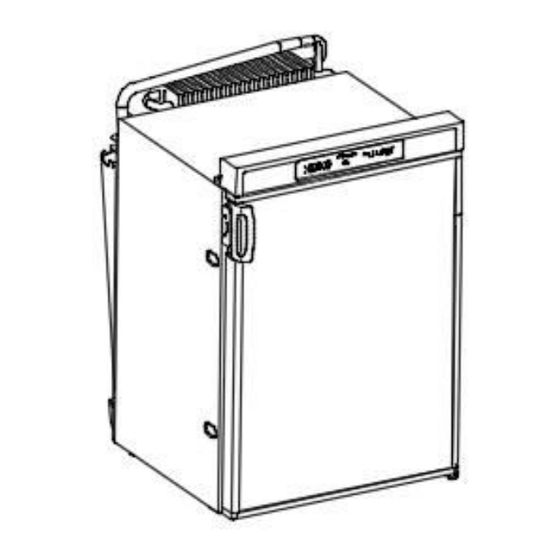
- Page 1 Installation and Operation Manual RAE90L 3-way Absorption Refrigerator 2023 V0.1 More information https://www.caravansplus.com.au...
-
Page 2: Table Of Contents
Table of contents: 1、Brief introduction ....................2 2、Symbols .........................2 3、Safety instructions ....................3 4、Main parts ......................4 5、Installation ......................4 6、Operation .......................9 7、Notes on storing food.....................11 8、Defrosting the refrigerator ..................11 9、Fault messages.......................12 10、Trouble shootings....................13 11、Cleaning and maintenance..................14 12、Cleaning the gas burner..................14 13、Disposal.. -
Page 3: 3、Safety Instructions
3、Safety Instructions WARNINGS 1. Read manufacturer's instructions before use this appliance shall be installed according to the rules in force. 2. This appliance shall be installed according to the manufacturer's instructions 3. To be used only in a well-ventilated area, above ground and protected from rain. These statements shall be visible, legible to the user during the operation of the appliance and durable. -
Page 4: 4、Main Parts
1. Inside of the refrigerator and its panel cannot be heated by any appliances. 2. Enough ventilation is a must for heat dissipation and supplying sufficient comburent oxygen. 3. Cables for the refrigerator must be protected from humidity. 4. Children aged from 3 to 8 years are allowed to load and unload refrigerating appliances. 4、Main parts 1. - Page 5 Vent cut-out sizes H156*W451mm Distance between vents Minimum:813mm 5.1 Sealing(to prevent burning gas flowing into living space) 5.1.1 Sealing strips with thickness of 15mm must be stuck to the floor of the cabinet that will contact the refrigerator bottom. 5.1.2 Sealing strips with thickness of 10mm must be stuck to the sides and top of the refrigerator.
- Page 6 1. Container for burner 2. Solenoid valve 3. Connector 4.Hose assembly 5.Regulator 6.Cylinder Only use approved regulator to be used accordance with national guidelines. Compare the pressure information on the type plate with the pressure information on the propane or butane gas cylinder. The appliance shall be kept away from inflammable materials.
- Page 7 5.4.2 DC12V connection There are 4 connectors, the left “+” and “ -” are for power supplied to circuit board, using 18AWG copper wire; the right “ +” and “-” are for power supplied to DC heater, using 4 ㎟ copper wire with the whole length of ≦10 meters.
- Page 8 WARNING! Compare the pressure information on the type plate with the pressure information on the propane or butane gas cylinder. The appliance shall be kept away from inflammable materials. Only use approved hose lines with a maximum length of 1.5m. Your connecting hose must be replaced in accordance with national guidelines.
-
Page 9: 6、Operation
6、Operation 6.1 Introduction to the panel A: DC mode indicator B: AC mode indicator C: Auto mode indicator D: GAS mode indicator E: Check indicator F: Temperature indicator 6.2 On&Off and mode switch 6.2.1 Press ON/OFF button, the product will first execute check process. Then lamps illuminated show energy and working status. - Page 10 Five lights on - Maximum cooling capacity Select medium cooling capacity when the ambient is +15°C to +25°C. 6.4 Shelf relocation 6.4.1 Taking out:As the picture on the right, pull the shelf to the left (direction 1) with both hands until the right side of the shelf leaving the blind plugs, then elevate the shelf upward (direction 2) and move to the right until it leaves the through-hole plugs.
-
Page 11: 7、Notes On Storing Food
The refrigerator compartments are recommended for the following types of food: Food Frozen food Cooked foods Dairy products, prepared food, thawing goods Meat, fish Salad, vegetables, fruit Drinks in bottles or cartons Dressing, ketchup, jam Eggs, butter Please observe the following instructions for storing items: •... -
Page 12: 9、Fault Messages
• Put a cloth in the ice compartment and the refrigerator to absorb any excess water. Leave the door open. • The condensation of the main cooling compartment is removed via a hose out of the ventilation grille of the vehicle. •... -
Page 13: 10、Trouble Shootings
○ indicator on Note: indicator flash ◎ ● indicator off COLDEST indicator will show fault status when keep pressing COLDEST button. · Contact customer service if you cannot repair by yourself. 10、Trouble shootings Fault Possible cause Suggested remedy With AC The fuse in the AC mains is Replace the fuse.(fuse 1A,fuse 5A)... -
Page 14: 11、Cleaning And Maintenance
connected to the AC mains The refrigerator is The ventilation around the Check that the vents are not not adequately cooling unit is not sufficient. obstructed. cooling The temperature is set too Set a lower temperature. high. The ambient temperature is set Remove the vents for a while so that too high. -
Page 15: 13、Disposal
12.4 Close gas valves. 12.5 Remove the vent. 12.6 Remove the screws on the burner cover, pull the cover out from the bottom. 12.7 Clean the coarse impurities inside the pipe with appropriate soft brush. 12.8 Blow the burner pipe with compressed air through slots in the pipe. 12.9 Clip the burner cover back into the assembly first, push inward until there is an audible click, then screw on firmly. - Page 16 Jiangsu Sanjo Intelligent Technology Co.,Ltd Address:No.8 Jinguazi Road, Nandu Town, Liyang City, Jiangsu Province, China Tel:0086-400-839-8111 E-Mail:sanjo@jssqzn.com URL:www.jssqzn.com More information https://www.caravansplus.com.au...
Need help?
Do you have a question about the RAE90L and is the answer not in the manual?
Questions and answers