
Related Manuals for Duclsaty YXS003

Summary of Contents for Duclsaty YXS003
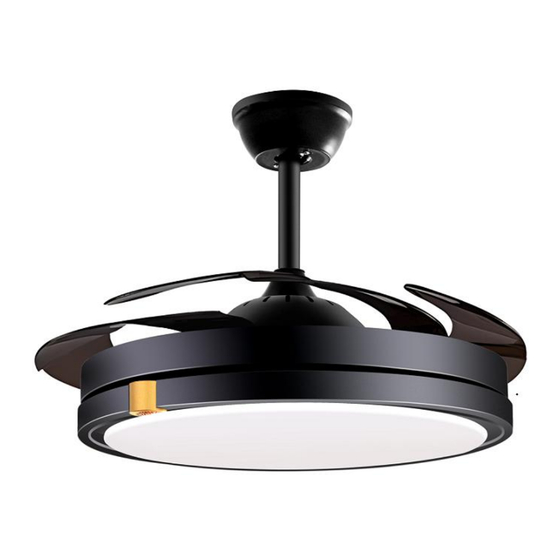
- Page 1 Installation Guide Installation &Troubleshooting Manual 42inch Retractable Ceiling Fans Installation Video Fan Exhibition PDF Manual (QR code above are for Amazon Sold Products ONLY)
-
Page 2: Safety Rules
Installation Guide SAFETY RULES To reduce the risk of electric shock, turn off the electricity to the fan at the main fuse box or circuit panel before installation. All wiring must be in accordance with the local electrical codes or National Electrical Code. Electrical installation should be performed by a qualified licensed electrician. - Page 3 Installation Guide Installation preparation Ⅰ. TOOLS REQUIRED Ⅱ. Cut off power supply before installation Ⅲ. Suggest to have someone to help you Ⅳ. All the screws and down rods should be nice and solid when you finish the step Ⅴ. Unpack your fan and check the contents. You should have followings,...
- Page 4 Installation Guide ********************************************************************************* Installation Steps Ⅰ. Down rod installation Ⅱ. Hang the fan to the Ceiling Ⅲ. Connecting wires Ⅳ. Canopy Mount Ⅴ. LED light Assembly Ⅵ. Remote Control Introduction VII.Quick answers to common Questions VIII.Trouble Shooting ********************************************************************************* Ⅰ. Down rod installation 1.
- Page 5 Installation Guide (Pic.4) (Pic.5) (Pic.6) (Pic.7) 3. Unpack and Collect the wires as Pic.8 and get them passed through the down rod as Pic. 9. (Pic.8) (Pic.9) 4. Insert the down rod to the Fan Motor base.Look at Pic.10 the two holes are not in the same position but the correct action is two holes should be on the same position after completely insert the...
- Page 6 Installation Guide down rod. (Pic.10) 5. Insert the lock pin.To make this step easier,please take your screw driver and push the screw driver through between the wires in the down rod (Pic.11) and get that lock pin slides through,you just push it on the end (Pic.12)and it just glide through (Pic.13&Pic.14),otherwise it can be that difficult because there are wires in the down rod which may block the lock pin when slide through.
- Page 7 Installation Guide 3. Put the R-shaped Hitch pin into the lock pin in Pic. 15 and tighten the TWO screws in Pic.16.Then pull down the coupling cover Pic.17. (Pic.15) (Pic.16) (Pic.17) ********************************************************************************* Ⅱ. Hang the fan to the Ceiling 1. CUT OFF the power supply for SAFTY!!! 2.
- Page 8 Installation Guide (Pic.18) (Pic.19) 3.Hold the Ceiling fan at the point as Pic.20 and carefully lift to the ceiling and sit the hanger ball to the mounting bracket as Pic.21. Rotate the down rod until the notch on the hanger ball engaged the ridge on mounting bracket in Pic.22&Pic.22a Down rod can not be rotated if the step is done properly otherwise the fan will wobbles when it is working.
- Page 9 Installation Guide (Pic.20) (Pic.21) (Pic.22) (Pic.22a) ********************************************************************************* Ⅲ. Connecting wires It is a bit tricky yet it would not be issue if you assembled based on the illustration below. 1. Insert the black remote receiver to the interspace up on the mounting bracket as Pic.23. Pic.25 shows how the wires going, connecting white to white,blue to blue,red to red.Just buckle each other in the same color.Leave the antenna as it is,no need to connect with any wire.Connect the black live wire and the white neutral wire to the power cord from the ceiling electric box by giving a couple of...
- Page 10 Installation Guide (Pic.23) (Pic.24)
- Page 11 Installation Guide (Pic.25) ********************************************************************************* Ⅳ. Canopy Mount Reorganize the wires Pic.26 and lift the canopy as Pic.27. Attention there is limited room in the canopy so you have to keep all the wires in order to squeeze them into the canopy. Spin the canopy until the two half loose canopy screws are locked in the smaller hole then tighten down the TWO screws as Pic.28.
- Page 12 Installation Guide (Pic.26) (Pic.27) (Pic.28) ********************************************************************************* Ⅴ. LED light Assembly 1. Find the LED drive Pic.29.Connect the LED driver to the fan motor,blue to blue,red to red Pic.30,give a couple of twist and screw a cap,finished Pic.31.Put the magnetic side of the the LED to the fan motor Pic.32.Plug the white wire of the LED drive into the LED light at the arrow-marked point as Pic.33.
- Page 13 Installation Guide (Pic.29) (Pic.30) (Pic.31) (Pic.32) (Pic.33)
- Page 14 (Pic.34) (Pic.35) (Pic.36) (Pic.37) ********************************************************************************************* All done! Installation Finished. Duclsaty Ceiling Fans with lights can be used as fan and/or lights as you like.
- Page 15 Installation Guide ********************************************************************************************* Ⅵ. Remote Control Introduction Customer Service we provide Damaged Parts Replacement Missing Parts Replenishment Professional Installation Guide Other Customized Products and Service Feel free to contact Amazon...
- Page 16 Installation Guide ********************************************************************************************* VII.Quick answers to common Questions. 1. Can the light and fan work separately? Like, can I turn on just the fan without turning on the light and vice versa? Yes,the light and the fan can work separately,controlled by remote control 2.
- Page 17 Installation Guide 1.Put two AAA batteries into the Handheld remote control that you want to use to sync two ceiling fan. 2.Connect the Black remote receiver's black Live line and white Neutral Line with your power cord from the ceiling. 3.Turn on the power supply and wall switch.
- Page 18 Installation Guide 4. Remote control can not control the fan Check the battery is installed properly.Check the wiring of the remote receiver is correct(Pic.25) 5. Lampshade is broken Contact us via Amazon Message and we will offer you an ideal solution. All parts damaged can be replaced with new ones to make sure your product is perfect and can install smoothly.
Need help?
Do you have a question about the YXS003 and is the answer not in the manual?
Questions and answers