Table of Contents
Advertisement
Available languages
Available languages
Advertisement
Table of Contents

Related Manuals for HEALLUX Alena EOH01-08E


Summary of Contents for HEALLUX Alena EOH01-08E
- Page 1 RADIATEUR À Lisez toujours attentivement la notice avant de monter et d’utiliser votre appareil et conservez- la pour vous y référer ultérieurement. INERTIE FLUIDE Aléna EOH01-08E : 800W EOH01-10E : 1000W EOH01-14E : 1400W EOH01-18EE : 1800W 230V ~ 50Hz...
-
Page 2: Consignes De Sécurité Importantes
CONSIGNES DE SÉCURITÉ IMPORTANTES • Cet appareil peut être utilisé par des enfants âgés d'au moins 8 ans et par des personnes ayant des capacités physiques, sensorielles ou mentales réduites ou dénuées d’expérience ou de connaissance, s'ils (si elles) sont correctement surveillé(e)s ou si des instructions relatives à... - Page 3 il doit être remplacé par le fabricant, son service après- vente ou des personnes de qualification similaire afin d'éviter un danger. • AT T E N T I O N : A f i n d ' é v i t e r t o u t d a n g e r d û a u réarmement intempestif du coupe-circuit thermique, cet appareil ne doit pas être alimenté...
- Page 4 précise d’huile spéciale. Les réparations nécessitant l’ o uverture du réservoir d’huile ne doivent être effectuées que par le fabricant ou son service après-vente qu’il convient de contacter en cas de fuite d’huile. • Lorsque l’appareil de chauffage est mis au rebut, respecter les réglementations concernant l’élimination de l’huile.
-
Page 5: Description Des Symboles
• Cet appareil est destiné à un usage domestique uniquement. DESCRIPTION DES SYMBOLES: L’utilisation de symboles dans ce manuel a pour but d’ a ttirer l’attention sur les risques possibles. Les symboles de sécurité et les explications qui les accompagnent doivent être parfaitement compris. - Page 6 Conforme aux réglementations européennes s'appliquant au produit. Symbole de classe II : Ce symbole indique que votre appareil dispose d’une double isolation. Il ne doit pas être relié à une prise de terre. Le pictogramme de la poubelle barrée indique que le produit doit faire l’...
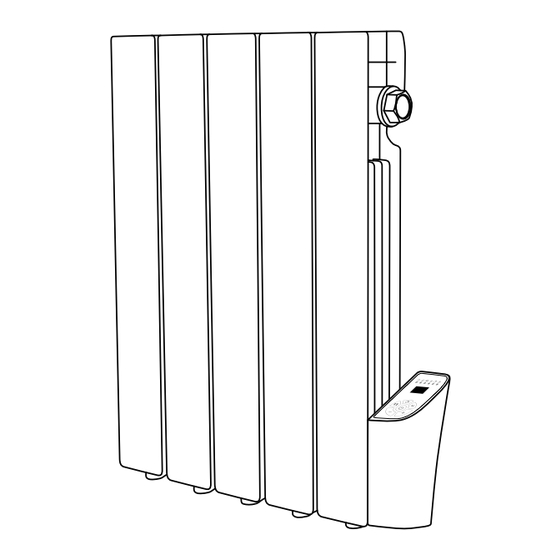
- Page 7 I. DESCRIPTION Partie principale Supports muraux Partie principale...
-
Page 8: Fixation Au Mur
II. FIXATION AU MUR ø 10mm M4 x 40mm ø 10mm 35mm EOH01 446mm 800W 1000W 1400W 1800W 160mm 240mm 400mm 640mm... -
Page 9: Caracteristiques Techniques
1) Percer les trous dans le mur en suivant les instructions dans l'emballage. Assurez- vous que les distances comme indiquées sur la figure ci-dessus soient respectées. 2) Introduire les chevilles, installer les supports au mur. 3) Accrocher le chauffage sur les supports fixés. Après avoir bien placé le chauffage, tournez le levier de verrouillage en position de verrouillage comme montré... - Page 10 2 / Démarrage rapide • Raccorder le radiateur au secteur 230V ~ 50Hz, l’ a ppareil émet un bip et la LED indicatrice est allumée. • Appuyer sur le bouton pour allumer l’écran, l’ a ppareil s’ a llumera en mode confort.
- Page 11 • Appuyer sur pour ajuster la température. Mode Confort: Température constante réglable entre 5°C et 35°C. Mode Economique: Température constante réglable entre 1°C et 31°C.La température Economique et toujours de 4°C inférieur à celle de mode Confort. Mode Hors Gel, l’écran affiche Fr (Froid) : Température de 7°C non réglable. •...
- Page 12 • : Programme du Lundi au vendredi : Programme du Samedi et Dimanche • Personnalisation du programme 1. Appuyer successivement sur jusqu’à que le radiateur soit en mode . Une fois dans ce mode appuyer sur pendant 3 sec pour entrer dans la programmation des jours de Lundi –...
-
Page 13: Entretien
radiateur se remette en marche. • Pour désactiver la fonction fenêtre ouverte, pressez à tout moment sur la touche le voyant correspondant s’éteint alors. V. DISPOSITIF DE SÉCURITÉ ANTI-SURCHAUFFE • Votre radiateur est équipé d’un dispositif de sécurité qui éteint le radiateur en cas de surchauffe. -
Page 14: Conditions De Garantie
VIII. CONDITIONS DE GARANTIE Il est donc garanti 2 ans à compter de la date d’ a chat. Conservez votre ticket de caisse qui fera office de justificatif d’ a chat. En cas de dysfonctionnement, retournez impérativement votre produit dans votre point de vente. - Page 15 À la puissance Contrôle adaptatif de l'activation [non] thermique nominale À la puissance Limitation de la durée d'activation [oui] thermique minimale En mode veille 0,000 Capteur à globe noir [non] HEALLUX SAS Coordonnées de 31 rue de Metz contact 31000 Toulouse...
- Page 16 À la puissance Contrôle adaptatif de l'activation [non] thermique nominale À la puissance Limitation de la durée d'activation [oui] thermique minimale En mode veille 0,000 Capteur à globe noir [non] HEALLUX SAS Coordonnées de 31 rue de Metz contact 31000 Toulouse...
- Page 17 ALUMINUM OIL Always read this instruction manual before installing or using your appliance and always keep for future reference. FILED RADIATOR EOH01-08E : 800W EOH01-10E : 1000W EOH01-14E : 1400W EOH01-18EE : 1800W 230V ~ 50Hz...
-
Page 18: Important Safety Requirements
IMPORTANT SAFETY REQUIREMENTS • This appliance can be used by children aged from 8 years and above and persons with reduced physical, sensory or mental capabilities or lack of experience and knowledge if they have been given supervision or instruction concerning use of the appliance in a safe way and understand the hazards involved. - Page 19 be supplied through an external switching device, such as a timer, or connected to a circuit that is regularly switched on and off by the utility. • The heater must not be located immediately below a socket-outlet. • The heater must not be located directly in front of a socket outlet.
- Page 20 not cover the heater. • Warning: this product shall be installed in the volume 2 or hors volume only according to the national wiring rules (For France NF C 15-100) • Note: The below drawing is for reference only. • We suggest you to contact a professional electrician for assistance.
- Page 21 I. DESCRIPTION Main Part Bracket Main Part...
-
Page 22: Installation On The Wall
II. INSTALLATION ON THE WALL ø 10mm M4 x 40mm ø 10mm 35mm EOH01 446mm 800W 1000W 1400W 1800W 160mm 240mm 400mm 640mm... -
Page 23: Technical Characteristics
1) Drill holes on the wall accordizng to the instruction inside the box. Warning: Be sure to keep the safety distances as shown on the above drawing. 2) Fit the fasten tube in the hole and fit the bracket on the wall with screws 3) Hang the unit on the bracket gently, after ensuring the unit is right fixed, turn the lock in the bracket as picture show. - Page 24 2 / How to Operate: • Plug the appliance into a 230V ~ 50Hz socket, the unit will “beep” once. The indicator light illuminates for standby mode. • Press to turn on the heater. For the first use the heater is in factory default settings as shown below: (If default settings are different, it will simply be be-cause the unit has been quality tested after production).
- Page 25 • Comfort mode: Press to set the temperature from 5-35°C. • ECO mode: Press to set the temperature from 1-31°C. Note: ECO mode=Comfort mode - 4°C. • Use of countdown timer: In standard heating ECO or Comfort mode you can leave the model on permanent or programme the countdown timer so the unit turns off after your set hours have elapsed, press the button once and the “...
- Page 26 00:00am – 01:00am comfort mode, 01:00am – 07:00am ECO mode and 07:00am – 00:00am comfort mode. • is a preset programme Monday-Friday and Saturday -Sunday. See image below for P2 preset programme which shows the unit settings in a 24hr period which will repeat over a 7 day period.
- Page 27 (Saturday-Sunday) Adjustable program 00:00am – 06:00am unit is in anti-frost mode, 06:00 – 00:00am Comfort mode How to adjust program setting: It is good practice to spend time carefully studying and practising the programming of program 3 to fully understand the benefits which include time saving and cost savings.
-
Page 28: Pat Testing
temperature the open window function is activated, the indicator light keeps flashing and stops heating to save energy. • Press button again to cancel open window function and revert back to pre- vious operational settings. V. PAT TESTING: • When used in a workplace, this product must be safety-tested yearly by a qualified electrician (PAT Tested) in order to comply with the Electricity at Work Regulations. -
Page 29: Warranty Terms
VIII. WARRANTY TERMS Therefore, the warranty period is two years from the date of purchase. Keep your cash receipt as proof of purchase. In case of any problems, be sure to return the product to your point of sale This symbol means that if you wish to dispose of the product once its useful life has ended, it must be deposited with an authorised waste management agent for the selective collection of Waste Electrical and Electronic Equipment (WEEE) This appliance complies with Directive 2014/35/EC on Low Voltage, with Directive... - Page 30 With distance control option [no] consumption At nominal heat With adaptive start control [no] output [yes] At minimum heat With working time limitation output In standby mode 0.000 With black bulb sensor [no] HEALLUX SAS Contact details 31 rue de Metz 31000 Toulouse...
- Page 31 With distance control option [no] consumption At nominal heat With adaptive start control [no] output [yes] At minimum heat With working time limitation output In standby mode 0.000 With black bulb sensor [no] HEALLUX SAS Contact details 31 rue de Metz 31000 Toulouse...
- Page 32 V 202404...
Need help?
Do you have a question about the Alena EOH01-08E and is the answer not in the manual?
Questions and answers
comment fait-il que mon chauffage n'émet plus de chaleur et pourtant il affiche la température mais ne chauffe plus