Table of Contents
Advertisement
Available languages
Available languages
COEUR CÉRAMIQUE
CHAUFFE
TAO
EPC07C-10R : 1000W
EPC07C-15R : 1500W
EPC07C-20R : 2000W
230V ~ 50Hz
Fabriqué en RPC
Importé par HEALLUX SAS
31 Rue De Metz N°46 -
31 000 Toulouse
FRANCE
Lisez toujours attentivement la notice avant de
monter et d'utiliser votre appareil et conservez-
la pour vous y référer ultérieurement.
Advertisement
Table of Contents

Related Manuals for HEALLUX TAO


Summary of Contents for HEALLUX TAO
- Page 1 CHAUFFE la pour vous y référer ultérieurement. EPC07C-10R : 1000W EPC07C-15R : 1500W EPC07C-20R : 2000W 230V ~ 50Hz Fabriqué en RPC Importé par HEALLUX SAS 31 Rue De Metz N°46 - 31 000 Toulouse FRANCE...
-
Page 2: Consignes De Sécurité Importantes
CONSIGNES DE SÉCURITÉ IMPORTANTES • Cet appareil peut être utilisé par des enfants âgés d'au moins 8 ans et par des personnes ayant des capacités physiques, sensorielles ou mentales réduites ou dénuées d’expérience ou de connaissance, s'ils (si elles) sont correctement surveillé(e)s ou si des instructions relatives à... - Page 3 d'éviter un danger. • ATTENTION: Afin d'éviter tout danger dû au réarmement intempestif du coupe-circuit thermique, cet appareil ne doit pas être alimenté par l'intermédiaire d'un interrupteur externe, comme une minuterie ou être connecté à un circuit qui est régulièrement mis sous tension et hors tension par le fournisseur d'électricité.
- Page 4 ne pas couvrir l'appareil de chauffage. Avertissement: cet appareil doit être installé uniquement dans le volume 2 ou hors volume d’une salle de bain conformément aux exigences de la norme française d’installation électrique NF C 15-100. Note: Le schéma ci-dessous est donné uniquement à titre d’exemple.
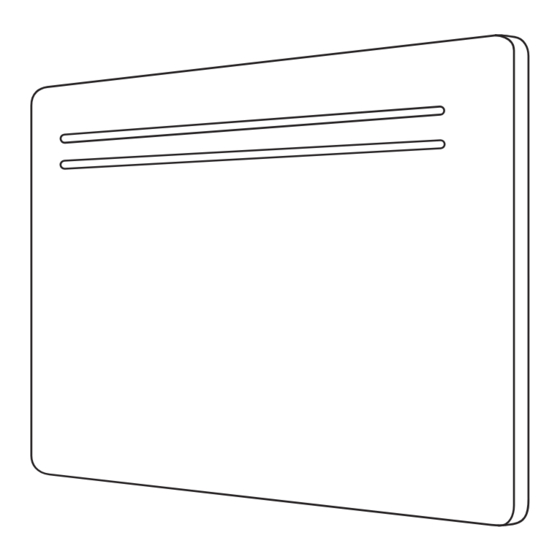
- Page 5 I. DESCRIPTION Partie principale Supports muraux...
-
Page 6: Fixation Au Mur
II. FIXATION AU MUR ø 10mm 176mm (EPC07C-10R) 326mm (EPC07C-15R) 496mm (EPC07C-20R) 1) Percer les trous dans le mur en suivant le schéma ci dessus. Assurez-vous que les distances comme indiquées sur la figure ci-dessus soient respectées. 2) Introduire les chevilles, installer les supports au mur. 3) Accrocher le chauffage sur les supports fixés. - Page 7 III. UTILISATION 1 / Panneau de contrôle et affichage Les 6 Boutons du clavier: Mise en marche / veille Réglage de la température + : Appuyer sur ce bouton pour une augmentation rapide de la température.
- Page 8 • Pour la modification de l’heure: maintenir le bouton appuyé pendant environ 3 secondes pour modifier l’heure. • Pendant le réglage de l’heure, l’ a ffichage de l’heure clignote alors à l’écran, appuyer sur +/- pour sélectionner l’heure (0-23) et sur pour passer au réglage des minutes, appuyer sur +/- pour sélectionner les minutes (0-59) et sur pour...
- Page 9 Mode Hors Gel : Température de 7°C non modifiable. : Un programme unique de lundi à dimanche, le programme est personnalisable. : Une programmation de lundi à vendredi puis un programme différent pour samedi et dimanche. De lundi à Vendredi Samedi et Dimanche : Vous pouvez régler un programme différent pour chaque jour.
- Page 10 Signifie Mode Eco; Signifie Mode Hors Gel; Une fois votre choix fait appuyer sur pour passer à l’heure suivante. Si vous avez fait une erreur vous pouvez revenir au réglage de l’heure précédente en appuyant sur • Une fois la personnalisation des 24h terminées, appuyé sur pour confirmer le réglage et sortir du menu.
- Page 11 • Une fois la personnalisation des 24h terminées, appuyé sur pour confirmer le réglage et sortir du menu. 7 / Modification du programme P3 • Durant le programme , appuyer sur une fois, le le symbole et le symbole de la première heure commencent à...
-
Page 12: Nettoyage & Maintenance
Confort - 2 Hors Gel Veille NOTE: En ordre Comfor-1 ou Confort-2, la température ne peut pas être réglée. 9 / Fonction fenêtre ouverte: Quand la fonction est active, une chute de température de 2°C en moins de 2 minutes, arrête automatiquement le radiateur. Le logo clignote sur l’écran. -
Page 13: Conditions De Garantie
poussière ou les saletés qui se seraient accumulées à l’intérieur ou à l’extérieur de l’ a ppareil. • Avertissement: Ne jamais utiliser de détergent, d’ a gents chimiques ou de solvants car cela pourrait endommager les parties plastiques. V. CONDITIONS DE GARANTIE Il est donc garanti 2 ans à... - Page 14 Limitation de la durée d'activation [non] thermique nominale À la puissance thermique minimale Capteur à globe noir [non] En mode veille 0,000 Coordonnées de Importé par : HEALLUX SAS contact 31 Rue De Metz N°46 - 31 000 Toulouse - France...
- Page 15 EPC07C-10R : 1000W EPC07C-15R : 1500W EPC07C-20R : 2000W 230V ~ 50Hz Fabriqué en RPC Importé par HEALLUX SAS 31 Rue De Metz N°46 - 31 000 Toulouse FRANCE...
-
Page 16: Important Safety Requirements
IMPORTANT SAFETY REQUIREMENTS • This appliance can be used by children aged from 8 years and above and persons with reduced physical, sensory or mental capabilities or lack of experience and knowledge if they have been given supervision or instruction concerning use of the appliance in a safe way and understand the hazards involved. - Page 17 as a timer, or connected to a circuit that is regularly switched on and off by the utility. • The heater must not be located immediately below a socket-outlet. • The heater must not be located directly in front of a socket outlet.
- Page 18 assistance. In the case as of buildings room, a room receiving a bath or a shower and socket-outlets lower or equal to 32 A the circuit corresponding must be protected by a device with differential residual current (RCD) lower or equal to 30 mA. FOR HOUSEHOLD USE ONLY...
- Page 19 I. DESCRIPTION Main Part Bracket...
-
Page 20: Installation On The Wall
II. INSTALLATION ON THE WALL: ø 10mm 176mm (EPC07C-10R) 326mm (EPC07C-15R) 496mm (EPC07C-20R) 1) Drill holes on the wall according to the instruction inside the box. Warning: Be sure to keep the safety distances as shown on the above drawing. 2) Fit the fasten tube in the hole and fit the bracket on the wall with screws 3) Hang the unit on the bracket gently, after ensuring the unit is right fixed, turn the lock in the bracket as picture show. - Page 21 III. INSTRUCTIONS FOR USE 1 / Control panel and screen. 6 Button: Power on /stand by Increasing; Keep pressing for quick increasing; Forward the hour in 24 hour program setting.
- Page 22 4 / Function setting: Press to choose the mode or the program; 2. Press to choose the temperature. Comfort mode: Setting temp. from 5°C to 35°C ECO mode: Setting temp. from 1.5°C to 31.5°C; 3.5°C less than comfort mode, when you set up the temp. of comfort mode. Anti-frost mode: Setting 7°C for room temp;...
- Page 23 NOTE: the block against the clock will twinkle when the block against the program is working. 5) Program factory presetting: : Same program from Monday to Sunday, custom can modify the program. : Same program from Monday to Friday and same program from Saturday to Sunday.
- Page 24 Comfort Comfort -1 Comfort -2 Anti-frost Stand-by NOTE: When in Comfort-1 or Confort-2, the temperature can’t get set. 7 / Windows detector function: Press to turn on/off the windows function, when the logo display in the screen, it means window function is on. If temperature goes down, heater will stop working and the window logo twinkling.
-
Page 25: Cleaning And Maintenance
IV. CLEANING & MAINTENANCE • Switch off from the power supply before cleaning. • Using a soft, moist cloth, with or without a mild soap solution, carefully clean the exterior surface of the product. • CAUTION: Allow the product to completely cool before handling or cleaning it. •... - Page 26 At nominal heat With working time limitation [no] output At minimum heat output With black bulb sensor [no] In standby mode 0,000 Contact details Importé par : HEALLUX SAS 31 Rue De Metz N°46 - 31 000 Toulouse - France...
- Page 28 V 202405...
Need help?
Do you have a question about the TAO and is the answer not in the manual?
Questions and answers
produit tao heallux epc07c-15r:1500w en mode hors gel en cas de coupure de courant redémarre-t-il seul en mode hors gel le courant revenu?