Table of Contents
Advertisement
Available languages
Available languages
Quick Links
Advertisement
Table of Contents

Related Manuals for Ronix RH-4051


Summary of Contents for Ronix RH-4051
- Page 1 GASOLINE WATER PUMP 2 INCH RH-4051 www.ronixtools.com...
-
Page 3: Technische Daten
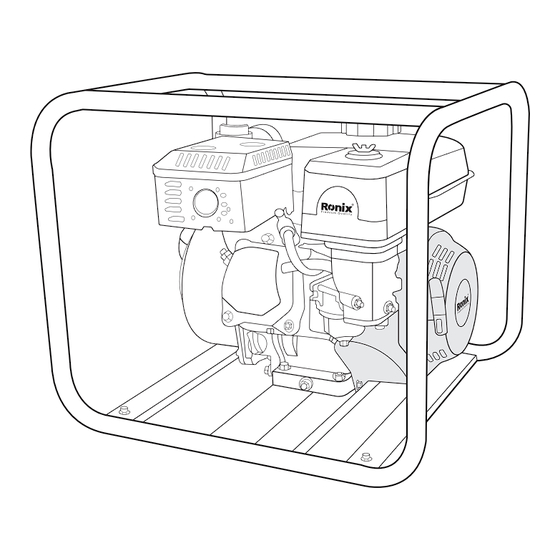
TECHNISCHE DATEN Modell RH-4051 Selbstansaugende Kreiselpumpe Max. Fördermenge 30m³/h Max. Förderhöhe Einlass-/Auslassdurchmesser 2×''2'' Saughöhe Flüssigkeitstyp Sauberes Wasser Max. Flüssigkeitstemperatur 65ºc Max. Umgebungstemperatur 40ºc Pumpe Arbeitsdruck 3.2BAR Pumpengehäusematerial Material der Gleitringdichtung Keramik Sicherheitssystem Ölwarnungen Laufradtyp Halb-offen Laufradmaterial Gusseisen Wellenmaterial Sphäroguss Modell... - Page 4 Zündkerze F7TC/F7RTC Motor Rahmengröße 22mm Abmessungen 500×430×430mm Abmessungen Nettogewicht 21.5Kg Bruttogewicht 23.5Kg 1 Stk. Zündkerzenhülse ENTHÄLT 1 Stk. Stange 1 Stk. Zubehör WERKZEUGTEILE Luftfilter Wasser-Einfüllkappe Schalldämpfer Sauganschluss Rahmen Auslass Kraftstoff-Einfüllkappe Gashebel Chokehebel Ölablassschraube Pumpen-Ablasskappe Kraftstoffventilhebel Filter Ölmessstab Seilzugstartergriff Zündschalter SICHERHEIT DER PUMPE Diese Pumpen sind nur zum Pumpen von Wasser vorgesehen, das nicht für den menschlichen Verzehr bestimmt ist.
- Page 5 Eigentümern führen. Die meisten Unfälle können vermieden werden, wenn Sie alle Anweisungen in diesem Handbuch und auf der Pumpe befolgen. Die häufigsten Gefahren werden unten besprochen, zusammen mit den besten Möglichkeiten, sich selbst und andere zu schützen. VERANTWORTUNG DES BEDIENERS Der Bediener ist dafür verantwortlich, die notwendigen Sicherheitsvorkehrungen zu treffen, um Menschen und Eigentum zu schützen, die Pumpe im Notfall schnell zu stoppen, den Motor...
-
Page 6: Vor Dem Betrieb
Schalldämpfer nicht zu berühren, solange er heiß ist. Lassen Sie den Motor abkühlen, bevor Sie die Pumpe transportieren oder in Innenräumen lagern. Um Brandgefahren zu vermeiden, halten Sie die Pumpe während des Betriebs mindestens 1 Meter (3 Fuß) von Gebäudewänden und anderen Geräten entfernt. - Page 7 PRÜFEN SIE DEN ALLGEMEINZUSTAND DER PUMPE - Überprüfen Sie die Pumpe rundherum und darunter auf Öl- oder Benzinlecks. - Entfernen Sie übermäßigen Schmutz und Ablagerungen, besonders um den Motor, den Schalldämpfer und den Seilzugstarter. - Achten Sie auf Anzeichen von Beschädigungen. - Stellen Sie sicher, dass alle Muttern, Bolzen, Schrauben, Schlauchanschlüsse und Klemmen fest angezogen sind.
- Page 8 haben. Um die Gefahr von Feuer oder Explosionen zu verringern, seien Sie besonders vorsichtig im Umgang mit Benzin. Zum Reinigen der Teile verwenden Sie ausschließlich ein nicht brennbares Lösungsmittel und niemals Benzin. WARTUNGSPLAN REGELMÄSSIGE WARTUNGSINTERVALLE (3) Die Wartung sollte nach den angegebenen Monaten oder Betriebsstunden durchgeführt werden, je nachdem, was zuerst erreicht wird.
- Page 9 1) Bei Verwendung in staubigen Umgebungen ist eine häufigere Wartung erforderlich. 2) Bei gewerblichem Einsatz sollten Sie die Betriebsstunden protokollieren, um die richtigen Wartungsintervalle zu bestimmen. TANKEN - Vor dem Tanken: Stellen Sie sicher, dass der Motor gestoppt ist und die Pumpe auf einer ebenen Fläche steht.
- Page 10 Tankdeckel sicher. - Sicherheit: Tanken Sie niemals in geschlossenen Räumen, in denen Benzindämpfe entstehen könnten. LAGERUNGSVORBEREITUNG Eine ordnungsgemäße Lagerungsvorbereitung ist wichtig, um Ihre Pumpe problemlos und in gutem Zustand zu halten. Die folgenden Schritte helfen, Rost und Korrosion zu vermeiden, damit die Funktion und das Aussehen Ihrer Pumpe nicht beeinträchtigt werden.
- Page 11 Pumpenablassschraube HINWEIS: Ein Trockenbetrieb kann die Pumpendichtung beschädigen. Stellen Sie sicher, dass die Pumpenkammer vor dem Starten des Motors gefüllt ist. - Stoppen Sie den Motor und lassen Sie ihn abkühlen. - Entfernen Sie die Pumpenablassschraube und spülen Sie die Pumpe mit sauberem, frischem Wasser.
- Page 12 - Lassen Sie den gesamten Kraftstoff in den Behälter ablaufen. Setzen Sie anschließend die Ablassschraube und die Sedimenttasse wieder ein und ziehen Sie sie fest. O-Ring Unterlegscheibe Ablassschraube Sedimenttasse MOTORÖL - Wechseln Sie das Motoröl. - Entfernen Sie die Zündkerze. - Gießen Sie einen Esslöffel (5–10 cc) sauberes Motoröl in den Zylinder.
-
Page 13: Fehlerbehebung
Die Kerbe auf der Riemenscheibe mit dem Loch oben am Deckel ausrichten. LAGERUNGSVORSICHTSMASSNAHMEN Wenn Ihre Pumpe mit Benzin im Tank und Vergaser gelagert wird, ist es wichtig, die Gefahr einer Benzindampf-Entzündung zu minimieren. Wählen Sie einen gut belüfteten Lagerbereich, der von Flammenquellen wie einem Ofen, Wassererhitzer oder Wäschetrockner entfernt ist. - Page 14 - Ist genug Kraftstoff im Tank? - Ist der Kraftstoffhahn auf „ON“? - Erreicht Benzin den Vergaser? Um dies zu überprüfen, entfernen Sie die Ablassschraube des Schwimmergehäuses und stellen Sie den Kraftstoffhahn auf „ON“. Der Kraftstoff sollte frei herausfließen. Ablassschraube –...
- Page 15 WENN DIE PUMPE KEIN WASSER PUMPT: - Ist die Pumpe vollständig gefüllt (vorgeschmiert)? - Ist der Filter verstopft? - Sind die Schlauchschellen am Saugschlauch fest angezogen? - Ist der Saugschlauch beschädigt? - Ist die Dichtung am Saugschlauchanschluss eingebaut? - Ist die Saughöhe zu hoch? - Falls die Pumpe weiterhin kein Wasser pumpt, bringen Sie sie zu einem autorisierten Wasserpumpen-Händler.
- Page 16 GASOLINE WATER PUMP 2 INCH RH-4051...
-
Page 17: Technical Specifications
TECHNICAL SPECIFICATIONS Model RH-4051 Type Self-Priming Centrifugal Max.Flow 30m³/h Max.Head Inlet/Outlet Port Diameter 2×''2'' Suction Height Liquid Type Clean Water Max. Liquid Temperature 65ºc Max. Ambient Temperature 40ºc PUMP Working Pressure 3.2BAR Pump Housing Material Mechanical Seal Material Ceramics Safety System... -
Page 18: Parts List
Spark Plug: Type F7TC/F7RTC ENGINE Frame Diameter 22mm Dimension 500×430×430mm DIMENSION Net Weight 21.5Kg Gross Weight 23.5Kg 1 Pc - Spark Plug Sleeve INCLUDE 1 Pc - Rod 1 Pc - ACCESSORIES PARTS LIST Air Cleaner • Priming Water Filler Cap • Muffler •... -
Page 19: Operator Responsibility
Most accidents can be prevented if you follow all instructions in this manual and on the pump. The most common hazards are discussed below, along with the best way to protect yourself and others. OPERATOR RESPONSIBILITY It is the operator’s responsibility to provide the necessary safeguards to protect people and property. -
Page 20: Carbon Monoxide Hazard
from building walls and other equipment during operation. Do not place flammable objects close to the engine. CARBON MONOXIDE HAZARD Exhaust gas contains poisonous carbon monoxide. Avoid inhalation of exhaust gas. Never run the Engine in a closed garage or confined area. SAFETY LABEL LOCATIONS The labels shown here contain important safety information. -
Page 21: Check The Engine
CHECK THE SUCTION AND DISCHARGE HOSES - Check the general condition of the hoses. Be sure the hoses are in serviceable condition before connecting them to the pump. Remember that the suction hose must be reinforced construction to prevent hose collapse. - Check that the sealing washer in the suction hose connector is in good condition. -
Page 22: Suction Hose Installation
the time it takes the pump to bring water the distance of the suction head during the initial operation. Discharge Head Total Head Suction Head SUCTION HOSE INSTALLATION Use a commercially available hose and hose connector with the hose clamp provided with the pump. The suction hose must be reinforced with a no collapsible wall or braided wire construction. -
Page 23: Discharge Hose Installation
DISCHARGE HOSE INSTALLATION Use a commercially available hose and hose connector, and clamp provided with the pump. It is best to use a short, large-diameter hose; because that will reduce fluid friction and improve pump output. A long or small-diameter hose will increase fluid friction and reduce pump output. Tighten the hose clamp securely to prevent the discharge hose from disconnecting under pressure. -
Page 24: Starting The Engine
STARTING THE ENGINE - Prime the pump. - Move the fuel valve lever to the ON position. - To start a cold engine, move the choke lever to the CLOSED position. To restart a warm engine, leave the chock lever in the open position. - Move the throttle lever away from the SLOW position about 1/3 of the way toward the FAST position. -
Page 25: Stopping The Engine
by adjusting the engine speed. Moving the throttle lever in the FAST direction will increase pump output, and moving the throttle lever in the SLOW direction will decrease pump output. Throttle Lever • Slow Fast STOPPING THE ENGINE To stop the engine in an emergency, simply turn the ignition switch to the OFF position. -
Page 26: Maintenance Safety
for recommendations applicable to your individual needs and use. To ensure the best quality and reliability, use only new, genuine parts or their equivalents for repair and replacement. MAINTENANCE SAFETY Read the instructions before you begin, and make sure you have the tools and skills required. - Page 27 Every 2 years Fuel tube Check (2) (Replace if necessary) 1) Service more frequently when used in dusty areas. 2) For commercial use, log hours of operation to determine proper maintenance intervals. REFUELING - With the engine stopped and on a level surface, remove the fuel tank cap and check the fuel level.
-
Page 28: Fuel Recommendations
reach flames or sparks. Keep gasoline away from appliance pilot lights, barbecues, electric appliances, power tools, etc. FUEL RECOMMENDATIONS - Use unleaded gasoline with a pump octane rating of 86 or higher. - Never use stale or contaminated gasoline or an oil/gasoline mixture. Avoid getting dirt or water in the fuel tank. -
Page 29: Engine Oil Change
ENGINE OIL CHANGE Drain the used oil while the engine is warm. Warm oil drains quickly and completely. Oil Filler Cap / Dip- — • Sealing Washer Drain Plug • — - Place a suitable container below the engine to catch the used oil, then remove the oil filler cap/dipstick, drain plug, and sealing washer. -
Page 30: Engine Oil Recommendations
NOTICE: Running the engine with a low oil level can cause engine damage. ENGINE OIL RECOMMENDATIONS Oil is a major factor affecting performance and service life. Use 4-stroke automotive detergent oil. SAE 10W-30 is recommended for general use. Other viscosities shown in the chart may be used when the average temperature in your area is within the recommended range. -
Page 31: Air Filter Cleaning
Wing Nut • — — • Cover Washer AIR CLEANER Cover • — Air Filter • — — • Grid AIR FILTER CLEANING A dirty air filter will restrict airflow to the carburetor, reducing engine performance. If you operate the pump in very dusty areas, clean the air filter more frequently than specified in the MAINTENANCE SCHEDULE. - Page 32 Air Filter • — - Disconnect the spark plug cap, and remove any dirt from around the spark plug area. - Remove the spark plug with a 13/16-inch spark plug wrench. - Inspect the spark plug. Replace it if the electrodes are worn, or if the insulator is cracked or chipped.
-
Page 33: Storage Preparation
- After the spark plug seats, tighten with a 13/16-inch spark plug wrench to compress the washer. If reinstalling the used spark plug, tighten 1/8-1/4 turn after the spark plug seats. If installing a new spark plug, tighten 1/2 turn after the spark plug seats. -
Page 34: Draining The Fuel Tank And Carburetor
• Pump Drainplug NOTICE: A dry operation will damage the pump seal. Be sure the pump chamber is filled before starting the engine. - Stop the engine, and allow it to cool. - Remove the pump drain plug, and flush the pump with clean, fresh water. Allow the water to drain from the pump chamber, then reinstall the drain plug. -
Page 35: Storage Precautions
• O-Ring Washer • — Drain Bolt • — • Sediment Cup ENGINE OIL - Change the engine oil. - Remove the spark plug. - Pour a tablespoon (5-10 cc) of clean engine oil into the cylinder. - Pull the starter grip several times to distribute the oil in the cylinder. - Reinstall the spark plug. -
Page 36: Troubleshooting
area away from any appliance that operates with a flame, such as a furnace, water heater, or clothes dryer. Also avoid any area with a spark-producing electric motor, or where power tools are operated. If possible, avoid storage areas with high humidity, because that promotes rust and corrosion. - Page 37 A. Remove the spark plug cap. Clean any dirt from around the spark plug base, then remove the spark plug. B. Install the spark plug in the plug cap. C. Turn the engine switch ON. D. Grounding the side electrode to any engine ground, pull the recoil starter to see if sparks jump across the gap.
- Page 40 www.ronixtools.com...
Need help?
Do you have a question about the RH-4051 and is the answer not in the manual?
Questions and answers