Table of Contents
Advertisement
Quick Links
Advertisement
Table of Contents

Related Manuals for Securam SH-SS01


Summary of Contents for Securam SH-SS01
- Page 1 SECURAM GUARD App Guide Wi-Fi Security Switch | SH-SS01...
-
Page 2: Table Of Contents
Contents Device Setup................3 Device Management.............34 a. Ambient Light Sensor Smart Control................6 b. Motion Sensor Smart Mode................7 c. Manual Off Buffer d. LED Status a. Add a Smart Mode Rule e. Set LED Color b. Edit a Smart Mode Rule c. Delete a Smart Mode Rule Arming System...............40 Schedule.................11 Sharing the Device............41... - Page 3 Smart Modes and voice assistant integration. Feel free to explore at your own pace, ensuring a seamless and straightforward journey to enhance your home security. Let's elevate the safety and intelligence of your home with SECURAM GUARD.
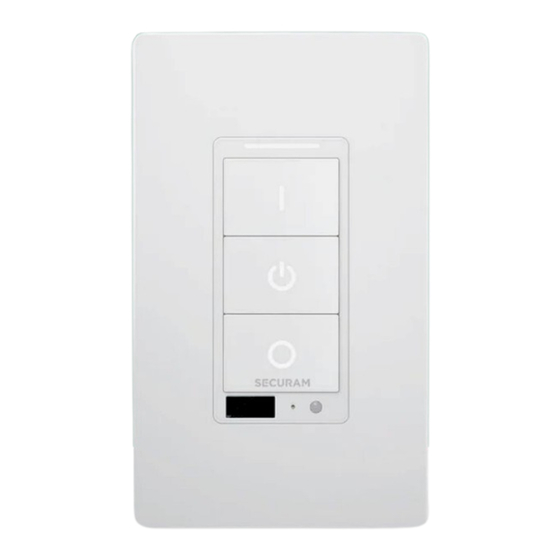
- Page 4 Overview of Wi-Fi Security Switch SECURAM SH-SS01 INDICATOR SMART ON ON/OFF SMART OFF LIGHT LASER MOTION SENSOR SENSOR...
-
Page 5: Device Setup
Device Setup Start by downloading the SECURAM GUARD app from App Store or Google Play. Sign up & login to the Tap “+”in the home Select the “Lights” tab, Tap “Next” APP. page. then tap “WIFI SWITCH”. y u s... - Page 6 Device Setup Follow the app Select your device(s) Select your Wi-Fi Input your Wi-Fi . instructions to press the and tap Next. network. RESET button.
- Page 7 Device Setup Pairing Device. Paring success! You Press “Done”. may rename your devices here.
-
Page 8: Smart Control
Smart Control Homepage: View your Tap the on/off button to connected devices control the lights... -
Page 9: Smart Mode
Smart Mode - Add a Smart Mode Rule Note: Control lights through rules set by built-in motion and ambient light sensors Tap "Smart Mode". Select "Create Rules". Tap "Add" to include the rules. " " " " " " ( / / /... -
Page 10: Add A Smart Mode Rule
Smart Mode - Add a Smart Mode Rule Tap & Set the rule's Specify conditions for Specify conditions for Tap Save. time. light to turn on. light to turn off. -
Page 11: Edit A Smart Mode Rule
Smart Mode - Edit a Smart Mode Rule On the Device Detail Tap "Edit Rules" to Adjust the rules as page, select Smart enter the settings page. needed and then tap Mode. Save. -
Page 12: Delete A Smart Mode Rule
Smart Mode - Delete a Smart Mode Rule Within "Edit Rules," tap Confirm the deletion. Deletion successful. the "Delete" icon. -
Page 13: Schedule
Schedule - Add a Schedule Automate your lights with scheduled on/off settings. On the Device Detail Tap "Schedule." Press the "+" icon in the Select the turn-on page, select "Program." Program Page method, either Manually or at a set time. -
Page 14: Add A Schedule
Schedule - Add a Schedule Choose the activation Set the turn-off time. Tap Save. View created method: Manually or at schedules on this page. a specific time. -
Page 15: Edit A Schedule
Schedule - Edit a Schedule On the Schedule page, Make the necessary select the schedule you changes to the wish to edit. schedule and then tap Save. -
Page 16: Delete A Schedule
Schedule - Delete a Schedule On the Schedule page, Tap "Delete." The schedule has been choose the schedule successfully deleted. you wish to delete. -
Page 17: Timer
Timer Automate light control with a countdown timer. On the Device Detail Tap "Timer." Set the duration, choose Once the timer reaches page, select "Program." to turn on or off, and zero, the light will save. automatically turn on/off. -
Page 18: Vacation Mode
Vacation Mode Activate vacation mode to simulate presence by randomly turning the switch on/off within the set time range. On the Device page, Tap "Vacation." Toggle the switch to Customize the vacation select "Program." enable vacation mode. mode time and tap Save. -
Page 19: Smart On
Smart On Method 1: Utilize the "Routines" page to add the Routines. Activate multiple switches with the Smart On button. On the Home page, tap Press "+" to add a Tap "Smart On" to add Tap "+" to set the "Routines"... - Page 20 Smart On Method 1: Utilize the "Routines" page to add the Routines. Choose the Source Tap "+" to select the Select the Target Add a Schedule to set Device, then tap "Next." action of the routine. Device, then tap "Next." when this routine will be active.
- Page 21 Smart On Method 1: Utilize the "Routines" page to add the Routines. After setting the Tap "Save." Set the Routine Name Routine saved! The Schedule, tap "Next." and tap "Save." Smart On button is now programmed.
- Page 22 Smart On Method 2: Program the SMART ON button using the "Smart Buttons" page. On the Device page, tap Tap "+" to set the Select a Target Device Add a Schedule to set "Smart Buttons," then Routine. and tap "Next." when this routine will the "| Button."...
- Page 23 Smart On Method 2: Program the SMART ON button using the "Smart Buttons" page. After setting the Tap "Save." Set the Routine Name Routine saved! The schedule, tap "Next." and tap "Save." Smart On button is now programmed.
-
Page 24: Smart Off
Smart Off Method 1: Add a Smart Off routine in the "Routines" page. Deactivate multiple switches with the Smart Off button. In the Routines page, Tap "Smart Off" to add Tap "+" to select the Select the Source tap "+". the Smart Off routine switch. - Page 25 Smart Off Method 1: Add a Smart Off routine in the "Routines" page. Tap "+" to select the After selecting the Add a Schedule to set After setting the Target Device. Target Device, tap when this routine will be schedule, tap "Next." "Next."...
- Page 26 Smart Off Method 1: Add a Smart Off routine in the "Routines" page. Tap "Save." Set the Routine Name Routine saved! The and tap "Save." Smart Off button is now programmed.
- Page 27 Smart Off Method 2: Use "Smart Buttons" to add the Smart Off Routine. In the Device page, tap Tap "+" to select the After selecting the Tap the dropdown for "Add "Smart Buttons" then Target Device. Target Device, tap Schedule" tap the "...
- Page 28 Smart Off Method 2: Use "Smart Buttons" to add the Smart Off Routine. After setting the Tap "Save." Set the Routine Name Routine saved! The schedule, tap "Next" and tap "Save." Smart Off button is now programmed.
-
Page 29: Routines
Routines - Motion Detected Create a routine for when motion is detected, enabling automatic light control. On the Routines page, Tap "Motion Detected." Tap "+" to add the After selecting the tap "+". Source Device. Source Device, tap "Next."... - Page 30 Routines - Motion Detected Tap "+", choose the After selecting the Select "Turn lights off" After selecting, tap Target Device. Target Device, tap to determine how the "Confirm." "Next." lights will deactivate.
- Page 31 Routines - Motion Detected Add a Schedule to set After setting, tap "Next." Tap "Save." Set the Routine Name when this routine will be and tap "Save." The active. routine has been saved!
- Page 32 Routines - Motion and Dark Establish a routine for when motion and darkness are detected, allowing for automatic light control. In the Routines page, Tap "Motion and Dark" Tap "+" to add the After selecting the tap "+". to add the Motion Source Device.
- Page 33 Routines - Motion and Dark Tap "+", select the After selecting the Choose "Turn lights off" After selecting, tap Target Device. Target Device, tap to specify how the lights "Confirm." "Next." will deactivate.
- Page 34 Routines - Motion and Dark Add a Schedule to set After setting, tap "Next." Tap "Save." Set the Routine Name when this routine will be and tap "Save." active. The routine has been saved!
- Page 35 Routines - Deleting Routines Press and hold the Select the routine and Tap "Confirm." The routine has now routine you wish to tap "Delete" at the been successfully delete. bottom of the page. deleted.
-
Page 36: Device Management
Device Management On the Device page, tap Tap "More" at the View more settings for " Tap for settings" at bottom of the page. the device. the bottom. -
Page 37: Ambient Light Sensor
Device Management - Ambient Light Sensor The ambient light sensor, activated by default, allows you to regulate ambient light sensitivity. This setting serves as a trigger condition in routines like "Motion & Dark." Access the device Tap "Dusk/Dawn." Customize ambient light settings, tap "Light values and save. -
Page 38: Motion Sensor
Device Management - Motion Sensor The Switch detects human movement in a certain range, triggering corresponding settings. Motion Sensor is enabled by default. Set the distance for motion detection: 1-6 feet. In the Device settings, Set the distance for tap "Motion Sensor." motion detection (1-6 feet) and save. -
Page 39: Manual Off Buffer
Device Management - Manual Off Buffer When the light is manually turned off, there's a buffer time before the motion and light sensor activate to avoid immediate triggering. Customizable time: 10s/20s/30s.. In the Device settings, Set the Manual Off tap "Manual Off Buffer." buffer time and save. -
Page 40: Led Status
Device Management - LED Status When motion is detected, the LED status indicator lights up. Toggle to enable/disable the LED status indicator. Set the time the LED status indicator stays on: 10s/30s/1min. Customizable LED status indicator color. On the Device page, tap Select your preferred "Led Status"... -
Page 41: Set Led Color
Device Management - Set LED Color In the Device page, tap Choose a color and tap the LED light bar. "Select."... -
Page 42: Arming System
Arming System Arm On: After successfully setting Arm On, motion detection triggers the alarm and sends a notification to your phone. From the Home page, Tap "Arm Away." After a 1 min Arm Away Mode press "Tap to arm." countdown, the system enters Arm Away mode. -
Page 43: Sharing The Device
Sharing the Device Share: Allow your family to control devices using the app. In the User page, tap Tap the House to share. Tap "Invite" for Family. Input the Email or "Share." Phone number to send the invite. - Page 44 Sharing the Device - continued Select devices to share. Invite sent successfully!
-
Page 45: Accepting An Invitation
Accepting an Invitation Use your Email address or Phone number to log in to the App. Tap "User" in the Tap "Invitations." Tap "Received." Tap the invite bottom navigation bar. information and accept the invitation. Khalil Alex Alex... -
Page 46: Voice Control
Voice Control - Control with Alexa In the Alexa App, tap "More," then tap Skills & Games. Search for "SECURAM" Choose "SECURAM Tap "ENABLE TO USE." Input your SEUCRAM in Alexa Skills. Guard." Guard App account and password. -
Page 47: Control With Alexa
Voice Control - Control with Alexa Input your SECURAM Account linked to Alexa. Alexa searches for Alexa is now ready to Guard App account and newly connected control this light! password. devices. -
Page 48: Control With Google Home
Voice Control - Control with Google Home In the Google Home Tap "Works with Enter "Securam," then Enter your Securam App, tap "Add." Google." tap "SECURAM Guard." Guard account details. - Page 49 Voice Control - Control with Google Home Connection successful! Select the device for Choose a home and Choose a room for your You may now control voice control through room for your device. device. the switches with Google. Google Home.
- Page 50 FCC Notice This device complies with part 15 of the FCC Rules. Operation is subject to the following two conditions: (1) this device may not cause harmful interference, and (2) this device must accept any interference received, including interference that may cause undesired operation.
Need help?
Do you have a question about the SH-SS01 and is the answer not in the manual?
Questions and answers