
Subscribe to Our Youtube Channel
Related Manuals for Elba EL 45 CCM

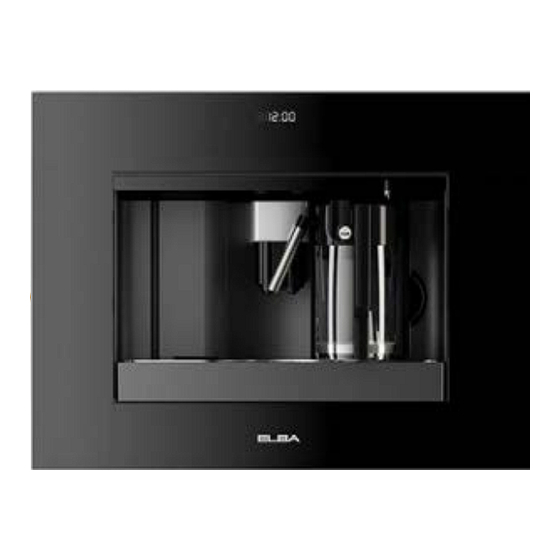
Summary of Contents for Elba EL 45 CCM
- Page 1 Installation advices - Instructions for the use BUILT-IN AUTOMATIC COFFEE MAKER EL 45 CCM ELBA QUALITY MADE IN ITALY Made in Italy...
- Page 2 Dear Customer, Thank you for having purchased and given your preference to our product. The safety precautions and recommendations reported below are for your own safety and that of others. They will also provide a means by which to make full use of the features offered by your appliance.
-
Page 3: Table Of Contents
CONTENTS MAKING CAPPUCCINO ....14 INTRODUCTION .......4 CHANGING THE QUANTITY OF MILK AND COFFEE FOR CAPPUCCINO ...15 Symbols used in these instructions ..4 Changing the quantity of milk .....15 Letters in brackets ........4 Changing the quantity of coffee ..16 Troubleshooting and repairs ....4 SAFETY ..........4 CLEANING ........16 Fundamental safety warnings ....4... -
Page 4: Introduction
INTRODUCTION Danger of burns! Symbols used in these Failure to observe the warning could result in instructions scalds or burns. . Important warnings are identified by these symbols. Failure to observe the instructions N.B.! could result in electric shock, serious injury, burns, fire or damage to the appliance. - Page 5 If the plug or power cable is damaged, it must be replaced by customer services only to avoid all risk. Appliances with removable cord: avoid splashes of water on the power cord connector or socket at the back of the appliance. WARNING: Models with glass surfaces: do not use the appliance if the surface is cracked.
-
Page 6: Designated Use
DESCRIPTION to make the coffee (the measure for example) in the special holder. Do not rest large objects Description of the appliance which could obstruct movement or unstable (page 28 - A) objects on the appliance. Do not allow children and animals to stop or A1. -
Page 7: Description Of Milk Container And Accessories
Connecting the appliance icon to exit the selected mode B7-B8. icons to scroll forwards or backwards through the menu and Danger! Check that the mains power display the various modes supply voltage corresponds to the value in- B9. OK icon to confirm the selected function dicated on the rating plate on the bottom of B10. -
Page 8: Built-In Installation
BUILT-IN INSTALLATION h 378 mm Verify the minimum measurements required for correct installation of the appliance. The coffee maker must be installed in a column and the column must be firmly fixed to the wall with commercially available brackets. Important: •... - Page 9 orem Lorem Lorem x 16 x 16 Lorem x 16 Position the rails on the sides of the cabinet as shown in the figure. Fix with the screws supplied, then extract them completely. If the coffee maker is installed over a warmer Position the appliance on the rails, making sure the pins are correctly inserted in the drawer, use the top surface of this as a...
-
Page 10: Using The Appliance For The First Time
USING THE APPLIANCE FOR THE FIRST TIME N.B.! When using the appliance for the first time, you need to make 4-5 cups of coffee and 4-5 cappuccinos before the Coffee has been used to factory test the • appliance gives satisfactory results. appliance and it is therefore completely normal for there to be traces of coffee in N.B.! Each time you turn the coffee... -
Page 11: Replacing The Filter("Filter Reset")
Removing the filter selection (or (B6) to cancel). “HOT WATER PRESS OK” is displayed. To use the appliance without a filter, you 12. Press the OK icon (B9) again. The ap- must remove it and notify the appliance of its pliance begins delivering hot water and removal as follows: the message “PLEASE WAIT... -
Page 12: Making Coffee Using Coffee Beans
MAKING COFFEE USING If on the other hand more than 2/3 • COFFEE BEANS minutes have passed since the last coffee was made, before requesting another coffee, you must preheat the The appliance is preset to make coffee brewing unit by pressing the icon with a normal taste. -
Page 13: Changing The Quantity Of Coffee In The Cup
When cleaning, always extract the drip (fig. 15). Press the icons (B7) and tray completely. (B8) (fig. 2) until “PROGRAM COFFEE” is displayed. Press the OK icon (B9). Important! When extracting the • drip tray, the waste coffee container MUST Select the type of coffee you want to •... -
Page 14: Making Espresso Coffee With
MAKING ESPRESSO COFFEE icon (B13) or To interrupt, press the WITH PRE-GROUND COFFEE icon (B6). The appliance stops delivery once the set (INSTEAD OF BEANS) quantity is reached. icon (B4) (fig. 8) and select • Press the CHANGING THE QUANTITY the pre-ground coffee function. -
Page 15: Changing The Quantity Of Milk And Coffee For Cappuccino
Place a recipient under the milk spout (fig. • Make sure the intake tube is correctly • inserted in the rubber washer (fig. 24) 26). Press the CLEAN button on the lid (C3) then replace the milk container lid. • Position the frothed milk regulator (C1) and hold down for at least 5 seconds •... -
Page 16: Changing The Quantity Of Coffee
Changing the quantity of coffee Clean the waste coffee container • thoroughly. Press the SET icon (B2) to enter the • menu (fig. 15) or press the icons Important! When extracting the drip (B7) and (B8) (fig. 2) until “PROGRAM tray, the waste coffee container must always CAPPUCCINO”... -
Page 17: Cleaning The Pre-Ground Coffee Funnel
Cleaning the pre-ground coffee Support funnel Check regularly (about once a month) • that (the pre-ground coffee funnel is not blocked (fig. 21). Danger! Before performing any cleaning operations, the machine must be turned off by pressing the main switch (A23) and unplugged from the mains power supply. -
Page 18: Changing And Setting Menu Parameters
be washed in a dishwasher, placing them in • Water hardness Program coffee the top basket of the dishwasher. • Turn the milk container lid clockwise • Program cappuccino then remove it. • Program water Remove the milk spout and intake tube. •... -
Page 19: Setting The Clock
Changing coffee temperature Press the OK icon (B9) to confirm. • icon (B6) to exit. • Press the To change coffee temperature, proceed as follows: Setting the clock Press the SET icon (B2) to enter the • icons (B7) menu and then the Press the SET icon (B2) to enter the •... -
Page 20: Programming Cappuccino
“CHANGING THE QUANTITY OF COFFEE Press the OK icon (B9). Descaler flows • IN THE CUP” section. out of the hot water spout into the container below. Programming cappuccino The appliance displays: “DESCALING”. • • The descale programme automatically For instructions on programming cappuccino, see the “CHANGING THE QUANTITY OF performs a series of deliveries and MILK AND COFFEE FOR CAPPUCCINO”... -
Page 21: Statistics
Statistics Water filter For instructions on the water softener filter, This displays statistics relating to the see the section “INSTALLING THE FILTER”. machine. To display, proceed as follows: Press the SET icon (B2) to enter the • TURNING THE APPLIANCE icons (B7) and menu and then the (B8) until “STATISTICS”... -
Page 22: Electrical Connection (Uk Only)
ELECTRICAL CONNECTION (UK ONLY) If your appliance comes fitted with a plug, it will incorporate a 13 Amp fuse. If it does not fit your socket, the plug should be cut off from the mains lead, and an appropriate plug fitted, as below. WARNING: Very carefully dispose of the cut off plug after removing the fuse: do not insert in a 13 Amp socket elsewhere... -
Page 23: Displayed Messages
DISPLAYED MESSAGES DISPLAYED MESSAGE POSSIBLE CAUSE REMEDY FILL TANK • The water tank is empty Fill the tank with water • and/or insert it correctly, or positioned incorrectly. pushing it as far as it will GROUND TOO FINE ADJUST • grinding •... - Page 24 DISPLAYED MESSAGE REMEDY POSSIBLE CAUSE ADD PRE-GROUND COFFEE • The “pre-ground coffee” • Extract the appliance and place pre-ground coffee in function been selected without placing he funnel. any pre-ground coffee in the funnel. • Empty the funnel with the funnel (A21) •...
-
Page 25: Troubleshooting
TROUBLESHOOTING Below is a list of some of the possible malfunctions. If the problem cannot be resolved as described, contact Customer Services. PROBLEM POSSIBLE CAUSE REMEDY The coffee is not hot. cups were • Warm the cups by rinsing • preheated. - Page 26 PROBLEM POSSIBLE CAUSE REMEDY The coffee is delivered The coffee is ground • • Turn the grinding adjustment too quickly. too coarsely. knob one click anticlockwise towards “1” while the coffee mill is in operation (fig. 14). Avoid turning the grinding adjustment knob excessively otherwise when you select 2 cups, the coffee may be...
- Page 27 PROBLEM POSSIBLE CAUSE REMEDY milk contains • The milk is not cold • should ideally bubbles or squirts out of enough or is not semi- skimmed semi-skimmed the milk spout. skimmed. milk at refrigerator temperature (about 5°C). If the result is still disappointing, try another brand of milk.
-
Page 28: Figures
FIGURES A7 A6 A8... - Page 32 The manufacturer cannot be held responsible for possible inaccuracies due to printing or transcription errors in the present booklet. The manufacturer reserves the right to make all modifications to its products deemed necessary for manufacturer commercial reasons at any moment and without prior notice, without jeopardising the essential functional and safety characteristics of the appliances.
Need help?
Do you have a question about the EL 45 CCM and is the answer not in the manual?
Questions and answers