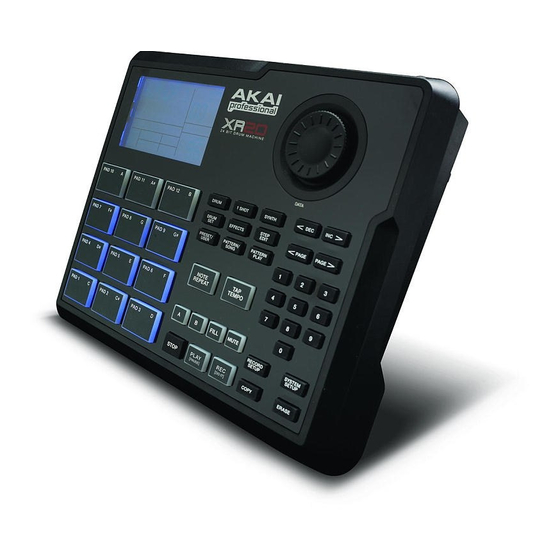
Akai XR 20 Reference Manual
Beat production center
Hide thumbs
Also See for XR 20:
- Quick start manual (76 pages) ,
- Datasheet (1 page) ,
- Service manual (66 pages)
Table of Contents
Advertisement
Quick Links
Advertisement
Table of Contents

Related Manuals for Akai XR 20


Summary of Contents for Akai XR 20
-
Page 3: Table Of Contents
Page 2 / RECEIVE MIDI NOTES PLAYING PATTERN SEQUENCES WITH THE PADS Page 3 / TRANSMIT MIDI NOTES RECORDING PATTERN SEQUENCES INTO A Page 4 / ASSIGN MIDI NOTE NUMBERS TO DRUM SONG PADS ASSIGNING PATTERNS TO THE PADS Page 5 / ACCEPT EXTERNAL CLOCK VALUE... -
Page 5: Introduction
Data can be saved so that it is retained in memory even if the power is turned off. If the memory fills up with drum Patterns and Songs, this data can be saved permanently to MIDI System Exclusive storage devices. - Page 6 User Patterns are Patterns you can program, edit, and save. The PRESET/USER button selects between these two master banks of Presets. It is important to note that the only way to modify a Preset Pattern is to copy it to a User Pattern, where it can be edited.
- Page 7 What's a Voice? Each of the 12 large pads triggers a voice. A voice is a sound-generating element with several variable parameters: sound assignment, tuning, volume, output assignment (the voice's audio output can go to either one of two sets of stereo outputs, and furthermore, to anywhere within the stereo field of the chosen set of outputs), MIDI note number, etc.
-
Page 8: Connection Diagram
Connect a MIDI device, such as a sampler or sound module, to the MIDI OUT of the XR20. Connect a MIDI device, such as a percussion controller, to the MIDI IN of the XR20. If you have ¼” TS footswitches, connect them to the START / STOP and COUNT / A / B / FILL jacks. -
Page 9: Top Panel Physical Layout
NOTE REPEAT – While programming Patterns, hold down this button and press a pad to create a roll. The roll will last for as long as the pad is being held down. This lets you play a series of drum hits without having to repeatedly press the pads, and is typically used to create steady 16th note hi-hat parts, quarter note kick drum parts, snare rolls, etc. -
Page 10: Navigation Buttons
A & B – Each Pattern consists of two Main sub-patterns – A & B. You can select each of the two sub-patterns by pressing its corresponding button. These sub-patterns allow you to program variation in your Patterns (i.e. sub-pattern A is the verse, sub-pattern B is the chorus). -
Page 11: Setup Buttons
When you modify or customize a Drum Set, you will need to make sure that you save it (press the SAVE button, then press REC to confirm) in order to be able to access it later. To exit Drum Set Mode, press the Drum Set button again. -
Page 12: Rear Panel Physical Layout
10. START / STOP FOOTSWITCH – Connect a ¼” TS footswitch to this input to remotely start and stop playback on the XR20. 11. COUNT / A / B / FILL – Connect a ¼” TS footswitch to this input to remotely control pattern playback on the XR20. -
Page 13: Display Layout
In operations that require selecting a drum pad, this window displays the drum pad number. 3. Drumset Edited indicator - If you have edited a Drum Set to which a particular Pattern was assigned, the display also shows DRUMSET EDITED. This is a reminder that you need to save your changes if you would like to be able to recall them at a later time. -
Page 14: Basics
Example: If the display shows 00 and you want to enter 01, tap the INC button once. These buttons, as well as the PAGE buttons, also have a "scroll" feature. If you press and hold a button, after a short pause the display will either increment or decrement at a rapid rate. -
Page 15: Steps To Instant Gratification (Setup And Checkout)
To hear the built-in demo, hold down the PATTERN/SONG button and press PLAY. To stop the demo, press STOP. If you want to play along with the demo, feel free to bash away on the pads. -
Page 16: The Instrument Layers
THE INSTRUMENT LAYERS The XR20 allows you to play three different kinds of sounds with the pads. These sounds are available in three different Play Modes or Banks. These are DRUM, 1-SHOT and SYNTH and are accessible by pressing the corresponding button on the top panel. - Page 17 Pattern number will play the B variation. You can also enter a two-digit Pattern number followed by A or B or PRESET / USER to call up an A or B or Preset or User Pattern, regardless of the Pattern that is currently playing.
- Page 18 Fills are always the same length, and use the same Drum Set, as the associated Main Pattern. This lets you "drop in" a Fill at any time. As soon as you press the FILL button, the Fill takes over from the Main Pattern and starts playing until the end of the Fill.
- Page 19 Press a pad on the first beat of what will be a series of hits and hold it down. Immediately after pressing the pad, press and hold the NOTE REPEAT button. The drum will be retriggered at the current quantization rate for as long as the pad and NOTE REPEAT button are held down.
- Page 20 To play a Song, press the PATTERN / SONG button until SONG is displayed in the upper corner of the screen. Select the Song you want to play with the INC / DEC buttons or the VALUE dial. After you select the Song press the PLAY button.
-
Page 21: Recording Patterns
Note: An empty Pattern defaults to an 8 beat length (2 Bars), with 16th note quantization and swing off (50%). If you need to change the length, it is best (though not essential) to do so before recording. Other parameters can be changed while you're recording. -
Page 22: Pattern Play Mode
The assigned Pattern will be displayed on the bottom line. You can also press A or B to choose whether the selected pattern’s A or B part will be played when the pattern is triggered. Press another pad to select it and then adjust the Pattern assignment in a similar fashion. -
Page 23: Selecting, Editing And Creating Drum Sets
Sets’ section), then press DRUM SET again to exit. Note: To select sounds for the 1-Shot or Synth section of the kit, press the corresponding button for these sections and then edit the parameters the same way you would for the Drums. - Page 24 SYNTH. (Note that Synth sounds can only be modified as a group). Press the pad (the display will show the pad number in the upper right corner and the name of the sound assigned to the pad on the top line).
- Page 25 INC/DEC buttons or VALUE dial. The seven available pan positions correspond to the number buttons shown in parenthesis: hard left (1), soft left (2), left of center (3), center (4), right of center (5), soft right (6), and hard right (7). The display will show <> when panning position is center.
- Page 26 The Decay envelope is available for all Pad Play Modes (Drums, 1-Shot, Synth) and affects the amount of time before the sound stops ringing out. This allows you to get the effect of a deep drum sound that will decay over a specific period, or with a short decay time, a short staccato hit.
- Page 27 The XR20 can play up to 32 voices at a time, so it's possible to run out of voices if you play a flurry of notes and have lots of pads in the Multi assign mode. If 16 sounds are playing and you ask the XR20 to play another one, the sound that's closest to finishing its decay cycle will be "stolen"...
- Page 28 4 of the Drum Set menus). This allows several output assignment options: Mono: Plug into one of the output pair jacks; the XR20 is smart enough to know that plugging in one plug means you must want mono. Any pan settings are ignored. Do not plug into both outputs, or stereo will be activated.
-
Page 29: Effects
Finally, press REC to save to the selected location. If you were editing a Preset Drum Set and want to save it, you will be given the option to save it to a User Drum Set since you cannot overwrite a Preset Drum Set. This technique can also copy one Drum Set to a different Drum Set. -
Page 30: Record Setup
Enter the desired quantization value with the INC/DEC buttons, VALUE dial, or number buttons (1 = quarter note, 2 = quarter note triplet, 3 = 8th note, 4 = 8th note triplet, 5 = 16th note, 6 = 16th note triplet, 7 = 32nd note, 8 = 32nd note triplet, 9 and 0 = Off, equivalent to 1/384th note resolution). -
Page 31: Page 2: Gate
R’n’B and pop music. For example, with Swing set to 62%, the first note of the pair takes up 62% of the total duration of the pair of notes, while the second note takes up 38% of the total duration. -
Page 32: Page 6: Velocity Sensitivity
VALUE dial or the number buttons (1 = Fixed 1, 2 = Fixed 2, 3 = Fixed 3, 4 = Fixed 4, 5 = Fixed 5, 6 = Fixed 6, 7 = Fixed 7, 8 = Fixed 8, 9 = Soft, and 0 = Loud). Note that the Medium setting can be selected only with the INC/DEC buttons or VALUE dial. -
Page 33: Page 9: Pattern Length
The XR20 should be in Pattern mode and stopped. The display says OFFSET, which will be 00 (no offset). Press the pad to be offset (as confirmed by the display). If you don't select a pad, offset affects the entire Pattern. -
Page 34: Editing Patterns - Erase Functions
While holding down ERASE, press the pad corresponding to the sound to be erased just before the first event to be erased, and release just after the last event to be erased. To erase a single event, tap the pad on that single event. -
Page 35: Editing Patterns - Copy/Save Functions
The following operation will copy only the selected sub-pattern (A, B, or FILL) to another destination. If the current Pattern is shorter than the destination, the part will be copied to the beginning, leaving the remainder blank. Copying a sub-pattern longer than the destination Pattern will automatically lengthen the destination Pattern (128 Beat maximum). -
Page 36: Editing Patterns - Transposition
Step mode provides detailed Pattern editing. (Note that "step" does not refer to Song steps, but to the steps in a Pattern that hold drum events.) You can move through a Pattern one step at a time, stop at each event as desired, and delete the event, add an event, or change an event's volume. -
Page 37: Adding A New Drum To A Step
(how hard the pad was hit), will be recorded into the displayed step. If you play a pad and there is already a drum event played by that pad on the displayed step, you will edit the volume rather than add another event. This is true even if there are several events on the displayed beat, and an event other than the one to be edited is showing. -
Page 38: Song Mode
SONG MODE After creating the Patterns that make up a Song, it's time to string those Patterns together to create a complete Song. You can use Preset Patterns, User Patterns, or a combination of both to create your Song. There are three ways to create Songs: In real time. -
Page 39: Recording A Song In Real-Time
When finished, press STOP. NOTES: If you enter a new Pattern number (Preset or User, A or B) while the first Pattern is playing, the new Pattern will begin playing after the first Pattern has finished and be stored as another Song step in the Song. -
Page 40: Manual Song Creation (Song Step Edit Mode)
MANUAL SONG CREATION (SONG STEP EDIT MODE) Another way to sequence your Song is to use Step Edit Mode. In this mode, you can manually enter Pattern numbers for each step of the Song. Select Song mode (the display should indicate SONG in the upper right corner) and select a desired Song number with the number keypad, INC / DEC buttons or the VALUE dial. - Page 41 While in Record mode, there are two ways to remove a Fill from a Song: When the Fill step appears, press the A button for an A Pattern or press the B button for a B Pattern and the Fill will be removed.
-
Page 42: Setting Song Tempo
TAP TEMPO button. Method 2 Alternatively, you can press and hold the TAP TEMPO button and use the INC / DEC buttons or VALUE dial to select a new tempo. INSERTING A TEMPO CHANGE IN A SONG This option allows you to insert a tempo change at a selected Song step. -
Page 43: Controlling Playback Position
CONTROLLING PLAYBACK POSITION If you press STOP while a song is playing, the next time you press PLAY the Song will start from the beginning. If you press PLAY while a song is playing, the song will pause. Press PLAY again to resume playback. -
Page 44: Erasing An Entire Song
When you are finished putting together your Song, you will need to save it to permanent memory. Please note that all Song data will be lost if you turn off the XR20 before saving your Song. The XR20 should be in Song Mode. -
Page 45: System Setup
After making all needed changes, press SYSTEM SETUP again to exit, or choose another page. Note: All the parameters on the following pages remain as set, even if you turn off power, until the parameters are changed again. Page 1 / MIDI CHANNEL (MIDI CH) When controlling the XR20 with external MIDI devices, such as MIDI drum pads and keyboards, you can specify MIDI Channel settings for each instrument layer on this page. -
Page 46: Transmit Midi Notes
Select OFF if you don't want the XR20 to transmit note data. Tip: If the XR20 is acting as a drum machine and provides the master clock to a MIDI system, select OFF so that other devices don't respond to the MIDI note data. -
Page 47: Accept External Clock Value
Page 5 / ACCEPT EXTERNAL CLOCK VALUE (CLOCK IN) Playback and tempo on the XR20 can be controlled by external devices through MIDI Clock if: The external device (sequencer, drum machine, etc.) generates MIDI timing signals. These signals go from the external device's MIDI OUT to the XR20's MIDI IN. -
Page 48: Merge Midi In With Midi Out
Technically speaking, MIDI timing data (as provided by a master unit such as a sequencer) received at the XR20's MIDI IN is not sent to the MIDI OUT. However, this will appear to be the case since the XR20 will generate its own timing data in response to the timing data received at its MIDI IN, if CLOCK IN and CLOCK OUT are both ON. -
Page 49: Tempo Selection
MIDI notes. The logic to this assignment is that there are 12 drum pads per octave of notes, so pad 1 always starts on a C note (MIDI notes 000, 012, 024, 036, 048, 060, 072, 084, 096, and 108). Remember that these drum assignments must be saved as Drum Sets in order to... - Page 50 Drum note map in MULTI-DRUMSET mode. NOTE: In this chart, Pad and MIDI note number values for drumset 00 also apply to drumsets 10, 20, 30, and 40; values for drumset 01 also apply to drumsets 11, 21, 31 and 41, etc.
-
Page 51: Manual Drumset Override
Drum Set regardless of whether or not you change Patterns. This is useful if you want to hear how a Pattern would sound with a different Drum Set (just set one up manually) as opposed to the one stored with the Pattern. -
Page 52: Low Battery Warning
XR20 duplicates a Pattern before it is modified (length change, offset change, etc.). If you try to alter a Pattern that takes up more memory than is available, the display will tell you that there is no more memory left. -
Page 53: Sending Midi Sysex Song And Pattern Data To The Xr20
SENDING MIDI SYSEX SONG AND PATTERN DATA TO THE XR20 If you wish to load Pattern and Song data back into the XR20, please follow the instructions below. Please note that this operation will erase any Song and Pattern data which exists on the XR20! Connect a 5-pin MIDI cable from your MIDI SysEx device to the XR20’s MIDI IN. -
Page 54: Applications
Song Position Pointer if it is available. Press PLAY on the XR20. The slave units should start at the same time, and progress at the same tempo. If the slaves respond to Song Position Pointer, you can start an XR20 Song at... -
Page 55: Strategies For Assembling Patterns And Songs
Many times a Fill will simply be a variation on another Pattern, but with a few minor differences to add variety or serve different musical purposes. To save time, use the Copy function to copy the main Pattern to the Fill, and then add variations to the Fill in real time or with Step Edit mode. -
Page 56: Understanding Rhythmic Notation
7/4 compositions would have you count each measure not as 1, 2, 3, 4, 5, 6, 7 but as 1, 2, 3, 4, 1, 2, 3. It's often easier to think of 7/4 as one bar of 4/4 followed by one bar of 3/4 (or the other way around, depending on the phrasing), since, as we mentioned, 4/4 and 3/4 are extremely common time signatures. -
Page 57: Midi Implementation Chart
Change True # System Exclusive RESTORE MIDI Mode only MIDI out only Song Pos System Song Sel Common Tune System Clock Realtime Commands Local On/Off Active Sense Messages Reset GM On Notes: * Available for Synth sounds only O:YES X:NO... -
Page 58: Key Features
Large 32MB sound set, featuring drum, 1-shot and synth sounds Dynamic Articulation stereo samples with reverb and ambience for realistic playing 100 Preset / 100 User drum kits with a large collection of sounds assignable to any pad 32 voice polyphony Built-in Effects –... - Page 60 www.akaipro.com...
Need help?
Do you have a question about the XR 20 and is the answer not in the manual?
Questions and answers