Table of Contents
Advertisement
Quick Links
Advertisement
Table of Contents

Related Manuals for IWCS iriSelect Black Box

Summary of Contents for IWCS iriSelect Black Box
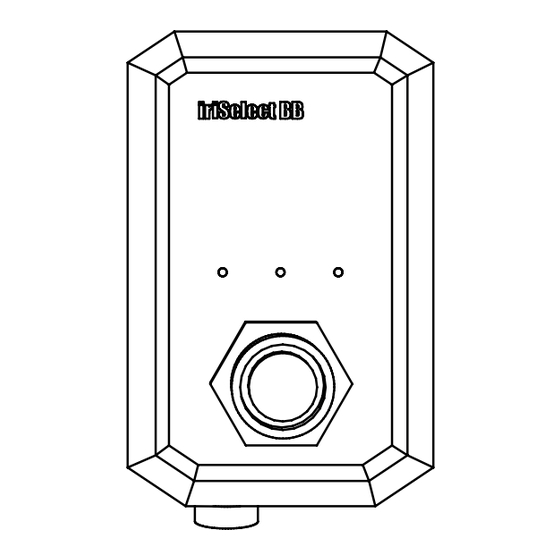
- Page 1 User manual iriSelect Black Box V. 02/24FA...
- Page 2 CONGRATULATIONS ON YOUR NEW PRODUCT FROM IRIDIUM WATERPROOF COMMUNICATION SYSTEMS iriSelect Black Box IWCS HOPE YOU WILL ENJOY THE BENEFITS OF TROUBLE FREE HIGH QUALITY INTERCOM. PLEASE READ THESE INSTRUCTIONS CAREFULLY BEFORE FIRST USE. IF INSTALLED, OPERATED AND MAINTAINED ACCORDING TO THIS MANUAL, iriSelect Black Box WILL BE A RELIABLE PARTNER IN MANY YEARS TO COME.
-
Page 3: Table Of Contents
3.1 Installing the Bracket Page: 3.2 Screw holes 1:1 Page: 3.3 Bracket placement Page: 3.4 Screws Page: 3.5 installing the iriSelect Black Box Page: 4. Connection options 4.1 Wired Connection Page: 4.2 Wireless Connection Page: 5. Wired Connection 5.1 Cable installation Page: 6. - Page 4 10.4 Menu Bar Page: 11. Quick Guide 11.1 Quick Guide Page: Service and Maintenance 12.1 Maintenance Page: 12.2 Updating iriSelect Black Box Page: 12.3 Troubleshoot Page: Technical Data and Drawings 13.1 Specifications Page: 13.2 Measurements Page: 13.3 Declartion of Conformity...
-
Page 5: Introduction
The information in this manual is provided for informational purposes only, is subject to change without notice and may contain errors or inaccuracies. Manuals issued by IWCS are periodically revised and updated. It is recommended that anyone relying on this information acquires the most current version by requesting it at info@iwcs.eu. -
Page 6: Safety Warning Page
Failure to comply with these precautions or with specific warnings elsewhere in this manual violates safety standards of design, manufacture and intended use of the equipment. IWCS assumes no liability for the customer’s failure to comply with these requirements. -
Page 7: Unboxing
Unboxing 2.1 What’s in the box 1 x iriSelect Black Box 1 x Mounting Bracket 1 x Magnet 1 x User Manual Hejrevang 13 +45 43 43 26 26 3450 Allerød info@iwcs.eu Denmark www.iwcs.eu V. 02/24FA... -
Page 8: Installation
LAN cable or its internal WiFi hot spot. If you opt for a LAN cable connection, ensure that you have ample space for the cable to connect to the front of the iriSelect Black Box and consider the length of your LAN cable. If you choose to utilize the internal WiFi, it’s crucial not to hide the unit to maintain a stable connection between the iriSelect Black Box and your MFD (Multi-function display), mobile device or computer. -
Page 9: Screw Holes 1:1 Page
3.2 Screw holes 1:1 Scale 1:1. use for exact hole placement Hejrevang 13 +45 43 43 26 26 3450 Allerød info@iwcs.eu Denmark www.iwcs.eu V. 02/24FA... - Page 10 Backside of drill tamplate Hejrevang 13 +45 43 43 26 26 3450 Allerød info@iwcs.eu Denmark www.iwcs.eu V. 02/24FA...
-
Page 11: Bracket Placement Page
The minimum distance from the underside of the bracket to the nearest surface should be no less than 150 millimeters to ensure proper cable clearance. Min. 150 mm. Hejrevang 13 +45 43 43 26 26 3450 Allerød info@iwcs.eu Denmark www.iwcs.eu V. 02/24FA... -
Page 12: Screws Page
Round headed screws 13.4 Drilling holes When mounting the bracket for the iriSelect Black Box, it is essential to consider the material and the appropriate drill bit size. Please note the following guidelines: If you are using wood screws you will need: •... -
Page 13: Installing The Iriselect Black Box Page
3.5 Installing the iriSelect Black Box Once the bracket is securely in place, you can proceed to insert the iriSelect Black Box into the designated slot. You might need to wiggle the iriSelect Black Box slightly to make it fit between the bracket arms. -
Page 14: Connection Options
4.1 Wired Connection Are you doing a wired connection, please go to page 15. 4.2 Wireless Connection Are you doing a waireless installation, please go to page 17. Hejrevang 13 +45 43 43 26 26 3450 Allerød info@iwcs.eu Denmark www.iwcs.eu V. 02/24FA... -
Page 15: Wired Connection
Wired Connection 5.1 Cable installation Once the iriSelect Black Box is securely installed, you can proceed with inserting all the necessary cables. To ensure proper connections and waterproofness, please follow the steps below carefully. 1. Insert data cable Align the white dot on the cable connector with the white dot on the flush connector. - Page 16 Connect the other end of the cable to either a Multi-Function-Display (MFD) or a computer. Once the connection is established, the MFD or computer will automatically detect the iriSelect Black Box and install the necessary software. Hejrevang 13 +45 43 43 26 26 3450 Allerød info@iwcs.eu...
-
Page 17: Wireless Connection
6.1 Activate local WiFi hot spot To activate the local WiFi of the iriSelect Black Box and make it visible when scanning for WiFi’s, simply hold the provided magnet over the WiFi icon located on the front of the device. -
Page 18: Access Settings Site
BB Temp Secure The iriSelect Black Box does not have any preset password. This can later be set on the settings site. Simply press ”Connect” Once connected to the iriSelect Black Box’s WiFi, open the browser on your computer and enter the following URL in the search bar: ”iriselect/settings/”... -
Page 19: Mobile Access Page
Current network IWCS-5 Connected Available networks iriSelect BB Temp Connected iriSelect BB The iriSelect Black Box does not have any Password preset password. This can later be set on the setings site. Auto reconnect Simply press ”Connect” View more Connect Once you are connected to the iriSelect Black Box’s WiFi, open the browser on your phone... -
Page 20: Settings Site
8.1 Hardware settings The Settings page provides you with full control over the configuration and management of your iriSelect Black Box. It allows you to customize various settings according to your preferences, ensuring a personalized experience with the device. Grid Size... - Page 21 4. Enter password :WiFi 5 This is the password you have chosen on your MFD or your boats WiFi. Password: 5: Click connect Enter password Connect Hejrevang 13 +45 43 43 26 26 3450 Allerød info@iwcs.eu Denmark www.iwcs.eu V. 02/24FA...
-
Page 22: Radio Settings Page
”Radio 3” = radio connected to channel 8 on the iriSound. This configuration ensures that the assigned radio names correspond to the physical connections on your iriSound. Please refer to your schematic. Hejrevang 13 +45 43 43 26 26 3450 Allerød info@iwcs.eu Denmark www.iwcs.eu V. 02/24FA... - Page 23 5: Press update when done Update Make all your desired changes and press ”Update”. *If you don’t give name your radios, these will not appear on your MFD. Hejrevang 13 +45 43 43 26 26 3450 Allerød info@iwcs.eu Denmark www.iwcs.eu V. 02/24FA...
-
Page 24: Grid Settings Page
Name: Name: Enter text Enter text Enter text Enter text Enter text Enter text Safe Locked Safe Locked Safe Locked Change Locked Change Locked Change Locked Hejrevang 13 +45 43 43 26 26 3450 Allerød info@iwcs.eu Denmark www.iwcs.eu V. 02/24FA... - Page 25 5: Continue with grid 2, 3, 4,..6: Press update when done Update Make all your desired changes and press ”Update”. Hejrevang 13 +45 43 43 26 26 3450 Allerød info@iwcs.eu Denmark www.iwcs.eu V. 02/24FA...
-
Page 26: Grid Size Page
No audio When configuring your grid size, it is crucial to ensure that the order of settings match the physical installation. Please refer to your schematic. Hejrevang 13 +45 43 43 26 26 3450 Allerød info@iwcs.eu Denmark www.iwcs.eu V. 02/24FA... - Page 27 *Edit Grid Site on MFD 4: Continue with grid 2, 3, 4,..5: Press ”Update” when done Update Make all your desired changes and press ”Update”. Hejrevang 13 +45 43 43 26 26 3450 Allerød info@iwcs.eu Denmark www.iwcs.eu V. 02/24FA...
-
Page 28: The Interface
Please note that the illustrations, screenshots or examples provided in this documentation are for general reference and may not precisely reflect the actual user interface or display on your specific device. Hejrevang 13 +45 43 43 26 26 3450 Allerød info@iwcs.eu Denmark www.iwcs.eu V. 02/24FA... -
Page 29: Grids Selection Page
Please note that activating a new grid will deactivate your current grid. It’s important to remember that only one grid can be active at a time. Hejrevang 13 +45 43 43 26 26 3450 Allerød info@iwcs.eu Denmark www.iwcs.eu V. 02/24FA... -
Page 30: Radios Page
9.5 Error The ”Error” indicator will alert you if there is a loss of connection to a headset. Hejrevang 13 +45 43 43 26 26 3450 Allerød info@iwcs.eu Denmark www.iwcs.eu V. 02/24FA... -
Page 31: 9.6 Avad
Quick guide When Clikcked you will navigate to the quick quide page from where you can gain more knowlagde about spesific features. Hejrevang 13 +45 43 43 26 26 3450 Allerød info@iwcs.eu Denmark www.iwcs.eu V. 02/24FA... -
Page 32: Grid Site
This is now your default on this grid. Currently editing grid Press to edit grid Hejrevang 13 +45 43 43 26 26 3450 Allerød info@iwcs.eu Denmark www.iwcs.eu V. 02/24FA... -
Page 33: Grid Editing Page
10.3 Grid Editing Inactive channel Active channel Horizontal channnel row Siturational awareness Vertical channnel column Hejrevang 13 +45 43 43 26 26 3450 Allerød info@iwcs.eu Denmark www.iwcs.eu V. 02/24FA... -
Page 34: Menu Bar Page
As you switch between different sites within the interface, the menu bar will reflect the context of each site Back to home screen Save changes Hejrevang 13 +45 43 43 26 26 3450 Allerød info@iwcs.eu Denmark www.iwcs.eu V. 02/24FA... -
Page 35: Quick Guide Page
QR-code for direct support Use the camera on your phone to scan the QR-co- de. Click the link. It will guide you to our support team. Hejrevang 13 +45 43 43 26 26 3450 Allerød info@iwcs.eu Denmark www.iwcs.eu V. 02/24FA... -
Page 36: Service And Maintenance
Service and Maintenance 12.1 Maintenance Please refrain from using chemicals or solvents to clean your iriSelect Black Box. Instead, use a damp cloth with cold or lukewarm freshwater to carefully wipe and rinse the visible surfaces of the device. If there are saltwater crystals present, you can remove them by rinsing the affected areas with cold or lukewarm freshwater. -
Page 37: Troubleshoot Page
Cause Action LAN Connection lost Cable not fully insertet Turn off MFD/computer into iriSelect or MFD/ and iriSelect Black Box. computer. Take the cables out and reinsert them. Look for any damage on the cables. boot up system again. Wireless connection lost... -
Page 38: Technical Data And Drawings
Technical Data and Drawings 13.1 Specifications Specifications iriSelect Black Box Weight 246 g Range (WiFi) Waterproof IPX7, seawater resistant Power source iriSound Temperature range -15 to + 55 degrees Celsius Ethernet 10/100 Mb WiFi 802.11b MIL-std-810g—Designed 503.6 Temperature Shock, 505.6 Solar Radiation, 509.6 to meet Salt Fog, 512.5 Immersion, 515.7 Aucoustic Noice, 521.4... -
Page 39: Measurements Page
13.2 Measurements 71,5 mm 112 mm 38,5 mm Hejrevang 13 +45 43 43 26 26 3450 Allerød info@iwcs.eu Denmark www.iwcs.eu V. 02/24FA... -
Page 40: Declartion Of Conformity Page
13.3 Declartion of Conformity Hejrevang 13 +45 43 43 26 26 3450 Allerød info@iwcs.eu Denmark www.iwcs.eu V. 02/24FA... - Page 41 Hejrevang 13 +45 43 43 26 26 3450 Allerød info@iwcs.eu Denmark www.iwcs.eu V. 02/24FA...
- Page 42 Hejrevang 13 +45 43 43 26 26 3450 Allerød info@iwcs.eu Denmark www.iwcs.eu V. 02/24FA...
- Page 43 Hejrevang 13 +45 43 43 26 26 3450 Allerød info@iwcs.eu Denmark www.iwcs.eu V. 02/24FA...
- Page 44 Black Box is developed, designed and manufactured by IWCS Aps Hejrevang 13 3470 Kvistgaard Denmark +45 4343 2626 Info@iwcs.eu www.iwcs.eu...
Need help?
Do you have a question about the iriSelect Black Box and is the answer not in the manual?
Questions and answers