Table of Contents
Advertisement
Quick Links
Advertisement
Table of Contents

Related Manuals for eRapta AY5


Summary of Contents for eRapta AY5
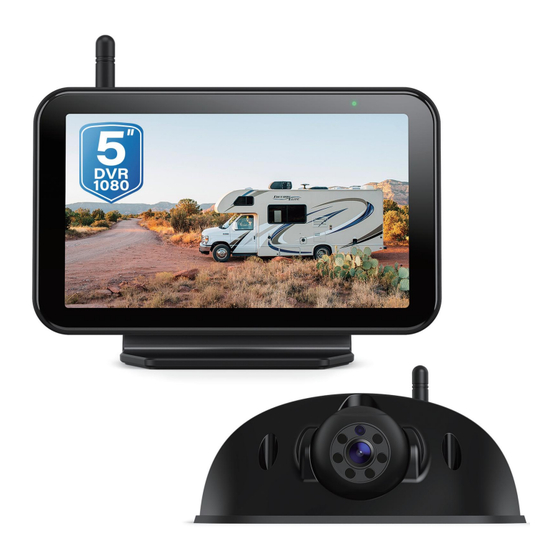
- Page 1 HD Wireless 5'' Camera Syste (AY5) Installation and Operation Guide...
- Page 2 Foreword Thank you for purchasing our product! eRapta has always been committed to providing high-quality products, and bringing a good experience to our customers. It’s our great honor to have your trust! This manual includes product installation guide and system operation instructions. To obtain the best performance, please read the manual carefully before installing, and keep the manual properly.
-
Page 3: Table Of Contents
Contents 1. Package List....................... 1 2. Introduction and Specification................... 2 2.1 Specification......................2 2.2 Introduction to Camera..................2 2.3 Introduction to Monitor..................2 3. Installation Guide....................... 7 3.1 Make an Installation Plan.................. 7 3.2 Monitor Installation...................7 3.3 Camera Installation....................8 3.4 Power up Monitor and Camera................. 9 4. -
Page 4: Package List
1. Package List Thanks for choosing eRapta AY5 wireless backup camera system! Our monitor, camera and accessories are of the high quality, so our product will serve you for years. Please first check the external packaging to see whether there are any signs of rough handling. -
Page 5: Introduction And Specification
2. Introduction and Specification 2.1 Specification The system is designed to observe surroundings and assist parking, including a monitor, a camera, and other accessories needed to install the system. It requires 12-24 Volt Direct Current power to work. To avoid damage caused by electricity shock or improper installation, we recommend a qualified and experienced engineer install the system for you. - Page 6 1. SD Card Access Port 2. Suction Cup Mount Slot 3. POWER Button 4. OK Button 5. DOWN/Switch CAM Button 6. MENU Button 7. UP/Switch CAM Button 8. Power Cord Connector 2.3.1 SD Card Access Port The SD card slot is on the right side of the monitor. The system supports 16G-128G micro SD card.
- Page 7 : This camera has signal. : This camera doesn’t have signal. : Indicates which camera (channel) is displayed on the screen. : Rewrite has been turned on. : This camera is not recording. : This camera is recording. : SD card has been inserted. : SD card error.
- Page 8 (1) POWER Button After powering up the system, press this button to turn on/off the monitor. When the monitor is turned on, the light indicator on the right top of the monitor will light up. (2) MENU Button In the main interface, press this button to access menu page. There are eight panels in the menu (Pairing / Picture / Mirror-Flip / Mode / Cam Setup / System / Play / Record).
- Page 9 screen. In the menu page or eight panels, press this button to move the cursor through different options. After selecting a sub-panel, press this button to increase its parameter. Example1. In the menu page, press UP/DOWN buttons. The cursor will move to other options.
-
Page 10: Installation Guide
3.Installation Guide 3.1 Make an Installation Plan Before installation, we recommend you spend a little time testing the system. This can help you confirm whether the system works normally before you install it on your vehicle. You can use a 12-24V power supply to power up the monitor and camera. Our camera has been paired with the monitor before they leave our factory. -
Page 11: Camera Installation
(5) Remove suction cup mount: Pinch hard on the two areas circled. Push the mount downward out of the slot. 3.3 Camera Installation (1) Install an antenna on camera. The (2) Drill five holes on your vehicle for bottom of the monitor antenna is black. mounting the camera. -
Page 12: Power Up Monitor And Camera
3.4 Power up Monitor and Camera Connect the power cord of camera to a There are two ways to power up the 12-24V power supply. The red wire monitor: connect the USB to a port in should be connected to positive pole, and your vehicle, or plug the cigarette lighter black wire to negative pole. -
Page 13: System Operation
4.System Operation This part describes the functions of eight panels in menu page. You can access the menu page and adjust settings by buttons on the monitor. Please note that you can’t access menu page when the main interface is split screen. When you move the cursor to a panel or a sub-panel, its icon will become yellow. -
Page 14: Pairing
SYSTEM Time, Language, Color-Sys, P-Line, Delaytime PLAY RECORD Rewrite, Format 4.1 PAIRING Before leaving our factory, the camera has already been paired with the monitor. But you need to re-pair the camera if it lost paired, or you want the camera shown on another channel. -
Page 15: Mir-Flip
Adjust brightness, contrast and hue of the screen in this panel. Steps: When the main interface displays full screen, press MENU button to access menu page - press UP button once to move the cursor to “Picture” option - press OK button to confirm your selection and enter this panel - press UP/DOWN buttons to choose from three sub-panels - press OK button to confirm selecting a sub-panel - press UP/DOWN to increase/decrease the parameter - press OK button again to... -
Page 16: Cam-Setup
4.5 CAM-SETUP In this panel, you can turn on/off CAM1/2/3/4, start/stop autoscan, and set scantime. *If you want to view a camera, you need to make sure its channel has been turned on through “MENU - Cam Setup”. See 2.3.3 (5) OK Button for detailed operation steps. -
Page 17: System
4.6 SYSTEM Set time, language, color-sys, P-line, delaytime in this panel. *Choose NTSC and PAL according to your needs in “Color-sys” sub-panel. *Choose on which channel you want the parking lines to appear. If you turn off parking lines in CAM1, CAM1 will not show parking lines; if you turn on parking lines in CAM4, CAM4 will show parking lines. -
Page 18: Record
Feb 19, 2022. The recorded channel is CAM2. Steps: Access menu page - access “PLAY” panel - press OK to enter “100SONIX”. 4.8 RECORD Turn on/off rewrite and format in this panel. *In the main interface, press OK button to start/stop recording. *The system will only record what is displayed on the screen. -
Page 19: Faq
Turn off autoscan through “MENU- Cam setup- Autoscan”. (4) What can I do if my camera gets water inside the lens? Please contact us at: sales2@erapta. com. We will help you. (5) How can I turn on/off the infrared lights? The infrared lights can’t be turned on/off manually. - Page 20 (9) Why does the camera not power up? Voltage is not ranging from 12V to 24V. Vehicle engine doesn’t start. Turn on vehicle engine. The wiring is incorrect. Check the wiring. After power up the camera, cover its lens with your hands, and see whether the infrared lights inside will turn red.
-
Page 21: Warranty
6.Warranty eRapta provides 24-hour online after-sales service, 2-year warranty and lifetime technical support, so our product will last for many years. We promise that you will receive the best after-sales service from us. So if you have any problems or needs,...
Need help?
Do you have a question about the AY5 and is the answer not in the manual?
Questions and answers