
Related Manuals for Bushnell 11 0834


Summary of Contents for Bushnell 11 0834
- Page 1 110833 110834 Instruction Manual Model #s: 110833/110834 Lit.#: 98-0917/02-07 Imageview 110833+110834 1LIM fin1 1 3/5/07 1:58:34 PM...
- Page 2 The photos and videos are both automatically stored in the internal memory, or on an optional SD (Secure Digital) card, and can be instantly reviewed on the flip-up LCD, or downloaded to your computer without the need to install any special software (With Windows 2000, XP, Vista or Mac OSX.
- Page 3 Raise the LCD display, pulling up at the indented areas on each side. Press and hold the POWER button until the red power LED stays on, then let go. You will see a “Clock Set” screen when the camera is used for Camera the first time-refer to “Camera Setup”...
- Page 4 (first frame). To review previous photos or videos one at a time, press the Left arrow key. Delete Photos/ The icon at the top right corner of the display will show the movie icon if the file is a video. The numbers Videos at the top left show the current file number/total files (2 of 3, etc).
-
Page 5: Technical Specifications
English, French, Spanish, Italian, German, Chinese Shutter Menu Languages 1/1000 seconds Focusing Range Fixed, approx 30’ ~ Auto Power Off (after inactivity) 1, 2, or 3 minutes or Disabled per Setup menu infinity (camera) f/5.6 2xAAA Batteries, Alkaline/Lithium/NiMh type Lens Aperture Power Supply... -
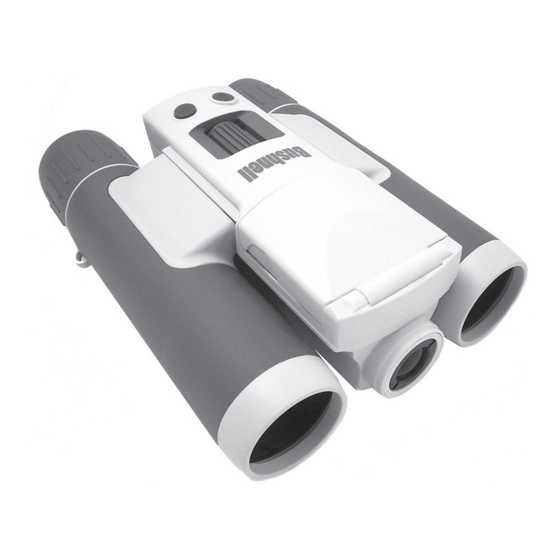
Page 6: Camera And Binocular Parts Guide
Camera and Binocular Parts Guide Power Remote Port Jack LCD Display View Button Display 5-way Keypad w/ Button Menu/OK Button Diopter Adjustment Remote Card Binocular SNAP Slot Focus MODE SNAP Button Button Pull Here to Raise Display Camera Lens Imageview 110833+110834 1LIM fin6 6... - Page 7 Resolution setting ( Very High, High, Medium, Low Remaining Memory ( fi lls in solid as internal or card memory is used # of Photos/Videos Taken Quality/File Compression ( ***Best / **Better / *Standard Digital Zoom magnifi cation ( 1.0x~3.0x.
-
Page 8: Loading Batteries
“notched” corner on the left as indicated by the card icon below the slot. Insert the SD card with the label side facing down. Note: be sure the power is turned off before inserting or removing cards to prevent possible loss of files or damage to the card. - Page 9 “Clock Set”, and press Menu. Select “OK”, then press Menu again. Now set the Year, Month, Date, Hour, Minute and Second, using the Up/Down arrow keys to make changes, and the Right key to move to the next item. Once date & time are set, press the Menu but- ton.
-
Page 10: Taking Still Photos
7) Press the View button if you wish to check the photo after you take it, then press it again to return to a live preview. See the sec- tion “Review Menu” for more regarding reviewing and deleting previously taken photos. -
Page 11: Shooting Videos
2) To change from still photo to video mode, press the Right arrow key 3 times, until the movie camera icon is displayed at the top right area of the LCD. You are now in Video Mode. Press SNAP to start recording a new video clip, and press it again to stop recording and store the video in memory. - Page 12 Press the “Menu” button to enter the main menu. Use down or up arrow buttons to highlight an option within the menu, then press Menu if you wish to change the settings for that option. Use the Left/Right arrow to select the setting you want, then press Menu to confirm this setting.
- Page 13 Image Quality Standard, Better, Best Sets the amount of file compression, which affects the quality of the photo and the size of the file it creates. This can be used independently of Image Size to help store more photos in exchange for slightly reduced quality.
- Page 14 Select “Disable” to prevent auto shutoff altogether. Clock Set (Cancel, OK) Select “OK” and use the arrow keys to set (in or- der) the Year, Month, Date, and Hour, Minute, Second. See “Date Stamp” also Sound On, Off...
- Page 15 (Default Settings in Bold) MENU Option Settings Description Exit Select “Exit” and press Menu to exit the Setup submenu. EXIT Select “Exit” and press Menu to exit the Main menu and return to the preview (“live” camera) display Imageview 110833+110834 1LIM fin15 15...
- Page 16 To take a photo at the exact time you wish and reduce camera shake, plug the included remote shutter release cable into the jack on the rear of the camera pod and press the button on the remote instead of Snap on the camera.
- Page 17 Press “View” to enter Review mode. Use the Left arrow key to go back through the stored photos/videos. Once you are in review mode, pressing the Menu button will enter the review menu. This operates in the same way previously described in the main menu system instructions (use the arrow keypad to navigate to the desired menu...
- Page 18 “Yes” and press “OK” to delete all files currently in memory. Format Cancel, OK Select OK and press Menu to format (clear) an SD card for use in the camera. Erases all previously stored files on the card. Will also erase internal memory contents. Protect Press “Menu”...
-
Page 19: Software Installation
After installation, restart your computer. Windows 2000, ME, XP and Vista do not require drivers, as the camera uses the USB mass storage standard , allowing the photo files to be accessed as if they were stored on an external hard drive. For any Windows OS, if you are not already using photo editing software you prefer, you may install Roxio PhotoSuite®... - Page 20 4. (This step is not required with Windows XP, simply use the options in the pop-up window to view, copy or edit your photos). Open My Computer or Windows Explorer. The camera will be seen as a new “Removable Disk” with an unused drive letter assigned to it.
- Page 21 Open window, select “My Computer”, select your hard drive, and double click any photo in the folder where you copied the files from the camera. It is also possible to open and work with your photos directly from the ImageView while it is still connected.To do this with PhotoSuite, first follow steps 1-3,...
- Page 22 Standard Actual storage capacity will vary based on content of each photo M 1280x1024 Best file. You may be able to take a few photos more or less than the listed Better average capacity. Standard Use High or Very High resolution...
- Page 23 Class B digital device, pursuant the date of purchase. In the event of a defect under this warranty, we will, at our option, repair or replace to Part 15 of the FCC Rules. Th ese limits are designed the product, provided that you return the product postage prepaid.
- Page 24 Notes Imageview 110833+110834 1LIM fin24 24 3/5/07 1:58:38 PM...
- Page 25 Imageview 110833+110834 1LIM fin25 25 3/5/07 1:58:38 PM...
- Page 26 INNOVATION THAT THRIVES OUTSIDE For further questions or additional information please contact: Bushnell Outdoor Products 9200 Cody, Overland Park, Kansas 66214 (800) 423-3537 • www.bushnell.com ©2007 Bushnell Outdoor Products Imageview 110833+110834 1LIM fin26 26 3/5/07 1:58:39 PM...
Need help?
Do you have a question about the 11 0834 and is the answer not in the manual?
Questions and answers