
Related Manuals for Rinnai RPC35PDRWF


Summary of Contents for Rinnai RPC35PDRWF
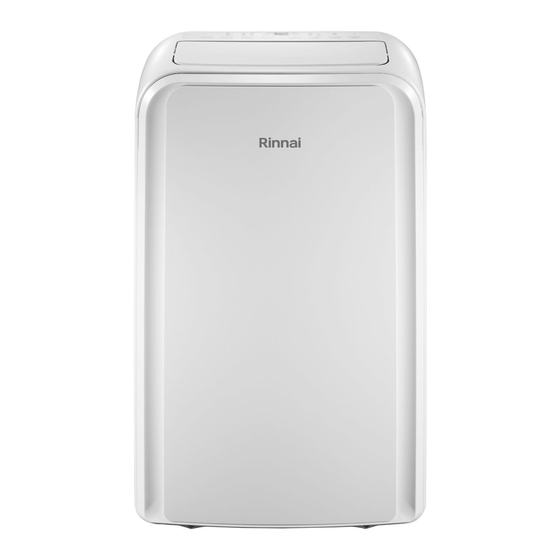
- Page 1 MODEL REFRIGERANT RPC35PDRWF R290 Portable Room Air Conditioner Operation & Installation Manual Page 1...
- Page 2 For continued safety of this appliance it must be installed and maintained in accordance with the manufacturer’s instructions. Before proceeding with the operation of your new Portable Room Air Conditioner, please read this manual thoroughly and gain a full understanding of the requirements, features and operation of your new appliance.
-
Page 3: Table Of Contents
Table of Contents Safety Precautions Important Information ..........................04 Safety Precautions ..........................05 Introduction Introduction ............................13 Warnings and Important Information .....................14 Specifications Specifications ............................14 Mandatory Inspection Prior to Installation .....................14 Installation Instructions Preparation ............................15 Design Notice ............................15 Ambient Temperature Range For Unit Operating ..................15 Exhaust Hose Installation ........................15 Choosing The Right Location ........................16 Recommended Installation ........................16... -
Page 4: Important Information
Important Information Important Issues Regarding the Proper Use of this Air Conditioner Please contact your supplier for advice before returning unit Use this air conditioner only as described in this instruction manual. This appliance is fitted with a special safety device. When the compressor switches off or when the appliance is first turned on, this device prevents the compressor from switching on again for at least three minutes. -
Page 5: Safety Precautions
Safety Precautions Safety Precautions Read Safety Precautions Before Operation and Installation Read Safety Precautions before Operation and Installation. To prevent death or injury to the user or other people and property damage, the To prevent death or injury to the user or other people and property damage, the following instructions MUST be following instructions must be followed. - Page 6 In a thunderstorm, the power must be cut off to avoid damage to the machine due to lightning. • Your air conditioner should be used in such a way that it is protected from moisture. • e.g. condensation, splashed water, etc. Do not place or store your air conditioner where it can fall or be pulled into water or any other liquid.
- Page 7 Disconnect the power if strange sounds, smell, or smoke comes from it. • • Do not press the buttons on the control panel with anything other than your fingers. Do not remove any fixed covers. Never use this appliance if it is not working properly, or if it has •...
- Page 8 Using R290 Refrigerant WARNING Do not use means to accelerate the defrosting process or to clean, other than those recommended by the manufacturer. The appliance shall be stored in a room without continuously operating ignition sources (for example: open flames, an operating gas appliance or an operating electric heater). Do not pierce or burn.
- Page 9 1.Transport of equipment containing flammable refrigerants See transport regulations 2.Marking of equipment using signs See local regulations 3.Disposal of equipment using flammable refrigerants See national regulations. 4.Storage of equipment/appliances The storage of equipment should be in accordance with the manufacturer's instructions. 5.Storage of packed (unsold) equipment Storage package protection should be constructed such that mechanical damage to the equipment inside the package will not cause a leak of the refrigerant charge.
- Page 10 8)Checks to the refrigeration equipment Where electrical components are being changed, they shall be fit for the purpose and to the correct specification. At all times the manufacturer's maintenance and service guidelines shall be followed. If in doubt consult the manufacturer's technical department for assistance. The following checks shall be applied to installations using flammable refrigerants: The charge size is in accordance with the room size within which the refrigerant containing parts are installed;...
- Page 11 9.Cabling Check that cabling will not be subject to wear, corrosion, excessive pressure, vibration, sharp edges or any other adverse environmental effects. The check shall also take into account the effects of aging or continual vibration from sources such as compressors or fans. 10.Detection of flammable refrigerants Under no circumstances shall potential sources of ignition be used in the searching for or detection of refrigerant leaks.
- Page 12 14.Decommissioning Before carrying out this procedure, it is essential that the technician is completely familiar with the equipment and all its detail. It is recommended good practice that all refrigerants are recovered safely. Prior to the task being carried out, an oil and refrigerant sample shall be taken in case analysis is required prior to re-use of reclaimed refrigerant.
-
Page 13: Introduction
This Rinnai portable refrigerated air conditioner model RPC35PDRWF has a maximum cooling capacity of 3.50 kW and a maximum heating capacity of 3.0kW. -
Page 14: Specifications
For safety and warranty purposes, appliances that may be damaged or incorrect MUST NOT be installed or operated under any circumstances. Installation of damaged or incorrect appliances may contravene local government regulations. Rinnai disclaims any liability or responsibility whatsoever in relation to the installation or operation of damaged or incorrect appliances. Page 14... -
Page 15: Installation Instructions
Installation Instructions Installation Instructions Preparation NOTE: All the illustrations in the manual are for explanation purpose only. Your machine may be slightly different. The actual shape shall prevail. The unit can be controlled by the unit control panel alone or with the remote controller. -
Page 16: Choosing The Right Location
The exhaust hose and adaptor must be installed or removed in accordance with the usage mode. For COOL,HEAT(heat pump type) or AUTO mode must be installed exhaust hose. For FAN, DRY or HEAT (electrical heat type) mode must be removed exhaust hose. Choosing The Right Location Your installation location should meet the following requirements: - Make sure that you install your unit on an even surface to minimise noise and... -
Page 17: Tools Needed
in a kitchen, or in a room with high ceilings. After you’ve found the right cooling capacity or your room, you can look at other features. Tools Needed -Medium Philips screwdriver; -Tape measure or ruler; -Knife or scissors; -Saw (On some models, to shorten window adaptor for narrow windows) Accessories NOTE: Items with (*) are on some models. -
Page 18: Window Installation Kit
Window Sliders 1 set(*) Window Installation Kit Window installation Step One: Preparing the Exhaust Hose assembly Model A Model B Press the exhaust hose (or extended exhaust hose) Exhaust hose Air exhaust Exhaust hose Exhaust hose assembly passage into the window slider adaptor(or wall exhaust adaptor) and unit adaptor, clamp automatically by elastic buckles of the adaptors. - Page 19 Make sure the adaptor Lower groove Exhaust hose assembly along the arrow direction adaptor is inserted into the lower groove of the air outlet. for installation. Bolt Bolt Step Three: Preparing the Adjustable Window Slider Window slider A Window slider B Window slider A Window slider B MODEL A MODEL B...
-
Page 20: Installation
Installation Installation NOTE: Once the Exhaust Hose assembly and Adjustable Window Slider are prepared, choose from one of the following two installation methods. Type 1: Hung Window or Sliding Window Installation(For some models) Foam seal B Foam seal B (Adhesive type-shorter) (Adhesive type-shorter) Foam seal A (Adhesive type) - Page 21 M ODEL A M ODEL B 5. Insert the window slider adaptor into the hole of the window slider. Type 2: Wall Installation(For some models) 1. Cut a 125mm (4.9inch) hole into the wall for the Wall Exhaust Adaptor B. 2.
-
Page 22: Operating Instructions
Operating Instructions Operating Instructions Control Panel Features NOTE: The following control panels are for explanation purpose only. The control panel of the unit you purchased may be slightly different according to the models. Your machine may not contain some indicators or buttons. -
Page 23: Operation Instructions
and the LED DISPLAY shows 'OF' for 3 seconds, ION/Fresh feature(on some models) press SWING and UP(+) buttons at the same Press FAN button for 3 seconds to initiate ION/FRESH time to turn on Wireless function and the LED feature and the ION/FRESH light illumiantes(if applicable), DISPLAY shows 'On' for 3 seconds. -
Page 24: Other Features
Note: For some models, the fan speed can not be initiate the Auto-off stop program, the TIMER OFF adjusted under HEAT mode. indicator light illuminates. Press the UP or down button to select the desired time. Press the TIMER button again within 5 seconds, the Auto-on start DRY operation program is initiated. - Page 25 Place the end of the hose into the drain and make AIR FLOW DIRECTION ADJUSTMENT sure the end of the hose is down to let the water The louver can be adjusted automatically. Adjust the flow smoothly.(See Figs with . Do never let it up. √...
-
Page 26: Remote Control Operation
Remote Control Operation Remote Control Specifications Model RG57H(B)/BG(C)E Rated Voltage 3.0V (AAA×2) Signal Receiving Range Range -5°C~60°C ON/OFF SHORT TIMER MODE TEMP TIMER SLEEP SWING NOTE Buttons design is based on typical model and might be slightly different from the actual one you purchased, the actual shape shall prevail. -
Page 27: Remote Control Functions
Remote Control Functions Function Buttons Before you begin using your new air conditioner, make sure to familiarize yourself with its remote control. The following is a brief introduction to the remote control itself. For instructions on how to operate your air conditioner, refer to the How to Use Basic Functions section of this manual. SHORT CUT ON/OFF Sets and activates your... -
Page 28: Handling The Remote Control
Handling the Remote Control NOT SURE WHAT A FUNCTION DOES? TIPS FOR USING REMOTE CONTROL Refer to the How to Use Basic Functions and The remote control must be used within 8 How to Use Advanced Functions sections meters of the unit. of this manual for a detailed description of how to use your air conditioner. -
Page 29: Remote Control Led Screen Indicators
Remote LED Screen Indicators Remote LED Screen Indicators Transmission Indicator Lights up when remote sends signal to unit ON/OFF display MODE display Appears when the unit is turned on, Displays the current and disappears when it is turned off mode, including: TIMER OFF display TIMER ON display AUTO... -
Page 30: Basic Functions
Basic Functions How To Use The Basic Functions SETTING TEMPERATURE The operating temperature range for units is 17-30 C. You can increase or decrease the set temperature in 1 C increments. AUTO operation In AUTO mode, the unit will automatically ON/OFF SHORT select the COOL, FAN, HEAT or DRY mode... - Page 31 How To Use The Basic Functions DRY operation(dehumidifying) 1. Press the MODE button to select DRY mode. 2. Set your desired temperature using the Temp or Temp button. 3. Press the ON/OFFbutton to start the unit. NOTE: FAN SPEED can t be changed in ON/OFF SHORT DRY mode.
- Page 32 How To Use The Basic Functions HEAT operation 1. Press the MODE button to select HEAT mode. 2. Set your desired temperature using the Temp or Temp button. 3. Press the FAN button to select the fan speed: AUTO, LOW, MED,or HIGH. 4.
-
Page 33: Timer Function
Timer Function Your air conditioning unit has two timer-related functions: TIMER ON- sets the amount of timer after which the unit will automatically turn on. TIMER ON TIMER ON TIMER OFF- sets the amount of time after which the unit will automatically turn off. TIMER ON function The TIMER ON function allows you to set a period of time after which the unit will... - Page 34 TIMER OFF function The TIMER OFF function allows you to NOTE: When setting the TIMER ON or set a period of time after which the unit TIMER OFF functions, up to 10 hours, will automatically turn off, such as when the time will increase in 30 minute you wake up.
- Page 35 Setting both TIMER ON and TIMER OFF at the same time Keep in mind that the time periods you set for both functions refer to hours after the current time. For example, say that the current time is 1:00 PM, and you want the unit to turn on automatically at 7:00 PM.
- Page 36 Example: Setting the unit to turn on after 6 hours, operate for 2 hours, then turn off (see the figure below) Your remote display Timer on Timer is set To turn ON 6 hours from current time Timer off Timer is set to turn OFF 8 hours from current time Unit turns Unit turns...
-
Page 37: Advanced Functions
Advanced Functions SLEEP Function The SLEEP function is used to decrease energy use while you sleep (and don t need the same temperature settings to stay comfortable). Note: The SLEEP function is not available in FAN or DRY mode. ON/OFF SHORT TIMER MODE... -
Page 38: Wi-Fi Operation
Wi-Fi Operation Refer to the Wireless Operation Manual for App connectivity and operation. A copy of the manual may be downloaded from the Rinnai Website: https://www.rinnai.com.au/air-conditioning/portable-air-conditioners/ or by scanning this QR code: Page 38... -
Page 39: Maintenance
Maintenance Maintenance Safety Precautions · Always unplug the unit before cleaning or servicing. · DO NOT use flammable liquids or chemicals to clean the unit. · DO NOT wash the unit under running water. Doing so causes electrical danger. · DO NOT operate the machine if the power supply was damaged during cleaning. A damaged power cord must be replaced with a new cord from the manufacturer. -
Page 40: Store The Unit When Not In Use
Store the unit when not in use · Drain the unit’s water collection tray according to the instructions in the following section. · Run the appliance on FAN mode for 12 hours in a warm room to dry it and prevent mold. ·... -
Page 41: Troubleshooting Tips
Troubleshooting Tips Troubleshooting Tips Problem Possible Causes Solution The Water Collection Tray is full. Turn off the P1 Protection Code unit, drain the water from the Water Collection Tray and restart the unit. Unit does not turn on when pressing In COOL mode: room ON/OFF button temperature is lower than... -
Page 42: Terms Of Warranty
Terms of Warranty - Australia Rinnai Australia Pty. Ltd. ABN 74 005 138 769, 100 Atlantic Drive, Keysborough VIC 3173. DEFINITIONS The terms listed below shall have the following meanings: “Authorised Service Representative” means an independent service contractor authorised by Rinnai or Rinnai service personnel. - Page 43 Normal Business Hours by an Authorised Service Representative. Repair by persons other than an Authorised Service Representatives may void the Warranty. 2.4 Alternatively to clause 2.3 above, Rinnai can at its discretion elect to pay you an amount equivalent to the cost of repairing or replacing the Product.
- Page 44 7 “Purchaser’s Responsibilities” on page 45; c) notifies Rinnai within 30 days of a defect occurring or, in the case of a latent defect, becoming apparent, that a claim is being made under this Warranty; and d) provides, in support of the claim made under this Warranty, a Proof of Purchase.
- Page 45 Rinnai to enquire about alternative arrangements. If you wish to make a warranty claim in respect of any fixed Product, please contact Rinnai on the details set out below to make arrangements for an Authorised Service Representative to inspect the product.
- Page 46 NOTICE TO CONSUMERS UNDER AUSTRALIAN CONSUMER LAW Our goods and services come with guarantees that cannot be excluded under the Australian Consumer Law. For a major failure with a good, you are entitled to a replacement or refund and compensation for any other reasonable foreseeable loss or damage.
- Page 47 NOTES Page 47...
- Page 48 Help Line. innai recommends that this appliance be serviced every 2 years. With our policy of continuous improvement, we reserve the right to change, or discontinue at any time, specifications or designs without notice. Page 48 Rinnai Portable Room AC RPC35PDRWF OIM Issue 1 - May 2024...
Need help?
Do you have a question about the RPC35PDRWF and is the answer not in the manual?
Questions and answers