
Subscribe to Our Youtube Channel
Related Manuals for Nordcap SPH 255


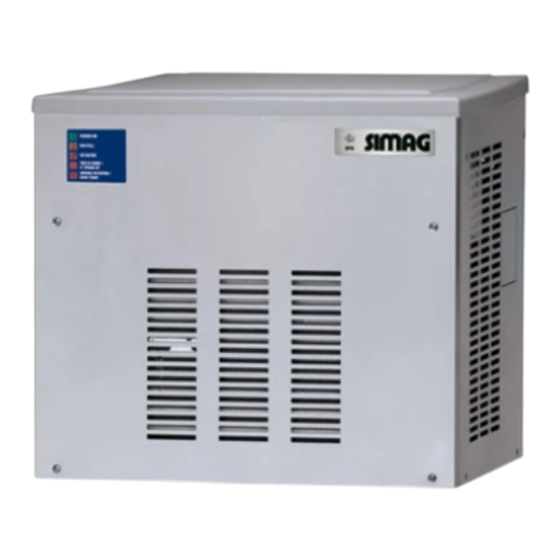
Summary of Contents for Nordcap SPH 255
- Page 1 Page 1 Page 1 SPH 255 SPH 405 SPH 605 R 290 VERSION NEW PC BOARD Electronic modular superflakers REV. 11/2022...
- Page 2 STATUS REASON WHY – SIGNIFICATION – SIGNIFICATO – Beschreibung ON STEADY UNIT OFF AT BIN FULL FIXE CABINE PLAINE FISSO CONTENITORE PIENO Ständig an Maschine AUS, Speicher voll! BLINKING SLOW I/R BEAM CUTTED CLIGNOTANT LENT FAISCEAU INFRA ROUGE CELLULE NIVEAU GLACE INTERROMPU LAMPEGG.
-
Page 3: Table Of Contents
Replacement of the Gear Motor Magnetic Sensor Replacement of the auger, water seal, bearings and coupling Replacement of the gear motor assy Replacement of the freezing cylinder Wiring diagram SPH 255-405-605 single phase Service diagnosis MAINTENANCE AND CLEANING INSTRUCTIONS General... - Page 4 Page 3 Page 3...
- Page 5 Page 4 Page 4 SPECIFICATIONS ELECTRONIC MODULAR SUPERFLAKER MODEL SPH 255 Important operating requirements: • Air temperature 10°C (50°F) 40°C (100°F) • Water temperature 5°C (40°F) 35°C (90°F) • Water pressure 1 bar (14 psi) 5 bars (70 psi) • Electr. voltage •...
- Page 6 Page 5 Page 5 SPECIFICATIONS SPH 255 - MACHINE SPECIFICATIONS Water req. Model Cond. unit Finish Comp. HP lt/24 HR SPH 255 AS S. Steel Start Electric power cons. Basic electr. Amps Watts Nr. of wires Amps fuse Amps Kwh per 24 HR 230/50/1 15.2...
-
Page 7: Specifications Sph 405
Page 6 Page 4 SPECIFICATIONS ELECTRONIC MODULAR SUPERFLAKER MODEL SPH 405 Important operating requirements: • Air temperature 10°C (50°F) 40°C (100°F) • Water temperature 5°C (40°F) 35°C (90°F) • Water pressure 1 bar (14 psi) 5 bars (70 psi) • Electr. voltage •... - Page 8 Page 5 Page 7 SPECIFICATIONS Dimensions: HEIGHT (less legs) 645 mm. HEIGHT (with legs) 650 mm. WIDTH 535 mm. DEPTH 660 mm. WEIGHT 77 Kg. SPH 405 - MACHINE SPECIFICATIONS Water req. Model Cond. unit Finish Comp. HP lt/24 HR SPH 405 AS S.
-
Page 9: Specifications Sph 605
Page 8 Page 6 SPECIFICATIONS ELECTRONIC MODULAR SUPERFLAKER MODEL SPH 605 Important operating requirements: • Air temperature 10°C (50°F) 40°C (100°F) • Water temperature 5°C (40°F) 35°C (90°F) • Water pressure 1 bar (14 psi) 5 bars (70 psi) • Electr. voltage •... - Page 10 Page 7 Page 9 SPECIFICATIONS Dimensions: HEIGHT (less legs) 785 mm. HEIGHT (with legs) 790 mm. WIDTH 535 mm. DEPTH 660 mm. WEIGHT 93 Kg. SPH 605 - MACHINE SPECIFICATIONS Water req. Model Cond. unit Comp. HP Finish lt/24 HR 1 1/4 SPH 605 AS S.
-
Page 11: General Information And Installation
2 above. step-by-step procedures for the installation, start-up and operation, maintenance and Remove all internal support packing and cleaning for the SIMAG SPH 255, SPH 405, masking tape. SPH 605 Modular Icemakers. The Electronic Superflakers are quality designed, Check that refrigerant lines do not rub engineered and manufactured. -
Page 12: Location And Levelling
Page 9 Page 11 Lay carefully down the bin on its back to On R Series Storage Bin inspect its top protect the finish and remove the bolts holding mounting gasket which should be flat with no the shipping skid to the bin. wrinkles, to provide a good sealing when the CBT Top Cover is installed on top of it. -
Page 13: Water Supply And Drain Connections
Page 12 Page 10 Make sure that the ice machine is connected to Install a vertical open vent on drain line high point its own circuit and individually fused (see data at the unit drain connection to ensure good plate for fuse size). draining. -
Page 14: Installation Practice
Page 11 Page 13 G. INSTALLATION PRACTICE 1. Hand shut-off valve 2. Water filter 3. Water supply line (flexible hose) 4. 3/4" GAS male fitting 5. Power line 6. Main switch 7. Drain fitting 8. Vented drain 9. Vented drain 10. -
Page 15: Operating Instructions
Page 14 Page 12 OPERATING INSTRUCTIONS Elapsed the stand by period the unit starts START UP operating with the activation in sequence of the following assemblies: After having correctly installed the ice maker and completed the plumbing and electrical GEAR MOTOR/S connections, perform the following “Start-up”... - Page 16 Page 13 Page 15 FIG. 2 WATER LEVEL RESET GEAR MOTOR ROTATION CONTACTOR COIL RELAYS CONDENSER TEMP. T 40÷50°C EVAPORATOR TEMP. GEAR MOTOR ICE LEVEL CONTROL TRIAC FAN MOTOR TRANSF. ELECTRONIC CARD FIG. 3 WATER LEVEL RESET GEAR MOTOR ROTATION CONTACTOR COIL RELAYS CONDENSER TEMP.
- Page 17 Page 16 Page 14 NOTE. On air cooled models, the condenser NOTE. If, after ten minutes from the compressor start-up, the evaporating tem- temperature sensor, which is located within perature has not dropped down to a value the condenser fins, keeps the head °...
- Page 18 Page 15 Page 17 This will cause a gradual decrease of the water After 3 minutes the unit resumes its total operation level in the float reservoir and as soon as the with the immediate start-up of the gear motor level gets below the two vertical metal pins, the and, few seconds later, of the compressor.
- Page 19 Page 18 Page 16 NOTE. The ICE LEVEL CONTROL NOTE. During the life of the machine the Ice (INFRARED SYSTEM) is independent of the Level Control may require a recalibration temperature however, the reliability of its mainly when the glass of the two optical eyes detection can be affected by external light are covered by a thin lay of scale.
-
Page 20: Principle Of Operation (How It Works)
Page 17 Page 19 PRINCIPLE OF OPERATION By running the ice maker, i.e. by putting the unit WATER CIRCUIT under power, starts the automatic and continuous The water enter in the machine through the icemaking process which would not stop until the water inlet fitting which incorporates a strainer - ice storage bin gets filled-up to the level of the located at the rear side of the cabinet - then it... - Page 21 Page 20 Page 18 and send a low voltage power flow to the MICRO- it causes the total and immediate SHUT-OFF PROCESSOR of the P.C. Board which energizes, of the machine (compressor first and gear through a TRIAC, the Fan Motor in ON-OFF motor 3' later) in order to prevent the unit from mode.
-
Page 22: Mechanical System
Page 19 Page 21 NOTE. If, after ten minutes from the unit start LED on account of the intervention of the up, no ice is made and the evaporating Electromagnetic Safety Device - based on temperature detected by the evaporator Hall Effect principle. -
Page 23: Operating Pressures
The refrigerant charges indicated REFRIGERANT CHARGE (R 290) are relatives to averages operating conditions. Air cooled 115 gr SPH 255 SPH 405 150 gr SPH 605 150 gr ° OPERATING PRESSURES (With 21... -
Page 24: Components Description
Page 21 Page 23 In case the condenser temperature sensor detects COMPONENTS DESCRIPTION ° a temperature at the condenser lower than +3 ° F) that means ambient temperature too low for the correct unit operation, the sensor signals EVAPORATOR TEMPERATURE to the P.C. - Page 25 Page 24 Page 22 When the light beam is interrupted the Bin Full control the operation of the different electrical YELLOW LED located in the front of the P.C. components of the ice maker (compressor, gear BOARD blinks; in case the light beam gets motor, etc.).
- Page 26 Page 23 Page 25 TO BY-PASS THE 3'/60' STAND BY TIME, SYMPLY JUMP "TEST" CONTACTS WITH PCB ENERGIZED SELF CALIBRATION JUMP IN - YES JUMP OUT - NO Set up of the Safety Condensing 60/70°C G. JUMPERS Temperature Sensor The Flaker PC Board is equipped by six jumpers: JUMP IN - 70°C JUMP OUT - 60°C SELF CAL...
- Page 27 Page 26 Page 24 A water seal system is located in the bottom part The drive motor rotor is kept aligned on its of the freezer while at the top end is fitted the ice vertical axis by two ball bearings permanently breaker.
-
Page 28: Adjustment, Removal And Replacement Procedures
Page 25 Page 27 ADJUSTMENT, REMOVAL AND REPLACEMENT PROCEDURES Unloose the three screws securing the NOTE. Read the instructions throughly plastic cover to the top of the gear motor and before performing any of the following remove it. adjustment or removal and replacement pro- cedure. -
Page 29: Replacement Of The Gear Motor Assy
Page 28 Page 26 15. Install bottom bearing and brass retainer Unloose and remove cap screw and remove assy into the bottom of the freezer. the ice breaker from the auger. 16. Install the ice breaker inclusive by the top Clean away the old grease from the interior bearing. -
Page 30: Replacement Of The Freezing Cylinder
Page 27 Page 29 Unsolder and disconnect the capillary tube Trace and disconnect the electric wires and the accumulator/suction line assy from the leads of the drive motor. Lift and remove the outlet line of the freezing cylinder. entire gear motor assembly. Remove the three/four bolts and washers To install the replacement gear motor assy securing the gear reducer base to the unit chassis,... - Page 31 Page 30 Page 28 WIRING DIAGRAM SPH 255-405-605 SINGLE PHASE...
-
Page 32: Service Diagnosis
Page 29 Page 31 SERVICE DIAGNOSIS SYMPTON POSSIBLE CAUSE SUGGESTED CORRECTION Unit will not run Blown fuse in P.C.Board Replace fuse & check for cause of No LED lighted-on blown fuse Master switch in OFF position Turn switch to ON position Inoperative P.C.Board Replace P.C.Board Loose electrical connections... - Page 33 Page 32 Page 30 SERVICE DIAGNOSIS SYMPTON POSSIBLE CAUSE SUGGESTED CORRECTION Wet ice Ambient temperature too high Move unit to cooler location Under or overcharge of refrigerant Recharge with correct quantity High water level in the freezer Lower to approx. 20 mm below ice spout Faulty compressor Replace...
-
Page 34: Maintenance And Cleaning Instructions
Page 31 Page 33 MAINTENANCE AND CLEANING INSTRUCTIONS This should cause the immediate blinking of the GENERAL Bin Full YELLOW LED located in the front of P.C. Board and, 6 seconds later, the total stopping of The periods and the procedures for maintenance the ice maker with the simultaneous light up of and cleaning are given as guides and are not to the same LED (steady). - Page 35 Page 34 Page 32 Remove the top panels to gain access to NOTE. The ice made with the cleaning the water reservoir. solution is slushy and coloured also, it may tend to loose fluidity creating some resistence Remove the float reservoir cover and with a ...
- Page 36 Großmoorbogen 5 Hermann-Bopp-Straße 4 Tel.+49 421 48557-0 Tel.+49 30 936684-0 Tel.+49 211 540054-0 Tel.+49 40 766183-0 Tel.+49 6132 7101-0 Fax+49 421 488650 Fax+49 30 936684-44 Fax+49 211 540054-54 Fax+49 40 770799 Fax+49 6132 7101-20 www.nordcap.de bremen@nordcap.de berlin@nordcap.de erkrath@nordcap.de hamburg@nordcap.de ingelheim@nordcap.de...
Need help?
Do you have a question about the SPH 255 and is the answer not in the manual?
Questions and answers