Table of Contents
Advertisement
Quick Links
Advertisement
Table of Contents

Related Manuals for Hasselblad 907X 50C Anniversary Edition


Summary of Contents for Hasselblad 907X 50C Anniversary Edition
- Page 1 907X Series User Guide 2021-09-28 907X 50C/907X Anniversary Edition The 907X 50C and 907X Anniversary Edition have the same functions and operations with some differences in their appearance. Unless otherwise specified, the descriptions in this user guide use the 907X 50C as an example.
- Page 2 SD card Charging the battery Battery charger Charge the battery Charging from the USB port Battery warning and camera shut-down Attach the lens Attach the shoulder strap Using the protective covers The First capture 907X 50 C USER GUIDE www.hasselblad.com...
- Page 3 How to remove shortcuts on the main menu How to move shortcuts on the main menu Control screen Locked exposure parameters on the control screen Settings on the control screen Self Timer settings Interval settings Interval operation Exposure bracketing settings Exposure bracketing operation Long exposure screen Focus Bracketing Focus Bracketing settings Focus Bracketing Operation Step Size 907X 50 C USER GUIDE www.hasselblad.com...
- Page 4 Browse overlays Histograms 6.9 Image Rating Rating Function 6.10 Video Recording How To Record Video How to View Recorded Video 907X C ONTROL GRIP 907X Control Grip Parts and Controls Attaching the Control Grip Using the Control Grip Joystick 907X 50 C USER GUIDE www.hasselblad.com...
- Page 5 OVF Markings PHOCUS Phocus overview Phocus Features in Phocus Phocus Mobile 2 Connect to a computer 9.3 Phocus and Hasselblad capture files 10 S ETTIN GS 10.1 The camera settings menu Exposure Increment settings Shutter function settings True Exposure explained AE-L (AE-Lock) / Quick Adjust Auto ISO / P / Full Auto Crop &...
- Page 6 Tripod mount ring 75mm XPan Lens adapter Release cord X Battery charging hub 12 AP PENDI X 12.1 Change from a foreign language 12.2 EV Value 12.3 Clean the sensor filter 12.4 Clean the lens glass surface Remove dust Remove smear 12.5 Error messages 12.6 Information about the 907X user guide Updates 3D product images Trademarks Copyright 907X 50 C USER GUIDE www.hasselblad.com...
- Page 7 INTRODUCTION...
- Page 8 The CFV II 50C’s tilt screen enables the classic waist-level shooting style of the V System, hinting to Hasselblad’s history while letting photographers compose their images from a new point of view in the digital era.
- Page 9 V System and XPan System lenses All XCD Lenses can be fully used with the same functionality All Lenses from the Hasselblad V and XPan Systems can be as on an X System Camera, including Autofocus. used in electronic shutter mode. Requires optional XV or XPan Lens adapters.
- Page 10 V System cameras ever made. Battery type is the The rear screen can be tilted upwards 90 degrees for conven- same that is used for X System cameras. ient operation in many situations. 907X 50C/907X Anniversary Edition CONTENTS www.hasselblad.com...
- Page 11 Hasselblad Phocus digital imaging software Makes it easier to keep details in both deep shadows and The Hasselblad Phocus Digital imaging software is a capture, bright highlights. It will also allow fantastic HDR images to be processing and file management application aimed primarily assembled from less captures.
-
Page 12: Included Items
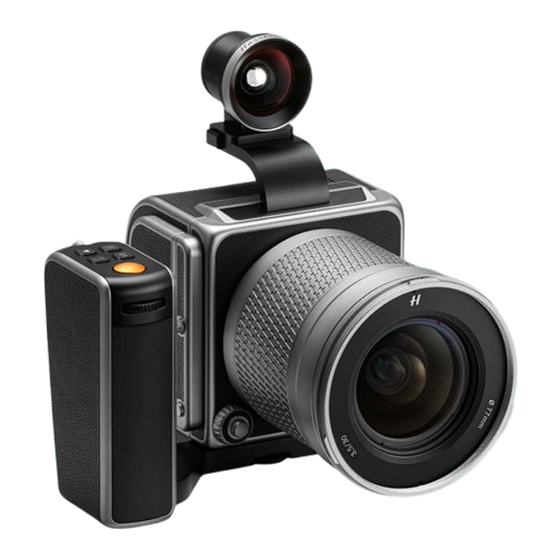
Shoulder strap ● Quick Start guide ● In the box ● Warranty leaflet ● Disclaimer and ● safety guidelines Focusing screen mask USB A to C cable, 80cm USB charger Registration card ● 44x33mm 907X 50C/907X Anniversary Edition CONTENTS www.hasselblad.com... - Page 13 Control Grip inc. front lens cap and rear lens cap) (Anniversary Edition) Optical Viewfinder Lens Shade (Anniversary Edition) Lens Protective Pouch ● Control Grip Quick Start Guide ● Optical Viewfinder Quick Start ● Guide 907X 50C/907X Anniversary Edition CONTENTS www.hasselblad.com...
- Page 14 Video: 2.7K (2720 x 1530) and HD (1920 x 1080), max 29:59 minutes/clip). Video covers the full sensor width in a 16:9 ratio. File Format Hasselblad 3FR RAW, Full size JPEG. Video: H.264 Compressed (29,97 fps). Single shot and Video, Continuous, Self Timer, Interval Timer, Exposure Bracketing and Focus Shooting Mode Bracketing.
- Page 15 907X 50C TECHNICAL SPECIFICATIONS – CONTINU E D Hasselblad XCD lenses with built in electronically controlled shutter and aperture. Automatic or manual focusing with instant manual focus override. Lens shades can be mounted in reverse for transport. Lenses Compatible with all H System lenses and some H System accessories using an XH Lens Adapter. Also compatible with V System and XPan Lenses using a XV or XPan Lens Adapter.
- Page 16 Video: 2.7K (2720 x 1530) and HD (1920 x 1080), max 29:59 minutes/clip). Video covers the full sensor width in a 16:9 ratio. File Format Hasselblad 3FR RAW, Full size JPEG. Video: H.264 Compressed (29,97 fps). Single shot and Video, Continuous, Self Timer, Interval Timer, Exposure Bracketing and Focus Shooting Mode Bracketing.
- Page 17 Hasselblad XCD lenses with built in electronically controlled shutter and aperture. Automatic or manual focusing with instant manual focus override. Lens shades can be mounted in reverse for transport. Lenses Compatible with all H System lenses and some H System accessories using an XH Lens Adapter.
- Page 18 Corresponding area of coverage 42 x 32 cm Corresponding exposure reduction 0.3 f-stops COMPATIBILIT Y • Hasselblad X System cameras, Hasselblad 907X series cameras LE NS D ESIGN 11 elements in 10 groups 1 aspherical element FOCUS T YPE Full focusing with floating mechanism...
- Page 19 When images are imported to Phocus, light fall-off is automatically removed. f/3,5 Image height [mm] D ISTORTION Infinity setting. When images are imported to Phocus, distor- tion is automatically removed. Image height [mm] Note: Technical specifications may change without notice. 907X 50C/907X Anniversary Edition CONTENTS www.hasselblad.com...
-
Page 20: System Requirements
- A change in White Balance setting in Phocus Mobile 2 will be synchronized to the camera. See separate User Guide for Phocus. EV value ● Added information about EV (Exposure Values) on page 159. 907X 50C/907X Anniversary Edition CONTENTS www.hasselblad.com... - Page 21 Live View. Before you start to use your new camera, please visit www. hasselblad.com and download the latest camera firmware Swipe: A sliding movement is when you press and hold the and update the camera system to make sure you get the latest finger and slide in one direction.
- Page 22 LE NSES...
-
Page 23: Xcd Le Ns Range
50 mm equivalent field of view. making it a perfect general Its high aperture and excellent purpose and travel lens. close-range performance makes it perfect for general type of photography as well as for reproduction. 907X 50C/907X Anniversary Edition CONTENTS www.hasselblad.com... - Page 24 Focuses down to an converter, providing a 4.8/230mm image scale of 1:2. It has a 95 mm lens. 35 mm equivalent focal equivalent field of view. lengths are 107 and 181 mm. 907X 50C/907X Anniversary Edition CONTENTS www.hasselblad.com...
- Page 25 ø XCD 45P 62mm where the orientation is critical. ø XCD 65 67mm ø XCD 80 77mm ø XCD 90 67mm ø XCD 120 Macro 77mm ø XCD 135 77mm ø XCD 35-75 77mm 907X 50C/907X Anniversary Edition CONTENTS www.hasselblad.com...
-
Page 26: Quick Start
QUICK START... -
Page 27: Asse M B Li N G Th E Cam E Ra
F I RMWARE Make sure the camera has the latest firmware by checking the latest version that you can download at www.hasselblad. com. You can see the currently installed firmware by following the procedure on page 152. Instructions on how to update firmware can be found on page 147. - Page 28 Close the lid by swinging it back and sliding it forward. For best results, the card should be formatted in the camera by using the procedure on page 77. For recommended memory cards, see page 76. 907X 50C/907X Anniversary Edition CONTENTS www.hasselblad.com...
-
Page 29: Charging The Battery
(C). At 0%, the camera will shut down completely. Note! The camera can show current battery capacity in % on the control screen by activating the setting as described on page 142. 907X 50C/907X Anniversary Edition CONTENTS www.hasselblad.com... - Page 30 Try to make the lens change with the sensor facing down. You can use a soft dust brush or compressed air to remove dust. Also see page 160. 907X 50C/907X Anniversary Edition CONTENTS www.hasselblad.com...
-
Page 31: At Tac H Th E Shoulde R Strap
If the strap is exposed to strong pulling force there is a risk that the metal rings or the strap itself can be damaged. Regularly check the condition and replace the rings or the entire strap if necessary. 907X 50C/907X Anniversary Edition CONTENTS www.hasselblad.com... - Page 32 To attach: Place the CFV on the lower supports (D) and slide the locking button in the direction of the arrow (E). Tilt the cover inwards until it locks. 907X 50C/907X Anniversary Edition CONTENTS www.hasselblad.com...
- Page 33 (C) to confirm the new ISO value Note! From the control screen you can also change white balance by tapping the white balance icon in the top left corner. See more on page 56. Continued on the next page. 907X 50C/907X Anniversary Edition CONTENTS www.hasselblad.com...
- Page 34 Finally, press the shutter release fully to make the capture. The captured image is now shown on the display where you can zoom and pan by swiping to examine details. See more on page 89. 907X 50C/907X Anniversary Edition CONTENTS www.hasselblad.com...
- Page 35 Phocus which is our software for Mac and PC. Both the user guide and Phocus can be downloaded from www.hasselblad.com. To view the image/images on a computer, connect the camera to the computer with the supplied USB cable. The SD card will show up in the Mac Finder Windows Explorer.
- Page 36 SAFETY...
-
Page 37: Safety And Warnings
Use a protective case or camera bag when you transport the Caution! equipment. This will help prevent damage to the equipment. Keep all equipment out of reach of small children. This will prevent damage to the equipment. 907X 50C/907X Anniversary Edition CONTENTS www.hasselblad.com... - Page 38 Caution! Do not try to remove the glass IR filter from the front of the CMOS (due to dust or similar). This can cause damage to the equipment. Always contact your local Hasselblad Authorized Service Centre. Caution! If you use canned compressed air to clean the glass of the IR filter, read the instructions very carefully before use.
- Page 39 CFVII 50C SE 50YOM when tested for use by the Body is 0.27 W/kg and Extremity is 0.301W/kg against a limit of 1.6W/kg. 907X 50C/907X Anniversary Edition CONTENTS www.hasselblad.com...
-
Page 40: Parts And Controls
PARTS & CONTROLS... -
Page 41: Parts, Compon E Nts, Buttons And Controls
When the control screen is active, it is You can force the camera into standby mode to save power by used for parameter selection. pressing and holding the Menu button and making a short- press on the On/Off button. 907X 50C/907X Anniversary Edition CONTENTS www.hasselblad.com... - Page 42 Live View or start AF. Second position will capture 6 Lens Release Button the image Button to release the lens or front protective cover. 3 Lens Mount Index Index for lens mount alignment. 907X 50C/907X Anniversary Edition CONTENTS www.hasselblad.com...
- Page 43 Contacts used for lens and camera control. Secures a stable and precise mount for the CFV II back. 2 CFV Hooks 4 CFV Support Hooks that hold the CFV II in locked position. Lower support for the CFV II. 907X 50C/907X Anniversary Edition CONTENTS www.hasselblad.com...
- Page 44 Used to synchronize exposure with the 500, EL, SWC, unmodified 200 and 2000 type cameras. Note! When the CFV II is used on the 907X body, all contacts are used for body and lens communication. 907X 50C/907X Anniversary Edition CONTENTS www.hasselblad.com...
- Page 45 Locking hole for the control grip. Spec: 12-24 VDC/35W. 5 Control grip connectors Plug: 3.7/1.3 mm. Positive voltage on center pin. Make Electrical connectors for the control grip. sure polarity is correct not to damage the camera. 907X 50C/907X Anniversary Edition CONTENTS www.hasselblad.com...
- Page 46 This button is used to select which of aperture Slot for SD card number 1. and shutter speed that is controlled by the control wheel. 5 SD Card 2 Slot for SD card number 2. Image plane index 907X 50C/907X Anniversary Edition CONTENTS www.hasselblad.com...
-
Page 47: Ports And Conn Ections
Wireless flash triggers with a 2.5 mm plug can be connected using the Exposure Cable CW. See illustration to the right. Maximum allowed voltage: 100 VDC. Flash Sync output Cable 907X 50C/907X Anniversary Edition CONTENTS www.hasselblad.com... - Page 48 There are click-stops for 45 and 90 degrees, but any angle in between can be used. Note! Always remember to fold the screen to normal position before transporting the camera. 907X 50C/907X Anniversary Edition CONTENTS www.hasselblad.com...
- Page 49 USING THE 907X...
-
Page 50: Touc H Di Splay Navi Gation
(E) . Pinch ● Place two fingers on the display apart and move them together without lifting them from the surface to zoom out (F) . 907X 50C/907X Anniversary Edition CONTENTS www.hasselblad.com... -
Page 51: Avai Lab Le Sc Re E N S
Live view (G) ● ● Sample menu screen Continuously updated live view. Setting (D) ● Sample setting screen. Main menu Control screen Menu screen Setting screen Browse 1 screen Browse 9 screen Live view screen 907X 50C/907X Anniversary Edition CONTENTS www.hasselblad.com... -
Page 52: Touch Displ Ay M Ain Me Nu
Live View Quality Focus Storage See detailed description on how to add and remove shortcuts The plus sign (6) is used to add a new shortcut. to your favourite list on the following page. 907X 50C/907X Anniversary Edition CONTENTS www.hasselblad.com... - Page 53 1 Press and Hold on the icon you want to move until the close symbol appears (D) . 2 Press and hold the icon and drag it to a new location. Icons will automatically rearrange. Remove Spirit Level shortcut Move shortcut Shortcut moved 907X 50C/907X Anniversary Edition CONTENTS www.hasselblad.com...
-
Page 54: Control Screen
9 Drive mode (60). 10 Exposure adjustment scale. 11 Remaining captures on card. 12 Card status (75). 13 Fixed exposure adjustment (59, 73). 14 Shutter speed (56). Numbers within parenthesis are links to pages with more info. 907X 50C/907X Anniversary Edition CONTENTS www.hasselblad.com... - Page 55 P Mode grey colour indicating that you cannot change them by touch. Note that you can use the front control wheel to shift aperture Aperture and and shutter speed combination. Shutter Speed are set automatically. 907X 50C/907X Anniversary Edition CONTENTS www.hasselblad.com...
-
Page 56: Set Ti N Gs On Th E Control Sc Re E N
ISO can also be set by touch from the Live View screen. See 80. Focusing - AF Autofocus. - MF Manual focus. Tap the new value to select. Focusing This chapter continues on the next page. 907X 50C/907X Anniversary Edition CONTENTS www.hasselblad.com... - Page 57 ISO can also be set by touch from the Live View screen. See page 80. Continued on the next page. Temp [ºK] Tint Cloudy 6500 Shade 7500 Daylight 5500 Tungsten 2850 Fluorescent 3800 Flash 5500 Manual Variable Variable 2000 to 10000 -100 to 100 907X 50C/907X Anniversary Edition CONTENTS www.hasselblad.com...
- Page 58 You can fine-tune the position by tapping inside the circle. E.g., if you tap at point ( 3 ), the picker will move a small increment down. This chapter continues on the next page. 907X 50C/907X Anniversary Edition CONTENTS www.hasselblad.com...
- Page 59 In the automatic modes ( A , S and P ) you can also add a for convenient hand-held use. See more on page 99. quick exposure adjustment by pressing the shift button ( E ) while rotating the control wheel ( D ). Also see page 73. 907X 50C/907X Anniversary Edition CONTENTS www.hasselblad.com...
- Page 60 The camera will make exposures as long as the Shutter release button is pressed. Tap the Continuous icon (C) again to close the dialogue Single frame Drive mode make it active. Continued on the next page. Continuous Drive mode 907X 50C/907X Anniversary Edition CONTENTS www.hasselblad.com...
- Page 61 To change any of the parameters, tap the right part of the screen (E) . This will bring up the dedicated settings for the function. See details on the following pages. 907X 50C/907X Anniversary Edition CONTENTS www.hasselblad.com...
- Page 62 (E) . After the pre-set time is elapsed, the exposure will be made. Select Exit by pressing the Cross button if you want to cancel the Self Timer. 907X 50C/907X Anniversary Edition CONTENTS www.hasselblad.com...
- Page 63 (C) to (G) . When the settings are made, tap the left arrow (4) to return to the drive mode settings screen. Finally, tap the Interval icon again to make it active. Continued on the next page. 907X 50C/907X Anniversary Edition CONTENTS www.hasselblad.com...
-
Page 64: I Nte Rval Ope Ration
Note! Interval is not supported in Phocus Mobile 2 or when tethered to Phocus. For tethered operation, use the Capture Sequenc- er function in Phocus. 907X 50C/907X Anniversary Edition CONTENTS www.hasselblad.com... - Page 65 (C) to (H) . When the settings are made, tap the left arrow (4) to return to the drive mode settings screen. Finally, tap the exposure bracketing icon again to make it active. 907X 50C/907X Anniversary Edition CONTENTS www.hasselblad.com...
- Page 66 Light measurement, focusing and auto white balance are Screen when shutter speed is 1 sec or longer. performed before the first exposure and is applied to all images in the sequence. Exposing Finish Exposure 907X 50C/907X Anniversary Edition CONTENTS www.hasselblad.com...
-
Page 67: Foc Us B Rac Keti N G
Set focus on a point ( C ) behind the main subject. During the sequence, the camera will shift focus closer and closer to the camera. The sequence will stop after the pre-set number of images has been captured or the lens has reached near limit. 907X 50C/907X Anniversary Edition CONTENTS www.hasselblad.com... - Page 68 To change any of the settings, tap the value (2) to bring up any of the screens (C) to (H) . When the settings are made, tap the left arrow (I) to return to the Drive Mode settings screen. 907X 50C/907X Anniversary Edition CONTENTS www.hasselblad.com...
- Page 69 Focus Bracketing is not supported in Phocus Mobile or when tethered to Phocus. Note! Light measurement, focusing and Auto White Balance are performed before the first exposure and is applied to all images in the sequence. 907X 50C/907X Anniversary Edition CONTENTS www.hasselblad.com...
- Page 70 The image using Small is perfectly sharp in all areas. Magnified part from image using Small step size. Magnified part from image using Extra Large step size. Continued on the next page. 907X 50C/907X Anniversary Edition CONTENTS www.hasselblad.com...
- Page 71 2 × PP = 10,6 μm PP is the Pixel Pitch of the sensor which is the Large 4 × PP = 21,2 μm distance between two adjacent pixels. Extra Large 6 × PP = 31,8 μm 907X 50C/907X Anniversary Edition CONTENTS www.hasselblad.com...
- Page 72 EX AMPLE 4 – WATC H XCD 35-75 lens @35mm. XCD 120 Macro lens. Subject distance: 75 cm Subject distance: 50 cm Aperture: Aperture: f/6.8 Number of images: 15 Number of images: 80 Step Size: Medium Step Size: Medium 907X 50C/907X Anniversary Edition CONTENTS www.hasselblad.com...
-
Page 73: F Ixe D Exposure Compe N Sation Set Ti N G
(C) . In live view, a ‘±’ symbol (D) is displayed between the aperture and shutter speed setting as confirmation of the setting. Note! In the adjustment setting screen you can double-tap the icon to reset the setting to 0. 907X 50C/907X Anniversary Edition CONTENTS www.hasselblad.com... - Page 74 Emphasizes the central section of the focusing screen equivalent to approximately 25% of the image. This provides a balanced assessment and is a typical choice where the main subject is in the centre of the image. 907X 50C/907X Anniversary Edition CONTENTS www.hasselblad.com...
-
Page 75: Memory Cards
Live View when no card is inserted remaining captures, but can also show: No card. The card is locked. The card is full. Card error. Backup mode selected, but no second card is inserted. 907X 50C/907X Anniversary Edition CONTENTS www.hasselblad.com... -
Page 76: I N Se Rt Th E Sd M E Mory Card
Avoid using Micro SD/TF memory cards with SD card sets. Some Sony high-speed G UHS-II SD 300MB/s memory cards might have poor compatibility, and therefore, might not be able to write image data properly. 907X 50C/907X Anniversary Edition CONTENTS www.hasselblad.com... -
Page 77: Format Sd Cards
The storage shortcut is placed on the default main menu for easy access to card formatting. If the storage shortcut has been removed, see 53 for more information on how to add shortcuts. Format Card dialogue for SD1 907X 50C/907X Anniversary Edition CONTENTS www.hasselblad.com... - Page 78 Bracketing Actual values status is also depend on shown here. lens. Exposure compensation AE lock Aperture Exposure Electronic Shutter speed Remaining Setting (+1.0 EV) (f/5.6) adjustment shutter active (1/250 sec) images counter (1125 left) 907X 50C/907X Anniversary Edition CONTENTS www.hasselblad.com...
-
Page 79: Zoom I N G I N Live Vi Ew
Capture. 3 You can pan the image when zoomed in by swiping. Note! Live View demands higher power consumption than normal operation. Working with Live View will shorten the usage time of the Camera. 907X 50C/907X Anniversary Edition CONTENTS www.hasselblad.com... -
Page 80: Live Vi Ew Set Ti N Gs
See details on 57. Even if auto white balance (AWB) is set and no icon is shown, you can still tap in the upper left corner to bring up the white balance setting screen (D) . 907X 50C/907X Anniversary Edition CONTENTS www.hasselblad.com... -
Page 81: Auto Focus
AF functionality. The camera will default to manual focus mode for these lenses. Using H System lenses on the 907X camera requires the optional XH Lens adapter. 907X 50C/907X Anniversary Edition CONTENTS www.hasselblad.com... - Page 82 Green (3) Autofocus performed and focus is correctly set. Red (4) Autofocus failed to focus and is not correctly set. Green AF indicator. AF correctly set. Red AF indicator. AF analysis failed to focus. 907X 50C/907X Anniversary Edition CONTENTS www.hasselblad.com...
-
Page 83: Manual Focus
Using these modes will ensure accurate and precise focusing. Auto zoom is the most accurate and focus peaking is the fastest to use. Auto zoom to 50%. Focus set correctly. 907X 50C/907X Anniversary Edition CONTENTS www.hasselblad.com... -
Page 84: Foc Us Peaki N G
When focus peaking is active and you adjust the focus manually, areas in focus (orange in this case) moves in depth as you move the focus position. See more on Focus settings on 123. 907X 50C/907X Anniversary Edition CONTENTS www.hasselblad.com... -
Page 85: Move Autofocus Point
Main Menu > Camera Settings > Focus > Reset Focus Point . See 123. 6.7 RESIZE AUTOFOCUS POINT The autofocus point can be resized in the Focus menu as described on 123. See also 86. 907X 50C/907X Anniversary Edition CONTENTS www.hasselblad.com... - Page 86 ● Select the desired size by swiping the list (C) ● The display will return to the main menu screen (A) ● To exit without saving the setting, press the menu ● button (1) 907X 50C/907X Anniversary Edition CONTENTS www.hasselblad.com...
- Page 87 Use the rectangle button (4) to move the selection ● down and the cross button (2) to move up. When the desired size is selected, press the star button (3) to make the selection. 907X 50C/907X Anniversary Edition CONTENTS www.hasselblad.com...
-
Page 88: Browsing, Preview And Histogra M
Press Shutter release button (E) to exit browse mode or press the menu button (A) . Access the delete Image dialogue by pressing the cross button (B) . See 92. Continued on the next page. 907X 50C/907X Anniversary Edition CONTENTS www.hasselblad.com... - Page 89 (see 128), you can also press the star button (1). To view another image in one-view, just tap the small thumb- nail. If card contains many images on the card, you can swipe vertically (C) . 907X 50C/907X Anniversary Edition CONTENTS www.hasselblad.com...
-
Page 90: Se Lec T Card To B Rowse
1 Select folder by clicking the folder name (322HASBL) (5) . 2 Select the image you want to view from the 9 images view (6) . 3 The selected image is shown (7) . 907X 50C/907X Anniversary Edition CONTENTS www.hasselblad.com... -
Page 91: C Reate N Ew Folde R
Note! It is only possible to create a new folder on the currently active card. When browsing the other card, the “Add Folder” icon will not be available. Create folder dialogue Folder view 907X 50C/907X Anniversary Edition CONTENTS www.hasselblad.com... -
Page 92: Delete Images
(1) . This will return to browse mode (C) Showing the next image. If the deleted image was the last captured image, the previous image is shown. 907X 50C/907X Anniversary Edition CONTENTS www.hasselblad.com... - Page 93 Capture time (8) ● ● Aperture (3) Exposure mode (9) ● ● Shutter speed (4) Metering mode (10) ● ● White balance (11) ISO (5) ● ● Focal length (12) Exposure adjustment (6) ● ● 907X 50C/907X Anniversary Edition CONTENTS www.hasselblad.com...
- Page 94 Overexposure (C) Histogram display concentrated on the right with few pixels elsewhere indicates a likely overexposure. Many details will be Even exposure lost in the highlights. Overexposure 907X 50C/907X Anniversary Edition CONTENTS www.hasselblad.com...
- Page 95 Browse Mode - Rated 4 stars. Mode ( A ) will not be visible. Note! If two cards are inserted, only images on the primary card are rated. Note! Video files cannot be rated. 907X 50C/907X Anniversary Edition CONTENTS www.hasselblad.com...
-
Page 96: Video Recording
You can change ISO and White Balance from both Video Control Screen and Video Live View screen by tapping the values. Note! Video recording is not possible in tethered mode. Video Live View Screen Video Display when capturing video 907X 50C/907X Anniversary Edition CONTENTS www.hasselblad.com... - Page 97 6 By sliding the white dot in the progress bar to the left or right, you can fast forward or reverse to quickly view other parts of the video. Note! Video files cannot be rated. Screen when video is paused 907X 50C/907X Anniversary Edition CONTENTS www.hasselblad.com...
- Page 98 907X CONTROL GRIP...
- Page 99 Rear scroll wheel Front scroll wheel Shutter release button AF/MF button Menu button Joystick 10 Browse button 11 AF Drive button 12 1/4” tripod thread Functions of buttons and controls are described on page 101. 907X 50C/907X Anniversary Edition CONTENTS www.hasselblad.com...
- Page 100 Align the lock pin ( A ) and lock screw ( B ) as shown below. Make sure you insert the lock screw in the correct hole. Tighten the lock screw securely ( C ) by hand. 907X 50C/907X Anniversary Edition CONTENTS www.hasselblad.com...
- Page 101 The four top buttons ( 3 , 4 , 7 and 8 ) can be reprogrammed to a With the camera in a low position it may be easiest to use the different function as described on page 137. thumb for the all buttons. 907X 50C/907X Anniversary Edition CONTENTS www.hasselblad.com...
- Page 102 Move the joystick right to enter the settings and click to enter. light Quality. Move the joystick to setting. the right to enter. Move the joystick up/down and click to select a new setting. 907X 50C/907X Anniversary Edition CONTENTS www.hasselblad.com...
- Page 103 AF area is centered. Move the joystick two times to the right and two times up to move the AF area in this example. Browse images Sideways movement changes Up or down movement changes overlay. preview image. 907X 50C/907X Anniversary Edition CONTENTS www.hasselblad.com...
-
Page 104: Optical Viewfinder
907X OPTICAL VIEWFINDER... - Page 105 Remove the top plate ( 3 ) by sliding it backwards. ● Insert the OVF bracket ( 4 ) and make sure it is fully ● inserted. Attach the CFV to secure the OVF. ● 907X 50C/907X Anniversary Edition CONTENTS www.hasselblad.com...
- Page 106 For close-up and precise work, you should always use live view on the display. Note! Avoid attaching a flash unit with electrical contacts to the OVF bracket as there is a risk of short circuit that can damage the flash. 907X 50C/907X Anniversary Edition CONTENTS www.hasselblad.com...
- Page 107 PHOCUS...
-
Page 108: Phocus Overview
Phocus is a professional image processing and file manage- The image processing engine in Phocus is optimized for ment application aimed primarily at Hasselblad RAW 3F file Hasselblad RAW files. Ensuring the maximum quality from handling. Phocus is available license-free for both Mac and your images. -
Page 109: Features I N Phoc Us
Hasselblad’s Natural Colour Solution (HNCS) enables you to with all Hasselblad H and X System lenses, even with tilt/shift produce outstanding and reliable colours so that skin tones, movements and with all Carl Zeiss lenses from the classic V specific product colours, and difficult gradations reproduce System, using manual settings. -
Page 110: Phoc Us Mob I Le
- the original Phocus Mobile will still be needed for the older cameras. For further details please refer to the dedicated Phocus User Guide and hasselblad.com/phocusmobile2. Note! The 907X/CFV II 50C and X1D II 50C cameras are not compati- ble with the original Phocus Mobile app. -
Page 111: Connect To A Computer
See Phocus user manual for full description. Note! Make sure the Tethering mode is set to Mac/PC when con- necting to a computer. See more on page 132. 907X 50C/907X Anniversary Edition CONTENTS www.hasselblad.com... -
Page 112: Phocus And Hasselbl Ad Capture Files
9.3 PHOCUS AND HASSELBL AD CAPTURE FILES Images captured by the camera are stored as Hasselblad RAW When working tethered to Phocus or Phocus Mobile 2, 3FR format files or JPEG format. It is possible to store either RAW files are automatically processed and stored in the back- or JPG or both RAW and JPG simultaneously. - Page 113 SETTINGS...
-
Page 114: The Ca Mera Settings Me Nu
Press the camera icon on the touch display. The Camera Settings menu appears. Swipe right or press the menu button to get back to the main menu. Exposure settings are explained on the next page. 907X 50C/907X Anniversary Edition CONTENTS www.hasselblad.com... - Page 115 Select between: Whole step (1) Half step (1/2) Third step (1/3) Exposure setting Exposure Adjust Settings: Select resolution for exposure adjustment settings. Select between: Whole step (1) Half step (1/2) Third step (1/3) Exposure setting 907X 50C/907X Anniversary Edition CONTENTS www.hasselblad.com...
- Page 116 The True Exposure feature is designed to keep the effective shutter speed unaffected by aperture setting. Note! See next page. An active electronic shutter is indicated on the control screen and in live view with an "E" next to the shutter speed. 907X 50C/907X Anniversary Edition CONTENTS www.hasselblad.com...
-
Page 117: True Exposure Explai N E D
At You can download a complete explanation of this situation slow shutter speeds the effect is minimal but at faster speeds, at www.hasselblad.com. e.g. 1/500s, the effect becomes clearly visible. Automatic compensatory measures in speed setting adjustments are employed. - Page 118 When the box is checked you can use the rear control wheel to input a quick exposure adjustment. Reset After Exposure Select On or Off . Controls if a quick exposure adjustment and AE-Lock state is reset by an exposure or not. 907X 50C/907X Anniversary Edition CONTENTS www.hasselblad.com...
- Page 119 Shutter speed limit setting as a function of focal length. With this setting and a 45mm lens, the Shutter Speed Limit will be: 1/(2 x 45) = 1/90 s. 907X 50C/907X Anniversary Edition CONTENTS www.hasselblad.com...
- Page 120 JPG files are not cropped. Live view with 65x24 (XPan) ● Crop Modes are disabled in USB tethered mode. ● Crop Modes are not supported in Phocus Mobile 2. Continued on the next page. 907X 50C/907X Anniversary Edition CONTENTS www.hasselblad.com...
-
Page 121: Image Orientation
Clockwise Rotation Settings: Select between: Auto . Lock at 0 degrees. Lock at 90 degrees. Lock at 180 degrees. Lock at 270 degrees. 907X 50C/907X Anniversary Edition CONTENTS www.hasselblad.com... -
Page 122: Image Quality Settings
Select between: RAW. RAW + JPG. JPG. Image Format settings menu Note! JPG file size depends on subject and ISO value. Subjects with many details or a high ISO setting will give larger files. 907X 50C/907X Anniversary Edition CONTENTS www.hasselblad.com... - Page 123 Near Full Scan Range setting These settings will limit the focusing scan range to scan in AF mode. If Near or Far is selected, AF speed will be faster. Continued on the next page. 907X 50C/907X Anniversary Edition CONTENTS www.hasselblad.com...
- Page 124 Live View when Far setting is selected A Far-icon (A) is shown when Scan Range Far is selected. If Near is selected, the Near-icon (B) is shown. Live View when Near setting is selected 907X 50C/907X Anniversary Edition CONTENTS www.hasselblad.com...
- Page 125 Zoom Level Select 50% or 100%. Controls the zoom level when you double-tap the screen, press the Star Button in live view mode or use the Zoom Level Setting auto zoom function in manual focus. 907X 50C/907X Anniversary Edition CONTENTS www.hasselblad.com...
-
Page 126: Flash Set Ti N Gs
Sync settings Controls if the flash shall be triggered in the beginning or at the end of the exposure. Select between: Sync settings Normal (beginning of the exposure) Rear (end of the exposure) 907X 50C/907X Anniversary Edition CONTENTS www.hasselblad.com... -
Page 127: Cam E Ra Con F I Guration Set Ti N Gs
Image detail with Normal setting Image detail with Full setting Normal Standard setting. Will minimize the risk for internal reflections. Full Selects a fully open round aperture. Only for XCD Lenses. Continued on the next page. Normal Full 907X 50C/907X Anniversary Edition CONTENTS www.hasselblad.com... - Page 128 Image rating Image Rating If the box is checked, the star button is used for image rating in browse mode. See page 95. Time Setting B&T available Time Setting B&T not available 907X 50C/907X Anniversary Edition CONTENTS www.hasselblad.com...
-
Page 129: Video Settings Me Nu
Main Menu. QUALIT Y Resolution Video Quality Resolution Setting Select between: 2.7K (2720 ⅹ 1530 pixels) Full HD (1920 ⅹ 1080 pixels) Frame rate is 29.97 fps. See more on page 907X 50C/907X Anniversary Edition CONTENTS www.hasselblad.com... -
Page 130: Live View
You can toggle the overlay On or Off by pressing the Rectangle button while in Video Live View screen with grid enabled Video Live View. Note! Video recording is not possible in tethered mode. 907X 50C/907X Anniversary Edition CONTENTS www.hasselblad.com... -
Page 131: General Settings Menu
Connectivity settings menu MAIN MENU > GENERAL SETTINGS Press the General Settings icon on the touch display. The General settings menu appears. Swipe right or press the menu button to get back to the main menu. 907X 50C/907X Anniversary Edition CONTENTS www.hasselblad.com... -
Page 132: Connectivity Settings
Wi-Fi. If user touches the screen or press any key during this 60 second timeout the display timeout will be restored to normal value. Note! Some regions do not allow Wi-Fi/5 GHz Wi-Fi. 907X 50C/907X Anniversary Edition CONTENTS www.hasselblad.com... - Page 133 5sec, 10sec, 20sec, 30sec, 1min, 2min, 3min. Display Off setting Note! You can force the camera into standby mode to save power by pressing and holding the Menu button and making a short-press on the On/Off button. 907X 50C/907X Anniversary Edition CONTENTS www.hasselblad.com...
- Page 134 Simulation before you start to take image. In these cases you can use the photos with a flash. balance scale, down to the left in Live View mode, while adjusting the exposure settings, to maintain desired exposure. 907X 50C/907X Anniversary Edition CONTENTS www.hasselblad.com...
- Page 135 Check this box to show a preview on the rear screen after each exposure. Overexposure Warning When this box is checked, areas close to overexposure in the preview image will alternate between black and white. 907X 50C/907X Anniversary Edition CONTENTS www.hasselblad.com...
- Page 136 Swipe right or press the menu button to get back to the main menu. Touchpad for Display Move AF Point When checked, the AF point can be moved on the rear display by tapping on the new location. 907X 50C/907X Anniversary Edition CONTENTS www.hasselblad.com...
-
Page 137: C Ustom But Ton S
Restore button function to factory default. Pressing this button will bring up a confirm dialogue. Press the Rectangle button to restore the settings to default or the Cross button to exit without changing the settings. Browse button settings 907X 50C/907X Anniversary Edition CONTENTS www.hasselblad.com... - Page 138 Speed After 10 exposures, a speed value will be shown for the active SD Card. 907X 50C/907X Anniversary Edition CONTENTS www.hasselblad.com...
- Page 139 Select card to format, SD 1 or SD 2 , on the Storage menu. A new Format Card dialogue appears. To confirm, select Format by pressing the rectangle button. Exit without formatting by pressing the cross button. Format SD1 dialogue 907X 50C/907X Anniversary Edition CONTENTS www.hasselblad.com...
- Page 140 Off, Low, Medium, High Volume settings menu AF Result When this box is checked, a sound will indicate a finished AF setting. If AF is successful or not, the camera will play different sounds. 907X 50C/907X Anniversary Edition CONTENTS www.hasselblad.com...
-
Page 141: Date And Time
Set Date by changing year, month and day using the pop up menus. Time Set Time by changing hour and minute using the pop up menus. Year setting Month setting Day setting Hour setting Minute setting 907X 50C/907X Anniversary Edition CONTENTS www.hasselblad.com... - Page 142 Note! The camera will only be partially powered from USB. A charged camera battery is still required. Note! Only power from a USB Host device is supported. 907X 50C/907X Anniversary Edition CONTENTS www.hasselblad.com...
-
Page 143: Spi Rit Leve L
In live view, press the rectangle button until the spirit level overlay is shown. Camera tilted to the left. Camera aligned horizontally and vertically. Camera tilted to the right. Camera tilted up. Camera aligned vertically. Camera tilted down. 907X 50C/907X Anniversary Edition CONTENTS www.hasselblad.com... -
Page 144: Cali B Rate Spi Rit Leve L
Spirit Level is reset to Factory calibration settings. Note! The calibration stored in the user mode will remain until changed. Swipe right or press the menu button to get back to the main menu. 907X 50C/907X Anniversary Edition CONTENTS www.hasselblad.com... - Page 145 Traditional Chinese Korean Note! If the camera has been set to a language you do not understand, see page 158 for a solution. Unit of Distance Select Meter or Foot for the distance scale overlay. 907X 50C/907X Anniversary Edition CONTENTS www.hasselblad.com...
- Page 146 Press Save to Card to save log data as a file on the active card. See page 149. Default Settings Reset all Settings. See page 150. File Counter Reset the file counter. See page 151. 907X 50C/907X Anniversary Edition CONTENTS www.hasselblad.com...
-
Page 147: Firmware Update
Swipe right or press the menu button to get back to the main menu. Update firmware procedure Download the latest firmware at www.hasselblad.com. Save the firmware file to an SD Card. Insert the SD card in the camera. Select Settings from the main menu. - Page 148 Lens Firmware Update Procedure Attach the lens to the camera. Download the latest XCD Lens Firmware from www.hasselblad.com. Save the Firmware file to an SD card. Insert the SD card in the camera. Select Settings from the main menu.
- Page 149 Tap the General Settings icon. Navigate to Service. Navigate to Log Data. Press the Delete from Camera button. Delete log data confirm dialogue In the confirm dialogue, press Delete (rectangle button). Press the menu button to exit. 907X 50C/907X Anniversary Edition CONTENTS www.hasselblad.com...
- Page 150 A "Reset all Settings" confirmation dialogue appears. Select Reset to reset all settings. After confirmation, all settings will be reset to default values. Reset all Settings dialogue. Note! Select Exit to exit without resetting. 907X 50C/907X Anniversary Edition CONTENTS www.hasselblad.com...
- Page 151 Note! A new folder is created if there are images present on any inserted active SD memory card. File counter reset dialogue 907X 50C/907X Anniversary Edition CONTENTS www.hasselblad.com...
- Page 152 The serial number of the CFV II. Licenses Displays the available Licenses. Tap each line for more information. Usage Usage dialogue Displays the total number of the currently mounted lens exposures. 1603 in this example on the right. 907X 50C/907X Anniversary Edition CONTENTS www.hasselblad.com...
- Page 153 ACCESSORIES...
- Page 154 0,8x as well as increases the maximum and minimum aperture with 2/3 stops. • Hasselblad X System cameras, X1D with firmware 1.25.0 or later, or X1D II 50C/907X/CFV II with firmware 1.4.0 or later. •...
- Page 155 For a complete list oF accessories, see X V LE N S ADAPTE R CP.HB.00000241.01 the XV lens adapter is used to attach Hasselblad V system lenses to the 907X. compatible with all V system lenses (c, CF, CFi, CFE, CB, F and FE)
- Page 156 For a complete list oF accessories, see RE LEASE CORD X CP.HB.00000242.01 the Hasselblad release cord X allows for remote shutter control, helping to eliminate shake or vibration. A durable cloth-wrapped 90cm (36 inch) cable connects to the micro- phone input of the 907X and the simple single button opera- tion allows photographers to keep vibration to a minimum.
- Page 157 APPE NDIX...
- Page 158 Globe icon 4 Tap the text to the right (A) . 5 Scroll down to select your Language. Language Setting Swipe right or press Menu / EXIT button to get back to main menu. 907X 50C/907X Anniversary Edition CONTENTS www.hasselblad.com...
- Page 159 The table shows EV values for ISO 100. If you use another ISO setting the EV value should be modified as follows: ISO200: EV +1 ISO400: EV +2 ISO800: EV +3 Etc. More information here: https://en.wikipedia.org/wiki/Expo- sure_value 907X 50C/907X Anniversary Edition CONTENTS www.hasselblad.com...
-
Page 160: Cle An The Se Nsor Filter
1 If you are not sure how to remove the smear, contact your prevent damage to the filter. local Hasselblad Authorized Service Centre. 2 Clean the lens glass with a high quality lens cleaning If compressed air did not remove all the problems and you solution on a tissue. -
Page 161: Error Messages
Sandisk, Panasonic, Toshiba and Sony are trademarks of their respective corporations. COPYRI GHT All text in this user guide copyright © Victor Hasselblad AB. All images in this User Guide, not credited to a specific photographer, copyright © Victor Hasselblad AB. The text,...
Need help?
Do you have a question about the 907X 50C Anniversary Edition and is the answer not in the manual?
Questions and answers