
Subscribe to Our Youtube Channel
Related Manuals for HOMCOM 800-166V90


Summary of Contents for HOMCOM 800-166V90
- Page 1 IN221200320V02_IT 800-166V90 EN_FOR INDOOR HOUSEHOLD USE ONLY IT_SOLO PER USO DOMESTICO US_CA...
- Page 2 Leggere attentamente tutte le istruzioni prima di utilizzare questo apparecchio. Conservare questo manuale per riferimenti futuri. CONSERVARE QUESTE ISTRUZIONI Questo apparecchio non è destinato all'uso in ambienti quali: - Aree cucina per il personale in negozi, uffici e altri ambienti lavorativi. - Casolari.
-
Page 3: Parametri Tecnici
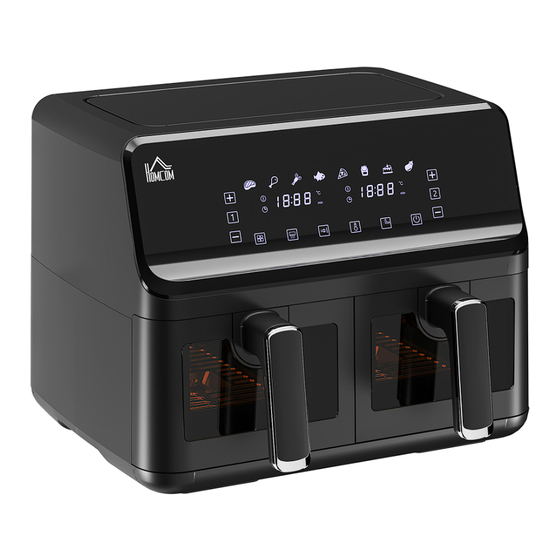
INTRODUZIONE Questa friggitrice ad aria offre un modo semplice e sano per preparare i vostri ingredienti preferiti. Utilizzando la circolazione dell'aria calda rapida e la griglia superiore, è in grado di preparare numerosi piatti. Essa riscalda il cibo in tutte le direzioni, quindi per la maggior parte degli ingredienti non è... - Page 5 Importante Pericolo Sotto la corretta supervisione guidata, questo apparecchio può essere utilizzato da bambini di età pari o superiore a otto anni, a condizione che ne comprendano i potenziali rischi e pericoli. Sotto la corretta supervisione guidata, questo apparecchio può essere utilizzato da persone con disabilità o senza esperienza, a condizione che ne comprendano i potenziali rischi e pericoli.
- Page 6 Non deve essere utilizzato dai clienti di hotel, motel, bed and breakfast e altri ambienti residenziali. - L'uso improprio di questo apparecchio o l'utilizzo per scopi commerciali ne annullerà la garanzia. Ci riserviamo il diritto di rifiutare qualsiasi responsabilità per i danni causati.
- Page 7 9. Controllare se gli ingredienti sono pronti. Se gli ingredienti non sono pronti, reinserire il cestello nell'apparecchio e impostare il timer per qualche minuto in più. 10. Per estrarre gli ingredienti (ad esempio patatine fritte), estrarre prima il cestello dalla friggitrice e posizionarlo su un ripiano. Non capovolgere il cestello: l'olio in eccesso sul fondo del cestello colerà...
- Page 8 l’indicatore del timer (in basso a sinistra sul display) rimarrà acceso. Cancellare la selezione tenendo premuto il tasto ++ per due secondi . L’apparecchio entrerà in modalità standby. Tasto 5 & Tasto 6 – Controllare il timer e la temperatura per del cestello sinistro.
- Page 9 3.3. Dopo aver caricato la ricetta e selezionato temperatura e timer, premere il tasto di accensione – il cestello++/ ++entrerà in funzione. Il display mostrerà il conto alla rovescia del timer senza lampeggiare. L'indicatore della ricetta selezionata rimarrà’ acceso, mentre gli altri indicatori saranno spenti. 3 .4 .
- Page 10 4.4 Estrarre il cestello 4.4. 1. Se un cestello viene rimosso durante la cottura, lo schermo visualizzerà la parola "APERTO" e il riscaldamento e il motore si interromperanno. Una volta reinserito il cestello, l'apparecchio continuerà la lavorazione con le impostazioni precedenti.
- Page 11 Note 1. Modalità di avvio: in questa modalità, è illuminata solo l'icona del tasto di accensione. 2. Modalità standby: i tasti di accensione, ++ e ++ sono illuminati; 3. Modifica delle impostazioni quando l'unità non è in funzione: Il tasto della funzione attiva è...
- Page 12 Impostazioni La seguente tabella seguente vi aiuterà a selezionare le impostazioni di base per gli ingredienti. Nota: ricordarsi che queste impostazioni sono delle indicazioni. Poiché gli ingredienti differiscono per origine, dimensione, forma e marca, non possiamo sempre garantire le migliori impostazioni. Poiché...
- Page 13 Pulizia Pulire l'apparecchio dopo ogni utilizzo. Non utilizzare utensili da cucina in metallo o materiali detergenti abrasivi per pulire il cestello e il ripiano: ciò potrebbe danneggiare il rivestimento antiaderente. 1. Scollegare l'apparecchio e lasciarlo raffreddare completamente. Nota: rimuovere la pentola per far raffreddare la friggitrice più rapidamente. 2.
- Page 14 Diagramma schema elettrico...
- Page 15 Risoluzione dei problemi Problema Possibili cause Soluzione L'apparecchio non è collegato Inserire la spina in una presa a muro con messa alla presa di corrente. a terra. La friggitrice non funziona. Impostare il tasto del timer sul tempo di cottura Non è...
- Page 16 Read all instructions carefully before using this appliance. Keep this manual for future reference. SAVE THESE INSTRUCTIONS This appliance is not intended to be used in locations such as: - Staff kitchen areas in shops, offices and other working environments. - Farm houses.
-
Page 17: Technical Data
INTRODUCTION This air fryer provides an easy and healthy way of preparing your favourite ingredients. By using hot rapid air circulation and a top grill, it is able to make numerous dishes. It heats food in all directions, so most ingredients do not need oil. TECHNICAL DATA: -----Voltage:220-240V,~50Hz -----Wattage:2500 Watts... - Page 18 Fig.4 Fig.5 Fig.6 Fig.7...
- Page 19 Important Danger Under guided supervision, this appliance can be used by children aged eight years and above, provided they understand the potential risks and hazards. Under guided supervision, this appliance can be used by persons with disabilities or persons without experience, provided they understand the potential risks and hazards.
-
Page 20: Before First Use
Before first use 1. Remove all packaging materials. 2. Remove any stickers or labels from the appliance. 3. Thoroughly clean the shelf and pot using hot water, washing up liquid and a non- abrasive sponge. 4.Wipe inside and outside of the appliance with a damp cloth. This is an oil free fryer that works on hot air –... -
Page 21: Control Panel Instructions
10. To remove ingredients (e.g. fries), pull the pot out of the air fryer and place it on the trial framework. Do not turn the pot upside down – excess oil at the bottom of the pot will leak onto the ingredients. -
Page 22: Detailed Instructions
the time indicator (on the lower left of the display) will always be on. Cancel the selection by holding for two seconds. The appliance will enter standby. Key 5 & Key 6 – Controls time and temperature for the left pot. You can increase or decrease the temperature by 5℃... - Page 23 time indicator will flash. To cancel the selections, hold two seconds for the left pot or for the right pot. If both pots are canceled, the appliance will enter standby. 3.2. Pressing the menu choice key lets you select the menu you need. When pressed, the temperature is adjusted by 5℃.
- Page 24 4.2 Changes during the double pots working process 4.2.1. If the two pots are cooking and you need to change the time or temp for pot 1, press – the recipe cannot be changed in this state. If there is no operation for 10 seconds after changes, the screen returns to normal.
- Page 25 4.7.2. “Synchronous end key” means that two pots with different time selected will be end at the same time. This means that the long time menu will start working first, the short time menu will be paused first--the screen will show “HOLd”, started when the two pots have the same amount of time remaining, and will end at the same time.
- Page 26 Settings This table below will help you select the basic settings for ingredients. Note: Keep in mind that these settings are indications. As ingredients differ in origin, size, shape and brand, we cannot guarantee the best settings. Because the Rapid Air technology instantly reheats the air inside the appliance, Pull the pot out briefly when preheating.
- Page 27 Cleaning Clean the appliance after every use. Do not use metal kitchen utensils or abrasive cleaning materials to clean the pot and shelf – this may damage the non-stick coating. 1. Unplug the appliance and let it cool down completely. Note: Remove the pot to let the air fryer cool down more quickly.
-
Page 28: Electrical Schematic Diagram
Electrical schematic diagram... -
Page 29: Troubleshooting
Troubleshooting Problem Possible cause Solution The appliance is not Put the mains plug in an earthed wall socket. plugged in. The air fryer does not work. Set the timer key to the required preparation time You have not set the timer.
Need help?
Do you have a question about the 800-166V90 and is the answer not in the manual?
Questions and answers