Table of Contents
Advertisement
Quick Links
Advertisement
Table of Contents

Related Manuals for Aczet Micro Balance CM 2


Summary of Contents for Aczet Micro Balance CM 2
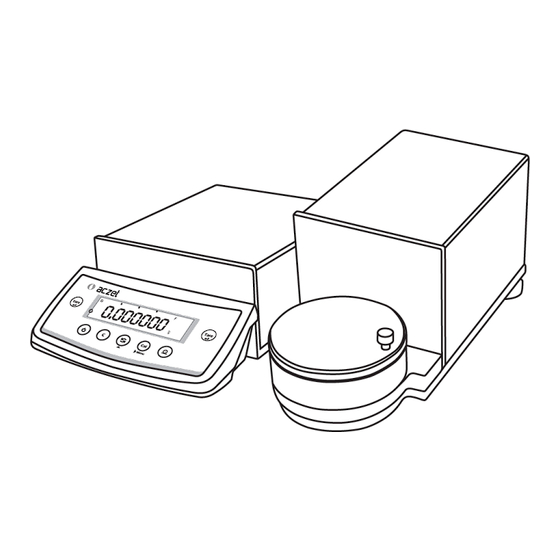
- Page 1 Micro Balance M i c r o B a l a n c e O p e r a t i n g M a n u a l...
-
Page 2: Table Of Contents
Contents Introduction ......................Warning & Safety Precautions ................Getting Started ....................Layout ........................Setting up the Balance ..................Location ......................Warm up ......................Keys of Balance ....................Power On ......................11 Simple Weighing ....................13 External Calibration .................... 17 Internal Calibration .................... 19 Calibration Test .................... -
Page 3: Introduction
Rugged, durable weighing system 1.1 Warnings and Safety precautions The balance has been constructed in Make sure that the voltage rating by Aczet and must check and, if accordance with the European printed on the AC adapter is necessary, correct these Directives as well as international identical to your local line voltage. -
Page 4: Getting Started
– Base Plat S.S. (CM) damage as a result of rough handling If it does not, contact your local ACZET dealers. during shipment If you see any sign of damage: Contact your local Aczet office,... -
Page 5: Setting Up The Balance
Anti-theft device Aczet Balance are equipped with a lug for optional anti-theft device. The anti-theft device (cable with lock) is suitable for all models. It is available from ACZET under order number CAD01. -
Page 6: Keys Of Balance
2.3 Keys of Balance On/Off key: Switches the display on / off Capacity Bar : This indicates the total amount of Tare key: Press here to tare the weight of any container so weight on the Pan that the readout shows the net weight of samples, also used Stability Symbol : This symbol is displayed when the to store reference settings. -
Page 7: Power On
Short-form operating Instructions Press key briefly Press and hold key until desired display appears Automatic procedure Aczet balances have several control levels the following section explains key functionality in simple weighing mode. Weighing mode (operation) Press briefly Press & Hold Switch on &... -
Page 8: Simple Weighing
4. Simple Weighing Purpose Features The basic weighing function is always accessible and can be – Taring the balance you can tare the balance within the entire used alone or in combination with an application program weighing range. (counting, weighing in percent, etc.). –... - Page 9 Switching of Weight Units 4.0.3 Switching of weight units All Aczet balances can display weight values in different weight units. The factory setting is Unit 1 (gm), Unit 2 (ct), Unit 3 (gm) Switching between unit 1, unit 2 and unit 3 Press <TOGGLE>...
-
Page 10: External Calibration
If Balance is connected externally to PC or Data Printer via Rs232 Cable, successful or unsuccessful calibration report will be automatically generated after the completion of Calibration process. Unsuccessful Calibration Successful Calibration When GLP ON When GLP ON ------------------------------ 14-Jul-10 03:46PM ------------------------------ Aczet 14-Jul-10 03:46PM Model CM 5F Aczet Ser.no. 9930508 Model CM 5F Ver.no. -
Page 11: Internal Calibration
If Balance is connected externally to PC or Printer via Rs232 Cable, successful or unsuccessful calibration report will be automatically generated after the completion of Calibration process. Successful Calibration Unsuccessful Calibration When GLP ON When GLP ON ------------------------ -------------------------------- 20-Jul-10 10:32AM 20-Jul-10 10:34AM Aczet Aczet Model CM 5F Model CM 5F Ser.no. 9223102 Ser.no. 9223102 Ver.no. r0.1.6.0 Ver.no. -
Page 12: Calibration Test
If Balance is connected externally to PC or Data Printer via Rs232 Cable, successful or unsuccessful calibration report will be automatically generated after the completion of Calibration process. When GLP ON When GLP OFF -------------------------------- Calibration: External 14-Jul-10 00:03AM Aczet W-ID ....Model CM 5F Temperature 30.710'C Ser.no. 1111111 +2.000000g... -
Page 13: Calibration Test With Actual Calibration
If Balance is connected externally to PC or Printer via Rs232 Cable, successful or unsuccessful calibration report will be automatically generated after the completion of Calibration process. When GLP ON When GLP OFF ------------------------------------ Calibration External 14-Jul-10 03:46PM Aczet W-ID .... Model CM 5F Ser.no. 9930508 Temperature 32.905'C Ver.no. -
Page 14: Overview Of Menu
Key Functionality in User Menu The following section explains key functionality in User Menu mode. Menu (called up with Press briefly Press & Hold On / Off Change Sub Menu Setting Increments the value of digit Change Main menu options Shifts the digit from left to right CAL / Confirm Setting... - Page 15 5.1 Adjusting the stability Filter You can use the stability Filter to match the balance to the ambient conditions. 2 Setting with normal balance surroundings (factory setting) 3 Setting with unstable balance surroundings. The balance operates slower but is less sensitive to external influences (vibrations, etc.) 4 Setting with extreme unstable balance surroundings.
- Page 16 Print Menu 5.5 Setting baud rate (data transmission rate) The data transmission rate (baud rate) determines the speed of the transmission via the serial interface. The unit is baud (1 baud (bd) = 1 bit/second). The following setting are available. bd 300, bd 600, bd 1200, bd 2400, bd 4800, bd 9600 (default), bd 19200, bd 57600 5.6 Setting Parity This feature determines the parity of the transmitted data.
- Page 17 5.10 GLP Menu Setting GLP off : If the user select this option then the balance print format are not compliance to ISO/GLP/GMP. GLP on : If the user select this option then the balance print format are compliance to ISO/GLP/GMP.
-
Page 18: Parameter Settings
Key Functionality in parameter 7. Parameter Settings settings mode The following section explains key functionality in parameter settings mode. Press briefly Press & Hold Change Sub Menu Setting Increments the value of digit Change Main menu options Shifts the digit from left to right Store and quit menu Confirm Setting (Auto Cal Menu) - Page 19 Parameter Settings By accessing the parameter menus the user can change the following settings. • ID and LID settings. • Time and Date Settings. ID & LID SETTINGS • Auto Calibration and Power On Calibration Settings. Operating Instructions These menus can be accessed by pressing the PRINT key or CAL key when all the characters of the display when coming out of stand by mode or Power On.
- Page 20 7.1.2 SET DATE Press TARE key, “date” is display Press TARE key, current date is displayed with first digit flashing. Flashing digit indicates that digit value or place can be changed. Press TOGGLE key ( ) to change the value of the Flashing digit. Press CAL key ( ) to shift the flashing digit from Left to Right After proper setting of date in day, month &...
-
Page 21: Auto Calibration
7.3 Auto Calibration Auto Internal Calibration can be triggered automatically, by the following • Time • Temperature • Power on Calibration Operating Instruction Press the CAL key briefly when coming out from stand by or Power on mode. 7.3.1 Auto CAL Time Settings Select Auto CAL ON and press the <TARE>... -
Page 22: Windows Direct Communication
7.3.3 Power on Calibration Press the CAL key when the LCM displays Auto CAL On or Off enter Power ON calibration options. This setting enables the user to turn on or turn off power on calibration. Power on calibration will take place every time the balance is powered on. Power on Cal will take place irrespective of whether CAL Test is On or Off. - Page 23 Windows direct communication settings (Balance Side) Press and hold the <PRINT> key in simple weighing mode until the windows print menu is prompted. Press the <TOGGLE> key briefly to change the windows option to ON of OFF. The default option is OFF. Windows Unit settings Select Windows print option as ON and press the <TARE>...
-
Page 24: Iso / Glp - Compliant Printout
GLP footer: – Date – Time at end of measurement – Field for operator signature The record is output to a ACZET data printer or a computer. Settings Set print option to request & GLP ON Function Keys Press the Print key to output header and first measured value. - Page 25 9.1 Output Format with 26 Characters The following characters can be output, depending on the characters displayed on the balance : Normal Operation Position 10 11 12 13 14 15 16 17 18 19 20 21 22 23 24 25 26 D D D D D D D D D D D D D D D * LF CR D D D D D D D D D D D D D D D *...
-
Page 26: Data Input Format
9.2 Data Input Format You can connect a computer to your balance to send commands via the balance interface port to control balance functions and applications. Format for commands Command Code Data •[: it shows start of command frame. •Command Code: it shows which functionality to be carried out for this command frame. •Data: This field in frame is optional and it is intended to provide data information between Bi-directional communications. -
Page 27: Error Codes
CONTINUOUS and user tries to set GLP ON from then turn GLP ON. USER MENU. RTC not operational. Contact Aczet Service center. Contact Aczet Service center. Error 2 Calibration Error + RTC Error. Error 3 Calibration Error + RTC Error. -
Page 28: Care & Maintenance
11. Care & Maintenance Service Regular servicing by a ACZET technician will extend the service life of your balance and ensure its continued weighing accuracy. ACZET can offer you service contracts, with your choice of regular maintenance intervals. The optimum maintenance interval depends on the operating conditions at the place of installation and on the individual tolerance requirements. - Page 29 This warranty does not apply if the product has been damaged by accident or misuse, exposed to radioactive or corrosive materials, has foreign material penetrating to the inside of the product, or as a result of service or modification by other than ACZET. In lieu of a properly returned warranty registration card, the warranty period shall begin on the date of shipment to the authorized dealer.
-
Page 30: Specification
Statistical Printer “CPR 02” with Date / Time & Statistics Remote Display “SRD01” Calibration Weights (F1) (ERTL, F2 with certificate) for further details, contact ACZET Dealers. USB Interface Density Kit “CDK 01” For determination of solids for determination of liquids with displacement body... - Page 31 Subject to technical changes and to the availability of the accessories supplied with the instruments. ACZET Inc. 1637, STELTON ROAD UNIT B-5, PISCATAWAY, NJ-08854. USA | Email: service@aczet.com | Web: www.aczet.com CS-09-05-11/2...
Need help?
Do you have a question about the Micro Balance CM 2 and is the answer not in the manual?
Questions and answers