
Subscribe to Our Youtube Channel
Related Manuals for Aczet CZ Series


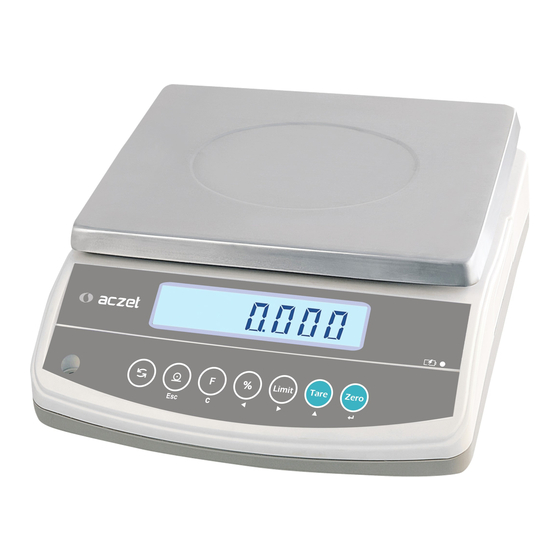
Summary of Contents for Aczet CZ Series
- Page 1 This document hosted by: www.oldwillknottscales.com Economical Precision Balances CZ Series...
-
Page 2: Table Of Contents
Contents 1 Technical Data 2 Basic Information (General) 2.1 Proper use 2.2 Improper Use 2.3 Warranty 3 Basic Safety Precautions 3.1 Pay attention to the instructions in the Operation Manual 3.2 Personnel training 4 Transportation & Storage 4.1 Testing upon acceptance 4.2 Packaging / return transport 5 Unpacking, Setup and Commissioning 5.1 Installation Site, Location of Use... - Page 3 7.4.2 NTEP models 7.5 Percent weighings 7.5.1 Non NTEP models 7.5.2 NTEP models 8 The menu 8.1 Menu map 8.2 Call up menu 8.3 Navigation in the menu 8.4 Menu overview non NTEP models 8.5 Menu overview NTEP models 8.6 Menu settings 8.6.1 Switch over weighing units (Unit) (only non NTEP appliances) 8.6.2 Display background illumination 8.6.3 Multi-Tare function (only models NTEP)
-
Page 4: Technical Data
1. Technical Data Aczet CZ 153 CZ 203 CZ 302 CZ 602 CZ 1202 CZ 2002 Readability (d) 0.001 g 0.001 g 0.01 g 0.01 g 0.01 g 0.01 g Weighing range (max) 150 g 200 g 300 g 600 g... - Page 5 Aczet CZ 601 CZ 1201 CZ 3001 CZ 6001 CZ 5001T Readability (d) 0.1 g 0.1 g 0.1 g 0.1 g Weighing range (max) 600 g 1200 g 3000 g 6000 g 5000 g Reproducibility 0.1 g 0.1 g 0.1 g 0.1 g...
- Page 6 NTEP Models Aczet CZ 502T CZ 602T CZ 1202T CZ 1201T CZ 501T Readability (d) 0.01 g 0.01 g 0.01 g 0.1 g 0.1 g Weighing range (max) 600 g 600 g 1200 g 1200 g 500 g Reproducibility 0.01 g 0.01 g...
- Page 7 NTEP Models Aczet CZ 601T CZ 5000HT CZ 6000T CZ 6000HT Readability (d) 0.1 g 0.1 g 0.1 g Weighing range (max) 600 g 5000 g 6000 g 6000 g Reproducibility 0.1 g 0.1 g 0.1 g Linearity ±0.3 g ±0.3 g...
-
Page 8: Basic Information (General)
The structure of the balance may not be modified. This may lead to incorrect weighing results, safety-related faults and destruction of the balance. The balance may only be used according to the described conditions. Other areas of use must be released by ACZET in writing. 2.3 Warranty Warranty claims shall be voided in case •... -
Page 9: Basic Safety Precautions
3.1 Pay attention to the instructions in the Operation Manual Carefully read this operation manual before setup and commissioning, even if you are already familiar with ACZET balances. Versions in other languages are non-binding translations. The only binding version is the original document in German. -
Page 10: Unpacking, Setup And Commissioning
5.Unpacking, Setup and Commissioning 5.1 Installation Site, Location of Use The balances are designed in a way that reliable weighing results are achieved in common conditions of use. You will work accurately and fast, if you select the right location for your balance. Therefore, observe the following for the installation site: •... -
Page 11: Placing/ Remove The Transportation Lock
Before connecting or disconnecting of additional devices (printer, PC) to the data interface, always disconnect the balance from the power supply. With your balance, only use accessories and peripheral devices by ACZET, as they are ideally tuned to your balance. -
Page 12: Initial Commissioning
5.5 Initial Commissioning In order to obtain exact results with the electronic balances, your balance must have reached the operating temperature (see warming up time chap. 1). During this warming up time the balance must be connected to the power supply (mains, accumulator or battery). The accuracy of the balance depends on the local acceleration of gravity. -
Page 13: Calibration Procedure (Non Ntep Models)
Calibration Procedure (non NTEP models) Take away calibration weight... -
Page 14: Calibration Procedure (Ntep Models)
MODE... -
Page 15: Linearization
“Pass” appears, the adjustment process has been finished successfully. • Remove adjusting weight during selftest Wait until the balance is again in weighing mode. 5.8 Linearization Linearity shows the greatest deviation of a weight display on the scale to the value of the respective test weight according to plus and minus over the entire weighing range. -
Page 16: Linearization Non-Verifiable Models (Low Resolution)
5.8.1 Linearization non NTEP models (low resolution) Balance Display Operation • Start balance by pressing Whilst the balance carries out a self test, press until “F1 Unt” appears MODE MODE • Press repeatedly until “tECH” appears • Press , “Pin” appears •... - Page 17 • Put on weight 1 (see table chap. 6.8.1) • Wait for the stability display and the signal sound • “LoAd 2” appears • Remove weight 1 and put on the weight 2 • After the stability display and the signal sound “LoAd 3” appears; remove weight 2 and put on weight 3 •...
-
Page 18: Linearization Of Non Verifiable Models (Low Resolution) And Verifiable Models
5.8.2 Linearization of non NTEP models (low resolution) and NTEP models Balance Display Operation • Start balance by pressing . While the balance carries out a self test, press until “F1 Unt” appears MODE MODE • Press repeatedly until “tECH“ appears In case of verifiable models press the adjustment switch on the lower side of the balance! •... - Page 19 5.8.3 Table Linearization points Non NTEP models: Weight 1 Weight 2 Weight 3 Weight 4 120 g 30 g 60 g 90 g 120 g 200 g 50 g 100 g 150 g 200 g 300 g 50 g 100 g 200 g 300 g 1200 g...
-
Page 20: Position Of Seals And Adjusting Switch
5.9 Position of seals and adjusting switch: Adjustment switch Plastic disk to cover the adjustment switch Self-destroying seal mark Self-destroying seal mark... -
Page 21: Controls
6. Controls 6.1 Keyboard overview MODE Designation Function • Turn on/off [ON/OFF] • Set weight display at zero • Activate the current element in the menu [ZERO] • Select in Weighing units (menu F UNIT): change to the next unit Tare •... -
Page 22: Overview Of Display
6.2 Overview of display Display Description Gram Kilogram Zeroing display Taring Stability display Display for parts counting Percent weighing display Display for tolerance weighing (mom) Momme Display for adjustment. Signals the adjustment function Bar graph Weight unit (Gramm) In models NTEP only g display (ct) Carat... -
Page 23: Operation
7. Operation 7.1 Simple Weighing 7.1.1 Non NTEP models Balance Display Operation • Start balance by pressing The balance will carry out a self-test. Wait for “0.0” display • Should the balance not display exactly “0.0” despite empty scale pan, press the button. -
Page 24: Taring
7.2 Taring The dead weight of any weighing container may be tared away by pressing a button, so that the following weighings show the net weight of the goods to be weighed. 7.2.1 Non NTEP models Balance Display Operation • Deposit weighing receptacles. The weight of the container is displayed. -
Page 25: Ntep Models
7.2.2 NTEP models Balance Display Operation • Put on weighing container. The weight of the container is displayed. Tare • Press , the zero display appears. The pictogram is displayed. The pictogram goes out. The weight of the container is now internally saved. •... -
Page 26: Parts Counting
7.3 Parts counting Before the balance can count parts, it must know the average part weight (i.e. reference). Proceed by putting on a certain number of the parts to be counted. The balance determines the total weight and divides it by the number of parts (the so-called reference quantity). Counting is then carried out on the basis of the calculated average piece weight. -
Page 27: Ntep Models
7.3.2 NTEP models Balance Display Operation • Start balance by pressing The balance will carry out a self-test. Wait for „0.0“ display. • Press Appears the reference quantity “10”. By pressing the key several times, the reference quantities 10, MODE 20, 50, 100, 200 can be set •... -
Page 28: Adding
7.4 Adding It is useful, when a mixture of various components is weighed in a tare container and finally for control purposes the sum weight of all weighed components is required. 7.4.1 Non NTEP models Balance Display Operation • Start balance by pressing Whilst the balance is carrying out a selftest, press . -
Page 29: Ntep Models
Then appears for 2 seconds the weight of both test items, before the weight of the second test item will appear again. With the further samples proceed as described above. In order to display the total weight of the samples, remove weight from the weighing plate, wait for the zero display and press . - Page 30 Press , „ACC 2“ is shortly displayed, then appears shortly the total weight and then the weight of the second sample which now is also stored. With the further samples proceed as described above. In order to display the total weight of the samples, remove weight from the weighing plate, wait for the zero display and press .
-
Page 31: Percent Weighings
7.5 Percent weighings Percent weighing allows to display weight in percent, in relation to a reference weight. Percent weighing allows to display weight in percent, in relation to a reference weight. 7.5.1 Non NTEP models Balance Display Operation • Start balance by pressing the balance will carry out a self- test. -
Page 32: Ntep Models
7.5.2 NTEP models Balance Display Operation • Start balance by pressing the balance will carry out a self- test. Wait for the “0.0 g” display. • Put a reference weight on the weighing plate, which corresponds to 100% • Press In the display appears “100.00%”... -
Page 33: The Menu
8. The Menu 8.1 Menu Map In the menu can be made 8 different settings and the adjustment. 8.2 Call up menu The menu is called-up by pressing the key, wile the balance is carrying out the self test. In the display appears the message “F1 UNT”. - Page 34 RS -232 interface S 232: • P Prt: connect with printer • b XXXX: Baud rate can be selected between 9600, 600, 1200, 2400, 4800 • LP-50: not documented • EnG: Selection of Language English • Chi: Selection of Language Chinese •...
-
Page 35: Menu Overview Ntep Models
8.5 Menu Map (NTEP models) Balance Display Operation Not available Background lighting on/automatic/off • EL on: background lighting on • EL Au: background lighting switches on automatically • EL off: background lighting off RS -232 interface S 232: • P Prt: connect with printer •... -
Page 36: Menu Settings
8.6 Menu settings 8.6.1 Switch over weighing units (Unit) (only non NTEP appliances) The weighing units are switched on or off via the menu. Activate Function. : Balance Display Operation • Start balance by pressing As long as the balance carries out a self test, press MODE “F1 Unt”... -
Page 37: Display Background Illumination
8.6.2 Display background illumination In the menu display background illumination can be switched on or off. To achieve this, follow the sequence of operations below. Balance Display Operation • Start balance by pressing As long as the balance carries out a self test, press MODE “F1 Unt”... -
Page 38: Multi-Tare Function (Only Models Ntep)
8.6.3 Multi-Tare function (only models NTEP) The balance can be tared several times successively. For that make in the menu the following setting: Balance Display Operation • Start balance by pressing While the balance carries out a self test, press MODE “F1 Unt”... -
Page 39: Data Output Rs 232
• Use a suitable cable to connect the weighing balance to the interface of the printer. Faultless operation requires an adequate ACZET interface cable. • Communication parameters (baud rate, bits and parity) of balance and printer must match. -
Page 40: Printer Operation - Printout Examples
9.3 Printer operation - Printout examples Standard printout “weighing data” 8.65 g Gross Weight Printout parts counting PCS : 10 pcs Reference quantity UW : 0.861 g Individual weight 8061 g Gross weight Printout adding 35.07 g N First weighing 8.62 g N Second weighing 8.00 g N... -
Page 41: Continuous Data Output
9.4 Continuous data output -Header 1- -Header 2- --Weighing Data-- Weighing Unit Final character Head line 1 : ST =stable, US=instable Head line 2: NT=net, GS=gross 9.5 Remote control instructions The remote control commands are sent from the remote control unit to the balance as ASCII code. After the balance having received the s/w/t commands, it will send the following data. -
Page 42: Error Messages
10. Error Massages Incorrect adjusting weight Err 3 Put on correct adjustment weight (see chap. 1; Technical Data Err 4 Zero range exceeded Remove load and press to reset balance to zero. Err 5 Keyboard error Inadmissible input Electronic error Switch balance off and on again. -
Page 43: Service, Maintenance, Disposal
Loose residue sample/powder can be removed carefully with a brush or manual vacuum cleaner. Spilled weighing goods must be removed immediately. 11.2 Service, maintenance The appliance may only be opened by trained service technicians who are authorized by ACZET. Before opening, disconnect from power supply. 11.3 Disposal Disposal of packaging and appliance must be carried out by operator according to valid national or regional law of the location where the appliance is used. -
Page 44: Instant Help
12. Instant help In case of an error in the program process, briefly turn off the balance and disconnect from power supply. The weighing process must then be restarted from the beginning. Help: Fault Possible cause The displayed weight does not glow. •... - Page 45 E2, Plot No. 15, WICEL, Opp. Seepz Gate No. 1, MIDC, Andheri (E), Mumbai 400 093. India Tel. : +91-22-4243 7700 | Fax : +91-22-4243 7800 | Toll Free : 1800 102 6054 E-mail : export@aczet.com | Web : www.aczet.com...
Need help?
Do you have a question about the CZ Series and is the answer not in the manual?
Questions and answers