Advertisement
Quick Links
IMPORTANT
RETAIN FOR FUTURE REFERENCE
READ CAREFULLY
Assembly Instructions
Note:
1. Do not use electric screwdriver.
2. Two people are required to assemble this item. Assemble the item on a flat, solid and even surface.
3. Make sure that all the necessary parts are in the carton before starting the assembly.
4. Please secure all parts and bolts loosely, only when the frame is complete should you fully tighten
the screws.
5. If any instability occurs, loosen the screws, re-align the components as necessary and re-tighten the
screws evenly.
6. This item is not a climbing frame or toy.
7. Danger of suffocation. Keep out of reach of children.
Advertisement

Related Manuals for FUNBERRY B0BYN8RPTD


Summary of Contents for FUNBERRY B0BYN8RPTD
- Page 1 IMPORTANT RETAIN FOR FUTURE REFERENCE READ CAREFULLY Assembly Instructions Note: 1. Do not use electric screwdriver. 2. Two people are required to assemble this item. Assemble the item on a flat, solid and even surface. 3. Make sure that all the necessary parts are in the carton before starting the assembly. 4.
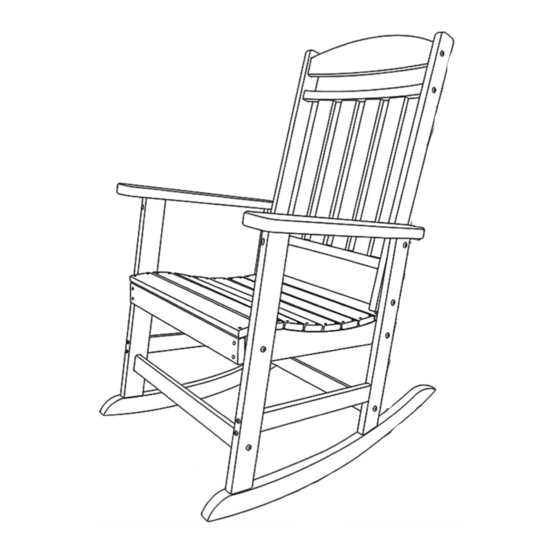
- Page 3 M6x100mm M6x60mm M6x40mm M6x50mm S5 Allen key Screw Screw Screw Bolt 8PCS Chair Seat Right Chair Arm Left Chair Arm Front&Back Rail Rheboscelia Chair Backrest Front cross-piece...
- Page 4 Step 1: Secure part H(Front cross-piece) to part A(seat panel), using Hardware3(M6×40mm Screw). Step 2: Attach part B(right chair arm) to the finished part in step 1 using Hardware 4(M6*50mm Bolt). Repeat part C(left chair arm) operation on the other side. Step 3: Connect part D(Front&back rail) to B(right chair arm) and C(left chair arm) using Hardware2 (M6×60mm Screw).
- Page 5 Step 4: Put part E(Rheboscelia) onto the chair arms and secure with Hardware1(M6×100mm Screw). Step 5: Insert part F(chair backrest) into chair arm using Hardware4 (M6×50mm Bolt). After this step, please fully tighten all bolts if you check all the parts are positioned. Assembly is complete.
Need help?
Do you have a question about the B0BYN8RPTD and is the answer not in the manual?
Questions and answers