Advertisement
Quick Links
IMPORTANT
RETAIN FOR FUTURE REFERENCE
READ CAREFULLY
INSTRUCTION MANUAL
Note:
1. Do not use electric screwdriver.
2. Two people are required to assemble this item. Assemble the item on a flat, solid and even surface.
3. Make sure that all the necessary parts are in the carton before starting the assembly.
4. Please secure all parts and bolts loosely, only when the frame is complete should you fully tighten
the screws.
5. If any instability occurs, loosen the screws, re-align the components as necessary and re-tighten the
screws evenly.
6. This item is not a climbing frame or toy.
7. Danger of suffocation. Keep out of reach of children.
1
Advertisement

Related Manuals for FUNBERRY B0C1NH4WVM


Summary of Contents for FUNBERRY B0C1NH4WVM
- Page 1 IMPORTANT RETAIN FOR FUTURE REFERENCE READ CAREFULLY INSTRUCTION MANUAL Note: 1. Do not use electric screwdriver. 2. Two people are required to assemble this item. Assemble the item on a flat, solid and even surface. 3. Make sure that all the necessary parts are in the carton before starting the assembly. 4.
- Page 2 Contact Us! Contact our friendly customer service department for help first. Replacements for missing or damaged parts will be shipped ASAP! E-mail service@abv-supreme.fun Contact Us! Dear Customer, Thanks for buying from us. lf you have questions or quality problems during the installation and use, please kindly contact us through Amazon message(or email to us: service@abv-supreme.fun).
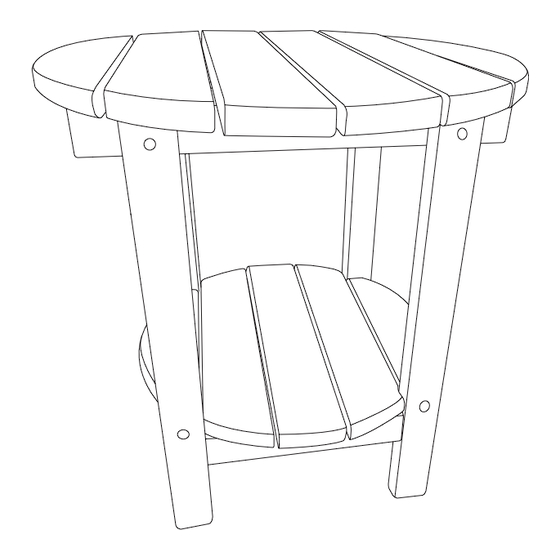
- Page 3 Hardware List M6 x 50mm ALLEN KEY SCREW (Provided) 20PCS Parts List 2PCS 4PCS 2PCS Note: The quantities above are for one single table.
- Page 4 Assembly Steps Step 1: Secure part B to D using Hardware1 (M6×50mm Screw). NOTE: The counter bore has to face toward the end of the support bar on part D, as shown in figure 1-b. Figure. 1-b ×8pcs Step 2: Put the two part A together, then secure part C to A using Hardware1 (M6×50mm Screw).
Need help?
Do you have a question about the B0C1NH4WVM and is the answer not in the manual?
Questions and answers