
Related Manuals for Radio Flyer FLYER 835BL


Summary of Contents for Radio Flyer FLYER 835BL
- Page 1 F LY E R 1 6 ” K I D S ’ B I K E O W N E R ’ S M A N U A L M O D E L S 8 3 5 B L , 8 3 5 R , 8 3 5 W , 8 3 5 T , 8 3 5 P...
- Page 3 The Flyer™ line delivers a high-performance experience for riders of all ages, ranging from micromobility solutions for families to premium wheels for kids. As an extension of the Radio Flyer® brand, Flyer™ products are created with the same beautiful design and quality that has inspired our work for over a century.
-
Page 5: Table Of Contents
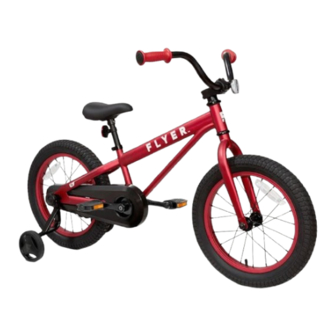
TA B L E O F C O N T E N T S Important Safety Instructions Getting Started Assembly Instructions Fastener Torque Values Accessories Adjusting Bike Riding & Safe Operating Guidelines Ride Safety Checklist Braking Instructions Maintenance Warranty... - Page 6 Component Guide 1. Seat Post 10. Saddle 2. Rear Reflector 11. Stem 3. Training Wheel Knob 12. Grips 4. Training Wheel Arm 13. Front Reflector 5. Training Wheel 14. Fork 6. Chain Guard 15. Spokes 7. Chain Wheel 16. Front Fork Dropouts 8.
-
Page 7: Important Safety Instructions
Important Safety Instructions S A F E T Y W A R N I N G S WARNING! When using this product, basic precautions should always be followed including the following: • Read all safety warnings and instructions before using the product. Failure to follow warnings and instructions may result in serious injury or death. -
Page 8: Getting Started
Getting Started A S S E M B LY I N S T R U C T I O N S The following steps provide a general overview of the assembly process for your bike. It is recommended to consult a professional bicycle mechanic for assistance with the bike’s assembly, maintenance, and repair. - Page 9 Step 2: Install the handlebar A. Using the provided 6mm allen wrench, loosen the four bolts and remove the stem faceplate. Ensure to rotate the fork so that the stem is facing forwards as in the image below. B. Align and center the handlebar in the stem. Adjust handlebar angle for rider preference.
- Page 11 Step 3: Install the front wheel The bike is shipped with a spacer installed in the fork dropouts to prevent damage during shipment. Prior to installing the front wheel, this spacer must be removed. Once removed, the spacer may be discarded. A.
- Page 12 Step 4: Install the Training Wheels A. Remove the outermost nut and washer on each side of the rear axle. Keep this nut for future removal of the training wheels. B. Ensure the alignment piece (1) is seated over the rear axle, and that the bent tab is inserted into the slot on the rear dropout.
- Page 13 Step 5: Install the saddle A. Using the provided 5mm allen wrench, loosen the seat clamp bolt and insert the seat post into the seat tube. B. Position the seat post at an appropriate height for the rider. See page 18. C.
- Page 14 Step 6: Install pedals A. Identify the right and left pedals before assembling. The different pedals are specified with stickers on their surface. The right pedal corresponds to where the rider’s right foot is during use. B. Install the right pedal to the right side crank arm by turning the axle clockwise by hand.
- Page 15 RIGHT LEFT RIGHT LEFT RIGHT LEFT...
- Page 16 Step 7: Install the reflectors A. If necessary, use a Phillips head screwdriver to remove the screw from the mounting portion of each reflector. B. Mount the white reflector to the front of the handlebar. Insert and tighten down the mounting screw to secure the reflector. Ensure the reflector is facing directly forwards.
-
Page 18: Fastener Torque Values
A C C E S S O R I E S Radio Flyer carries a full line of accessories to enhance the usability of your Flyer™ kids’ bike. Please refer to the instruction sheets provided with each accessory to ensure proper assembly. -
Page 19: Adjusting Bike
A D J U S T I N G S E AT H E I G H T The seat height should be set based on the rider’s personal preference. The initial seat position can be set by first placing the ball of the rider’s foot on the pedal with the crank arm in its lowest position. - Page 20 A D J U S T I N G H A N D L E B A R R O TAT I O N A L P O S I T I O N Following the initial assembly of the handlebar, the handlebar rotational position should be adjusted for the rider.
-
Page 21: Riding & Safe Operating Guidelines
Riding & Safe Operating Guidelines It is the owner’s sole responsibility to ensure safe riding. Among other things: • Always have the rider obey road and traffic laws as applicable in your local area. • Always have the rider wear a helmet that meets the US CPSC standard. Wearing a helmet can prevent head injuries. - Page 22 • Ensure the seat is securely connected to the bike and the seat cannot be moved. Seat • Confirm the clamp is fully tightened to 8 to 12 Nm. • Verify the seat is properly adjusted to fit the rider’s height. •...
- Page 23 U S I N G C O A S T E R B R A K E The Flyer 16” Kids’ Bike is fitted with a rear coaster brake. To activate the rear brake, pedal backwards.
-
Page 24: Maintenance
Maintenance Always have a certified and reputable bike mechanic complete a tune-up on your bike after your first 50-100mi. Regular tune-ups and inspections are critical to ensuring your bike stays in safe condition. For more information on recommended maintenance intervals please visit: •... -
Page 25: Warranty
Warranty For information on your Flyer 16” Kids’ Bike’s warranty please visit:...
Need help?
Do you have a question about the FLYER 835BL and is the answer not in the manual?
Questions and answers