Advertisement
Quick Links
ALLEN + ROTH and logo design are
trademarks or registered trademarks
of LF, LLC. All rights reserved.
ALLEN + ROTH y el diseño del logotipo
son marcas comerciales o marcas registradas
de LF, LLC. Todos los derechos reservados.
Questions, problems or missing parts?
Before returning, contact us on:
866-439-9800, 8 a.m. - 8 p.m., EST, Monday - Sunday or ascs@lowes.com.
¿Preguntas, problemas o piezas faltantes?
Antes de volver a la tienda, póngase en contacto al:
866-439-9800, de lunes a domingo, de 8 a.m. a 8 p.m., hora estándar del Este, o escriba a ascs@lowes.com.
Thank you for purchasing this ALLEN + ROTH product. We've created these easy-to-follow instructions to ensure you spend your time enjoying the product
instead of putting it together. But, if you need more information than what is provided here, please visit Lowes.com, search the item number and refer to the
Guides & Documents tab on the product's page.
Gracias por comprar este producto ALLEN + ROTH. Hemos creado estas instrucciones fáciles de seguir para garantizar que pase su tiempo disfrutando el
producto en lugar de armándolo. No obstante, si necesita más información que la entregada aquí, visite Lowes.com, busque el número de artículo y consulte
la pestaña Guides & Documents (Guías y documentos) en la página del producto.
TROUBLESHOOTING/SOLUCIÓN DE PROBLEMAS
PROBLEM
PROBLEMA
Shower rod falling from wall.
El cortinero para ducha se cae de la pared.
CARE AND MAINTENANCE/CUIDADO Y MANTENIMIENTO
•
Wipe clean with damp cloth./Limpie con un paño húmedo.
WARRANTY/GARANTÍA
1-Year limited warranty that protects against defects in materials and workmanship.
Garantía limitada de 1 año que protege contra defectos en los materiales y la mano de obra.
SAFETY INFORMATION/INFORMACIÓN DE SEGURIDAD
Please read and understand this entire manual before attempting to assemble, operate or install the product.
Lea y comprenda completamente este manual antes de intentar ensamblar, usar o instalar el producto.
WARNING/ADVERTENCIA
Make sure you are installing in a clean, dry and safe environment.DO NOT STAND ON TUB LEDGE.
Asegúrese de que está realizando la instalación en un entorno limpio, seco y seguro. NO LO INSTALE EN EL BORDE DE LA BAÑERA.
ITEM/ARTÍCULO #5138229/5277702/5277703/5277704/5277705
MODEL/MODELO #SHLSNC03SN/SHLSNC03CH/SHLSNC03MB
POSSIBLE CAUSE
CAUSA POSIBLE
The screws are not tightened.
Los tornillos no están apretados.
/SHLSNC03BR/SHLSNC03SG
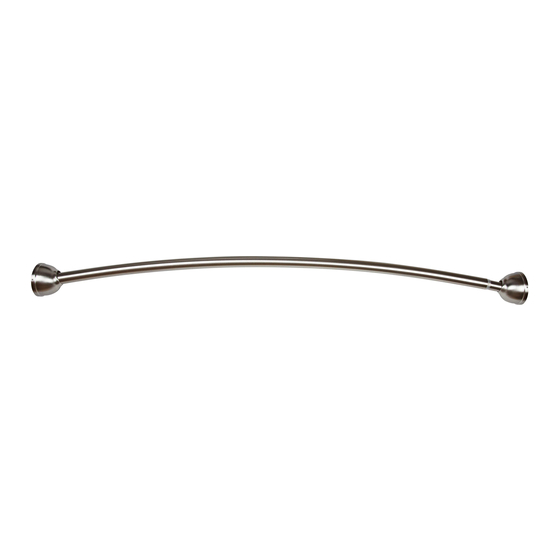
44-IN TO 72-IN
FIXED CURVED
SHOWER ROD
CORTINERO PARA DUCHA
CURVO FIJO DE
111.76 CM A 182.88 CM
CORRECTIVE ACTION
ACCIÓN CORRECTIVA
Tighten the screws with a screwdriver.
Apriete los tornillos con un destornillador.
1
Advertisement

Related Manuals for LF ALLEN + ROTH SHLSNC03SN


Summary of Contents for LF ALLEN + ROTH SHLSNC03SN
- Page 1 FIXED CURVED ALLEN + ROTH y el diseño del logotipo SHOWER ROD son marcas comerciales o marcas registradas de LF, LLC. Todos los derechos reservados. CORTINERO PARA DUCHA CURVO FIJO DE 111.76 CM A 182.88 CM Questions, problems or missing parts? Before returning, contact us on: 866-439-9800, 8 a.m.
- Page 2 PREPARATION/PREPARACIÓN Before beginning assembly of product, make sure all parts are present. Compare parts with package contents list and hardware contents list. If any part is missing or damaged, do not attempt to assemble the product. Antes de comenzar a ensamblar el producto, asegúrese de tener todas las piezas. Compare las piezas con la lista del contenido del paquete y la lista de aditamentos.
- Page 3 INSTALLATION OVERVIEW/ DESCRIPCIÓN GENERAL DE LA INSTALACIÓN Rotate all end caps to the left and separate backwards from all mounting brackets. 1. Gire todas las tapas para los extremos hacia la izquierda y sepárelas hacia atrás de todos los soportes de montaje. Place the rod in your desired location and extend until both mounting brackets touch the wall.
- Page 4 INSTALLATION OVERVIEW/DESCRIPCIÓN GENERAL DE LA INSTALACIÓN 4A. Insert mounting screws through the 4B. Tighten the mounting screws. mounting bracket into drywall anchors. 4B. Apriete los tornillos de montaje. 4A. Inserte los tornillos de montaje en el soporte de montaje y en las anclas de expansión para panel de yeso.
Need help?
Do you have a question about the ALLEN + ROTH SHLSNC03SN and is the answer not in the manual?
Questions and answers