
Related Manuals for Ferroli RVL-I PLUS 10


Summary of Contents for Ferroli RVL-I PLUS 10
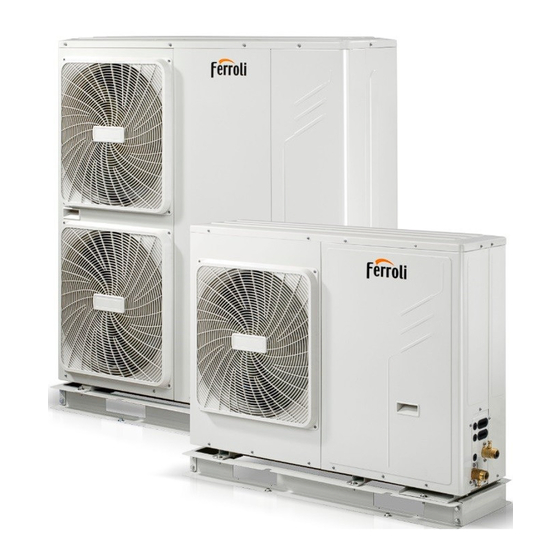
- Page 1 RVL-I PLUS REVERSIBLE HEAT PUMP FOR OUTDOOR INSTALLATION WITH DC INVERTER COMPRESSOR INSTALLATION AND MAINTENANCE MANUAL...
-
Page 2: Table Of Contents
Dear Customer, Thank you for having purchased a FERROLI product. It is the result of many years of experiences and of particular research stu- dies and has been made with top quality materials and advanced technologies. The CE mark guarantees that the products satisfy all the applicable European Directives. - Page 3 Backup heater (electrical booster) ..............65 AHS (Additional Heating Source, gas bolier) .
-
Page 4: Safety Information
SAFETY INFORMATION CONTAINS FLUORINATED GREENHOUSE GASES COVERED BY THE KYOTO PROTOCOL: - R410A (GLOBAL WARMING POTENTIAL GWP = 2088) • This manual supplied with the unit must be kept in a dry place and ready to hand for future consultation when required. •... - Page 5 SAFETY INFORMATION After completing the installation work, check to make qualified ersonnel according to the local laws and regula- sure that there is no refrigerant leakage. tions and this manual using a separate circuit. Insufficient capacity of the power supply circuit or improper electrical Never directly touch any leaking refrigerant as it could construction may lead to electric shocks or fire.
-
Page 6: General Features
Shipping weight of the unit Sound pressure level at 1m IP Level Protection Maximum pressure - High Side Maximum pressure - Low Side PED certification authority Ferroli Spa Ferroli Spa Via Ritonda 78/A Via Ritonda 78/A (VR) Italy (VR) Italy... -
Page 7: Main Components Of The Unit
GENERAL FEATURES Main components of the unit REFRIGERANT CIRCUIT: contained in a compartment protected from the air flow to simplify the maintenance operations, is equipped with DC inverter motor driven compressor twin rotary type to ensure greater dynamic balancing and reduce vibrations. It is placed on vibration-damping rubber supports and wrapped by a double layer of sound-absorbing material to reduce the noise. -
Page 8: Functional Diagram Of Hydraulic Compartment
GENERAL FEATURES Functional diagram of hydraulic compartment Air purge valve Expansion vessel Refrigerant gas connection Refrigerant liquid connection 14.3 Manometer Flow switch 9 Circulation Pump 10 Heat exchanger 11 Water outlet connection 12 Pressure relief valve 13 Water inlet connection Twout 14.1 Electrical heating tape 14.2... -
Page 9: Components Supplied With The Unit
GENERAL FEATURES Components supplied with the unit NAME SHAPE 5-7-9 10-12-12T-14-14T-16-16T Mod. Outdoor unit installation & owner’s manual(this book) Wire control owner’s manual Y- shape filter * Water outlet connection pipe assembly User interface kit(digital remote controller) Tighten belt for customer wiring use T5: Thermistor for domestic hot water tank temperature sensor clamp Transit line... -
Page 10: Operating Limits
OPERATING LIMITS HEATING MODE With electrical heaters or bolier Leaving water temperature °C ACS MODE NOTE FOR DHW MODE: leaving water temperature is the temperature of the water produced by the unit and not the With electrical heaters or DHW temperature available to the user; bolier the DHW temperature is in fact a function of this parameter and of the coil surface... -
Page 11: Technical Data And Performance
TECHNICAL DATA AND PERFORMANCE Technical data Efficiency capacity in heating mode - Average climate Models temperature (water 55°C) temperature (water 55°C) temperature (water 35°C) (water 35°C) NOTA: Declared according to European regulation 811/2013. The values are referred to units without options and accessories. Performances data Modelli 4600... -
Page 12: Performance
TECHNICAL DATA AND PERFORMANCE Performance Mod. 5 - Heating mode PT (kW) Tw_out (°C) Ta (°C) 130% 100% 130% 100% 2,646 2,205 1,838 1,286 0,978 2,32 2,53 2,58 2,64 2,69 2,859 2,423 2,053 1,458 1,890 2,40 2,59 2,67 2,75 2,84 3,865 3,248 2,730... - Page 13 TECHNICAL DATA AND PERFORMANCE Mod. 5 - Cooling mode PF (kW) Tw_out (°C) Ta (°C) 130% 100% 130% 100% 4,274 3,562 2,968 2,078 1,579 3,05 3,33 3,39 3,46 3,53 5,502 4,663 3,951 2,805 3,637 3,80 4,11 4,23 4,36 4,49 5,622 4,725 3,970 2,739...
- Page 14 TECHNICAL DATA AND PERFORMANCE Mod. 7 - Heating mode PT (kW) Tw_out (°C) Ta (°C) 130% 100% 130% 100% 3,464 2,887 2,406 1,684 1,280 2,21 2,40 2,45 2,50 2,55 3,742 3,172 2,688 1,908 2,474 2,28 2,46 2,54 2,61 2,69 5,060 4,252 3,573 2,466...
- Page 15 TECHNICAL DATA AND PERFORMANCE Mod. 7 - Cooling mode PF (kW) Tw_out (°C) Ta (°C) 130% 100% 130% 100% 5,595 4,663 3,886 2,720 2,067 2,93 3,19 3,25 3,32 3,39 7,202 6,104 5,173 3,673 4,761 3,65 3,94 4,06 4,18 4,30 7,360 6,185 5,197 3,586...
- Page 16 TECHNICAL DATA AND PERFORMANCE Mod. 9 - Heating mode PT (kW) Tw_out (°C) Ta (°C) 130% 100% 130% 100% 4,330 3,608 3,007 2,105 1,600 2,11 2,30 2,35 2,40 2,44 4,678 3,964 3,360 2,385 3,092 2,18 2,36 2,43 2,50 2,58 6,325 5,315 4,466 3,082...
- Page 17 TECHNICAL DATA AND PERFORMANCE Mod. 9 - Cooling mode PF (kW) Tw_out (°C) Ta (°C) 130% 100% 130% 100% 6,994 5,828 4,857 3,400 2,584 2,89 3,15 3,21 3,27 3,34 9,003 7,630 6,466 4,591 5,951 3,60 3,88 4,00 4,12 4,24 9,200 7,731 6,497 4,483...
- Page 18 TECHNICAL DATA AND PERFORMANCE Mod. 10 - Heating mode PT (kW) Tw_out (°C) Ta (°C) 130% 100% 130% 100% 4,634 4,213 3,511 2,458 1,868 1,92 2,10 2,14 2,18 2,23 5,133 4,583 3,884 2,757 3,575 2,08 2,24 2,31 2,38 2,45 7,565 6,815 5,727 3,952...
- Page 19 TECHNICAL DATA AND PERFORMANCE Mod. 10 - Cooling mode PF (kW) Tw_out (°C) Ta (°C) 130% 100% 130% 100% 7,877 7,161 5,968 4,177 3,175 3,39 3,59 3,67 3,74 3,81 9,688 8,971 7,602 5,398 6,997 3,65 3,84 3,95 4,07 4,19 11,200 10,275 8,635 5,958...
- Page 20 TECHNICAL DATA AND PERFORMANCE Mod. 12 - Heating mode PT (kW) Tw_out (°C) Ta (°C) 130% 100% 130% 100% 5,535 5,031 4,193 2,935 2,231 1,91 2,09 2,13 2,17 2,21 6,127 5,471 4,636 3,292 4,267 2,06 2,23 2,30 2,37 2,44 9,179 8,269 6,949 4,795...
- Page 21 TECHNICAL DATA AND PERFORMANCE Mod. 12 - Cooling mode PF (kW) Tw_out (°C) Ta (°C) 130% 100% 130% 100% 9,407 8,552 7,127 4,989 3,791 3,37 3,58 3,65 3,72 3,80 11,565 10,709 9,075 6,443 8,353 3,93 4,13 4,25 4,38 4,51 12,900 12,404 10,423 7,192...
- Page 22 TECHNICAL DATA AND PERFORMANCE Mod. 12T - Heating mode PT (kW) Tw_out (°C) Ta (°C) 130% 100% 130% 100% 5,549 5,044 4,203 2,942 2,236 2,01 2,19 2,23 2,28 2,32 6,876 6,140 5,203 3,694 4,789 2,39 2,59 2,66 2,74 2,83 10,643 9,589 8,058 5,560...
- Page 23 TECHNICAL DATA AND PERFORMANCE Mod. 12T - Cooling mode PF (kW) Tw_out (°C) Ta (°C) 130% 100% 130% 100% 9,407 8,552 7,127 4,989 3,791 3,37 3,58 3,65 3,72 3,80 11,565 10,709 9,075 6,443 8,353 3,93 4,13 4,25 4,38 4,51 12,408 11,384 9,566 6,601...
- Page 24 TECHNICAL DATA AND PERFORMANCE Mod. 14 - Heating mode PT (kW) Tw_out (°C) Ta (°C) 130% 100% 130% 100% 6,454 5,867 4,890 3,423 2,601 1,96 2,14 2,18 2,23 2,27 7,058 6,302 5,341 3,792 4,915 2,08 2,25 2,32 2,39 2,46 10,481 9,442 7,935 5,475...
- Page 25 TECHNICAL DATA AND PERFORMANCE Mod. 14 - Cooling mode PF (kW) Tw_out (°C) Ta (°C) 130% 100% 130% 100% 10,970 9,973 8,311 5,818 4,421 3,46 3,67 3,74 3,82 3,89 13,323 12,336 10,454 7,422 9,622 3,97 4,17 4,30 4,42 4,56 15,400 14,808 12,443 8,586...
- Page 26 TECHNICAL DATA AND PERFORMANCE Mod. 14T - Heating mode PT (kW) Tw_out (°C) Ta (°C) 130% 100% 130% 100% 6,470 5,882 4,902 3,431 2,608 2,06 2,24 2,29 2,33 2,38 7,921 7,073 5,994 4,256 5,517 2,42 2,61 2,69 2,77 2,85 12,153 10,949 9,201 6,348...
- Page 27 TECHNICAL DATA AND PERFORMANCE Mod. 14T - Cooling mode PF (kW) Tw_out (°C) Ta (°C) 130% 100% 130% 100% 10,970 9,973 8,311 5,818 4,421 3,46 3,67 3,74 3,82 3,89 13,323 12,336 10,454 7,422 9,622 3,97 4,17 4,30 4,42 4,56 15,400 14,808 12,443 8,586...
- Page 28 TECHNICAL DATA AND PERFORMANCE Mod. 16 - Heating mode PT (kW) Tw_out (°C) Ta (°C) 130% 100% 130% 100% 7,160 6,509 5,424 3,797 2,886 1,90 2,07 2,11 2,15 2,20 7,809 6,972 5,909 4,195 5,438 2,01 2,17 2,24 2,30 2,37 11,557 10,412 8,749 6,037...
- Page 29 TECHNICAL DATA AND PERFORMANCE Mod. 16 - Cooling mode PF (kW) Tw_out (°C) Ta (°C) 130% 100% 130% 100% 12,170 11,064 9,220 6,454 4,905 3,35 3,55 3,62 3,69 3,77 14,740 13,648 11,566 8,212 10,646 3,83 4,02 4,14 4,27 4,39 15,623 14,333 12,045 8,311...
- Page 30 TECHNICAL DATA AND PERFORMANCE Mod. 16T - Heating mode PT (kW) Tw_out (°C) Ta (°C) 130% 100% 130% 100% 7,178 6,525 5,438 3,807 2,893 1,99 2,17 2,21 2,26 2,30 8,764 7,825 6,631 4,708 6,104 2,33 2,52 2,59 2,67 2,75 13,401 12,073 10,145 7,000...
- Page 31 TECHNICAL DATA AND PERFORMANCE Mod. 16T - Cooling mode PF (kW) Tw_out (°C) Ta (°C) 130% 100% 130% 100% 12,170 11,064 9,220 6,454 4,905 3,35 3,55 3,62 3,69 3,77 14,740 13,648 11,566 8,212 10,646 3,83 4,02 4,14 4,27 4,39 15,623 14,333 12,045 8,311...
-
Page 32: Water Pump Working Head
WATER PUMP WORKING HEAD Setting the pump speed pump speed. The default setting is the highest speed (III). If the water flow in the system is too high the speed can be set to low (I). The available external static pressure for the plant function for water flow is shown in the graph below. -
Page 33: Dimensional And Physical Data
DIMENSIONAL AND PHYSICAL DATA Dimensional data base version Mod. 5 - 7 - 9 Mod. 10-12-12T-14-14T-16-16T 1210 1404 Models Packaging (W×D×H) 1500x1140x450 1475x1580x440 Weight Net \ Gross 99 / 117 99 / 117 99 / 117 162 / 178 162 / 178 177 / 193 162 / 178 177 / 193 162 / 178 177 / 193 Hydraulic connections base version Mod. -
Page 34: Dimensional Data Base Version + "Inertial Water Tank" Accessory
DIMENSIONAL AND PHYSICAL DATA Dimensional data base version + "Inertial water tank" accessory Mod. 5 - 7 - 9 1400 1210 WATER OUT 1” GAS-M Tubo non fornito WATER IN 1” GAS-M WATER IN 1” 1/4 GAS-M Inertial water tank accessory (not supplied in the base version) 760* WATER OUT... -
Page 35: Minimum Operating Area
DIMENSIONAL AND PHYSICAL DATA Minimum operating area To correctly install the unit, comply with the measurements for the free area that must be left around the unit, as shown in the drawing. (A) In case of stacked installation (B) In case of multiple-row installation (for roof top use, etc.) 1. - Page 36 RECEPTION AND POSITIONING Fig.1 Fig.2 Mod. 5 - 7 - 9 Mod. 10-12-12T-14-14T-16-16T Electric control Terminal block Terminal Block Mod. 5 - 7 - 9 Hydraulic system 5/7 kW Hydraulic System Refrigerant system Mod. 10-12-12T-14-14T-16-16T 10/14 kW Please remove the hollow Please remove the hollow plate after installation plate after installation.
- Page 37 RECEPTION AND POSITIONING Storage The units must be stored in a dry place, sheltered from the sun, rain, sand and wind. Comply with the storage conditions given below: • Do not stack the units • Maximum temperature = 60°C • Minimum temperature = -10°C •...
- Page 38 RECEPTION AND POSITIONING Selecting the installation site - Places that are well-ventilated. - Places where the unit does not disturb next-door neighbors. - Safe places which can bear the unit's weight and vibration and where the unit can be installed at an even level. - The equipment is not intended for use in a potentially explosive atmosphere.
- Page 39 RECEPTION AND POSITIONING Mod. 5 - 7 - 9 drain hole drain hole The drain hole is covered by rubber plug,if The drain hole is covered by one drain hole is not enough, the big drain rubber plug,if one drain hole is not enough, the big drain hole can be opened in field.
-
Page 40: Hydraulic Connections
HYDRAULIC CONNECTIONS Tips for a successful installation For a correct design and installation of the hydraulic plant comply the local laws governing safety matters and sound. The following information is suggestion for a correct installation of the unit: • Before connecting the unit to the system wash adequately the pipes using clean water, filling and emptying and cleaning the filters. Only after that proceed connecting the unit to the system;... -
Page 41: Protecting The Water Circuit Against Freezing
HYDRAULIC CONNECTIONS The unit is only to be used in a closed water system. Application in an open water circuit can lead to excessive corrosion of the water piping. Water connections must be made in accordance with the outlook diagram delivered with the unit, with respect to the water intake and water outlet (refer to section "DIMENSIONAL AND PHYSICAL DATA"). -
Page 42: Filling With Water
HYDRAULIC CONNECTIONS should be removed and dried, then can be reinstalled in the unit. NOTE WARNING ETHYLENE GLYCOL IS TOXIC CAUTION There need drying There need drying Use of glycol - Only propylene glycol having a toxicity rating or class of 1, as listed in "Clinical Toxicology of Commercial Products, 5th edition" may be used. higher temperatures. -
Page 43: Cheking The Maximum Water Volume And Expansion Vessel Precharge
HYDRAULIC CONNECTIONS Cheking the maximum water volume and expansion vessel precharge Before filling the water system, it is advisable to consider the type of installation in question, i.e. check the difference in level between the wet module and user. The following table gives the maximum water content of the water supply system in liters, depending on the capacity of the standard expansion vessel supplied and the pressure at which it should be charged. -
Page 44: Electrical Connections
ELECTRICAL CONNECTIONS WARNING wiring in accordance with relevant local laws and regulations. external pressure is applied to the terminal connections. lations. given below. Incomplete grounding may cause electrical shock. Precautions on electrical wiring work Fix cables so that cables do not make contact with the pipes (especially on the high pressure side). Secure the electrical wiring with cable ties as shown in figure so that it does not come in contact with the piping, particularly on the high-pressure side. - Page 45 ELECTRICAL CONNECTIONS Required number of Maximum running Item Description AC / DC conductor current User interface 200mA Room thermostat cable 2 or 3 200mA Boiler control cable (AHS) (dry contact) 200mA Temperature probe cable for T1B Outside circulation pump (P_o) 200mA DHW pump control cable (P_d) 200mA...
-
Page 46: Connections To The Terminals Of The Unit
ELECTRICAL CONNECTIONS Connections to the terminals of the unit Procedure 1. Connect the cable to the appropriate terminals as shown on the diagram. 2. Fix the cable with cable ties to the cable tie mountings to ensure stress relief. Power supply connection Door 1: compressor compartment and electrical parts: XT1 MOD. - Page 47 ELECTRICAL CONNECTIONS DHW pump (P_d) P_d N Voltage 220-240VAC Maximum run- 0.2A DHW PUMP ning current PUMPD CONTROL SIGNAL CONTROL SIGNAL OUTPUT OUTPUT Wiring size 0.75mm NOTE For 5/7 kW unit, the terminal number is 37 and 38. Room thermostat (ON/OFF - HEAT/COOL by digital input) External ON/OFF (thermostat) External COOL/HEAT HEAT...
- Page 48 ELECTRICAL CONNECTIONS Electrical booster The unit can manage an electrical booster (as backup hater) with 2 stages (for example 2 electrical heater 1.5 kW). Connect to IBH1 IBH1 IBH2 the stage 1, to IBH2 the stage 2. If the booster has only one stage IBH1 IBH2 CONTROL SIGNAL OUTPUT...
-
Page 49: How To Go To For Serviceman
SETUP OF THE SYSTEM How to go to FOR SERVICEMAN FOR SERVICEMAN Go to MENU> FOR SERVICEMAN. Press OK Please input the password: ENTER ADJUST SCROLL FOR SERVICEMAN FOR SERVICEMAN 1. DHW MODE SETTING 8. HOLIDAY AWAY MODE SETTING 2. COOL MODE SETTING 9. -
Page 50: Setup Of The System
SETUP OF THE SYSTEM users' requests. Various settings are available. These settings are accessible and programmable through the "FOR SERVICEMAN" menu. "FOR SEVICEMAN" menu - italian language... - Page 51 SETUP OF THE SYSTEM...
- Page 52 SETUP OF THE SYSTEM...
- Page 53 SETUP OF THE SYSTEM...
-
Page 54: For Seviceman" Menu - English Language
SETUP OF THE SYSTEM "FOR SEVICEMAN" menu - english language... - Page 55 SETUP OF THE SYSTEM...
- Page 56 SETUP OF THE SYSTEM...
- Page 57 SETUP OF THE SYSTEM...
-
Page 58: Dhw Mode Setting
SETUP OF THE SYSTEM DHW mode setting DHW:domestic hot water DHW MODE SETTING typically consists of the following: 1. DHW MODE: enable or disable the DHW mode 2. TANK HEATER: set whether the booster heater is available or not 3. DISINFECT: set the parameters for disinfection 4. -
Page 59: Tank Heater (Electrical Heater For Dhw Tank)
SETUP OF THE SYSTEM Tank heater (electrical heater for DHW tank) 1.2 TANK HEATER dT5 TBH OFF 5 °C If tank heater (booster heater) is avaliable, Go to FOR SERVICEMAN >DHW MODE SET- T4_TBH_ON 20°C TING>1.2 TANK HEATER and select “Yes”, when “OK” pressed, the following page will appear: _TBH_DELAY 90 MIN SCROLL... -
Page 60: Dhw Priority
SETUP OF THE SYSTEM WARNING installed at the hot water outlet connection of the domestic hot water tank. This mixing valve will ensure that the hot water tem- perature at the hot water tap never rises above a set maximum value. This maximum allowable hot water temperature shall be selected according to local laws and regulations. -
Page 61: Cool Mode Setting
SETUP OF THE SYSTEM COOL mode setting COOL MODE SETTING typically consists of the following: 1. COOL MODE: to set if the COOL mode is active or not 2. T1S RANGE: Selecting the range of target outlet water temperature 3. T4CMAX: Setting the maximum outdoor air operation temperature 4. -
Page 62: Heat Mode Setting
SETUP OF THE SYSTEM HEAT mode setting HEAT MODE SETTING typically consists of the following: 1. HEAT MODE: to set if the HEAT mode is active or not 2. T1S RANGE: Selecting the range of target outlet water temperature 3. T4HMAX: Setting the maximum outdoor air operating temperature 4. -
Page 63: Auto Mode Setting
SETUP OF THE SYSTEM AUTO mode setting Controlling AUTO mode typically consists of the following: 1. T4AUTOCMIN:setting the minimum operating outdoor air temperature for cooling 2. T4AUTOHMAX: setting the maximum operating outdoor air temperature for heating 4 AUTO MODE SETTING T4AUTOCMIN 25 °C To determine whether the AUTO mode is effective, go to MENU>... -
Page 64: Room Thermostat (On/Off - Heat/Cool By Digital Input)
SETUP OF THE SYSTEM 21: 55 08 - 08 - 2015 SAT. ROOM If you set WATER FLOW TEMP. to NON, and set ROOM TEMP. to YES, then the room temperature will be displayed on the home page, and the room temperature will work as 21: 55 08 - 08 - 2015 SAT. -
Page 65: Other Heating Source
SETUP OF THE SYSTEM Other heating source The OTHER HEATING SOURCE is used to set whether the backup heater, and additional heating sources like a boiler or solar energy kit is available. 7 OTHER HEATING SOURCE 7.1.BACKUP HEATER To set the OTHER HEATING SOURCE, go to MENU> FOR SERVICEMAN> OTHER 7.2.AHS HEATING SOURCE, Press OK. -
Page 66: Ahs (Additional Heating Source, Gas Bolier)
SETUP OF THE SYSTEM 7.2 ADDTIONAL HEATING SORUCE AHS (Additional Heating Source, gas bolier) HEAT MODE If an additional heating source (for example a gas boiler) is DHW MODE -5 °C T4_AHS_ON available, please select YES at the corresponding position. 5 °C dT1_AHS_ON Press OK and the following page is displayed:... -
Page 67: Holiday Away Setting
SETUP OF THE SYSTEM Holiday away setting The HOLIDAY AWAY SETTING is used to set the outlet water temperature to prevent freezing when away for holiday. 8 HOLIDAY AWAY SETTING T1S_H.A_H 20 °C To enter the HOLIDAY AWAY SETTING, go to MENU> FOR S ERVICEMAN> HOLIDAY AWAY SETTING. -
Page 68: Restore Factory Settings
SETUP OF THE SYSTEM Restore factory settings The RESTORE FACTORY SETTING is used to restore all the parameters set in the 10 RESTORE FACTORY SETTINGS user interface to the factory setting. All the settings will revert to factory default. Do you want to restore factory setting? To restore factory settings, go to MENU>... - Page 69 SETUP OF THE SYSTEM 11 TEST RUN Test run is on. ple, when 3-WAY VALVE is selected and ON/OFF is pressed, if the 3-way valve is open/ Air purge is on. close, then the operation of 3-way valve is normal, and so are other components. If you select AIR PURGE and OK is pressed, the page will displayed as follows: CONFIRM 11 TEST RUN...
-
Page 70: Special Function
SETUP OF THE SYSTEM Special function The SPECIAL FUNCTION contains AIR PURGE, PREHEATING FOR FLOOR, and FLOOR DRYING UP. It’s used in special NOTE: the special functions can be used by service man only, during special function operating other functions(SCHDULE,HOLIDAY AWAY, HOLIDAY HOME) can’t be used. 12 SPECIAL FUNCTION 12.1 AIR PURG Go to MENU>... -
Page 71: Auto Restart
SETUP OF THE SYSTEM 12.2 PREHEATING FOR FLOOR YES and press OK. The page will be displayed as follows: Preheat for floor is running for 25 minutes. Water flow temperature is 20 °C. CONFIRM 12.2 PREHEATING FOR FLOOR Do you want to turn of the preheating for floor function? CONFIRM SCROLL... -
Page 72: Parameters List
SETUP OF THE SYSTEM Parameters list Adjust N° Code Meaning Setting range Default precision Working Mode Auto, Cool, Heat, DHW Heat/ DHW cooling:17~30 ºC Room setting temp heating:17~30 ºC auto:17~30 ºC Cooling 1: 5~25 ºC Cooling 2: 18~30 ºC Water outlet setting temp Heating 1: 25~55 ºC Heating 2: 35~60... - Page 73 SETUP OF THE SYSTEM Adjust N° Code Meaning Setting range Default precision t_DI_max Operation time of disinfect mode 90~300 t_DHWHP_MAX Max. running time of DHW mode 10~600 t_DHWHP_RESTRICT Max. running time of heat pump mode 10~600 dT5_ON Temp difference to start of water temp in DHW mode 2~10 ºC dT1S5...
-
Page 74: Functional Diagram
FUNCTIONAL DIAGRAM... -
Page 75: Example Of Application System
EXAMPLE OF APPLICATION SYSTEM... - Page 76 EXAMPLE OF APPLICATION SYSTEM...
- Page 77 EXAMPLE OF APPLICATION SYSTEM...
- Page 78 EXAMPLE OF APPLICATION SYSTEM...
- Page 79 EXAMPLE OF APPLICATION SYSTEM...
- Page 80 EXAMPLE OF APPLICATION SYSTEM...
- Page 81 EXAMPLE OF APPLICATION SYSTEM...
- Page 82 EXAMPLE OF APPLICATION SYSTEM...
-
Page 83: Wiring Diagrams
WIRING DIAGRAMS Mod. 5 - 7 - 9... -
Page 84: Mod. 10-12-14-16
WIRING DIAGRAMS Mod. 10-12-14-16... -
Page 85: Mod. 12T-14T-16T
WIRING DIAGRAMS Mod. 12T-14T-16T... -
Page 86: Probe Characteristics
PROBE CHARACTERISTICS Temperature probe B =3950K, R90°C=5k 2550 NTC type temperature probes are used. When the probe bulb is at a temperature of 90°C the electrical resistance measurable at the probe ends with a multimeter is ÷ R ). The thermistor of these probes has a negative temperature coefficient: the electrical resistance value decreases as the temperature increases. -
Page 87: Temperature Probe B =3970K, R50°C=17,6K
PROBE CHARACTERISTICS Temperature probe B =3970K, R50°C=17,6k / T1 / T5 / T1B 0/100 wout NTC type temperature probes are used. When the probe bulb is at a temperature of 50°C the electrical resistance measurable at the probe ends with a multimeter is ÷... -
Page 88: Temperature Probe B =4100K, R25°C=10K
PROBE CHARACTERISTICS Temperature probe B =4100K, R25°C=10k 2550 NTC type temperature probes are used. When the probe bulb is at a temperature of 25°C the electrical resistance measurable at the probe ends with a multimeter is ÷ R ). The thermistor of these probes has a negative temperature coefficient: the electrical resistan- ce value decreases as the temperature increases. -
Page 89: Dip-Switch Setting
DIP-SWITCH SETTING DIP switch settings of the hydraulic module control board The DIP switch are located on the hydraulic module control board inside the unit's electrical panel (for more details see also MAINTENANCE AND SAFETY section). These allow you to specify whether the system includes the electric booster (IBH), the boiler (AHS). -
Page 90: Start-Up
START-UP Pre-operation checks Checks before initial start-up WARNING Switch off the power supply before making any connections. After the installation of the unit, check the following before switching on the circuit breaker: 1. Field wiring unit and domestic hot water tank, and unit and backup heater box have been connected according to the instructions described in the chapter 9.6 Field wiring, according to the wiring diagrams and to local laws and regulations. -
Page 91: Safety And Maintenance
SAFETY AND MAINTENANCE Opening the unit MOD. 10-12-12T-14-14T-16T MOD. 5-7-9 Door 1: Gives access to the compressor compartment, Door 1: Gives access to the compressor compartment to the hydraulic compartment and to the electrical parts and electrical parts Door 2: Gives access to the hydraulic compartment and electrical parts WARNING Switch off all power —... - Page 92 SAFETY AND MAINTENANCE Control box for Mod. 5-7-9 Control box for Mod. 10-12-12T-14-14T-16-16T PCB-2 PCB-3 PCB A PCB-1 PCB B Main control board PCB-3 PCB-2 PCB-1 PCB A PCB B main control board of hydraulic module Hydronic module PCB-4 of hydraulic module PCB C (at back of the PCB B,only for 3 phase unit) (at back of the PCB-2, only for 3 phase unit)
- Page 93 SAFETY AND MAINTENANCE PCB-3 - Inverter board for 1-phase Mod. 5-7-9 PCB A, Inverter board for 1 phase 5,7kw unit. 1 To main board (CN101,CN105) 2 Compressor connection port U V W (U,V,W) 3 Input port N for IPM module(N) 4 Input port P for IPM module(P) 5 Input port for PFC inductance P1(P1) 8 Output port P of PFC(P2)
- Page 94 SAFETY AND MAINTENANCE PCB-2 - Main control board for 1-phase Mod. 5-7-9 PCB A 10 Th temperature sensor port 2 Hydraulic compartment input port2 11 Pressure sensor port 12 Wire controller port 4 Power supply N 13 P/N/+18V port 5 Power supply L 14 To IPDU/PFC 6 Transformer output port 15 DC fan port...
- Page 95 SAFETY AND MAINTENANCE PCB-3 - Inverter module for 1-phase Mod. 10-12-14-16 PCB A, Inverter module for 1-phase 10~16kW unit 10 Input Port N For Pfc Module(VIN-N) 1 Reserved(CN2) 5 Power Supply Of U Phase For Compressor(U) 11 Input Port P Foripm Modele(P) 2 Input Port N For Ipm Module(N) 6 Output Port N Of Pfc Module(N_1) 12 Communicate Port Between Pcb A...
- Page 96 SAFETY AND MAINTENANCE PCB-3 - Inverter module for 3-phase Mod. 12T-14T-16T 1. +15V port(CN4) 2. To MCU(CN1) 3. IPM input N 4. Compressor connection port W 5. Compressor connection port V 6. Compressor connection port U 7. IPM input P 8.
-
Page 97: Parameters Check In The Unit
SAFETY AND MAINTENANCE 3-phase 12~16kW 1 Power supply L3(L3) 5 Ground wire(GND_1) 2 Power supply L2(L2) 6 Power supply for load(CN18) 3 Power supply L1(L1) 7 Power supply for main control board(CN19) 11 Ground wire(GND_2) 4 Power supply N(N) Parameters check in the unit To check the parameters of hydraulic box, open door 2 and you’ll Implication Number... - Page 98 SAFETY AND MAINTENANCE To check the parameters on the re- frigerant side, open door 1 and you’ll e t o see the PCB like the following (diffe- r h T d a e g n i r i d t c e n o i N I A rent for 1-phase and 3-phase unit):...
-
Page 99: General Guidelines
SAFETY AND MAINTENANCE This section provides useful information for diagnosing and correcting certain troubles which may occur in the unit. This troubleshooting and related corrective actions may only be carried out by your local technician. General guidelines Before starting the troubleshooting procedure, carry out a thorough visual inspection of the unit and look for obvious defects such as loose connections or defective wiring. - Page 100 SAFETY AND MAINTENANCE Pump is making noise (cavitation) POSSIBLE CAUSES CORRECTIVE ACTION There is air in the Purge air. system. Water pressure at pump • Check on the manometer that there is sufficient water pressure. The water pressure must be > 1 bar inlet is too low.
- Page 101 SAFETY AND MAINTENANCE carried out at regular intervals. This maintenance needs to be carried out by your local technician. In order to ensure optimal availability of the unit, a number of This maintenance has to be carried out by your local Midea technician. DANGER ELECTRIC SHOCK fuses (or switch off the circuit breakers) or open protection devices of the unit.
-
Page 102: Basic Safety Rules
SAFETY AND MAINTENANCE Basic safety rules Recall that the use of products that use electricity and water entails the observance of some basic safety rules , such as: This applian- ce is not intended for use by persons ( including children) with reduced physical , sensory or mental capabilities or lack of experience and knowledge, unless supervised or instructed on the use of the appliance by a person responsible for their safety . -
Page 103: General Recommendations About The R410A Refrigerant Used
SAFETY AND MAINTENANCE General recommendations about the R410A refrigerant used PRODUCT IDENTIFICATION 1 SUPPLIER COMPANY AND PRODUCT IDENTIFICATION Card No. FRIG 8 Product R-410A Supplier company identification RIVOIRA SpA 2 COMPOSITION / INFORMATION ON INGREDIENTS Substance / Preparation Preparation Components / Impurities Contains the following components : Difluoromethane (R32) 50 % in weight Pentafluoroethane (R125) - Page 104 SAFETY AND MAINTENANCE 13 CONSIDERATIONS ON DISPOSAL General Do not dispose of where accumulation can be hazardous. Usable with reconditioning. The depressurised containers must be returned to the supplier. Contact the supplier if instructions for use are deemed necessary. 14 INFORMATION FOR TRANSPORT Designation for transport LIQUEFIED GAS N.A.S.
-
Page 105: General Rules For Maintanance
SAFETY AND MAINTENANCE General Rules for Maintanance General Rules for Maintanance The maintenance is extremely important for the functioning of the system and the regular working of the unit over time. In accordance with the European Regulation EC 303/2008 , it should be noted that companies and engineers in maintenance , repair, leak testing and recovery / recycle refrigerant gases should be CERTIFIED in accordance with local regulations. - Page 106 SAFETY AND MAINTENANCE Axial fans Visually inspect these parts to make sure that the fans are well fixed to the bearing grille and that this latter is fixed to the structure of the unit. Check the fan bearings, and close the terminal box and cable glands. Bearings damaged and bad fixing are the source of abnormal noise and vibrations, •...
-
Page 107: First Checkup Start Module
FIRST CHECKUP STARTUP MODULE SECTION 1 ; user data/ installer Custumer data: Installer : Street: n.° City : Zip Code: Country: Model : Serial number : SECTION 2 : Designer o person in charge ; Designer: Idraulic diagram : Variation found in the original diagram : SECTION 3: Plant data Unit model Out let water tank... - Page 108 SECTION 6: If Ferroli plant solution were used report wich : PLANT SOLUTION n° _______________________ If during the starup of the unit will be detected some failings or inconsistensies , restoring the sistem will be on charge of the client...
- Page 109 NOTE...
- Page 110 NOTE...
- Page 111 NOTE...
- Page 112 Ferroli spa ¬ 37047 San Bonifacio (Verona) Italy ¬ Via Ritonda 78/A tel. +39.045.6139411 ¬ fax +39.045.6100933 ¬ www.ferroli.com...
Need help?
Do you have a question about the RVL-I PLUS 10 and is the answer not in the manual?
Questions and answers