D-Link DGE DGE-528T Manual
Gigabit ethernet pci adapter
Hide thumbs
Also See for DGE DGE-528T:
- Quick installation manual (33 pages) ,
- Manual (29 pages) ,
- User manual (7 pages)

Related Manuals for D-Link DGE DGE-528T


Summary of Contents for D-Link DGE DGE-528T
- Page 1 D-Link DGE-528T Gigabit Ethernet PCI Adapter Manual Rev. 01 (Nov. 01, 2003) Printed in Taiwan...
-
Page 2: Table Of Contents
Table of Contents Introduction ... 3 Contents of Package ... 4 Technology Basics ... 4 About Gigabit Ethernet ... 4 About Auto-Negotiation ... 5 About PCI Bus ... 5 Wake On LAN ... 6 Connecting the WOL Cable ... 6 Flow Control ... -
Page 3: Introduction
Introduction The D-Link DGE-528T is ideal for the small office or home office environment. After completing the steps in this manual, you will have the ability to share information and resources - such as files and printers - and take full advantage of a “connected” environment for work and play! The DGE-528T comes with drivers for the most popular operating systems and can be integrated into a larger network. -
Page 4: Contents Of Package
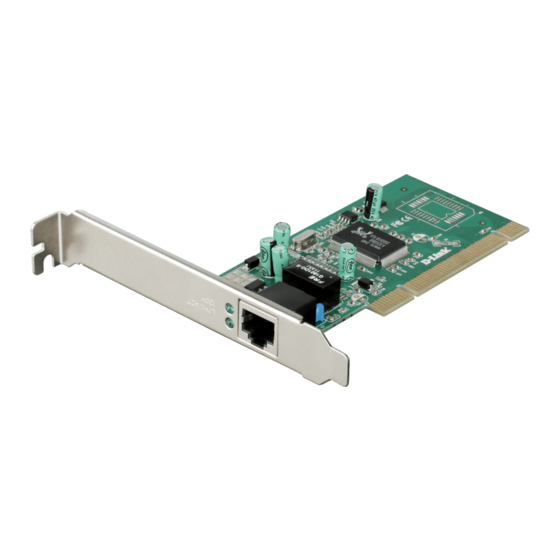
Contents of Package DGE-528T Gigabit Ethernet PCI Adapter DGE-528T Gigabit Ethernet PCI Adapter Manual on the CD-ROM Quick Installation Guide Technology Basics About Gigabit Ethernet Gigabit Ethernet is a network technology specified by IEEE Standard 802.3ab. It extends the traditional 100Mbps Fast Ethernet technology to achieve 1000Mbps transmission and reception, while retaining the same CSMA/CD Ethernet protocol. -
Page 5: About Auto-Negotiation
Category 5 cabling is required for 1000Base-T Gigabit Ethernet in order to provide full duplex operation. Full duplex 1000Base-T operation allows simultaneous transmission and reception, both at 1000Mbps, thus providing service potentially equal to 2000Mbps full-duplex service To provide compatibility in traditional 100Mbps Fast Ethernet environments (where, for example DGE-528T adapters are installed anticipating upgrade of supporting switch equipment to Gigabit Ethernet), the DGE-528T also supports traditional 100Mbps Fast Ethernet operation, in full-duplex as well as half-duplex modes. -
Page 6: Wake On Lan
The working relationship between a DGE-528T adapter and main memory working in Bus Master mode is powered by the Bridge/Memory Controller of the PCI bus. This reduces the CPU role in network operations, thus freeing the CPU to service other tasks, with resulting improvement in overall computing (multitasking) performance. -
Page 7: Flow Control
1. Power-ON the PC and press “Delete” or “F1” when prompted to enter the PCI/ISA BIOS CMOS Setup. Enable the WOL function or the power-ON function of the PC. The name of this function is system dependent, but may be located in a category heading titled something like Power Management. - Page 8 Networking Basics Please follow all the instruc- tions in this window: Click Next In the following window, select the best description of your computer. If your computer connects to the Internet through a gate- way/router, select the second option as shown. Click Next...
- Page 9 Networking Basics Enter a Computer description and a Computer name (optional.) Click Next Enter a Workgroup name. All computers on your network should have the same Workgroup name. Click Next...
- Page 10 Networking Basics Please wait while the Network Setup Wizard applies the changes. When the changes are complete, click Next Please wait while the Network Setup Wizard configures the computer. This may take a few minutes.
- Page 11 Networking Basics In this window, select the best option. In this example, Create a Network Setup Disk has been selected. You will run this disk on each of the computers on your network. Click Next Insert a disk into the Floppy Disk Drive, in this case drive “A.”...
- Page 12 Networking Basics Please wait while the Network Setup Wizard copies the files. Please read the information under Here’s how in the screen below. After you complete the Net- work Setup Wizard you will use the Network Setup Disk to run the Network Setup Wizard once on each of the computers on your network.
- Page 13 Networking Basics Please read the information on this screen, then click Finish to complete the Network Setup Wizard. The new settings will take effect when you restart the computer. Click Yes to restart the computer. You have completed configuring this computer. Next, you will need to run the Network Setup Disk on all the other computers on your network.
-
Page 14: Naming Your Computer
Networking Basics Naming your Computer To name your computer, please follow these directions: In Windows XP: Click Start (in the lower left corner of the screen) Right-click on My Computer Select Properties and click Select the Computer Name Tab in the System Properties window. - Page 15 Networking Basics Naming your Computer In this window, enter the computer name. All computers on your network must have the same Workgroup name. Select Workgroup and enter the name of the Workgroup. Click OK Checking the IP Address in Windows XP/2000 Go to Start >Run...
- Page 16 Networking Basics Type in Command Click OK Type ipconfig /all at the prompt. Hit Enter. All the configuration settings are displayed as shown below. Checking the IP Address in Windows XP/2000 Type ipconfig /renew at the prompt to get a new IP Address. Hit Enter. The new IP Address is shown below: (Windows 98/ME users: go to Start >...
- Page 17 Assigning a Static IP Address Note: Residential Gateways/Broadband Routers will automatically assign IP Addresses to the computers on the network, using DHCP (Dynamic Host Configuration Protocol) technology. If you are using a DHCP-capable Gateway/Router you will not need to assign Static IP Addresses. If you are not using a DHCP capable Gateway/Router, or you need to assign a Static IP Address, please follow these instructions: Go to Start...
- Page 18 Assigning a Static IP Address continued Highlight Internet Protocol (TCP/IP) Click Properties Select Use the following IP Address in the Internet Protocol (TCP/IP) Properties window Input your IP Address and subnet mask. (The IP Addresses on your network must be within the same range.
-
Page 19: Troubleshooting
2. Select the Device manager tab on top of the System Properties dialog box. 3. Double-click Network adapters if you do not see any items branching out. You should see D-Link DGE-528T Gigabit Ethernet PCI Adapter branching out after double-clicking Network adapters. -
Page 20: Understanding Indicators
Adapter has not been properly installed. Start at the beginning of the guide and follow all the steps for this computer. If you see symbols such as a yellow exclamation point or red “X” over the icon adjacent to “D-Link DGE-528T Gigabit Ethernet PCI Adapter,” your adapter is not installed properly or may have a problem. - Page 21 Pinging your DGE-528T Card continued Go to Start> Run. Type Command Click OK Type in the following: ping xxx.xxx.xxx.xxx, where xxx.xxx.xxx.xxx is the IP address to be pinged (i.e. 192.168.0.1). In this case, computer B with the IP address=192.168.0.1 is being pinged from computer A.
- Page 22 If the connection is good, you will receive four “Reply from” messages. Type exit at the prompt to return to Windows.
-
Page 23: Contacting Technical Support
Technical Support You can find software updates and user documentation on the D-Link website. D-Link provides free technical support for customers within the United States and within Canada for the duration of the warranty period on this product. U.S. and Canadian customers can contact D-Link technical support through our website, or by phone. -
Page 24: Technical Specifications
Technical Specifications Network Type: Gigabit Ethernet 1000Base-T IEEE 802.3ab standard for 1000 Mbps baseband CSMA/CD local area network Fast Ethernet 100Base-TX IEEE 802.3u standard for 100Mbps baseband CSMA/CD local area network Jumperless Hardware Auto-negotiation functionality ACPI PCI power management support Remote Wake up of ACPI/APM system support With AMD magic packet, Link Chg. - Page 25 Host Interface: PCI 2.1 and PCI 2.2 Bus (Bus Master) I/O & IRQ base address: assigned by Plug and Play system Physical Dimensions: 14 cm x 5.9 cm Environment: -10° to 70°C, (14° to 158°F) Storage: Operating: 0° to 55°C, (32° to 131° F) Humidity: 10% to 90% RH, non-condensing 4.5W max.
-
Page 26: D-Link Offices
Via Nino Bonnet No. 6/b, 20154 Milano, Italy TEL: 39-02-2900-0676 FAX: 39-02-2900-1723 URL: www.dlink.it, E-MAIL: info@dlink.it JAPAN D-LINK JAPAN 10F, 8-8-15 Nishi-Gotanda, Shinagawa-ku, Tokyo 141, Japan TEL: 81-3-5434-9678 FAX: 81-3-5434-9868 URL: www.d-link.co.jp E-MAIL: kida@d-link.co.jp RUSSIA D-LINK RUSSIA Michurinski Prospekt 49, 117607 Moscow, Russia... -
Page 27: Limited Warranty
LIMITED WARRANTY D-Link provides this limited warranty for its product only to the person or entity who originally purchased the product from D-Link or its authorized reseller or distributor. Limited Hardware Warranty: D-Link products described below (“Hardware”) will be free from material defects in workmanship and materials from the date of original retail purchase of the Hardware, for the period set forth below applicable to the product type (“Warranty Period”) if the... -
Page 28: Limited Software Warranty
D-Link of the defective Hardware. All Hardware (or part thereof) that is replaced by D- Link, or for which the purchase price is refunded, shall become the property of D-Link upon replacement or refund. Limited Software Warranty: D-Link warrants that the software portion of the product (“Software”) will substantially conform to D-Link’s then current functional... - Page 29 D-Link, 17595 Mt. Hermann Street, Fountain Valley, CA92708, with all shipping costs prepaid. D-Link may reject or return any product that is not packaged and shipped in strict compliance with the foregoing requirements, or for which an RMA number is not visible from the outside of the package.
-
Page 30: Disclaimer Of Other Warranties
INTEGRATED WITH ANY PRODUCT RETURNED TO D-LINK FOR WARRANTY SERVICE) RESULTING FROM THE USE OF THE PRODUCT, RELATING TO WARRANTY SERVICE, OR ARISING OUT OF ANY BREACH OF THIS LIMITED WARRANTY, EVEN IF D-LINK HAS BEEN ADVISED OF THE POSSIBILITY OF SUCH DAMAGES. THE SOLE... - Page 31 REMEDY FOR A BREACH OF THE FOREGOING LIMITED WARRANTY IS REPAIR, REPLACEMENT OR REFUND OF THE DEFECTIVE OR NON-CONFORMING PRODUCT. GOVERNING LAW: This Limited Warranty shall be governed by the laws of the state of California. Some states do not allow exclusion or limitation of incidental or consequential damages, or limitations on how long an implied warranty lasts, so the foregoing limitations and exclusions may not apply.
-
Page 32: Fcc Certifications
FCC Certifications This equipment has been tested and found to comply with the limits for a Class B digital device, pursuant to Part 15 of the FCC Rules. These limits are designed to provide reasonable protection against harmful interference in a residential installation. This equipment generates, uses and can radiate radio frequency energy and, if not installed and used in accordance with the instructions, may cause harmful interference to radio... -
Page 33: Ce Mark Warning
VCCI Warning Trademarks Copyright 1999 D-Link Corporation. Contents subject to change without prior notice. D-Link is a registered trademark of D-Link Corporation/D-Link Systems, Inc. All other trademarks belong to their respective proprietors. -
Page 34: Registration Card
Aerospace Engineering Education Retail/Chainstore/Wholesale Government System house/company Other________________________________ 9. Would you recommend your D-Link product to a friend? Don't know yet 10.Your comments on this product? __________________________________________________________________________________________ _______________________________________________________________ * Product installed in type of computer (e.g., Compaq 486) Home Business...
Need help?
Do you have a question about the DGE DGE-528T and is the answer not in the manual?
Questions and answers