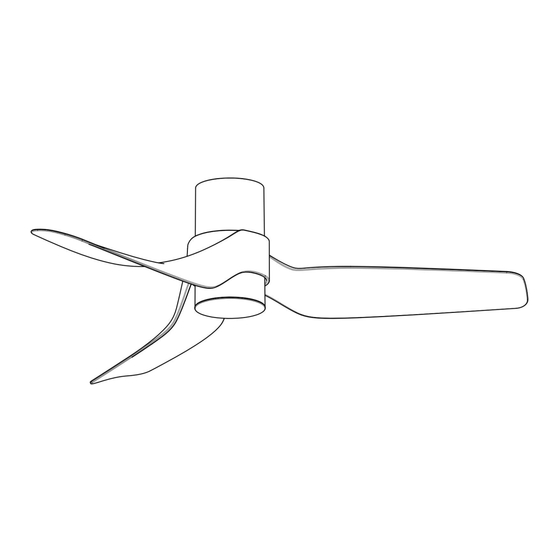
Summary of Contents for Beacon Lucci air AIRFUSION NAUTICA 19767
- Page 1 LUCCI AIRFUSION NAUTICA DC CEILING FAN INSTALLATION ⚫ OPERATION ⚫ MAINTENANCE ⚫ CAUTION READ INSTRUCTIONS CAREFULLY FOR SAFE INSTALLATION AND FAN OPERATION.
-
Page 2: Safety Precautions
AIRFUSION NAUTICA Installation Instructions THANK YOU FOR PURCHASING Thank you for purchasing the latest in energy saving ceiling fans. This fan runs on DC (direct current) power which gives it the benefit of being super energy efficient whilst still maintaining high volume air-movement and silent operation. - Page 3 AIRFUSION NAUTICA Installation Instructions Example: If a fan is connected to a circuit that can be isolated via an all- pole safety switch at the switchboard, then this is considered to be an all-pole disconnection to the ceiling fan electrical circuit, meeting the requirements of clause 7.12.2 of AS/NZS 60335.1.
-
Page 4: Parts List
AIRFUSION NAUTICA Installation Instructions PARTS LIST • Unpack your ceiling fan carefully. Remove all parts and hardware. • Lay out all the components on a smooth surface and make sure there are no components missing before assembling. If parts are missing, return the complete product to the place of purchase for inspection or replacement. -
Page 5: Installing The Fan
AIRFUSION NAUTICA Installation Instructions INSTALLING THE FAN TOOLS REQUIRED: Phillips / flat head screwdriver Pair of pliers Adjustable spanner Step ladder Wire cutter Wiring, supply cable as required by local provincial and national wiring codes and regulations INSTALLING THE MOUNTING BRACKET •... - Page 6 AIRFUSION NAUTICA Installation Instructions ELECTRICAL WIRING DIAGRAM THE FAN ⚫ PREPARE AND COMPLETE THE ELECTRICAL WIRING --- WIRING DIAGRAM (FIG. 4) WARNING: FOR YOUR SAFETY ALL ELECTRICAL CONNECTIONS MUST BE UNDERTAKEN BY A LICENSED ELECTRICIAN. NOTE: AN ADDITIONAL ALL POLE DISCONNECTION SWITCH MUST BE INCLUDED IN THE FIXED WIRING.
- Page 7 AIRFUSION NAUTICA Installation Instructions From mains supply to mounting bracket terminal block: (Fig. 4) 1. Connect the live supply wire to the “L” terminal of the terminal block on the mounting bracket. 2. Connect the neutral supply wire to “N” terminal of the terminal block on the mounting bracket. 3.
- Page 8 AIRFUSION NAUTICA Installation Instructions Finally attach the motor housing to the fan assembly, and secure it by pushing the stuck-point of motor housing ⚫ (Fig.6) onto the plastic toothed gear of fan assembly , and turn it anti clockwise. Fig. 6 INSTALLATION OF BLADE (Fig.
- Page 9 AIRFUSION NAUTICA Installation Instructions INSTALLATION OF Lamp 1. Loosen the screw (1) from the fan bracket. (Fig. 8a) Align the two slot screws with the keyhole slots (2) of the light housing. (Fig. 8b) Fig. 8b Fig. 8a 2. Turn the light housing counterclockwise until the slot screws are firmly at the end of the slots (2). (Fig. 8b) 3.
- Page 10 AIRFUSION NAUTICA Installation Instructions 5. Install the lamp shade to the light housing then secure it by turning clockwise. (Fig. 10) Fig. 10 INSTALLATION OF Bottom cover (Fig. 11) 1.if no lamp is required, Install the bottom cover to the light housing then secure it by turning clockwise. Fig.
-
Page 11: Using Your Ceiling Fan
AIRFUSION NAUTICA Installation Instructions USING YOUR CEILING FAN NOTE: The remote and receiver will need to be paired after the installation of the ceiling fan. NOTE: When two or more ceiling fans are installed in one location, please refer to the instruction on the next page. - Page 12 AIRFUSION NAUTICA Installation Instructions 3. Install a new 3V CR2032 DC battery in the compartment. Please make sure the polarity of the battery is correct. (Fig. 13c) Please make sure the polarity of the battery is correct. Fig. 13c 4. Install the battery compartment cover back onto the remote and secure by re-tightening the screw. PAIRING REMOTE &...
- Page 13 AIRFUSION NAUTICA Installation Instructions • Press and hold the “ ” button of remote 1 for 3-5 seconds within 30 seconds of switching the power ON to the receiver of ceiling fan 1. If the fan has light kit attached, the light will flash on and off to indicate the paring process is activated. •...
-
Page 14: After Installation
AIRFUSION NAUTICA Installation Instructions seconds”, to dim the LED light. Repeat pressing ON and then OFF within 5 seconds to dim further in the following sequence: 100% brightness → 53% brightness → 17% brightness → 100% brightness. To switch back to 100% brightness at any stage, turn OFF the luminaire, and then wait after 5 seconds turn ON the luminaire, it will reset to 100% brightness. -
Page 15: Care And Cleaning
AIRFUSION NAUTICA Installation Instructions frequency signals superimposed in the electricity for off-peak hot water control, may cause a change in fan motor noise. This is normal. Please allow a 24-hour “settling-in” period, most noises associated with a new fan disappear during this time. The manufacturer’s warranty covers actual faults that may develop and NOT minor complaints such as hearing the motor run –... -
Page 16: Technical Information
AIRFUSION NAUTICA Installation Instructions TECHNICAL INFORMATION 52’’ DC fan - NAUTICA SKU# 19767 Fan Models Rated Voltage 220-240V~ 50Hz Rated Wattage (Motor) Rated wattage (Lamp) GX53 (SKU#121363 / SKU#121364) , Max.12W (SKU#121363 Included) Battery for remote 3V CR2032 (Included) Weight 6.1kg Canopy Dimensions H:70mm...


Need help?
Do you have a question about the Lucci air AIRFUSION NAUTICA 19767 and is the answer not in the manual?
Questions and answers