Table of Contents
Advertisement
Quick Links
Advertisement
Table of Contents

Subscribe to Our Youtube Channel
Related Manuals for ICS psd codax Auto Sentry CPT

Summary of Contents for ICS psd codax Auto Sentry CPT
- Page 1 Auto Sentry® CPT Central Payment Terminal User Manual - Version 1.0...
- Page 2 No part of this manual may be reproduced or transmitted in any form or by any means, electronic or mechanical, for any purpose without the express written permission of PSD Codax and its product trademarks in this manual are trademarks of PSD Codax and ICS. All other marks are property of their respective owners.
-
Page 3: Table Of Contents
Table of Contents Chapter 1: Introduction ............... . . 13 Version Considerations . - Page 4 Vacuum Only ............. . . 32 Use Bill Breaker .
- Page 5 Configuring a TNC device to interface with CPT ....... .57 Configuring a Vacuum Device .
- Page 6 Automatically Created Shifts in the Cash Management Journal..88 Servicing Tips ............. . . 88 Stagger Times for Cash Removal .
- Page 7 List of Figures Figure 1. Touch Screen with Custom Graphics and Buttons ......16 Figure 2. SBC (Single Board Computer) Motherboard ....... 16 Figure 3.
- Page 8 Figure 33. Wireless Carrier Screen ..........42 Figure 34.
- Page 9 Figure 67. Diagnostic Screen ............85 Figure 68.
- Page 10 CPT® User Manual List of Tables...
- Page 11 List of Tables Table 1. System Overview..............15 Table 2.
- Page 12 Table 24. Journal Actions Descriptions ............106 Auto Sentry®...
-
Page 13: Introduction
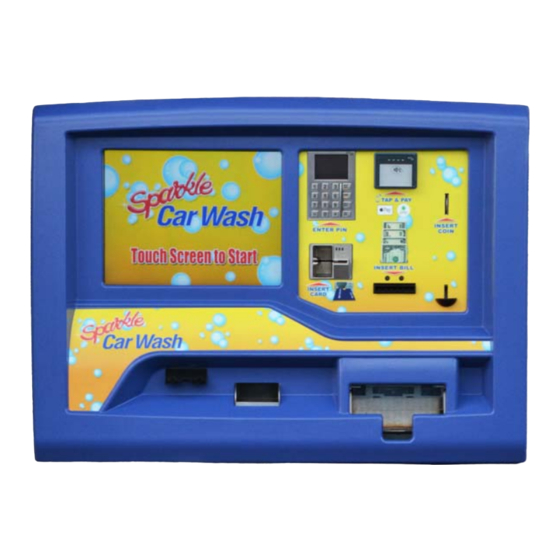
Chapter 1: Introduction Congratulations! Thank you for purchasing the Auto Sentry® CPT, the versatile central payment terminal for your unattended Self-Serve Wash Locations. We are excited to announce an affordable and secure Chip and PIN solution for your Jet Wash or Vacuums. The Auto Sentry® CPT designed to directly access and authorize Jet Wash or vacuum. -
Page 14: Related Documents
WashConnect Reports 2.5.5.0 ICSCoreGatewayServer Version 2.5.6.0 Touch/TouchPOSReady Version 5.2.26.6-SQL, V5.2.25.25-TM DeviceInt.exe software version 2.4.12.1 CoreClubService 2.4.11.1 AlertNotificationServer 2.4.9.0 Replication 4.5.6.1 CagePADSS 4.0.1.99 CageSecure 5.0.0.32 CentralLogServer 1.2.0.1 NetFuelEXP 1.1.8.4 Related Documents The following documents are available for further reference: WashConnect®... -
Page 15: Washconnect® Software
Codes for purchased time that may be redeemed directly at the wash bays or vacuum stations, and offers Bill Breaker functionality. The Auto Sentry® CPT touch screen interface can be fully translated into four languages. You can configure the button text and many other text fields to your own language requirements. A standard set of language buttons is also included with your Auto Sentry®... -
Page 16: Single Board Computer (Motherboard)
Figure 1. Touch Screen with Custom Graphics and Buttons Single Board Computer (Motherboard) The Single Board Computer, often called the motherboard enclosure, provides processing and memory for the Auto Sentry® CPT. Different peripheral devices (for example: bill dispenser, bill acceptor, and others) connect to the WashConnect through various communication ports (COM1, COM2, COM3, COM4, and 4 USB, etc.). -
Page 17: Port Assignments
Port Assignments Device Port Type and Location Gift Card Dispenser COM Port 1 Bill Acceptor COM Port 2 Coin Acceptor COM Port 3 Bill Dispenser COM Port 4 SIO Board COM Port 6 Touchscreen Credit Card Reader (Standard) Hecon Receipt Printer Barcode Reader USB (Virtual COM Port 5) Coin Hoppers... -
Page 18: Serial Input/Output Board (Sio)
Serial Input/Output Board (SIO) Most of the field wiring is terminated on the SIO board inside the Auto Sentry® CPT. Figure 3. Serial I/O Board Bill Acceptor The bill acceptor can accept paper media, for example, bills, or coupon notes. It provides four-way acceptance to allow the bills to be inserted in any direction. -
Page 19: Coin Acceptor
Coin Acceptor The installed coin/token acceptor can be programmed to distinguish and accept up to 6 different coins or tokens. Figure 5. Coin Acceptor Bill Dispenser The ATM-grade bill dispenser includes one cassette which can be configured to dispense a denomination of your choice, or token notes. -
Page 20: Coin Hopper
Coin Hopper Each coin hopper can dispense approximately 300 coins per minute. One hopper can hold approximately 600 coins, depending on the coin’s value. Up to three hoppers can be installed. Figure 7. Coin Hopper Chip and PIN Card Reader The card reader can accept credit, debit, gift, fleet, and wash cards. -
Page 21: Contactless Tap & Pay Reader
Contactless Tap & Pay Reader EMV smart payment cards, also known as Chip Cards, store data on integrated circuits in the card in addition to their magnetic stripe. These cards can be read over a short distance using RFID technology. It’s no longer necessary to dip or swipe the card in to the reader, customers simply wave or tap their EMV card on the contactless reader to pay for their transaction. -
Page 22: Receipt Printer
Receipt Printer The installed high-speed printer is designed to provide your customers with up to a 2 3/8-inch wide receipt or ticket, with or without bar codes depending on your configuration preferences and if you have a bar code reader installed. This device has a low power consumption rate and will detect when the printer paper is reaching the end of the roll. -
Page 23: Vandalism Sensor
Vandalism Sensor Guard your Auto Sentry with the Vandalism Sensor. The Vandalism Sensor needs to be installed inside the top of the Auto Sentry. The Seismic Detector is wired to the SIO or PIO board. When the Vandalism Sensor detects tampering of the unit after the wash is closed, the VandalismAlarm.mp4 video plays on the Auto Sentry screen. -
Page 24: Vandalism Sensor Input
Vandalism Sensor Input Deter vandalism, equip your Auto Sentry® CPT with a Vandalism Deterrent. You have the ability to install a seismic shock detector known as the Vandalism Sensor inside your Auto Sentry® CPT, and connect it to the HV Sense/Vandal input on the SIO board. Upon being triggered by impact, a video plays, “Tampering attempt detected. -
Page 25: Operating
In addition to your configuration settings, the Auto Sentry® CPT can be visually customized with your own graphics, including fonts, color schemes, logos, and backgrounds with our talented ICS marketing team. With a fully customized skin, you can use the Auto Sentry® CPT to build brand recognition. -
Page 26: Introducing The Idle Screen
Thank You Screens ▪ Thank You/ Wash Code Screen ▪ Thank You/Activate Bay Screen ▪ Thank You/Credit Card Added Screen Email Receipt Entry Screen Send Text Message with Wash Code (only when Customer doesn’t receive a Wash Code Receipt) Introducing the Idle Screen When the Auto Sentry®... -
Page 27: Instructions Video
The file must be located at D:\ICS\WCTouch\Web\Resources\AVIFiles\en\. In this example, en is the folder for the English version of the video. There will be separate language folders for each language being used with two-letter designations (es = Spanish, de = German, fr = French). - Page 28 Wash Code - If you have not parked in a bay yet, you can select the Wash Code button to purchase a time package, and then use the wash code in any available wash bay. Wash Only - If you are parked in a wash bay, you can select Wash Only button to purchase a time package for the wash bay you are already parked in.
-
Page 29: Purchasing Wash Code
Button Description Wash Code Used to purchase a bulk time package for a Jet Wash if customer has not parked in a wash bay yet. A code will print on the receipt for the customer to use in any available bay. -
Page 30: Figure 20. Purchase Wash Time Screen Example
The Purchase Wash Time screen appears which offers the configured time options. Figure 6. Purchase Wash Time Screen example 2 Customer needs to make a choice: to select either a Bulk Time Package or simply Buy the Time: ▪ Select one of the Buy Bulk Time packages that has the configured amount of time necessary, then the screen will automatically advance to the Vacuum Time screen if configured. -
Page 31: Purchasing Wash Only
For more information on payment methods, see “Understanding Payment Scenarios” on page 34. 5 After the payment is approved, the Thank You Activate Bay screen appears. Purchasing Wash Only If the customer already has their car parked in a bay, they can choose Wash Only from the Main Options screen. -
Page 32: Vacuum Only
4 From the Payment Selection screen, the Insert Cash screen appears where a customer can finalize the transaction by inserting payment. Figure 8. Payment Selection Screen 5 After the payment is approved, the next screen that appears is the Thank You/Activate Bay screen. -
Page 33: Card On File
Customers can insert a bigger bill and receive smaller bills of the same amount. 1 From the Main Options screen, select the Use Bill Breaker button. 2 The Bill Breaker screen will display. 3 The customer simply inserts a bill in the Auto Sentry® CPT. 4 The Auto Sentry®... -
Page 34: Understanding Payment Scenarios
Figure 9. Accept Terms and Conditions Screen Understanding Payment Scenarios The Payment Selection screen will display the amount of time that is going to be purchased along with the purchase amount. It will also display the configured payment options. These may be configured to include Cash, Credit, Debit, or Gift Card based on the configured credit card processor and Gift Card processor. -
Page 35: About Credit Card And Gift Card Combinations
Coins ® Token coins and notes (for example, MEI brand coins and coupons) Card payment methods include the following: Credit cards Debit cards Gift cards (if configured) About Credit Card and Gift Card Combinations The on-screen credit card and gift card payment options depend on the settings configured in WashConnect ®... -
Page 36: Cash And Coin Payment Combinations
Figure 12. Fail Try Again Screen Cash and Coin Payment Combinations You can configure the Auto Sentry® CPT to accept a cash payment type of bills only, or both bills and coins. A coin only payment option is not available. Once a cash payment type is selected, the transaction must be finalized with cash. -
Page 37: Debit Card
Debit Card Debit Selection screen prompts customer to insert Debit card and then remove it quickly. Some phones and Debit cards can be tapped on the Touchless reader. Gift Card Gift Card Selection prompts the customer through the use of a gift card as payment. Figure 14. -
Page 38: Thank You And Receipt Screens
Thank You and Receipt Screens Upon receipt of payment, the CPT will move to a Thank You screen. These screens may vary slightly depending on whether a wash code has been purchased, a wash bay was directly activated, or a new credit card has been added to your Card on File account. -
Page 39: Thank You Activate Bay Screen
Figure 16. Thank You with Wash Code on Screen Thank You Activate Bay Screen The Thank You Activate Bay Screen appears after completing a sale for either Wash Only or Vacuum Only to activate the bay. The Thank You Activate Bay screen will display three buttons: Print Receipt, Email Receipt, and Transaction Complete. -
Page 40: Send Text Message With Wash Code Purchase
Figure 17. Email Receipt Entry Screen 1 After purchasing a wash, select the Email Receipt button from a Thank You screen. The Email Receipt Screen appears. 2 In the Please enter your email address then press “Enter” box, type the email address. NOTE: Some common suffix buttons are available (@hotmail.com, @gmail.com, .com, and .net) to speed up the entry. -
Page 41: Figure 32. Text Your Code Dialog Box
1 After a customer purchases a wash code and is offered to print their receipt or email their receipt, the Receipt Printed? dialog box appears. 2 Select the Yes or No button: If Yes, text messaging is not offered because they indicated they received their wash code. - Page 42 number. If they choose My Carrier is Not Listed, they will need to enter the required information to send a text message with their carrier. Figure 19. Wireless Carrier Screen Figure 20. Enter Mobile Phone Number Screen There will be a confirmation message indicating the text message has been sent to the cus- tomer.
-
Page 43: Thank You - Credit Card Added Screen
Tap the OK button to advance to the Thank You screen where you can send an email receipt if necessary. Figure 21. Text Message Sent Dialog Box Thank You - Credit Card Added Screen When the Add Card on File option is selected from the Main Option screen, the Thank You Credit Card Added Screen appears after the credit card has successfully been added. -
Page 44: About Cancel And Back Buttons
About Cancel and Back Buttons Various error messages provide instructions to customers when an unexpected condition occurs. Command buttons such as Cancel and Back help customers navigate the touchscreen interface. Card Authorization Failure If a card fails to authorize, an error message is displayed. Customers are given the option to Cancel or try again. -
Page 45: Chapter 3: Configuring Settings
® software. Many of these settings are configured by ICS technicians during installation. Therefore, you should contact PSD Codax technical support if you are not certain if you are using the correct setting. Other settings can be modified to enhance the functionality of your Auto Sentry® CPT. For example, you can change settings for screen layout, languages, and many more. -
Page 46: About Settings And Logon Location
About Settings and Logon Location To change settings for a specific device, you must log on to the site location where that device is installed. Figure 16. Log on to Express N FullService CW In the illustration, Express N FullService CW is selected as the logon location. The Express N FullService CW location is a site where devices are installed. -
Page 47: To Restart Auto Sentry® Cpt, Follow These Steps
To restart Auto Sentry® CPT, follow these steps: After you make changes in any Settings screen, you must remember to restart the corresponding Auto Sentry® CPT which will enable the changes. 1 Go to the Auto Sentry® CPT, open the door locks with a hex key, and then locate the service switch. -
Page 48: Setup Jet Wash Bulk Time Packages And Options
Setup Jet Wash Bulk Time Packages and Options Create a Bulk Time package or various Bulk Time Package options that you would like to sell at the Auto Sentry® CPT. 1 Open WashConnect. 2 On the Configuration menu, select Goods and Services, and then select Sales Items. 3 In the Profit Center section, select Self Serve profit center. -
Page 49: Create A Profile To Sell Bulk Time Packages At The Cpt
3 In the Profit Center section, select Vacuum profit center. 4 Use the Add button to create a new Bulk Time Package. 5 In the PLU box, type a number. 6 In the Price box, type a price. 7 In the Name box, type a name for the bulk package. 8 In the Units Time(sec) box, type an amount of time (in seconds). -
Page 50: Settings For Devices
10 In the Schedule tool box, select the Add button. 11 In the Day of Week box, select All Days or the individual days. 12 In the Start Date box, select a start date. 13 In the End Date box, select an end date if necessary. 14 In the Start Time and End Time boxes, select a specific time, if necessary. -
Page 51: This Is What Can Be Changed In Settings
For example, you can select the Device Type of Auto Sentry® CPT; the Device Name of CPT, and then select Settings Type as the TouchConfiguration, and then select specific Settings for that device (for example, Language, Coin Acceptor, and more). There are many Device Type and Settings combinations. - Page 52 Name of Configuration Font Color Font Name Font Size Font Spacing Font Color Arial Small Button White Arial Button Header Yellow Arial Control Header Black Arial Large Button White Arial Medium Button White Arial Modal Popup Black Arial Control Secondary Navy Arial Table 4: Configure Auto Sentry®...
-
Page 53: Configure Text Groups
Configure Text Groups You can change the Font or Text configurations for the Auto Sentry® CPT. In WashConnect Settings, you can adjust the Font Color, Name, Size and Spacing from the Centralized Payment Settings. Figure 22. Settings for Font on Auto Sentry® CPT Screens Auto Sentry®... -
Page 54: Font Color Setting
Font Color Setting The exception to this standard is a setting called Font Color that is available at System Setup/ Devices/Settings/TouchConfiguration/Control. This does set a font color. Figure 23. Setting for Font Color The Font color setting controls the text on the screen as follows: ... -
Page 55: Button Header
Button Header The following screens display what is controlled by the Button Header group: Main Option Selection page - Controls the Names (displayed in yellow) on the option buttons. Control Header The following screens display what is controlled by the Control Header Group Timeouts. ... -
Page 56: Service Font Color
Service Font Color The following screens display what is controlled by the Service Font Color group: Purchase Selection page - Controls the text on the bulk time package when it does not use a custom bitmap. In this example it is the upper button on the left side. It controls the Description 1, Description 2, Name, and Price lines. -
Page 57: Configuring A Tnc Device To Interface With Cpt
Figure 24. Auto Sentry® CPT Settings for Service FontColor Configuring a TNC device to interface with CPT Configure an ICS Jet Wash device, Touch N’ Clean (TNC), to interface with the CPT by setting the EnableCPT to True in the WashConnect settings for each individual Jet Wash device. -
Page 58: Configuring A Vacuum Device
9 Click the Save button. Figure 25. Settings tab EnableCPT Configuring a Vacuum Device Configure the CPT to communicate and monitor the Vacuum PLC. This is configured using WashConnect. 1 Open WashConnect, and log on to the site. 2 From the System Setup menu, select Devices, and then Settings. 3 In the Device Type box, select Auto Sentry®... -
Page 59: Auto Sentry® Cpt Settings Description Tables
Figure 26. Manage Profit Centers tab Auto Sentry® CPT Settings Description Tables Auto Sentry® CPT Receipt Footer Field Description Receipt Footer 0 to 5 Text that appears on the receipt footer. Six lines are available. Each line is limited to 50 characters. -
Page 60: Auto Sentry® Cpt Coin Acceptor
Auto Sentry® CPT Coin Acceptor Field Description Accept Multiple Tokens Set to True if you want to allow customers to use more than one token per transaction. Set to False if you want to allow only one token per transaction. Operators frequently do not allow customers to use multiple tokens. - Page 61 Field Description Control_IncrementByDollars LARGE BUTTON FONT Large Button Font Color Large Button Font Name Large Button Font Size Large Button Font Spacing MEDIUM BUTTON FONT Medium Button Font Color Medium Button Font Name Medium Button Font Size Medium Button Font Spacing MODAL POPUP TEXT FONT Modal Popup Text Font Color Modal Popup Text Font Name...
- Page 62 Field Description Accept Token Note Determines whether or not to accept token notes. Set to Y to accept token notes and identify them as such. Set to N when the site does not have or accept token notes. Admin RFID Card The manager RFID card number used as an override for customers with RFID tags that do not read.
- Page 63 Short Cut Name NOT IMPLEMENTED. Name of shortcut used to launch touchint.exe (usually "Interface.lnk") Short Cut Path NOT IMPLEMENTED. Path where shortcut resides (usually C:\ICS) Stacking Add car to stack (1 = true, 0 = false) Station Unique station identifier. If using PCCharge, set this to the user name.
-
Page 64: Auto Sentry® Cpt Credit Card
Auto Sentry® CPT Credit Card Field Description American Express ® Set to Y if site accepts American Express cards, otherwise N. Only effects the buy wash bitmap that is displayed. CreditCard_CageHost Host location where Cage.exe credit card processing software runs. Example: localhost. - Page 65 you are uncertain, contact PSD Codax technical support. 1 Open WashConnect at local site. 2 On the System Setup menu, select Devices, and then select Settings. 3 From the TouchConfiguration Control settings, in the Multiple Languages box, select True. 4 From the TouchConfiguration Control settings, in the Language settings. 5 Select up to four languages from the Language Settings for Touch Configuration.
-
Page 66: Auto Sentry® Cpt Language
Auto Sentry® CPT Main Options Field Description MainOption_MyListenPort Port number (for example, 32503) for debugging and logging. This setting should only be modified by ICS technicians. Allow Card Credit cards accepted (True or False). Allow Cash Cash accepted (True or False). -
Page 67: Auto Sentry® Cpt Tickets
Auto Sentry® CPT Tickets Field Description Allow Loaded Tickets Detail Ticket Expiration Period Ticket Expiration Period This expiration setting value (in days) will be tied to every wash code ticket generated through the CPT device. Vacuum Ticket Expiration Period Table 13: Auto Sentry® CPT Tickets Vandalism Deterrent Field Description... -
Page 68: Service Font Color
Field Description Receipt Count Number of receipts to automatically dispense for cash transactions. Set to 0 if you want the system to prompt the customer to print a receipt. Token Error Msg1 Error message to print on receipts when touch is incapable of dispensing the correct tokens. -
Page 69: Component Port
Figure 28. Standard-Order MEI Jet Wash Coupons Contact your MEI sales associate or distributor for a complete overview, product pricing, and ordering information. Visit mei.anro.com Component Port Field Description XCeptor - Coin Acceptor Port selection for the coin acceptor. Mars - Bill Acceptor Port selection for the bill acceptor. - Page 70 Configuring Settings Auto Sentry® CPT User Manual...
-
Page 71: Service Unit Screen
Chapter 4: Service Unit Screen You can use the Service Unit screen to add and remove money from the bill dispenser or coin hoppers; remove money from the bill or coin acceptors; and verify the coin hoppers, and more. This screen will be directly accessible on the Auto Sentry®... -
Page 72: Create User Password And Pin For Service Unit Screen
Figure 29. Service Unit Main Options Screen Create User Password and PIN for Service Unit Screen To access the Auto Sentry® CPT Service Unit Screen, a user password and PIN must be created. You can create the password and PIN in the User dialog box. To create a password and PIN, follow these steps: 1 In WashConnect®, on the Users menu, click Manage Users. -
Page 73: Set Users Privilege To Access Service Unit Screen
Set Users Privilege to access Service Unit Screen Configure specified users to have access to the Service Unit screen on the CPT Device. There is a privilege that must be enabled for a user to open the Service Unit screen. 1 Open WashConnect, and log on to Corporate. - Page 74 SERVICE SWITCH UPPER-LEFT CHAMBER ON THE BACK SIDE OF THE AUTO SENTRY SERVICE SWITCH LOWER CHAMBER WHERE THE BILL DISPENSER IS LOCATED Figure 31. Service Unit Screen Buttons To log on to the Auto Sentry® CPT service unit screen, follow these steps: 1 Unlock the Auto Sentry®...
-
Page 75: Access Service Unit Screen With Admin/Management Card
4 From the Service Unit Username Entry Screen, the user may access the Service Unit Screen in one of two ways: ▪ The user may simply swipe the authorized Admin/Management card, and if it has authorization, the machine will advance to the Service unit menu. -or- ▪... - Page 76 Table 20: Service Unit Screen Icon Descriptions (Continued) Bill Acceptor, Coin Acceptor, Actions. ▪ Command buttons include Reset Device and Select Device. Bill Acceptor, Coin Acceptor, Actions. ▪ Command buttons include Add, Remove, Verify, and Cancel. Diagnostics. To perform more advanced testing and history information. Close Terminal, Open Terminal.
-
Page 77: Add Funds
Add Funds You can add coins, tokens, or bills to the Auto Sentry® CPT. The following instructions include adding coins, tokens, and bills to the Auto Sentry® CPT. The journal entry is added automatically. Adding coins or tokens to the Auto Sentry is Auto Verified so the user will not need to verify the journal. - Page 78 The available functions for that device will be displayed in Figure 34. Figure 34. Choose an Action dialog box 4 In the Add Bills dialog box, type the dollar value of the bills you are adding to the cassette. The amount appears in the keypad display. Figure 35.
-
Page 79: Remove Bill Or Coins
When the Add process is completed, the overall value of the device is increased. Figure 36. Add Bills to Bill Dispenser 6 Take the receipt. 7 Slide out the bill dispenser drawer. Physically add the bills, and then slide the drawer back. Remove Bill or Coins Selecting the Remove command tells the software to zero out the quantity at the selected device. - Page 80 4 The “What would you like to do?” dialog box appears with the available functions for this device. 5 Tap the Remove button. A confirmation message appears to verify to proceed with the selected function. NOTE: When removing bills from the bill acceptors, you must remove all bills in it. There is no ability to remove only a partial amount.
-
Page 81: Verify Coin Hoppers
When the Remove process is complete, the overall value of the device is reset to $0.00 and the screen displays the action that was completed. Figure 39. Remove cash from bill acceptor example Verify Coin Hoppers To audit the coin totals in the Auto Sentry® CPT for accuracy, the Service Unit Screen provides a Verify function. - Page 82 3 Prepare a bag or bucket to collect the coins, if necessary. Figure 40. Verify Action Dialog Box 4 Tap the Verify button. 5 In the Verify Coin Hopper dialog box, tap Yes to verify coin hopper. The coin hopper is emptied as the Auto Sentry® CPT counts all the coins as they are dispensed. NOTE: By selecting No, the verify process is stopped and the money is not dispensed.
-
Page 83: Terminal Operations
▪ If the amount is not correct, type the correct amount of coins (not the dollar amount), and then tap OK. The message “Ending bank has been adjusted by… “ appears in the instruction box. ▪ Take the receipt Figure 42. Ending Bank Unchanged message in instruction box Terminal Operations Close Terminal - Auto Sentry IMPORTANT: If the user closes the terminal with the Close Terminal button on the... -
Page 84: Close Terminal
To close a shift, follow these steps: 1 Log on the Service Unit Screen of the Auto Sentry® CPT. 2 In the Site ID box, select a Site ID, which is typically a four-digit number such as 1002. 3 Log on with your user ID / four-digit PIN, and then tap Enter. 4 Tap Bump Shift. - Page 85 2 Click the Diagnostics button. Figure 43. Diagnostic Button The Diagnostic Screen appears. Figure 44. Diagnostic Screen Table 21: Diagnostics Screen Descriptions Tap the Test button to print a test receipt. Auto Sentry® CPT User Manual Service Unit Screen...
- Page 86 Table 21: Diagnostics Screen Descriptions (Continued) Tap the bill dispenser, and then tap the Dispense button. A single bill is ejected from the device. This is not recorded in the software. You should replace the bill or coin after it has been dispensed. Tap the coin dispenser, and then tap the Dispense button.
-
Page 87: Exiting The Service Unit Screen
Version information may include but is not limited to the following application names: CAGE.exe. Credit card clearing software. CoreGatewayServer.exe. Sever application. Touch.exe. WashConnect® touchscreen software. Deviceint.exe. Device interface software. Bill Acceptor. Configured bill acceptor for the WashConnect®. Exiting the Service Unit Screen After all maintenance has been completed on the main Service Unit Screen or Diagnostics Screen, tap the Exit button. -
Page 88: Automatically Created Shifts In The Cash Management Journal
Automatically Created Shifts in the Cash Management Journal Each time the Auto Sentry® CPT creates a new shift—either automatically or with the Bump Shift command—an entry appears in the cash management journal. Servicing Tips The following tips are provided to help you service your Auto Sentry® CPT. Stagger Times for Cash Removal Theft is an unfortunate reality in the Jet Wash business. -
Page 89: Generate Wash Bay Tickets For Wash Down
Generate Wash Bay Tickets for Wash Down This feature is used to generate enough tickets to wash down each individual wash bay on site. You can Generate Wash Bay Tickets for the TNC Wash Bay devices through the Auto Sentry® CPT Service Unit Screen. - Page 90 Auto Sentry® CPT User Manual Service Unit Screen...
-
Page 91: Customizing Your Cpt
D:\ICS\WCTouch\Web\Resources\BMPFiles\en for the English images. The videos for the language specific screens will reside in D:\ICS\WCTouch\Web\Resources\AVIFiles\en for the English images. Currently the main video to be played would be an Instructions.mp4 video that is specific to a selected language meaning there Auto Sentry®... -
Page 92: Configure The Text Displayed Within The Auto Sentry® Cpt Screens
This video is to instruct a user about the features and use of the CPT. The sounds will reside at the typical path of D:\ICS\WCTouch\Web\Resources\WAVFiles for those sounds that are not language specific and will be shared across all screens. Currently these include a sound for Back and a common Beep. -
Page 93: Configure Text Groups
Configure Text Groups You can change the Font or Text configurations for the Auto Sentry® CPT. In the WashConnect Settings, you can adjust the Font Color, Name, Size, and Spacing from the Centralized Payment Settings. Figure 46. Settings for Font on Auto Sentry® CPT Screens Auto Sentry®... -
Page 94: Service Unit Time Out Settings
Service Unit Time Out Settings Service Menu Logout Time Out - The Service Menu Warning Time Out setting is the inactivity timer for the Service Unit screen. If no one has touched the screen for this set amount of time, the message comes up stating no one has used the screen, do you want to exit from it. - Page 95 Chapter 6: Reporting You can view many different reports for the transactions that take place on your Auto Sentry® CPT. This chapter includes an overview of the most essential reports: Shift Detail, Journals, and Terminal Balance. See WashConnect Web Help if you would like more information on the other management reports that are available.
- Page 96 SHIFT DETAIL Requested By: Admin User Date Range From: 5/7/2017 To: 5/13/2017 Page: 1 of 1 On Wednesday, May 24, 2017 Logged At:Corporate 10:53:30 AM Device(s): CPT[1500], Bay 1[2021], Bay 2[2022], Bay 3[2023], Bay 4[2024], Bay 5[2025], Vac 1[2501], Vac 2[2502], Vac 3[2503], Vac 4[2504], Vac 5[2505], Vac 6[2506] All Shifts V 2.5.7.0...
-
Page 97: Reporting
Table 23: Shift Detail Report Descriptions Line-Item Name Description Profit Center A Profit Center name will appear on the left above the section breakdown. The breakdown of each Profit Center will be itemized based on how the PLUs were setup for the particular Profit Center, for example, breakdown may include Base, Extra, Discount, Other, and more. - Page 98 Sales Tax: This is to account for the amount of money that will be collected as Sales Tax revenue, received from applying specified tax rates to specific Sales Items. This works with the configuration of Sales Items to determine if they are nontaxable, subject to a single tax, or subject to multiple taxes.
- Page 99 Total Non-Cash Reconciliation - This section will sum up all non-cash payments to determine what amount of revenue is tied to payments other than cash. Total Credit Cards This entry includes the total number and total dollar amount of all sales identified as being processed with a Credit Card during the selected shift(s).
- Page 100 Cash To Account For: This section will sum up all of the cash sources to determine the total amount of cash that is available in the selected shifts. This amount of cash is determined by including the following cash sources Beginning Bank This entry includes the beginning amount of cash available in each device at the opening of its shift.
- Page 101 Bank Deposits This entry includes the total number and dollar amount of (Checks) checks being taken from the system and sent to the Bank for Deposit. Checks are treated as Cash so Checks deposited to the Bank will be deducted from your total Cash on Hand. Bank Deposits (Cash) This entry includes the total dollar amount of cash being taken from the system and sent to the Bank for Deposit.
-
Page 102: View A Shift Detail Report
Retired Transactions This entry displays the number of transactions and the total -Only can occur if site dollar value of all transactions that have been retired for the is using a Tunnel selected shift(s). These transactions could have been retired Master while the shift was open or after it was closed. - Page 103 8 In the Condensed box, click to select. Click again to clear the Condensed check box. The report will do one of the following: ▪ If Condensed formatting option is not selected: The report will appear formatted with a lot more white space between the columns. ▪...
-
Page 104: Journals
Journals You can view the Journal. Figure 51. Journal About Journal Actions Every line in the Journal is considered one journal entry. The Action column shows what activity occurred for the journal entry. The following table describes each of the possible activities or movements that can appear in the Action column for each journal entry. - Page 105 2 In the Start Date and End Date boxes, select a date range. 3 In the Site box, select a site. 4 In the Device box, select a device. 5 In the Shift box, select a shift. 6 Click the Search button. The journal for that shift and device appears.
-
Page 106: About Journal Actions
and entered correctly in WashConnect, and if it wasn’t you can make a quick edit while Verifying the entry. Certain actions in Cash Management will automatically verify the journal entry. These are typically journal entries (records) that are created by the system that would not need to be verified by the user such as Adds to an Auto Sentry Dispenser, or the Beginning and Ending Balance of a Point-of-Sale (POS) shift (using the virtual safe). -
Page 107: View Journal Entry History
Figure 54. Verify Journal Dialog Box 5 Optional: Type changes in the New Qty. boxes, and then click the Save button. 6 Click the Save button. The entry is verified and Journals appears. The Verified column shows a date and logon ID for the verified entry. Figure 55. -
Page 108: View The Terminal Balance Report
Figure 56. Terminal Balance Report The Terminal Balance report shows the total bills, coins, and tokens in each Auto Sentry® CPT terminal. You can view the Terminal Balance report to decide whether you should add or remove cash from the Auto Sentry® CPT. View the Terminal Balance Report To view the Terminal Balance report, follow these steps: 1 On the Financial menu, click Cash Management, and then click Terminal Balance report. - Page 109 Change Version History Table 1: Document Change History Document Date Reviewer Initials Description Version Version 1.0 July 26, 2017 W.S. First release. Auto Sentry® CPT User Manual...
Need help?
Do you have a question about the psd codax Auto Sentry CPT and is the answer not in the manual?
Questions and answers