Table of Contents
Advertisement
Quick Links
Advertisement
Table of Contents

Related Manuals for Yamaha HTR-5935


Summary of Contents for Yamaha HTR-5935
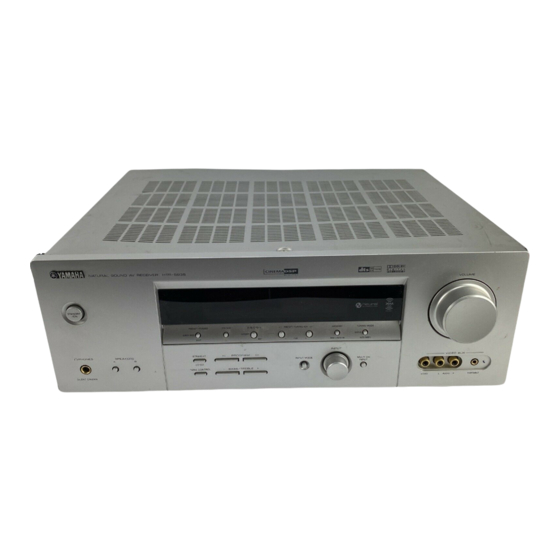
- Page 1 HTR-5935 AV Receiver OWNER’S MANUAL...
-
Page 2: Important Safety Instructions
QUALIFIED SERVICE PERSONNEL. the type of power source indicated on the marking label. If you are not sure of the type of power supply to your home, consult your product dealer or local power company. For products intended to operate from battery power, or other •... - Page 3 – NATIONAL ELECTRICAL CODE guidelines for proper grounding and, in particular, specifies that the cable ground shall be connected to the grounding system of the building, as close to the point of cable entry as practical. FCC INFORMATION (for US customers)
- Page 4 YAMAHA and the Electronic Industries Association’s Consumer Electronics Group want you to get the most out of your equipment by playing it at a safe level. One that lets the sound come through loud and clear without annoying blaring or distortion –...
-
Page 5: Table Of Contents
CONNECTIONS ..........11 Basic XM Satellite Radio operations....... 51 Placing speakers............11 Selecting the XM Satellite Radio search mode ..52 Connecting speakers ..........12 Setting the XM Satellite Radio preset channels ..56 Information on jacks and cable plugs ...... 15 Displaying the XM Satellite Radio information.. -
Page 6: Features
• y indicates a tip for your operation. • Some operations can be performed by using either the buttons on the front panel or the ones on the remote control. In case the button names differ between the front panel and the remote control, the button name on the remote control is given in parentheses. -
Page 7: Getting Started
PRESET/CH Installing batteries in the remote control Notes • Change all of the batteries if you notice a decrease in the operation range of the remote control. • Do not use an old battery together with a new one. • Do not use different types of batteries (such as alkaline and manganese batteries) together. -
Page 8: Controls And Functions
The XM Satellite Radio controlling functions in the following buttons (SEARCH MODE, CATEGORY, PRESET/TUNING/CH l / h, MEMORY, and DISPLAY) are operational only when “XM” is selected as the input source. For details, see “XM Satellite Radio controls and functions” on page 49. - Page 9 • When you connect headphones, no signals are output at the over the ones input at the AUDIO L/R jacks. SUBWOOFER OUTPUT jack or the speaker terminals. • All Dolby Digital and DTS audio signals are mixed down to the left and right headphone channels. B SPEAKERS A/B buttons...
-
Page 10: Remote Control
The XM Satellite Radio controlling functions in the following buttons (XM, XM MEMORY, SRCH MODE, DISPLAY, cursor buttons u / d / j / i, numeric buttons and ENT.) are operational only when “XM” is selected as the input source. For details, see “XM Satellite Radio controls and functions”... - Page 11 Turns on or off the night listening modes (see page 30). • Do not drop the remote control. I SET MENU • Do not leave or store the remote control in the following types of conditions: Enters “SET MENU” (see page 73).
-
Page 12: Front Panel Display
CONTROLS AND FUNCTIONS Front panel display Note The cursor on the left of the XM indicator lights up only when “XM” is selected as the input source. For details, see “Basic XM Satellite Radio operations” on page 51. VOLUME AUTO TUNED... - Page 13 K MUTE indicator Flashes while the MUTE function is on (see page 30). L 96/24 indicator Lights up when a DTS 96/24 signal is input to this unit. M Input channel indicators Indicate the channel components of the current digital input signal (see page 26).
-
Page 14: Rear Panel
UNBAL. CENTER SUBWOOFER 7 COMPONENT VIDEO jacks 1 Video component jacks See pages 17 and 18 for connection information. See pages 17 and 18 for connection information. 2 Audio component jacks 8 Antenna terminals See page 20 for connection information. -
Page 15: Connections
The center speaker is for the center channel sounds (dialog, vocals, etc.). If for some reason it is not practical to use a center speaker, you can do without it. Best results, however, are obtained with the full system. Place the 30˚... -
Page 16: Connecting Speakers
Notes • A speaker cord is actually a pair of insulated cables running side by side. Cables are colored or shaped differently, perhaps with a stripe, groove or ridge. Connect the striped (grooved, etc.) cable to the “+” (red) terminals of this unit and your speaker. Connect the plain cable to the “–”... - Page 17 Subwoofer (SW–P3600 only) FRONT terminals Connect one or two front speaker systems (1, 2) to these terminals. If you use only one front speaker system, connect it to the FRONT A or B terminal. CENTER terminals Connect a center speaker (3) to these terminals.
- Page 18 Insert the banana plug connector into the end of the corresponding terminal. Red: positive (+) Black: negative (–) Insert one bare wire into the hole on the side of each terminal. Red: positive (+) Black: negative (–) Tighten the knob to secure the wire.
-
Page 19: Information On Jacks And Cable Plugs
• Pull out the cap from the optical jack before you connect the fiber optic cable. Do not discard the cap. When you are not using the optical jack, be sure to put the cap back in place. This cap protects the jack from dust. -
Page 20: Audio And Video Signal Flow
Analog audio AUDIO PORTABLE Analog output Note This unit handles digital and analog signals independently. Thus, audio signals input at the analog jacks are output only at the analog AUDIO OUT (REC) jacks. Video signal flow for MONITOR OUT Output Input... -
Page 21: Connecting A Tv
CONNECTIONS Connecting a TV Connect your TV to the VIDEO MONITOR OUT jack, or the COMPONENT VIDEO MONITOR OUT jacks of this unit. CAUTION Do not connect this unit or other components to the AC power supply until all connections between components are complete. -
Page 22: Connecting A Dvd Player, A Dvd Recorder, A Vcr Or An Stb
Notes • Be sure to make the same type of video connections as those made for your TV (see page 17). For example, if you connected your TV to the VIDEO MONITOR OUT jack of this unit, connect your other components to the VIDEO jacks. - Page 23 CONNECTIONS Connecting a DVD recorder or a VCR AUDIO COMPONENT VIDEO VIDEO Audio in Video in Video out Component video out Audio out DVD recorder or Connecting an STB Cable TV receiver or satellite receiver Audio out Component video out...
-
Page 24: Connecting A Cd Player, An Md Player Or A Tape Deck
Note To make a digital connection to a component other than the default component assigned to each DIGITAL INPUT jack, select the corresponding setting for “OPTICAL IN” or “COAXIAL IN” in “INPUT ASSIGN” (see page 78). CD Player... -
Page 25: Connecting A Multi-Format Player Or An External Decoder
This unit is equipped with 6 additional input jacks (FRONT L/R, CENTER, SURROUND L/R and Use the VIDEO AUX jacks on the front panel to connect a SUBWOOFER) for discrete multi-channel input from a game console, a video camera or a portable audio player to multi-format player, external decoder, sound processor or this unit. -
Page 26: Connecting The Fm And Am Antennas
Notes • The AM loop antenna should be placed away from this unit. • The AM loop antenna should always be connected, even if an outdoor AM antenna is connected to this unit. • A properly installed outdoor antenna provides clearer reception than an indoor one. -
Page 27: Connecting The Power Cable
Power to these outlets is supplied when this unit is turned on. However, power to these outlets is cut off when this unit is in the standby mode or the power cable of this unit is disconnected from the AC wall outlet. -
Page 28: Turning On This Unit Or Setting It To The Standby Mode
CONNECTIONS Turning on this unit or setting it to the standby mode When all connections are complete, turn on this unit. STANDBY/ON STANDBY VOLUME POWER POWER STANDBY POWER POWER STANDBY MD/CD-R TUNER PRESET/TUNING FM/AM A/B/C/D/E l PRESET/TUNING/CH h MEMORY TUNING MODE... -
Page 29: Basic Setup
Notes • Make sure you disconnect your headphones from this unit. • If you wish to configure this unit manually using more precise adjustments, use the detailed parameters in “SOUND MENU” (see page 75). • Altering any parameters in “BASIC SETUP” resets all parameters manually adjusted in “SOUND MENU” (see page 75). - Page 30 BASIC SETUP Press d to select “SUBWOOFER” and then Press d once and then j / i to select the j / i to select the desired setting. desired setting. ENTER ENTER ENTER ENTER A-E/CAT. A-E/CAT. A-E/CAT. A-E/CAT. A-E/CAT. A-E/CAT.
- Page 31 BASIC SETUP Press j / i to select the desired setting. Press d / u to select a speaker and then j / i to adjust the balance. The selected speaker and the front left speaker or the surround left speaker output a test tone in turn.
-
Page 32: Playback
PLAYBACK CAUTION Extreme caution should be exercised when you play back CDs encoded in DTS. If you play back a CD encoded in DTS on a DTS-incompatible CD player, you will only hear some unwanted noise that may damage your speakers. Check whether your CD player supports CDs encoded in DTS. Also, check the sound output level of your CD player before you play back a CD encoded in DTS. - Page 33 • Sound field programs cannot be selected when the • When “TC.BYPASS” is set to “AUTO” (see page 77), and component connected to the MULTI CH INPUT jacks is “BASS” and “TREBLE” are set to 0 dB, audio output selected as the input source (see page 35).
-
Page 34: Using Other Features
Press MUTE on the remote control to mute the sources to preserve ease-of-listening for all sounds. audio output. Press MUTE again to resume the • Select “OFF ” if you do not want to use this feature. audio output. When a night listening mode is selected, the NIGHT MUTE indicator lights up in the front panel display. -
Page 35: Selecting The Input Mode
“INPUT MODE” to “DTS”. output. • If the digital output data of the player has been processed in any way, you may not be able to perform DTS decoding depending Notes on the player even if you make a digital connection between this unit and the player. -
Page 36: Using The Sleep Timer
The sleep sound field program. timer is useful when you are going to sleep while this unit is playing or recording a source. The sleep timer also V-AUX... -
Page 37: Adjusting The Speaker Level
Press NEXT on the front panel repeatedly to select the speaker channel whose output level you want to adjust and then press LEVEL +/– on the front panel to adjust the output Press ENTER on the remote control when level. -
Page 38: Selecting The Compressed Music Enhancer Mode
Notes ENHANCER 2CH • The Compressed Music Enhancer mode is compatible with the PCM signals (32 kHz, 44.1 kHz and 48 kHz) and the analog 2- Choices: 2ch Stereo, 5ch Stereo, Off channel input sources. • Select “2ch Stereo” to play back compression •... -
Page 39: Selecting The Multi Ch Input Component
To select another input source with STRAIGHT on the remote control again so the INPUT selector on the front panel (or one of the input selector that “STRAIGHT” disappears from the front buttons), press MULTI CH INPUT (or MULTI CH IN on the panel display. -
Page 40: Enjoying Pure Hi-Fi Stereo Sound
STRAIGHT Notes ENT. • To avoid unexpected noise, do not play CDs encoded in DTS when the “DIRECT STEREO” mode is selected. • When multi-channel signals (Dolby Digital and DTS) are input, this unit automatically switches to the corresponding analog input. -
Page 41: Playing Video Sources In The Background
Note Display status: 32kHz, 44.1kHz, 48kHz, 64kHz, If you want to enjoy an audio source input at the MULTI CH 88.2kHz, 96kHz INPUT jacks together with a video source, first select the video... -
Page 42: Enjoying Surround Sound
When you play back such sources in the extended surround mode, select You can also select a decoder by pressing j / i on the remote “MATRIX”. control while the decoder type is displayed in the front panel •... -
Page 43: Using Virtual Cinema Dsp
DTS processing for music sources – When the “DIRECT STEREO” (see page 36) or “2ch Stereo” Neural Surround processing for any mode (see page 35) is selected, or when this unit is in the Neural Sur. sources “STRAIGHT” mode (see page 35). -
Page 44: Recording
• When this unit is set to the standby mode, you cannot record between other components connected to this unit. • The setting of the TONE CONTROL (see page 29), VOLUME, the speaker level (see page 76) and the sound field programs (see page 59) do not affect recorded material. -
Page 45: Fm/Am Tuning
There are 2 tuning methods: automatic and manual. Automatic tuning is effective when station signals are strong and there is no interference. If the signal from the station you want to select is weak, tune into it manually. You can also use the automatic and manual preset tuning features to store up to 40 stations (A1 to E8: 8 preset station numbers in each of the 5 preset station groups). -
Page 46: Manual Tuning
FM/AM TUNING Manual tuning Press TUNING MODE (AUTO/MAN’L) so that the AUTO indicator disappears from the front If the signal received from the station you want to select is panel display. weak, tune into it manually. Note TUNING MODE Manually tuning into an FM station automatically switches the DISPLAY tuner to monaural reception to increase the signal quality. -
Page 47: Automatic Preset Tuning
You can use the automatic preset tuning feature to store The preset station number and the MEMORY and FM stations with strong signals up to 40 (A1 to E8: 8 AUTO indicators flash. After approximately 5 preset station numbers in each of the 5 preset station seconds, automatic presetting starts from the current groups) of those stations in order. -
Page 48: Manual Preset Tuning
You can specify the preset number from which this unit stores FM stations and/or begins tuning toward lower You can also store up to 40 stations (A1 to E8: 8 preset frequencies. station numbers in each of the 5 preset station groups) manually. -
Page 49: Selecting Preset Stations
When performing this operation with the remote control, set press MAN'L/AUTO FM TUNER to select “TUNER” as the input source. Press A/B/C/D/E on the front panel (or A-E/ CAT. j / i on the remote control) to select the MD/CD-R pTUNER V-AUX DTV/CBL desired preset station group (A to E). -
Page 50: Exchanging Preset Stations
Press and hold EDIT for more than 3 seconds. “E1” and the MEMORY indicator flash in the front You can select the desired preset station number (1 to 8) directly panel display. by pressing the numeric buttons on the remote control. - Page 51 FM/AM TUNING Select preset station “A5” using A/B/C/D/E and PRESET/TUNING/CH l / h. “A5” and the MEMORY indicator flash in the front panel display. See “Selecting preset stations” on page 45. PRESET/TUNING A/B/C/D/E SEARCH MODE CATEGORY EDIT NEXT Flashes MD/CD-R pTUNER...
-
Page 52: Xm ® Satellite Radio Tuning
• To ensure the optimal reception of the XM Satellite Radio signals, the XM Connect-and-Play digital antenna accessory must be placed at or near a southerly facing window with no obstacles in the path to the sky. You can mount it indoors or outdoors. -
Page 53: Xm Satellite Radio Controls And Functions
XM Satellite Radio controls and functions Note The following controls are available only when “XM” is selected as the input source. Rotate the INPUT selector on the front panel (or press XM on the remote control) to select “XM” as the input source. -
Page 54: Activating Xm Satellite Radio
80) cannot be adjusted by using the remote control. Instead, you need to adjust the orientation of the XM Connect-and-Play digital antenna accessory connected to the XM jack of this unit for a better percentage of the reception level. SPEAKERS... -
Page 55: Basic Xm Satellite Radio Operations
(or press XM on the remote control) to select “XM” as the input source. The cursor on the left of the XM indicator lights up in the front panel display and the XM Satellite Radio information (such as channel number, channel name, category, artist name, or song title) for the currently selected channel appears in the front panel display. -
Page 56: Selecting The Xm Satellite Radio Search Mode
Press SEARCH MODE on the front panel search mode (or SRCH MODE on the remote control) repeatedly to select “ALL CH SEARCH”. You can search for the desired channel using one of the three search modes (All Channel Search, Category Search, SET MENU PRESET/TUNING and Preset Search modes). - Page 57 PRESET/TUNING/CH h Remote control ENTER LEVEL A-E/CAT. A-E/CAT. PRESET/CH Front panel Remote control You can search for a channel quickly by pressing and holding PRESET/TUNING/CH l / h on the front panel (or PRESET/CH u / d on the remote control).
- Page 58 “PRESET SEARCH”. channels” on page 56. PRESET/TUNING SET MENU SEARCH MODE MENU EDIT All preset channels (A1 to E8) recalls “001 Preview” by the initial SRCH MODE factory setting. Front panel Remote control VOLUME CD pXM V-AUX...
- Page 59 • If no button is pressed within a few seconds after you enter a one-digit or two-digit number, this unit automatically confirms the entered channel number.
-
Page 60: Setting The Xm Satellite Radio Preset Channels
(or XM MEMORY on the remote control). The MEMORY indicator flashes in the front panel You can use this feature to store up to 40 XM Satellite display for approximately 5 seconds. Radio channels (A1 to E8: 8 preset channel numbers in each of the 5 preset channel groups). -
Page 61: Displaying The Xm Satellite Radio Information
Press MEMORY on the front panel (or XM Note MEMORY on the remote control) to set the If a status message or an error message appears in the front panel selected XM Satellite Radio channel as a display, see the “XM Satellite Radio” section in preset channel while the MEMORY indicator “TROUBLESHOOTING”... - Page 62 Note If you press DISPLAY while the XM Satellite Radio information display is scrolling from right to left in the front panel display, the XM Satellite Radio information display mode toggles as described above.
-
Page 63: Sound Field Programs
What really creates the rich, full tones of a live instrument are the multiple reflections from the walls of the room. In addition to making the sound live, these reflections enable us to tell where the player is situated as well as the size and shape of the room in which we are sitting. -
Page 64: Sound Field Program Descriptions
TV programs, video tapes, etc. Press the PROGRAM l / h buttons on the front panel (or press AMP and then press one of the sound field program selector buttons on the remote control) to select the desired sound field program (see page 59). -
Page 65: For Music Sources
You can select from the following sound fields when playing music sources, like CD, FM/AM broadcasting, tapes, etc. Press the PROGRAM l / h buttons on the front panel (or press AMP and then press one of the sound field program selector buttons on the remote control) to select the desired sound field program (see page 59). -
Page 66: Changing Sound Field Parameter Settings
• Repeat steps 2 and 3 as necessary to change other sound field A-E/CAT. A-E/CAT. A-E/CAT. A-E/CAT. program parameter settings. • If you press and hold j / i to change the sound field parameter PRESET/CH PRESET/CH value, the initial factory settings are shown momentarily in the front panel display. VOLUME... -
Page 67: Sound Field Parameter Descriptions
SOUND FIELD PROGRAMS Sound field parameter descriptions You can adjust the values of certain digital sound field parameters so that the sound fields are recreated accurately in your listening room. Not all of the following parameters are found in every program. - Page 68 The larger the value, the larger the surround sound field becomes. As the P.ROOM SIZE sound is repeatedly reflected around a room, the larger the hall is, the longer the time between S.ROOM SIZE the original reflected sound and the subsequent reflections. By controlling the time between the SB RM SIZE reflected sounds, you can change the apparent size of the virtual venue.
- Page 69 Reverberation time. Adjusts the amount of time taken for the dense, subsequent reverberation sound to decay by 60 dB at 1 kHz. This changes the apparent size of the acoustic environment over an extremely wide range. Set a longer reverberation time for “dead” sources and listening room environments, and a shorter time for “live”...
- Page 70 • The low-frequency signals input from the front left and right speakers are redirected to the subwoofer in the following cases: – “BASS OUT” is set to “BOTH” (see page 75). – “FRONT” is set to “SMALL” (see page 75) and “BASS OUT” is set to “SWFR” (see page 75). 5ch Stereo 5-channel stereo center, surround left, surround right, levels.
- Page 71 Initial setting: 0.3 The “Pro Logic II Music” and “DTS Neo:6 Music” parameters can be set only when “SUR. STANDARD” is selected. Press AMP and then press STANDARD on the remote control repeatedly to select “SUR. STANDARD” (see page 38).
-
Page 72: Sound Field Program Speaker Layouts
Note Be advised that there may be no or not enough sound output from speakers depending on the type of input source being played back. Furthermore, there may be some channels that can only be used partially when they are adjusted to specific aspects of movies, such as special sound effects, etc. -
Page 73: Dolby Digital
SOUND FIELD PROGRAMS 2-channel audio 2-channel audio Sound field program 5.1-channel audio (monaural) (stereo) MOVIE THEATER Spectacle Sci-Fi Adventure General SUR. STANDARD DOLBY DIGITAL PRO LOGIC Pro Logic Pro Logic SUR. STANDARD PLII Movie PLII Music PLII Game Movie/Game Movie/Game/Music Music SUR. - Page 74 SOUND FIELD PROGRAMS 2-channel audio 2-channel audio Sound field program 5.1-channel audio (monaural) (stereo) SUR. ENHANCED DOLBY DIGITAL PRO LOGIC Pro Logic Pro Logic SUR. ENHANCED PLII Movie SUR. ENHANCED Neo:6 Cinema STRAIGHT Monaural playback DIRECT STEREO Monaural playback...
-
Page 75: Set Menu
Use this feature to manually adjust speaker and system parameters. Sound menu 1 SOUND MENU Use this menu to manually adjust any speaker settings, alter the quality and tone of the sound output by the system or compensate for video signal processing delays when using LCD monitors or projectors. - Page 76 C)PARAM. INI Initializes the parameters of a group of sound field programs. D)MULTI ZONE Specifies the location of the speakers connected to the SPEAKERS B terminals. E)XM RADIO SET Displays the current reception level of the XM Connect-and-Play digital antenna accessory.
-
Page 77: Using Set Menu
“1 SOUND MENU” appears in the front panel RETURN DISPLAY XM MEMORY PRESET/CH display. • You can change the “SET MENU” parameters while this unit is reproducing sound. ENTER • If you press one of the sound field program selector buttons A-E/CAT. A-E/CAT. - Page 78 Press SET MENU to exit from “SET MENU”. ENTER to select and enter the desired SET MENU submenu. MENU Repeat 5 and 6 to navigate to and enter the items you SRCH MODE want to adjust. To return to the previous menu level, press RETURN. Memory back-up The memory back-up circuit prevents the stored data from being lost even if this unit is in the standby mode.
-
Page 79: Sound Menu
The LFE signals, the low-frequency signals other speakers set to “SML” or to “NONE” are all directed to the of the front left and right channels, and the low- front left and right speakers regardless of the “FRONT”... - Page 80 Ideally, each speaker should be the same distance from the main listening position. However, this is not possible in • Select “NRM” if you do not want to reverse the phase most home situations. Thus, a certain amount of delay of your subwoofer.
- Page 81 Initial setting: 0 dB Choices: MIN, STD, MAX • Select “MIN” (minimum) if you regularly listen at low Press u / d to select a frequency band and j / i to adjust the volume levels. selected frequency band. • Select “STD” (standard) for general use.
-
Page 82: Input Menu
DTV/CBL V-AUX Notes • You cannot select a specific item more than once for the same type of jack. • When you connect a component to both the DIGITAL INPUT Press AMP and then press j / i on the remote (COAXIAL) and DIGITAL INPUT (OPTICAL) jacks, priority control to place the “_”... -
Page 83: Option Menu
Choices: OFF, ON A to Z, a space, 0 to 9, a space, a to z, a space, symbols (#, *, –, +, etc.) • Select “OFF” to turn off the “MEMORY GUARD”... - Page 84 SPEAKERS B terminals when “SP B” is set to “ZONE B”. • If a DSP program is selected when “SP B” is set to “ZONE B”, this unit automatically enters the Virtual CINEMA DSP mode (see page 39).
-
Page 85: Remote Control Features
In addition to controlling this unit, the remote control can also operate other audiovisual components made by YAMAHA and other manufacturers. To control your TV or other components, you must set the appropriate remote control code for each input source (see page 83). -
Page 86: Controlling Other Components
This button functions only when the original remote control of the component has a POWER button. These buttons can operate your VCR when the remote control code of your VCR is set in DVR and DTV/CBL is selected. When you use this button to record a source, press it twice repeatedly to prevent a malfunction. -
Page 87: Setting Remote Control Codes
Notes You can control this unit only. You can only set TV remote control codes in DTV/CBL. • If the manufacturer of your component has more than one code, try each of them until you find the correct one. Note •... -
Page 88: Resetting The System
• The initial factory settings are activated next time you turn on this unit. To cancel the initialization procedure at any time without making any changes, press STANDBY/ON on the front panel to set this unit to the standby mode. -
Page 89: Troubleshooting
TROUBLESHOOTING Refer to the table below when this unit does not function properly. If the problem you are experiencing is not listed below or if the instruction below does not help, set this unit to the standby mode, disconnect the power cable, and contact the nearest authorized YAMAHA dealer or service center. - Page 90 Check that the speaker impedance setting is correct. goes off. because of a short circuit, etc. Check that the speaker wires are not touching each — other and then turn this unit back on. The sleep timer has turned off this unit.
- Page 91 This unit suddenly The internal temperature becomes too Wait about 1 hour for this unit to cool down and then — enters the standby high and the overheat protection circuitry turn it back on.
-
Page 92: Xm Satellite Radio
XM Satellite Radio If an operation takes longer than usual or an error occurs, one of the following messages may appear in the front panel display. In this case, read the cause and follow the corresponding remedies. Status message... - Page 93 Wrong distance or angle. The remote control functions within a maximum does not work nor range of 6 m (20 ft) and no more than 30 degrees off- function properly. axis from the front panel. Direct sunlight or lighting (from an Reposition this unit.
-
Page 94: Glossary
DTS decoders. “96” refers Dolby Digital is a digital surround sound system that gives to a 96 kHz sampling rate compared to the typical 48 kHz you completely independent multi-channel audio. With 3 sampling rate. “24” refers to 24-bit word length. DTS 96/... -
Page 95: Video Information
Satellite Radio for digital radio broadcast of surround With the component video signal system, the video signal recordings and live events in surround sound. Neural is separated into the Y signal for the luminance and the P ™ Surround employs psychoacoustic frequency domain and P signals for the chrominance. -
Page 96: Sound Field Program Information
Since the Dolby Surround and DTS systems were originally designed for use in movie theaters, their effect is best felt in a theater having many speakers designed for acoustic effects. Since home conditions, such as room size, wall material, number of speakers, and so on, can differ so widely, it is inevitable that there are differences in the sound heard. -
Page 97: Specifications
• AC Outlets ..........2 (Total 100 W maximum) CD, etc..............200 mV/47 kΩ • Dimensions (W x H x D) ........ 435 x 161 x 391 mm MULTI CH INPUT ..........200 mV/47 kΩ (17.1 x 6.3 x 15.4 in) •... -
Page 98: Dvd Player
LIST OF REMOTE CONTROL CODES RADIO SHACK LUXOR WARDS 395, 396, 336, 362 299, 293, 297 393, 396, 397, YAMAHA 399, 392, 393, 394 ADMIRAL 292, 293 293, 297, 234, 336, 349 ZENITH 344, 368, 379, AIWA 294, 276, 283, 284... - Page 99 YAMAHA ELECTRONICS (UK) LTD. YAMAHA HOUSE, 200 RICKMANSWORTH ROAD WATFORD, HERTS WD18 7GQ, ENGLAND YAMAHA SCANDINAVIA A.B. J A WETTERGRENS GATA 1, BOX 30053, 400 43 VÄSTRA FRÖLUNDA, SWEDEN YAMAHA MUSIC AUSTRALIA PTY, LTD. 17-33 MARKET ST., SOUTH MELBOURNE, 3205 VIC., AUSTRALIA...
Need help?
Do you have a question about the HTR-5935 and is the answer not in the manual?
Questions and answers