Table of Contents
Advertisement
Advertisement
Table of Contents

Related Manuals for WINDONE K2

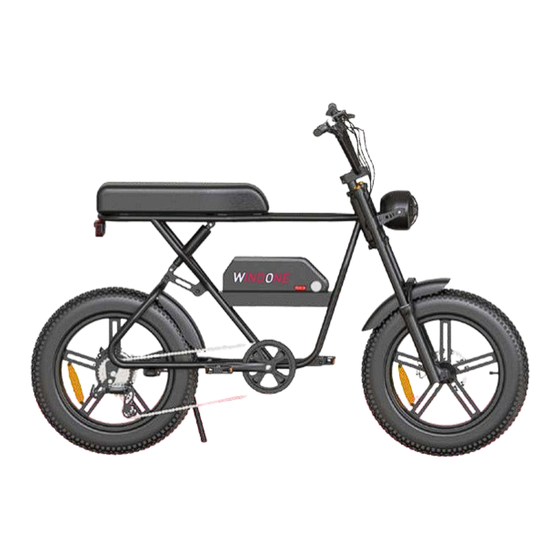
Summary of Contents for WINDONE K2
-
Page 2: Table Of Contents
After riding on a rainy day, please clean up the rainwater and sediment immediately 11. Specifications 12. Limited Warranty Statement lf you have any trouble with the installation, please contact WINDONE customer service for support@windone.com 13. Question & Answer 14. Trouble Shooting... - Page 3 Hexagon wrench x 6 absorber x 1 Installing tool x 3 Front wheel shaft x 1 Phillips screwdriver x 1 Rear Seat Footrest Please check package contents carefully, if anything is missing or damaged, please contact WINDONE customer service for support:support@windone.com...
- Page 4 Seat Cushion Shock Absorber Battery Battery Installing The Front Wheel Battery Lock 1. Take out the screws and front fender. Install the front fender first, and then install the front wheel. 2. Remove the gasket on the front wheel shaft and the nuts on the left and right sides. 3.
- Page 5 Installing The Handlebars Install Seat Shock Absorbers ① ② 1. Utilize a 5mm hex wrench to initially tighten the screw at position ①. 1. Please loosen the screws that connect the cushion to the shock absorber. 2. Loosen the screw at ② and remove the gland. 2.
- Page 6 1. Identify the Left and Right labels on the pedals. They can only be installed on their respective sides. INCORRECT INSTALLATION WILL CAUSE DAMAGE, PLEASE BE AWARE TO DISTINGUISHING BETWEEN LEFT & RIGHT Installing the Headlight BEFORE INSTALLATION. 1. As shown in Figure 1, insert the screw of the headlight into the front headlight hole. 2.
- Page 7 Display Introduction How to Use Headlight & Horn 1. There are five buttons on the operating unit, the power button , the plus button , the minus button the headlight button and the switch 2. After long pressing the power button key, the instrument starts to work and the working power of the controller is turned on.
-
Page 8: Start-Up Procedure
5. Begin riding carefully. With the proper safety gear and rider knowledge, you may now operate your bike. On a flat surface, 4. Start-up Procedure in a low gear (1 or 2), most riders should be able to start pedaling the bike with pedal assist level 0 or 1. You may also use the throttle to accelerate and maintain your desired speed.6. -
Page 9: Remove The Battery
6. Remove the Battery 7.How to Charge the Battery 1. Turn the key counterclockwise to the left to the UNLOCK icon. 2. Carefully slide the battery forward and lift it off the frame. Your electric bike will be fully charged when the LED light on the charger changes from red (charging) to green (fully charged). - Page 10 Notes of Charging 1. Charging time: 80% full charge in 4 hours, full charge in 6-7 hours. 2. The small light on the charger in RED indicates it is in charging; GREEN indicates it is fully charged. 3. Insufficient charging will not affect the battery's lifespan. AVOlDING deep discharge is helpful to protect the battery and extend its life cycle.
-
Page 12: Specifications
5. All accessories originally included with your purchase must be included with your return. Rated Power 500W Wheel 6. If you return a product to WINDONE, [a] without an RMA from WINDONE [b] without all parts included in the Motor Max.power 700W original package, WINDONE retains the right to refuse delivery of such return. -
Page 13: Question & Answer
1. Is there any necessary information that needs to be included before contacting the WINDONE Support Team? If a hardware defect is found and a valid claim is received by WINDONE within the warranty period, WINDONE will, A:Yes, if you need any support from WINDONE, please contact us at support@windone.com, and please always include at its option and to the extent permitted by law, either [1] repair the product at no charge, using new or refurbished your order number, correct model No. -
Page 14: Trouble Shooting
7s on the right side. After setting the speed mode to 5 and the power mode to 7s, if the speed still can't reach 28 mph, please contact the WINDONE support team to change the controller. In addition, the battery status, rider weight, and road conditions will also influence the maximum speed. -
Page 15: Contact Us
15. CONTACT US Contact us if you experience issues relating to riding, maintenance and safety, or errors/faults with your WINDONE electric bike K2.E-mail Service: support@windone.com...
Need help?
Do you have a question about the K2 and is the answer not in the manual?
Questions and answers
error 2 message and no horn
@David Long
How do you change a front tire on a windonE2Electice Bike
To change the front tire on a WINDONE K2 Electric Bike:
1. Flip the bike upside down for stability.
2. Remove the front wheel covers.
3. Install the wheel: place it between the front forks.
4. Add washers on both sides of the axle.
5. Screw on the nuts and tighten them securely.
6. Ensure all parts are firmly in place before riding.
This process allows you to remove or install the front tire as needed.
This answer is automatically generated
How do you change a front tire tire on a window E 2 Electric Bike Bike
Why is my new e-bike saying code 3