Advertisement
Table of Contents
AudioCodes RXVCam70 PTZ Camera
Welcome
Congratulations on purchasing your AudioCodes RXVCam70 PTZ Camera!
Checking Package Contents
Before installing your RXVCam70, make sure these items are included in your shipped box:
✓
Power Supply
✓
USB cable (A-C) 2m
✓
Wall Mount Bracket
✓
Power Adaptor
✓
Remote Control (RC)
✓
Ethernet cable
Quick Guide
P a g e
| 1
Advertisement
Table of Contents

Summary of Contents for AudioCodes RXVCam70
- Page 1 AudioCodes RXVCam70 PTZ Camera Quick Guide Welcome Congratulations on purchasing your AudioCodes RXVCam70 PTZ Camera! Checking Package Contents Before installing your RXVCam70, make sure these items are included in your shipped box: ✓ Power Supply ✓ USB cable (A-C) 2m ✓...
-
Page 2: Getting Acquainted
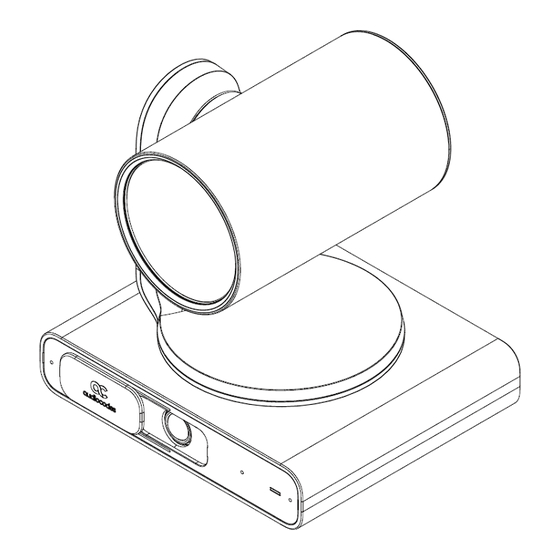
Getting Acquainted The figure below shows the front view of the RXVCam70. Use the table as reference to the preceding figure. Description PTZ Optical Zoom camera Microphone array Privacy cover Room view wide-angle camera LED indicator light P a g e... - Page 3 The figure below shows the back view of the RXVCam70. Use the table as reference to the preceding figure. Description Safety lock hole Audio In port USB 3.0 port RJ-45 network port (PoE+) DC 12V port P a g e...
-
Page 4: Installation
Installation ▪ The recommended installation height is 1.5m-1.8m above ground level. ▪ Screw specifications: 1 round head Phillips machine screw 1/4"-20UNC10) ▪ 4 cross-slotted round head screws with self-tapping threads (PWM3*8) Use the figures below as reference. P a g e... - Page 5 Cabling Use the figure below as reference when cabling RXVCam70. ▪ The preceding figure shows the AudioCodes RX40 Speakerphone (under the two TVs together with RXVCam70) to illustrate the setup’s audio device. ▪ Alternatively, other audio devices can be used, such as AudioCodes’ RX15 Speakerphone | Huddle Room Speaker (placed on the table together with RX-PAD).
- Page 6 Boot process Steady white light Camera On Flashing blue light Upgrade process Flash once Remote control Camera Tracking Mode From RX-PAD’s ‘Camera Settings’, select one of the following RXVCam70 camera Tracking Modes: ✓ Manual ✓ Auto framing ✓ Speaker tracking ✓...
- Page 7 Choosing a Tracking Mode Use the table below as reference when choosing a Tracking Mode. ▪ Automatically identifies 1-8 people ▪ Automatically lays out the display ▪ When a person moves, the camera automatically tracks them and keeps them centered ▪...
- Page 8 ▪ Select this option to manually adjust the Zoom, Tilt or Pan. ▪ In RX-PAD’s ‘Camera Settings’ page, use the sliders to set Zoom, Tilt or Pan. ▪ Using the RC, after selecting an area to display, zoom in | out, move up | down, and move left | right.
- Page 9 Getting Acquainted with the Remote Control (RC) Use the table following the figure below as reference. Use the table as reference to the preceding figure. Item Description Standby Press to put the camera in standby mode. Number keys Set or call presets. Use in combination with other buttons.
-
Page 10: Camera Select
Item Description PRESET Set presets: Set preset + number (0-9). Preset 0 can be set as the default. Confirm the selected menu or press to return the pan/tilt to the center position. Back Press to return to the previous level in the OSD (on-screen display) menu. - Page 11 Website: https://www.audiocodes.com/ ©2024 AudioCodes Ltd. All rights reserved. AudioCodes, AC, HD VoIP, HD VoIP Sounds Better, IPmedia, Mediant, MediaPack, What’s Inside Matters, OSN, SmartTAP, User Management Pack, VMAS, VoIPerfect, VoIPerfectHD, Your Gateway To VoIP, 3GX, VocaNom, AudioCodes One Voice, AudioCodes Meeting Insights, AudioCodes Room Experience are trademarks or registered trademarks of AudioCodes Limited.

Need help?
Do you have a question about the RXVCam70 and is the answer not in the manual?
Questions and answers