Table of Contents
Advertisement
Quick Links
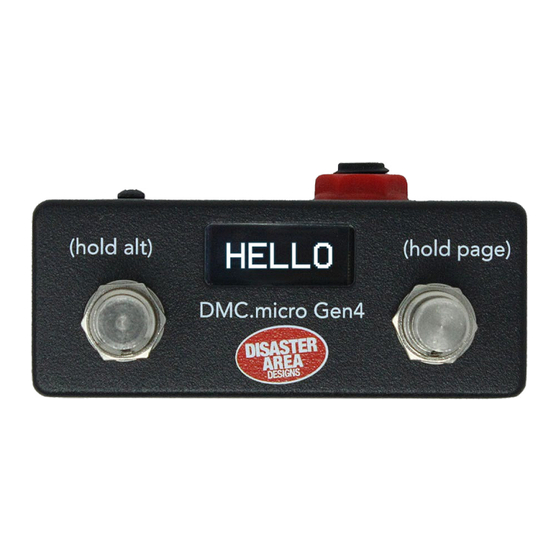
DMC.micro
Gen4 / Pro / Classic
USER MANUAL
C
ontents
..........................................1
...........................................2
............................................3
g
.................................9
l
6 s
g
..............................
..............................
a
n
s
DMC.micro Gen4 / Pro / Classic Manual Rev 2.04c 07.09.2024
disasteraareadesigns.com
...................6
............................7
.............................8
....................
10
11
12
s
g
...
13
...........................
14
4) ....................
15
usB h
M
(p
ost
ode
ro
p
M
........................................
reset
ode
d
M
........................................
evIce
ode
c
M
.........................................
lock
ode
u
M
......................................
tIlIty
odes
l
M
.......................................
ooper
ode
M
J
c
ultI
ack
onfIguratIon
c
d
s
..........................
ustoM
evIce
etup
MIdI t
r
hru and
outIng
d
s
Isplay and
creensaver
f
u
.................................
IrMware
pdate
e
a
..............................
dItor
pplIcatIon
/ c
) ......
16
17
19
20
21
22
...................
23
24
.....................
25
....................
25
26
28
Advertisement
Table of Contents

Subscribe to Our Youtube Channel
Related Manuals for Disaster Area Designs DMC.micro Gen4


Summary of Contents for Disaster Area Designs DMC.micro Gen4
-
Page 1: Table Of Contents
..........erIs etup uIde Isplay and creensaver ......... lexander erIes etup uIde IrMware pdate ............Mpress etup uIde dItor pplIcatIon usB h 4) ....DMC.micro Gen4 / Pro / Classic Manual Rev 2.04c 07.09.2024 disasteraareadesigns.com... -
Page 2: I Ntroduction
Important Note: ntroduCtIon This User Manual covers operation of the DMC.micro Gen4, DMC.micro Pro, and DMC. The DMC.micro series are our most popular MIDI controllers, featuring full-sized performance micro Classic running firmware version 2.04 or higher. in a tiny package. -
Page 3: I Ns And O Uts
Release the buttons when you see SETUP on the dual remote footswitch input, or even to send tap tempo to supported devices! display. HOLD TO DMC.micro Gen4 specific ports: ENTER USB Host: Standard USB Type-A connector. Please see the USB Host section on page 15. -
Page 4: S Etup M Enu
etup ContInued etup ContInued MAX PRESET / PRST: Number of presets available in Preset mode. If PRST is set to OFF, preset mode HOLD TIME / HOLD: Configures the time needed to trigger the “hold” functions for the DMC footswitches. Set this to LO to trigger holds faster, or set to HI if you are experiencing unwanted will be disabled. -
Page 5: S Etting Up The Dmc. Micro
dMC. ettIng up the MICro tryMon etup uIde The DMC.micro supports three “families” of Strymon MIDI devices: So now that you know what all the setup menu options are, how do you actually set this controller up to work with your rig? We’ll cover the general steps and provide an example Big-Box with Display: Timeline, Mobius, BigSky have dedicated 5-pin MIDI configuration to get you started. -
Page 6: E Ventide S Etup G Uide
Boss s ventIde etup uIde etup uIde The DMC.micro supports the following Boss pedals: The DMC.micro supports three “families” of Eventide devices: 500 Series: DD-500, MD-500, RV-500 H9 / Factor: H9, Timefactor, Modfactor, Pitchfactor, SPACE 200 Series: DD-200, OD-200, GE-200 Rose Slicer SL-20 (MIDI Clock only!) dot9 Series: Labeled “EVEN. -
Page 7: C Hase B Liss S Etup G Uide
hase lIss etup uIde etup uIde The large Automatone series pedals connect directly to the DMC.micro using a standard MIDI The DMC.micro supports several Line 6 devices: cable. Set the pedal MIDI channel to match the device slot you wish to use, ex. devA = CH1, devB = CH2. -
Page 8: M Eris S Etup G Uide
erIs etup uIde lexander erIes etup uIde To configure your Meris pedal with DMC.micro, plug in a TRS / mono cable from the MultiJack To configure your Alexander Neo pedal with DMC.micro, plug a TS / mono cable from the on DMC.micro to the EXP / MIDI jack on the back of the Meris. -
Page 9: Mpress S Etup G Uide
To configure your Empress Reverb or Echosystem pedal with DMC.micro, plug in a TRS / mono The DMC.micro Gen4 features a dedicated USB type-A port that serves as a USB MIDI Host. cable from the DMC.micro MultiJack to the Control Port on the back of the Empress pedal. Be Connect a class-compliant USB MIDI device to this port and the DMC.micro Gen4 will recognize... -
Page 10: Lassic )
usB h reset lassIC Preset mode is the heart of the DMC.micro. You’ll probably spend most of your time here, so anda ouRce udio we should get to know it! The older DMC.micro Pro / Classic units can also interface with one USB MIDI device on MIDI channel 1. - Page 11 reset ContInued evICe The DMC.micro PRO also allows you to name each preset, for easy identification later. Each preset name is 8 characters and may include upper and lower-case text, numbers, Device mode lets you scroll through all of your connected devices, change their patches / punctuation, and symbols.
- Page 12 tIlIty odes loCk The DMC.micro features two Utility modes, each of which allows you to send up to three different user-definable MIDI messages to your devices. Clock mode allows you to control the DMC.micro’s internal MIDI clock source. To enable Clock mode, change the CLOCK MODE / parameter in the setup menu.
- Page 13 tIlIty odes ContInued ultI onfIguratIon The 1/4” jack on the back of the DMC.micro is our amazing MultiJack. It does a ton of One of the more popular uses for Utility Mode is to control device functions on the Line 6 HX stuff, depending on your needs it can be a MIDI output, an expression pedal input, even a Stomp.
- Page 14 Isplay and Creensaver configuration items for CUSTOM 1 but the items for CUSTOM 2 are arranged the same way. The organic LED display used on the DMC.micro Pro and DMC.micro Gen4 is susceptible to CUST 1 MIN / C1LO Set this value equal to the lowest number preset your device needs.
- Page 15 Firmware updates require a Mac, Windows, or Linux computer with an available USB port. extension. DMC.micro Pro / Classic units require a USB mini-B cable, DMC.micro Gen4 units require a USB If the downloaded file is a .ZIP archive, unzip it.
- Page 16 dItor pplICatIon dItor pplICatIon ContInued We also offer a web-based editor / librarian application that allows you to configure your DMC. The Preset Editor tab allows you to rename, reorder, and change settings for each of the micro. This application runs on any web browser supporting Web MIDI, including Google DMC.micro presets.
Need help?
Do you have a question about the DMC.micro Gen4 and is the answer not in the manual?
Questions and answers