Table of Contents
Advertisement
Quick Links
user manual
C
ontents
..........................................1
...........................................1
............................................2
rIng.........................5
.....................3
...........4
utputs
........................5
.......................6
a
lexander
M
p
s
g
erIs
e
Mpress
B
p
ondI
usB h
p
M
........................................
reset
d
M
........................................
evIce
ode
p
x
Y - e
orts
and
xpressIon
......7
......................8
..................9
...................
10
......................
11
12
13
/ t
......
14
ap
Advertisement
Table of Contents

Related Manuals for Disaster Area Designs Qconnect


Summary of Contents for Disaster Area Designs Qconnect
-
Page 1: Table Of Contents
user manual ontents ..........1 ..7 ntroductIon lexander erIes etup uIde ...........1 ......8 ns and erIs edal etup uIde ..........2 ....9 etup Mpress edal etup uIde .....3 ....onnectIng evIces ondI edal etup uIde MIdI o ...4 usB h ...... onfIgurIng the utputs etup MIdI... - Page 2 You can hook up a huge variety of devices to the qCONNECT. While it’s impossible for us to cover every type of setup, here are a few examples to give you some ideas. 4 CHASE BLISS AUDIO PEDALS A 01 Connect using TRS (stereo) cables from ports A, B, C, D to the TAP / MIDI or A / MIDI jacks.
-
Page 3: I Ntroduction
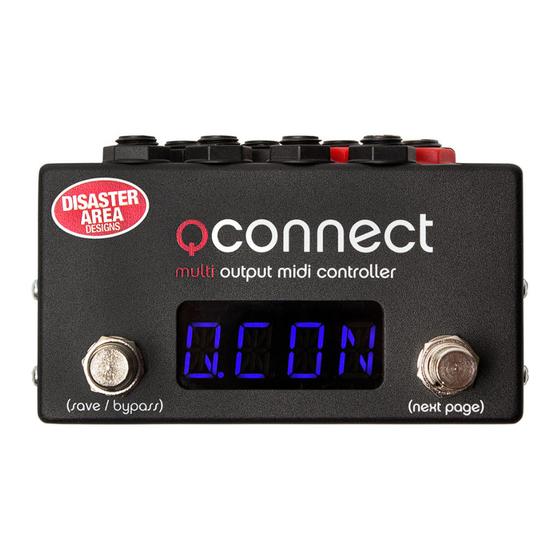
Contact page on our website and we’ll do our best to sort you out as quickly as we can. ns and You’ll notice that qCONNECT has a LOT of 1/4” jacks on the back panel - eight to be exact! These jacks aren’t for effects loops like some of our other controllers, but rather they send MIDI data over standard 1/4”... -
Page 4: S Etup M Enu
All of the configuration and customization options are contained within the Setup Menu. Any changes you make in this menu are saved in the memory of the qCONNECT for future use. Throughout this manual we’ll indicate Setup Menu options as MENU = OPTION, meaning we’d like you to navigate to that item in the Setup Menu and set its value to match. -
Page 5: C Onnecting Y Our D Evices
This part is pretty simple: Locate the MIDI port or jack on your first pedal, then hook it up to your qCONNECT using the appropriate type of cable. It doesn’t really matter which port you select on qCONNECT, since they can all send the required messages. -
Page 6: C Onfiguring The Midi O
If you wish to control one or more devices using the 5-pin MIDI output on the left side of the qCONNECT you don’t need to set up that port. The 5-pin port always sends out the same way, and doesn’t need to be configured. -
Page 7: Midi On Tip And S Etting Up Your D Evices
Note: There is no device “I” since that looks an awful lot like “1” on the display! That’s pretty much it. If you’ve told qCONNECT what kind of pedal or device you have on the correct channel, its important commands will be automatically configured and you should be ready to go! Please read through the next few pages for setup info on the most popular 1/4”... -
Page 8: C Hase B Liss S Etup G Uide
We figure a lot of folks who pick up qCONNECT will be using them with Chase Bliss Audio pedals, so we’ve set them up to work with CBA from the factory. To configure your Chase Bliss pedals with qCONNECT, plug a TRS / stereo cable from one of the ports on qCONNECT to the Tap / MIDI jack on the left side of your CBA pedal. -
Page 9: N Eo S Eries S Etup G Uide
To configure your Alexander Neo pedal with qCONNECT, plug a TS / mono cable from one of the ports on qCONNECT to the MultiJack on the left side of your Neo pedal. Enter Setup on the qCONNECT and configure the port you’re using as TIP or MID.T. -
Page 10: Edal Etup Uide
To configure your Meris pedal with qCONNECT, plug in a TRS / mono cable from one of the ports on qCONNECT to the EXP / MIDI jack on the back of the Meris. Enter Setup on the qCONNECT and configure the port you’re using as TIP or MID.T. -
Page 11: Edal S Etup G Uide
To configure your Empress Reverb or Echosystem pedal with qCONNECT, plug in a TRS / mono cable from one of the ports on qCONNECT to the Control Port on the back of the Empress pedal. Enter Setup on the qCONNECT and configure the port you’re using as TIP or MID.T. - Page 12 Power the Art Van off and back on while holding the tap tempo footswitch. Release when its two LEDs fade on and off. Tap the left or right buttons on the qCONNECT until you see the pink LED on the Art Van flash. Hold both footswitches on the Art Van to save.
-
Page 13: Ost M Ode S Etup
USB MIDI device on MIDI channel 1. To connect a USB MIDI pedal to qCONNECT, you’ll need a USB cable that matches the type on your pedal and a Disaster Area gHOST Adaptor Cable. Enter Setup on the qCONNECT and configure USB as HOST. - Page 14 Preset mode is the heart of the qCONNECT. You’ll probably spend most of your time here, so we should get to know it! If your qCONNECT doesn’t show “P” plus a number on the display, then long-hold the right button to return to preset mode.
-
Page 15: Ode
If you’re already in a device mode, hold the right footswitch to move to the next device mode (DevB, DevC, etc.) HOLD P 01 Once you are in device mode, the qCONNECT changes from controlling all of your devices at the same time to controlling only the selected device. LONG HOLD... - Page 16 You may have noticed that two of the ports on the back of your qCONNECT are different. They’ve got red or white nuts on them, and they have more options in their setup menus. What’s the deal with that? We designed ports X and Y to allow for more control and more power than the other six.
Need help?
Do you have a question about the Qconnect and is the answer not in the manual?
Questions and answers